Things are getting very tight at the top of the Bundesliga with Leipzig determinedly challenging for the title and putting an almost decade-long Bayern Munich’s dominance to the test. Only two points separate the two of them and Bayern Munich faced rivals Borussia Dortmund in an important match over the weekend.
Dortmund have recently lost steam and are currently in 6th place, a point behind Leverkusen and 4 points behind the Champions League spot. With just 11 games left to go, both of them will look to gain momentum heading into the final phase of the season. This tactical analysis focuses on the tactics deployed by both teams. Let’s begin the analysis.
Lineups
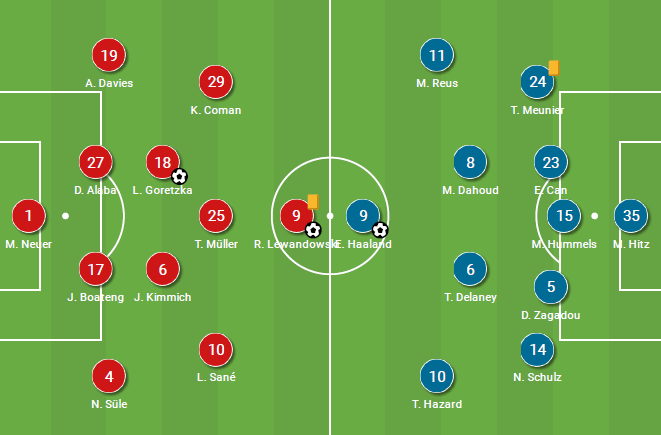
Flick made a couple of changes to the team that beat FC Koln last weekend. Thomas Muller and Kingsley Coman replaced teenager Jamal Musiala and Eric Choupo-Moting. While Dortmund, on the other hand, changed their setup from a 4-2-3-1 into a 3-4-3 system that saw Dan-Axel Zagadou, Thomas Meunier, Nico Schulz and Thorgan Hazard replace Jude Bellingham, Giovanni Reyna, Raphael Guerreiro and the injured Jadon Sancho.
Dortmund’s direct approach takes Bayern by surprise
Dortmund had a clear plan going into the game. They knew they will not be contesting toe-to-toe with Bayern in terms of positional play or possession but would look to drag them higher up and hit them on the counter. But they also added an additional strategy to their attack that is to play long-balls to their front-3 and look to win second balls in the final third. The common duels seen yesterday were Davies vs Reus and Haaland vs Boateng/Alaba. Sule being very tall would not be subjected to long balls and Dortmund would only target the central and their right-wing area.
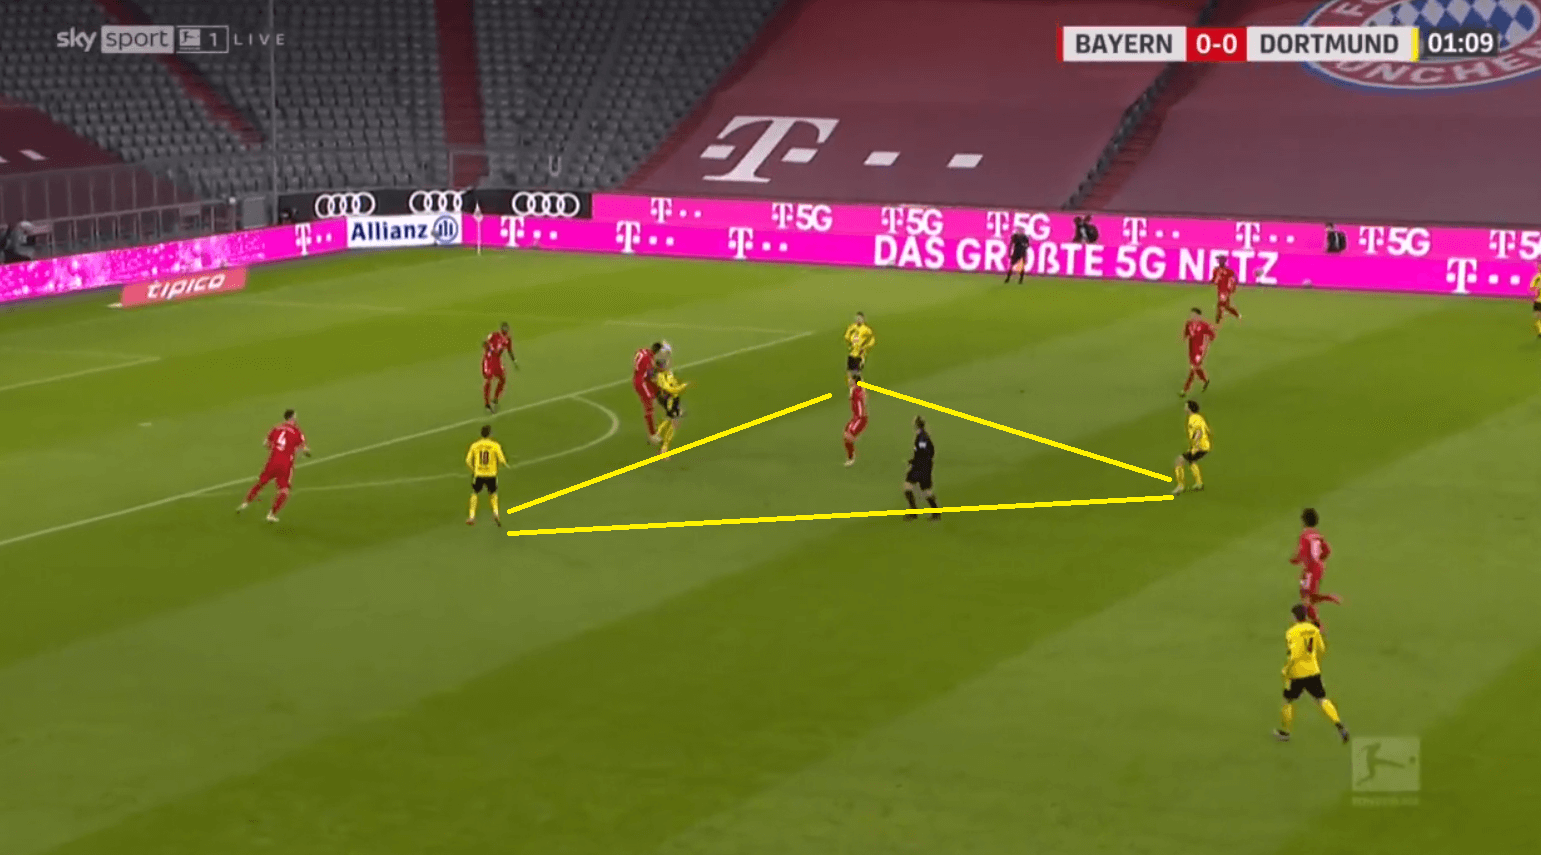
In the leadup to their first goal, we can see them launching a long ball to Haaland. The Dortmund players crowd the zone closer to the ball and we can see Kimmich being the only Bayern player close by able to win the second ball. The ball is intercepted and played to Haaland, who finishes it past Neuer to give Dortmund the lead.
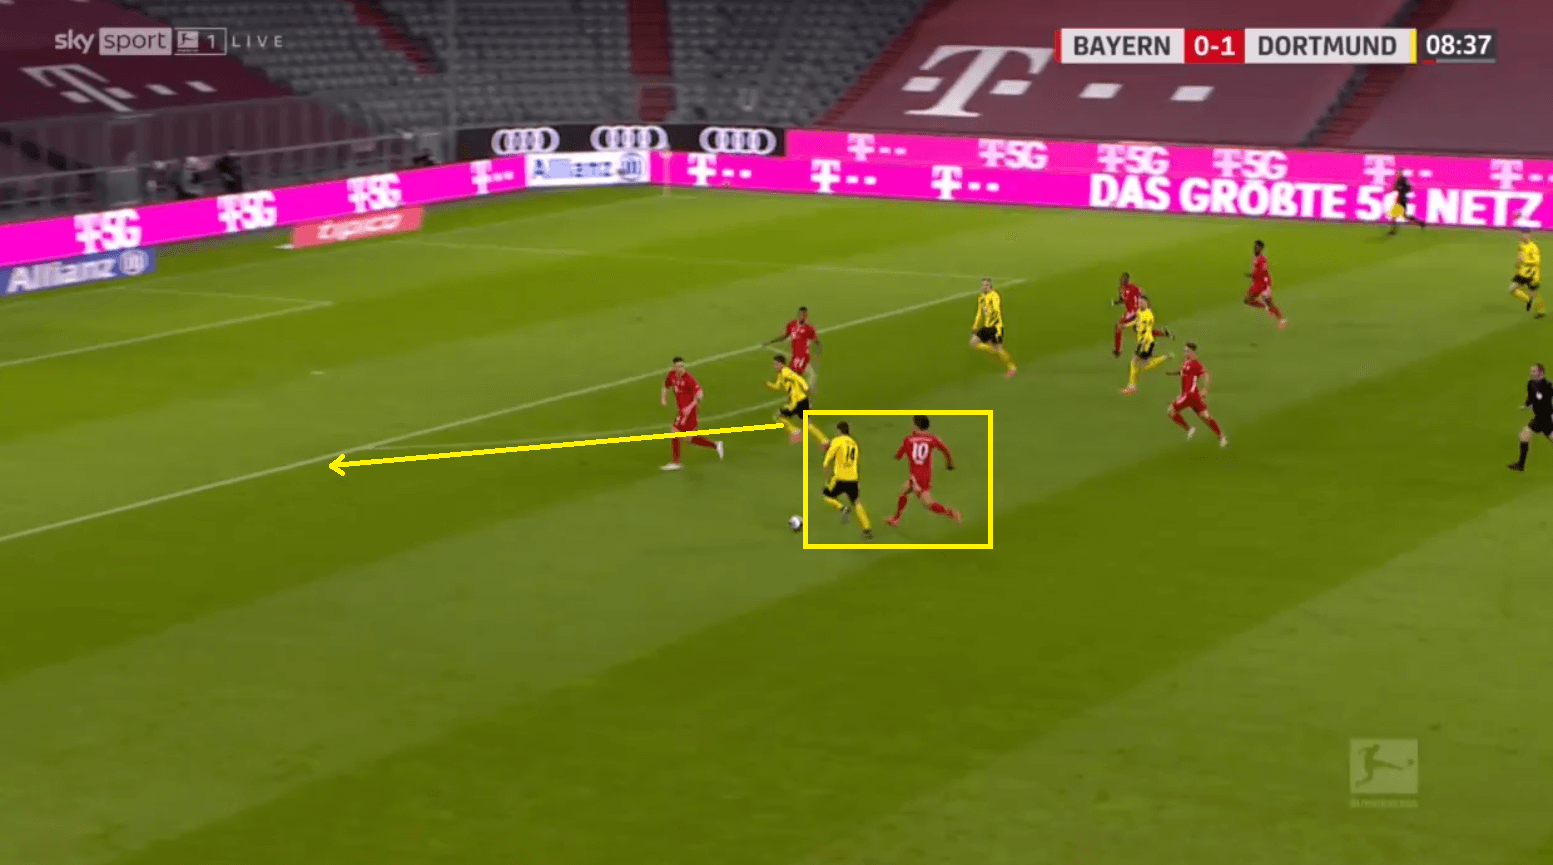
Combined with this they were also able to narrow the Bayern backline to create spaces for their wing-back. Their second goal came again from a long ball but this time it was to Meunier who contested that with Davies. Dortmund wins the second ball and drag Bayern to the ball-near flank. They immediately shift the ball to the other flank with Nico Schulz making an overlapping run. Since Hazard moved centrally, Sule also had to move along with him to ensure he does not have space in the central regions. But this in turn created wide spaces and with Sane not tracking quickly Schulz had a huge space to run into.
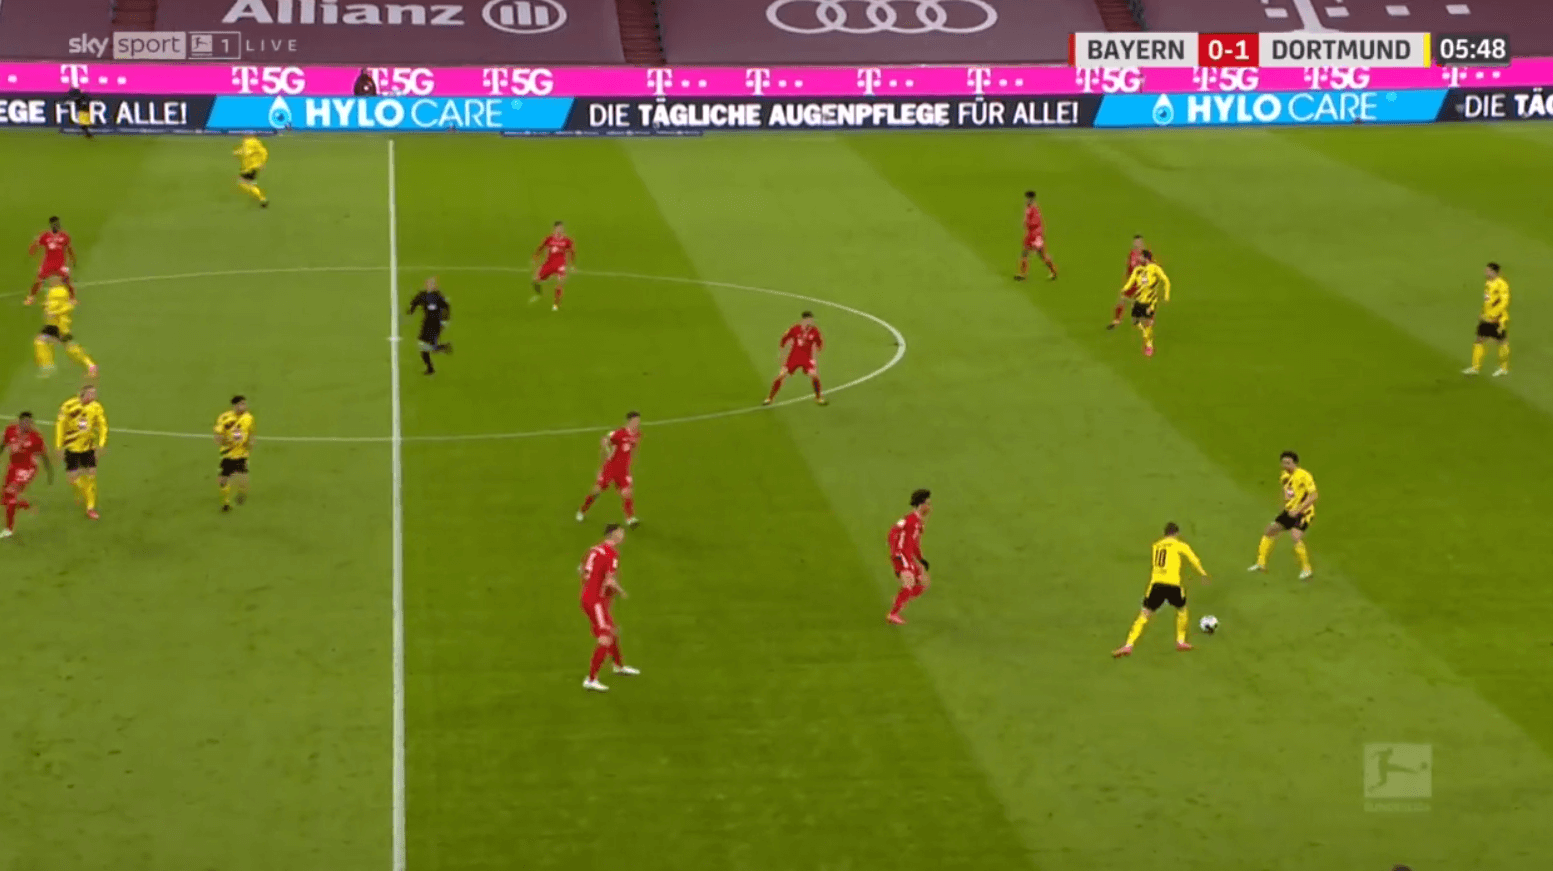
Another instance of Bayern’s defensive line being dragged to the centre is given below. The forwards occupy the backline and immediately Meunier is higher up the pitch with huge space to attack. Again the winger is nowhere near the Dortmund wing-back that allows Hazard to switch the play to the opposite flank.
Dortmund was pretty good in doing this and were able to get into the final third a very good amount of times. But after their second goal, Dortmund weren’t able to win much of the aerial duels as Bayern improved their intensity during the challenges.
Bayern start lethargically against a Dortmund mid-block
Starting with the 3-4-3 formation, Dortmund’s attack naturally shifted to a 3-2-5 when they entered the final third. In their defensive shape, they formed a 5-4-1 mid-block that attempted to close out passing lanes to the central players using a zonal system. The idea was to force the Bayern players to not thread passes centrally and move them to the wide areas. From here they would start a trigger press where the Dortmund wing-back would press the Bayern full-back. This would force the full-back to pass it back to the central defender and the wide Dortmund forward would press the centre-back while the ball is in motion. The image below shows the Dortmund players staying very narrow to show Bayern the opportunity to move wide.
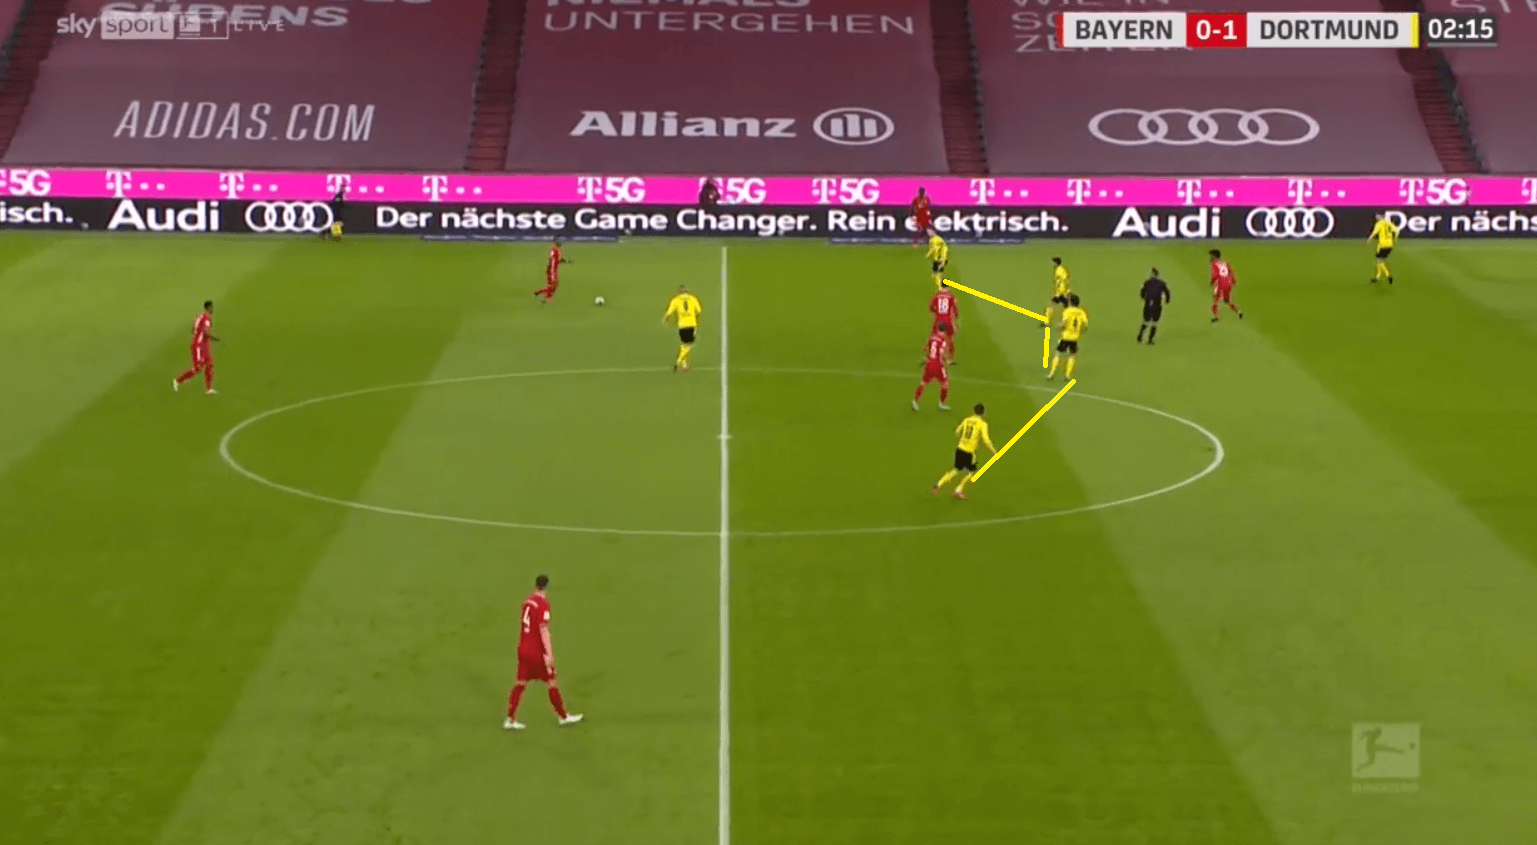
The run to the centre-back would be an arching one that enables the Dortmund forward to cut out the passing lane to the full-back now while pressurizing the centre-back. Haaland meanwhile, would stay just ahead of Kimmich to block the passing lane to him as he never actively looked to press the centre-backs. Even if he did he would make sure that Kimmich is there in his cover-shadow.
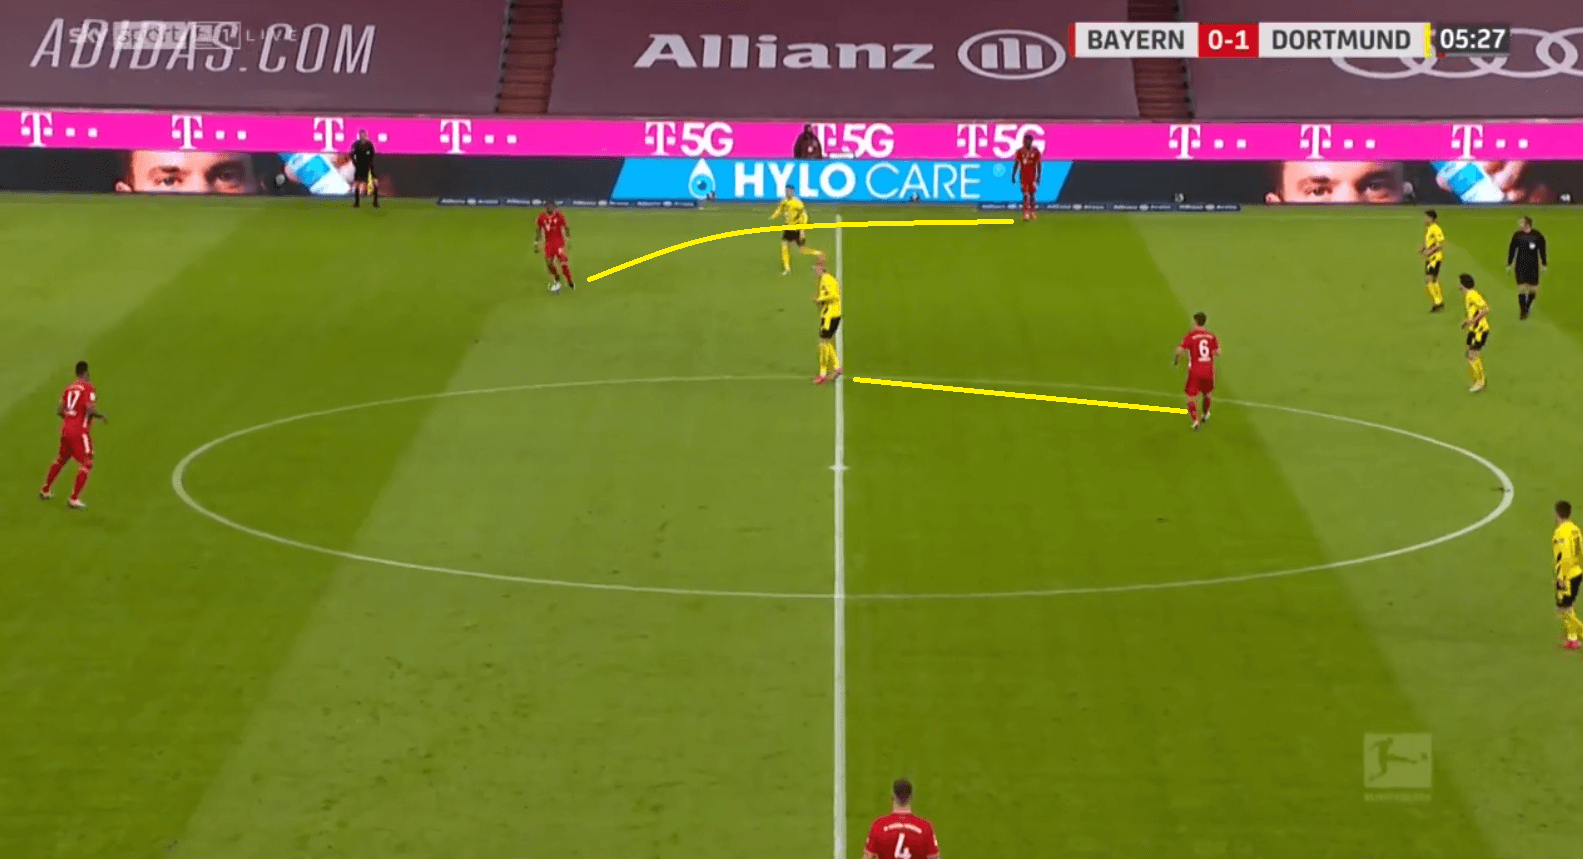
Initially, Bayern started to drop Sule as a 3rd centre-back for helping the team out to build from the back. But since Dortmund pressed with a single centre-forward, Sule was asked to push higher up the pitch to overlap or to provide support to Sane in the right-wing.
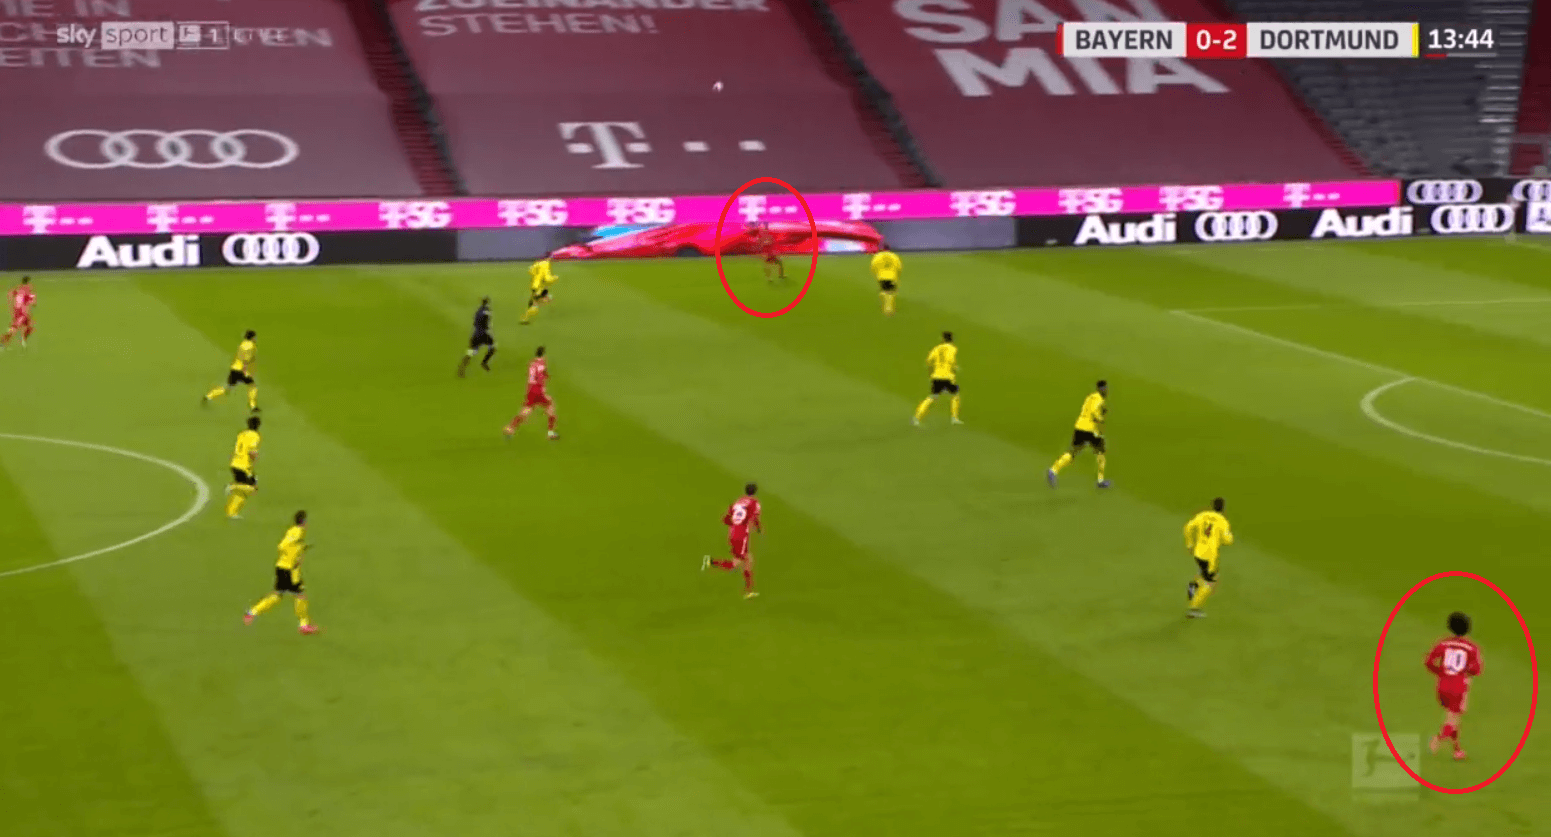
In the initial phases of the game, Bayern looked to attack the wide spaces left vacant by the Dortmund wing-backs when they press higher up the pitch. The Bayern wingers would be positioned very wide to receive a long ball by any of the deep players. They would especially target the right-wing of Dortmund’s since Meunier was very slow in tracking back after he goes up higher. Although Dortmund has an added security with an additional member at the back now, still a 4v4 situation could have possibly been created which Bayern weren’t swift enough to take. We can an example of that below where Meunier is higher and Coman is now at the space vacated by him. Emre Can cover well by shifting to the right-back position for the time being.
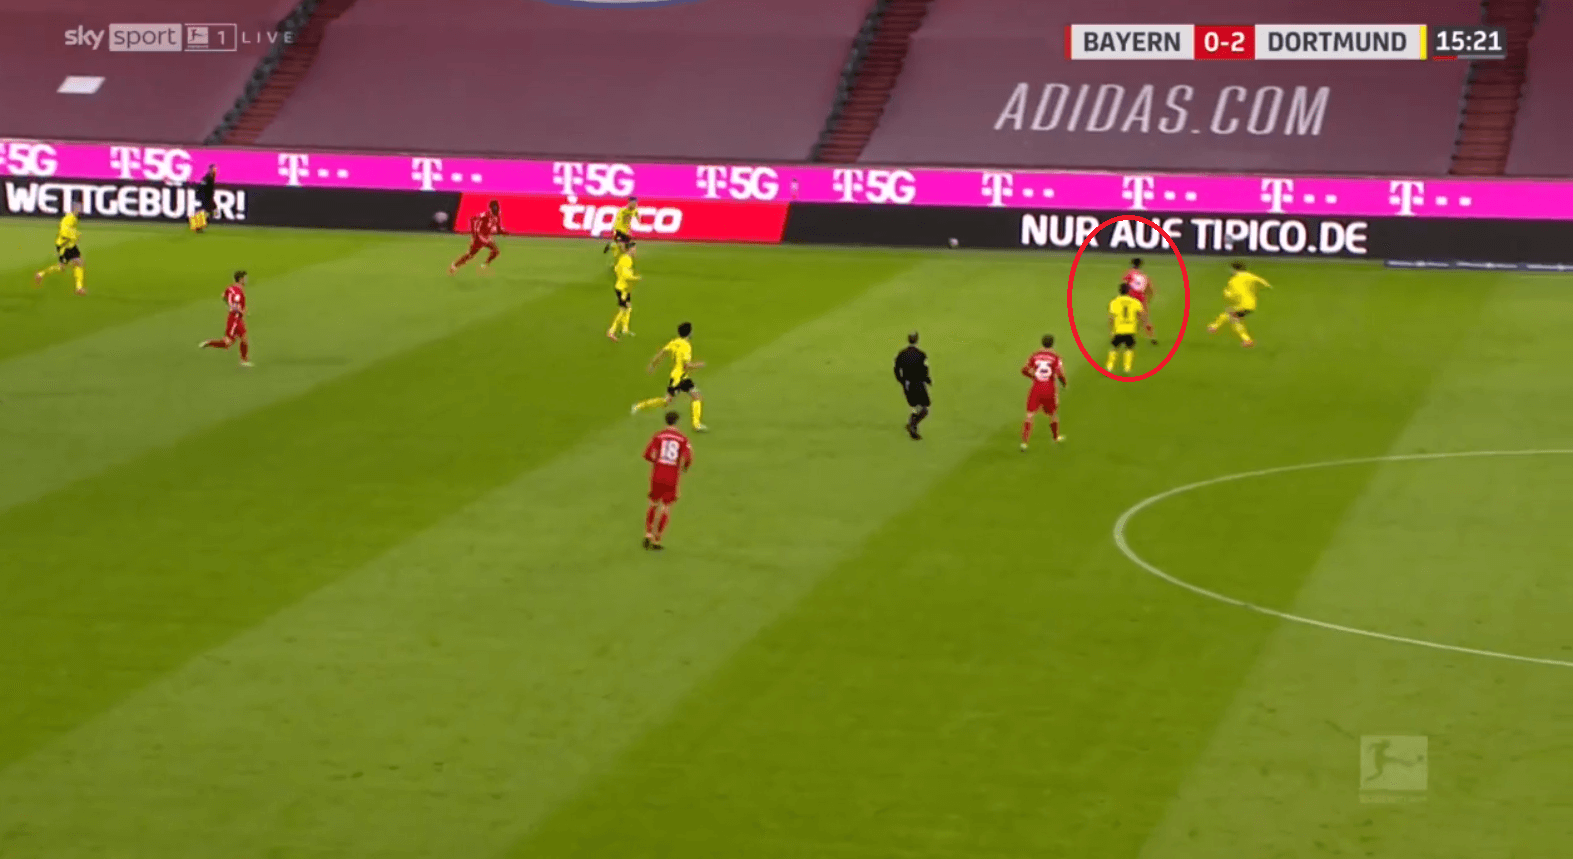
Dortmund centre-backs also didn’t press high along with the front lines to ensure that space behind is protected against the likes of Coman and Sane. They looked to delay their pressing until either of them got the ball. This was then used as an advantage by Bayern afterwards in the match.
Flick makes minor adjustments to get Bayern on track
With Bayern having a right-back not having the capability to overlap, Flick decided to use Sane very wide. We have seen both the Coman and Sane stayed wide and looked to stretch the Dortmund defensive line and open the wide spaces for the Muller to run into. He already had Muller playing as a roaming ten as he would make movements to occupy spaces while also This drags a Dortmund player with him and opens a passing lane Goretzka. Flick made a small change here as he asked Muller to stay near a Dortmund centre-back and immediately make a run into the flank and drag him out of position.
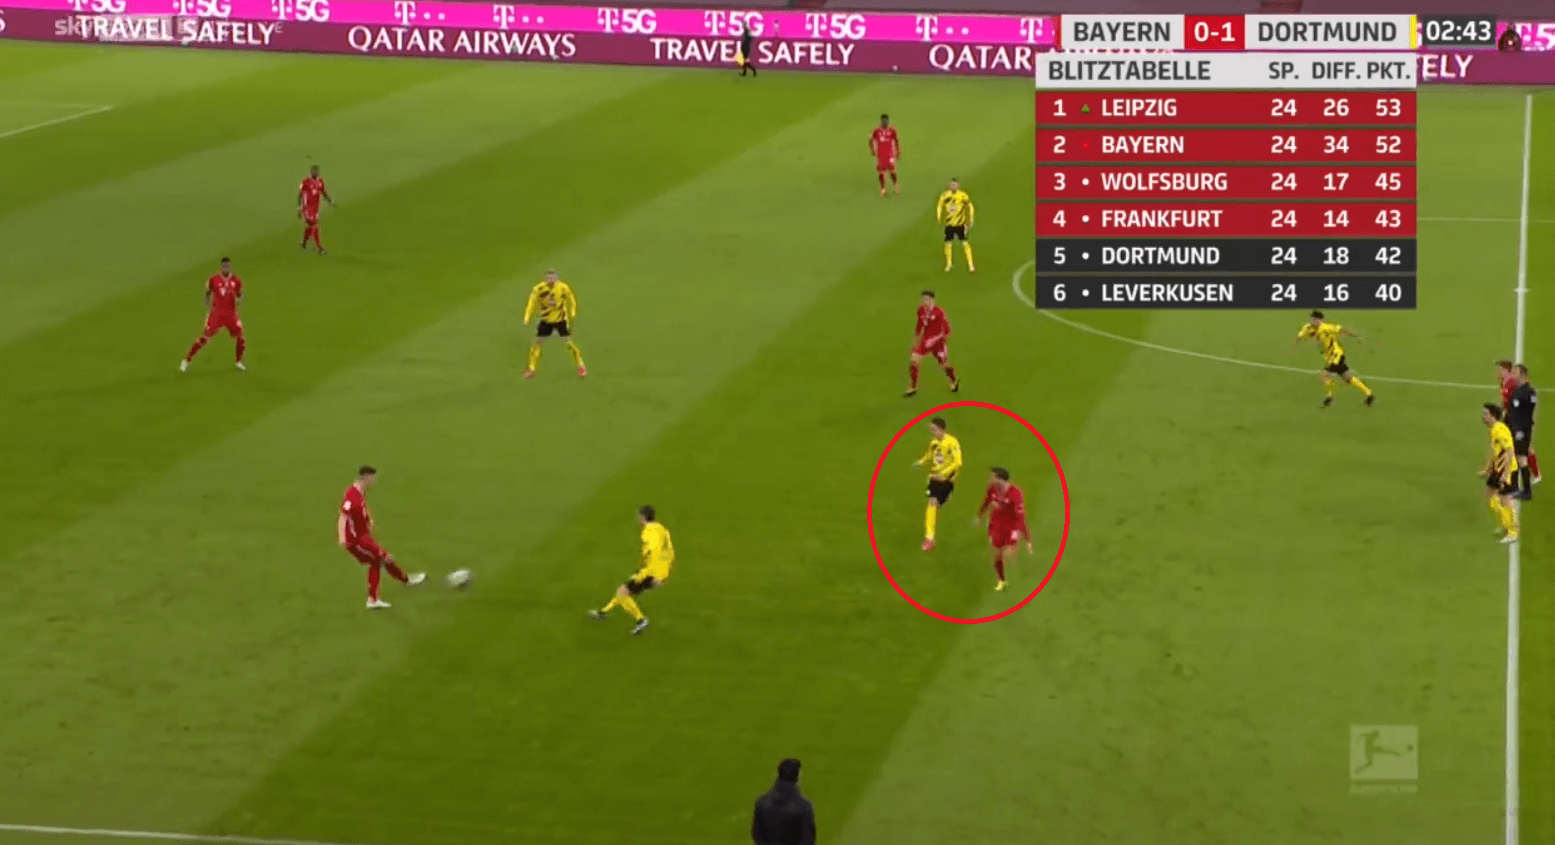
Muller’s constant movements around the box and in the middle third started creating issues for Dortmund and Bayern were gradually starting to build pressure. Again in this example, Muller makes a run into the wings. Due to his gravity, Zagadou moved with him to the wing and that increased the distance between him and Hummels. Look at how much space Sane is receives and Bayern in this instance didn’t make good use of the opportunity as Kimmich failed to play the ball to him.
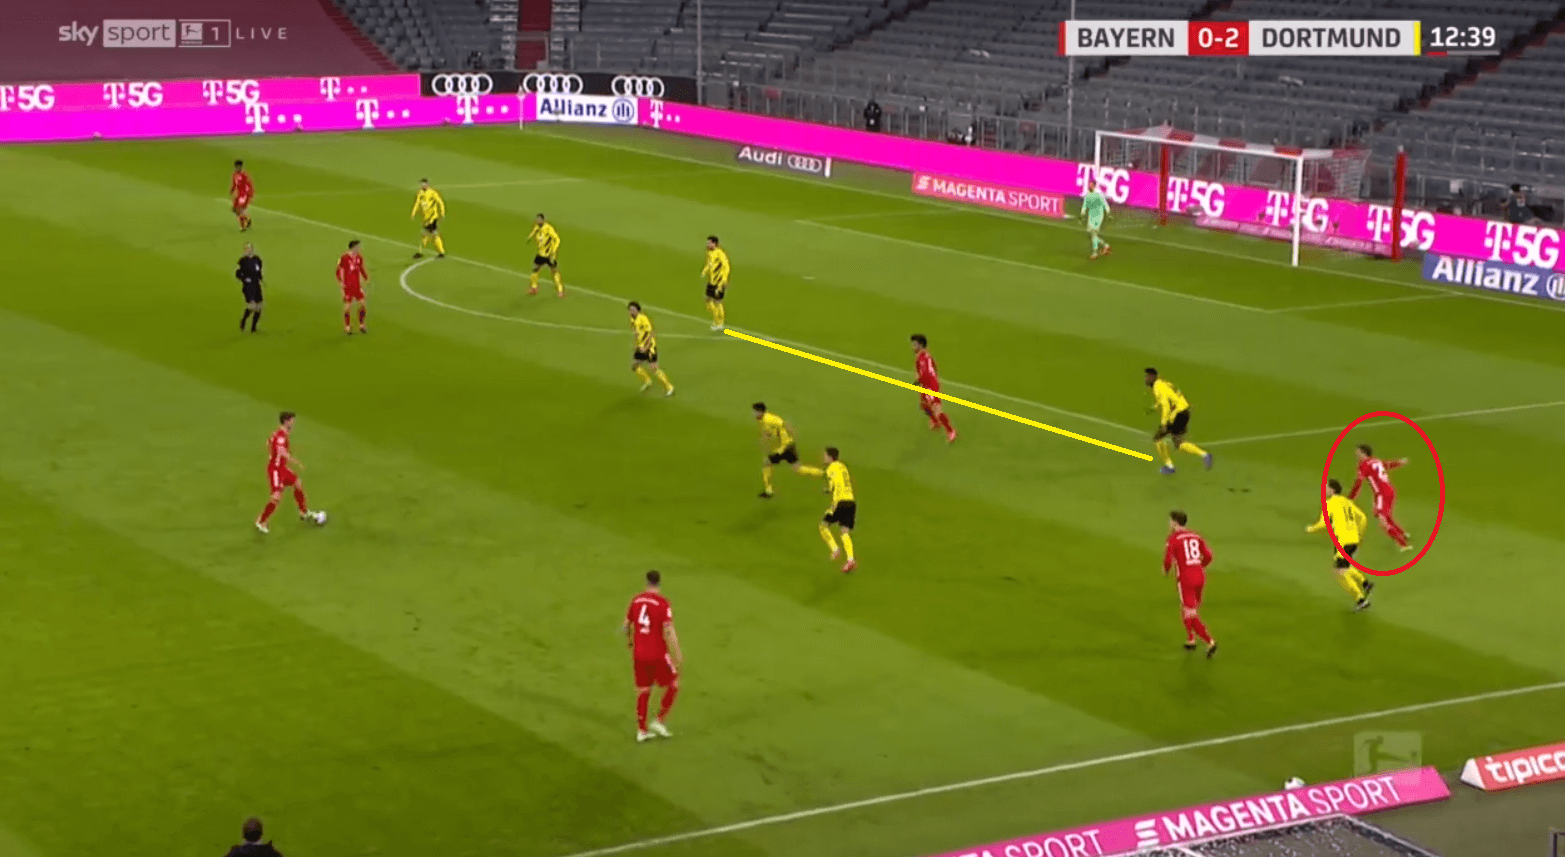
Again here both Lewandowski and Muller are on the right flank attracting Zagadou and Hummels as the latter two keeps their eyes on the former two. With the opposite side winger Coman staying wide, Emre Can looks behind to keep an eye on him (to check for blindside runs) and hence he forgets to close the distance between him and Hummels. Goretzka makes a very good run into space and chests it down to Lewandowski for a shot.

Even during the buildup, Muller would often drop deep to create overloads and help his team progress the ball. But as the game went on, Flick also had Lewandowski drop deep. Until before, Dortmund was able to press Muller when he dropped deep as Dahoud/Witsel would follow him higher up the pitch. With Lewandowski also dropping deep, Bayern were able to form a 2v1 against Witsel using Goretzka. Another Dortmund centre-back wasn’t able to follow Lewandowski since both Sane and Coman stayed high and they weren’t willing to expose their centre-back against the pace merchants. We can see in the image below as Muller now has two particular options to play into, Goretzka or Lewandowski, with Witsel trapped in between them.
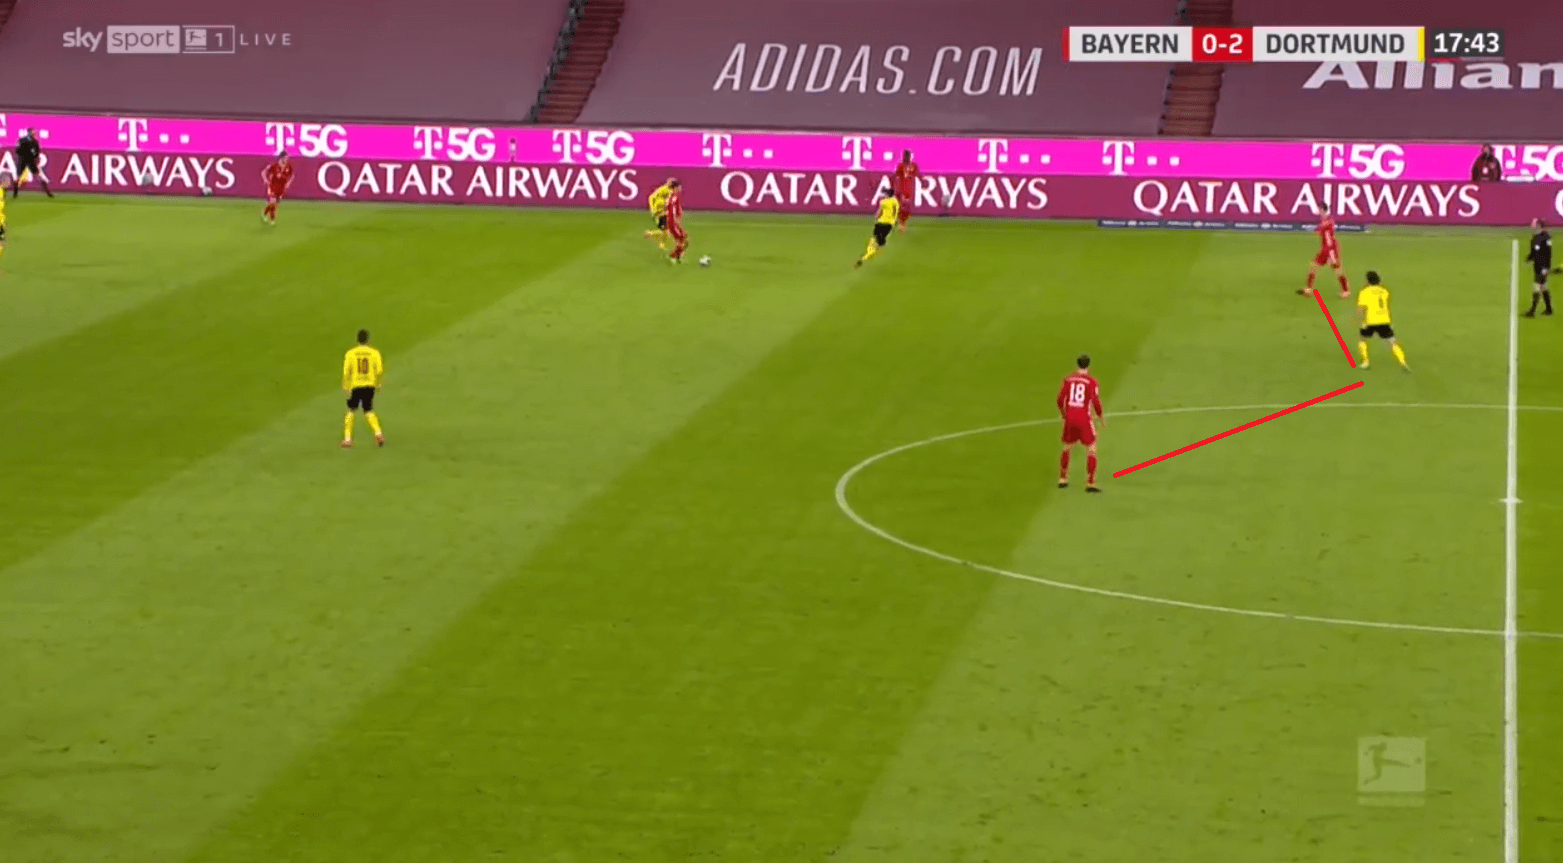
The overloads and constant rotation caused Dortmund much bigger issues especially in the second half where Bayern’s structure enabled them to have an effective counter-press due to their positional play shape.
Conclusion
Bayern were much more inspired to win the match after they went down 2-0 in the first 20 minutes with Dortmund not showing the same intensity they had at the start. Flick’s changes especially replacing Boateng with Martinez played a huge role in Bayern dominate the proceedings in the last 20 minutes and they deservingly scored 2 late goals to win the match. The win takes them back to the top of the league with just 2 points separating them and Leipzig.


Comments