After their promotion to the Belgian First Division A, OH Leuven had a difficult task of not getting relegated again.
At the moment of speaking, they have already done a great job in achieving that goal.
With 18 points out of 11 games, Marc Brys’s team are on their way to not only secure a place in the top flight for next season but are even fighting for the European places at the moment.
Credit has to be given to Brys, who implemented an energetic playing style since arriving at the club that shares the same owner as the Premier League side Leicester City.
But when we take a look at the stats, their other coaches also deserve a bit of credit.
OHL found the net 19 times thus far while nine came from set-piece situations.
But even more impressive are the variations OH Leuven perform during a game.
The mind behind these variations is Bram Verbist, the goalkeeper coach.
Having said that, we believe it is worthwhile to analyse OHL’s set-pieces thus far this campaign.
This OH Leuven tactical analysis will take a look at the key principles and tactics in set pieces and corner variations OH Leuven apply to be unpredictable yet so effective and dangerous at set-piece play.
OH Leuven Key principles
The first key principle OH Leuven apply in most set-pieces is blocking of the opponents to isolate a free man in a good scoring position.
The aim of the blocking principle is to prevent defenders from covering spaces and consequently creating space for an attacker to exploit.
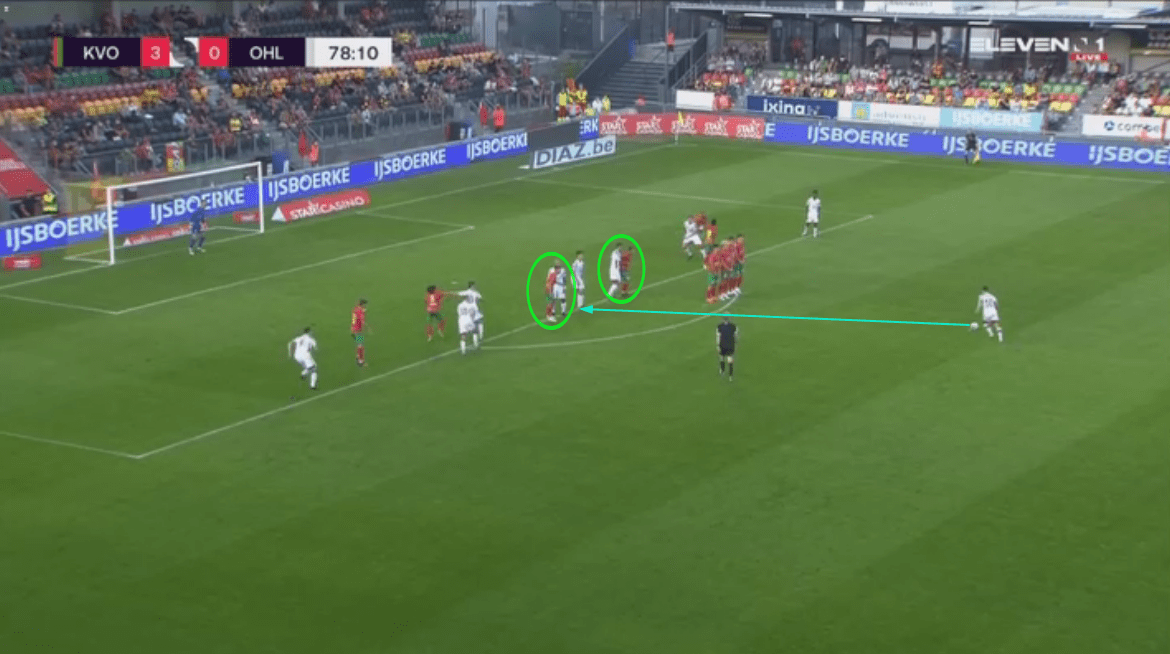
Here we can see a rehearsed set-piece against Oostende where two OHL attackers block two Oostende defenders.
This frees up the attacker between the two blockers who Xavier Mercier easily finds with a simple pass and sends into a scoring position.
As discussed above, blocking players helps to create space for other players.
This brings us to OHL’s next principle when approaching set-pieces.
To exploit the space created by the blocking players, OHL use runs from deep.
Below is a good example of these deep runs.
The three circled OHL players try to block the three Beerschot defenders by leaning or even grabbing them.
Sasha Kotysch makes a run from deep behind the last line into space in the first zone.
Deep runs also give the advantage to avoid offside.
Notice the ball going to the first zone from a deeper, indirect free-kick.
Most free-kicks from this position are played with a chipped pass to the first zone.

Blocking doesn’t necessarily have to only prevent defenders covering space or marking players.
Another way the blocking principle can be useful is by blocking vision to cause a surprise.
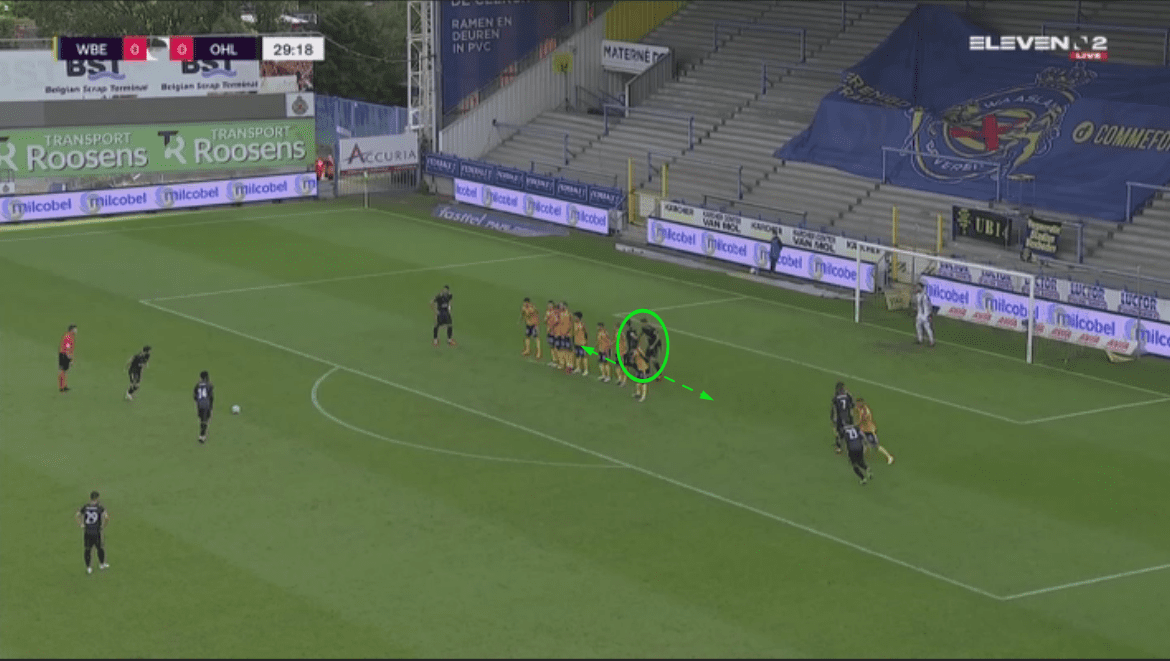
Below against Waasland Beveren two OHL players block the vision of the opposing goalkeeper, who is trying to have a glance at the ball.
The moment the shot is taken, the blockers move aside to surprise the keeper, who now has less time to react to the shot.
The concept of opposite movement is another effective one that OHL use to their advantage.
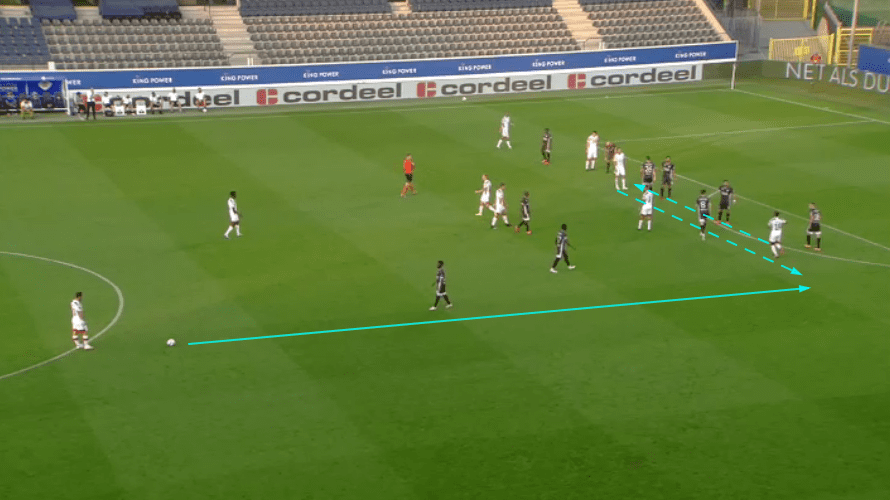
Below the former Ligue 1 defender, Frédéric Duplus, runs from the ball-near space into the ball-far space, where most of the players are positioned.
What happens because of this movement is that Duplus attracts and drags the player positioned in the ball-near space behind the wall away from that area.
Space opens up behind the wall and due to Kotysch making the movement in the opposite way, Mercier can find him through a simple pass behind the wall.
The next principle has to do with the space behind the wall.
OHL will look to exploit unoccupied spaces.
In the case of a free-kick, the unoccupied onside space is often behind the wall or on the ball-far side.
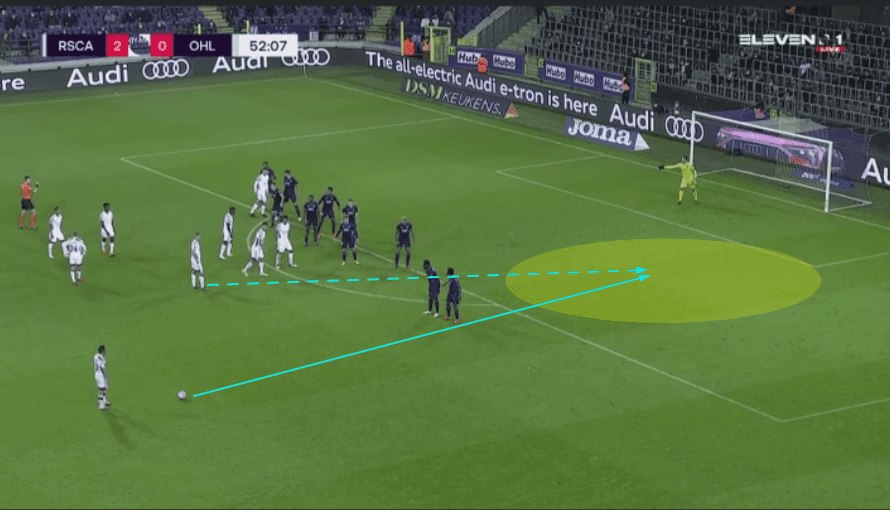
In the below image an example of a run into an underloaded space can be seen.
The OHL attacker makes a run from deep to attack the space and release a shot or provide someone else with the opportunity to do so.
The opposite is also possible.
Creating a superiority in particular areas to progress the ball quickly and play their way through to the opposing goal.
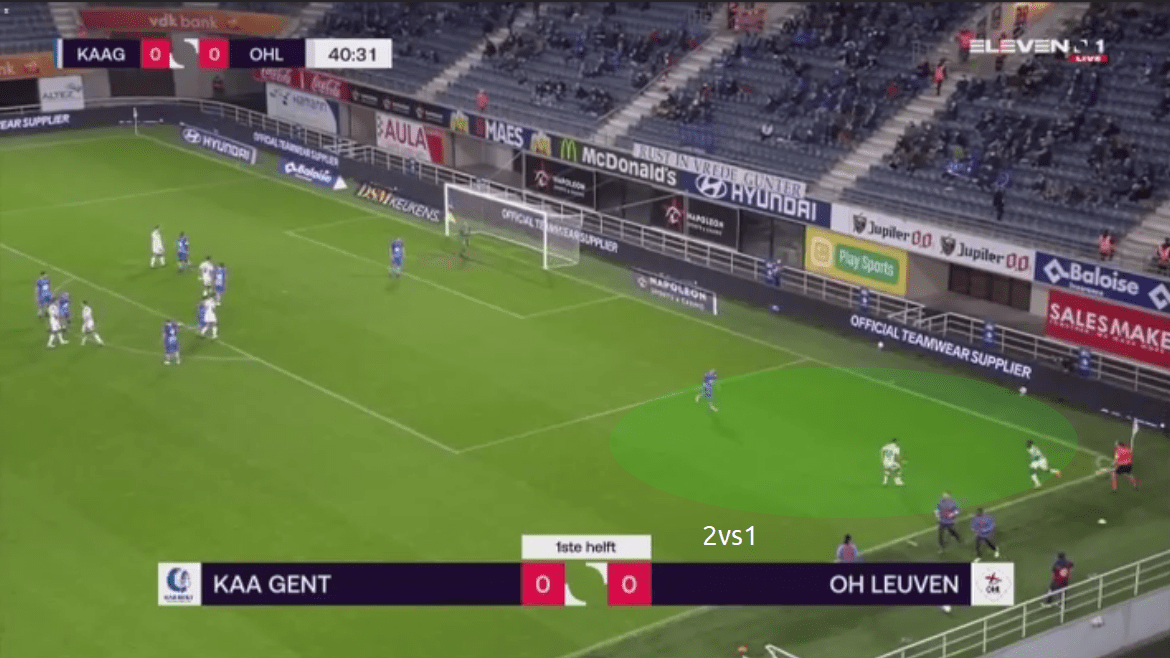
A simple example is when a short corner is taken.
Normally when a short corner is taken, one defender from the opposing team steps out to press the ball-carrier.
But once the corner is taken, the player who took the corner moves back onside to become the free player and create an overload.
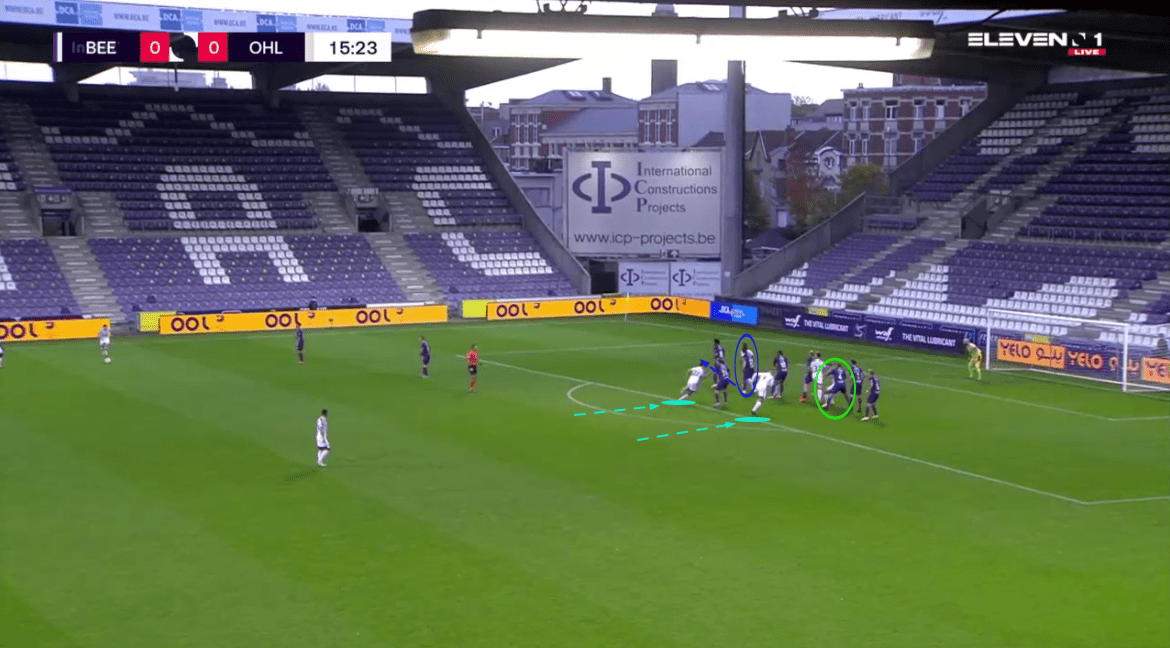
The last image illustrates a successful set-piece resulting in a goal and including many principles that are mentioned above.
Mercier will deliver this free-kick to the first zone.
That’s why the OHL blue-circled player will move away to drag the defender with him.
The green-circled OHL player will block the Beerschot defender which creates a gap in their zonal marking system between the dragged and blocked defenders.
Two OHL runners from deep attack this unoccupied space to see the ball end in the back of the net.

The numbers
After looking at the key principles in dead-ball situations, we will take a look at the cold hard facts.
The stats and graph below will give us more insight into their corner routine.
So we will focus in the remainder of this analysis on the corner routines OHL use.
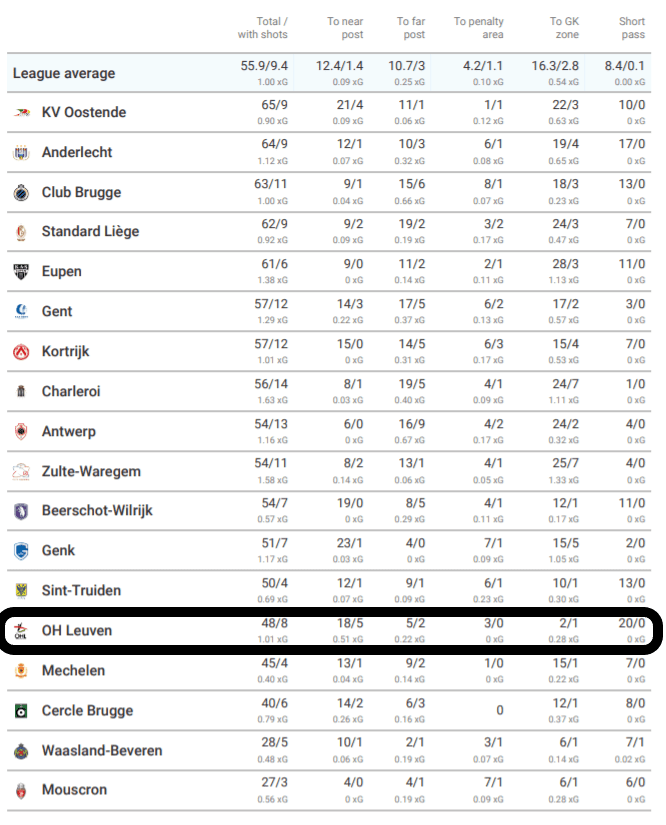
The below chart covers the stats from corners thus far this season in the Belgian first division A.
When we look closely OHL stand out in two categories.
The first one being the deliveries to the first post from a corner.
From the 48 corners taken by OHL, 18 have been delivered to the near post.
An impressive data from these near post corners is the xG from them too.
OHL have an xG of 0.51 from near-post corners.
This is much higher than any other team in the Belgian league and means that OHL would be expected to score from the corner to the near post 51% of the time.
The other stat is the short corner one.
OHL take the most short corners relative to the other Belgian first division A teams.
Which is logical when we take into consideration the rehearsed short corner routine they use.
More about this later on.
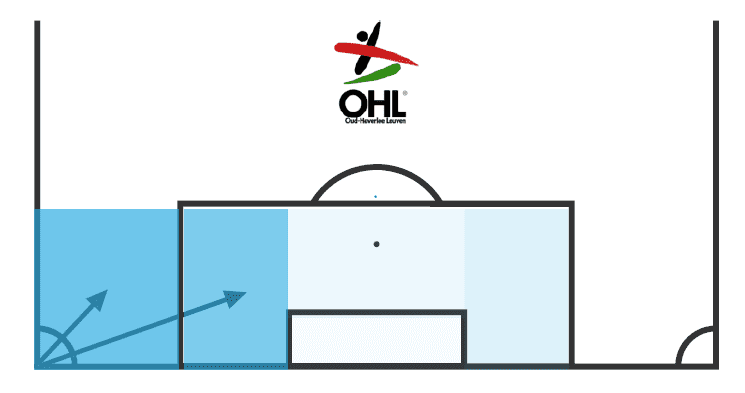
The Below graph confirms the above statistics.
The darker the blue colour, the more corner deliveries have come to this area.
The short and near post are the most used, then comes the far wide area of the box and the last option is the danger zone.
The corner routines
As we now know, the most used option from a corner is the short one.
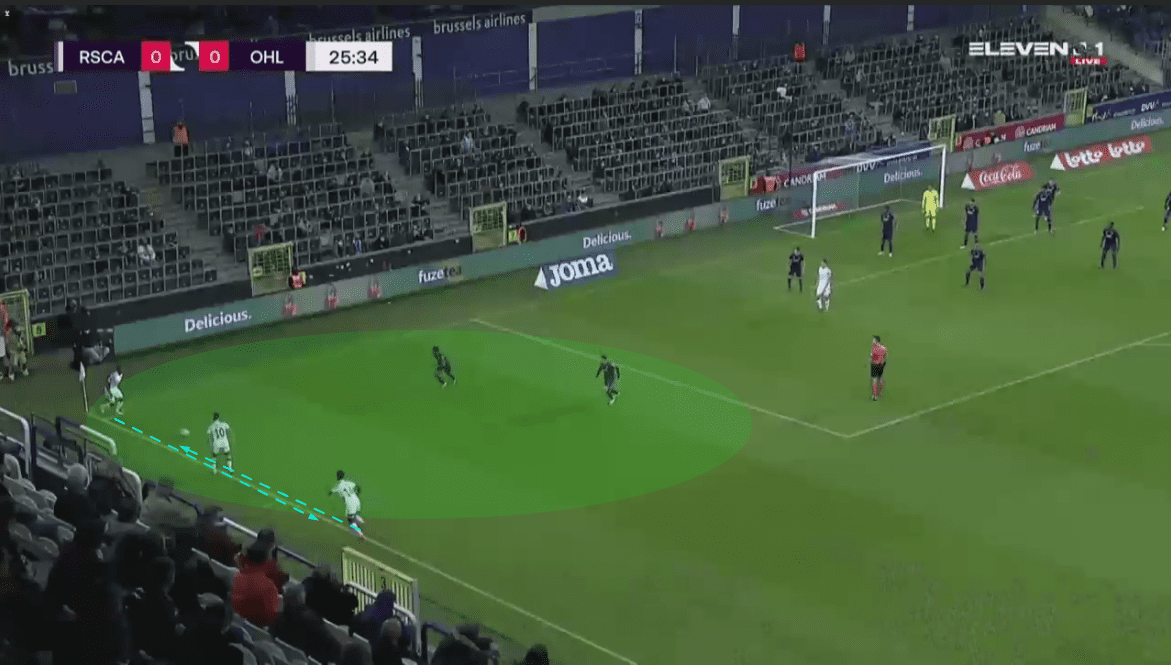
Below we have an example of a short taken corner.
Here the overload principle comes into play.
Once the ball is played, OHL looked to overload this area in a 3v2 situation.
Through opposite runs around the receiver of the short corner, OHL try to confuse the opposition.
The goal they scored in this situation against Waasland Beveren shows the effectiveness of the routine.
Another dangerous variant is the low cross into the close wide area of the box.
This is mostly used against man-marking systems like the one Beerschot use below.
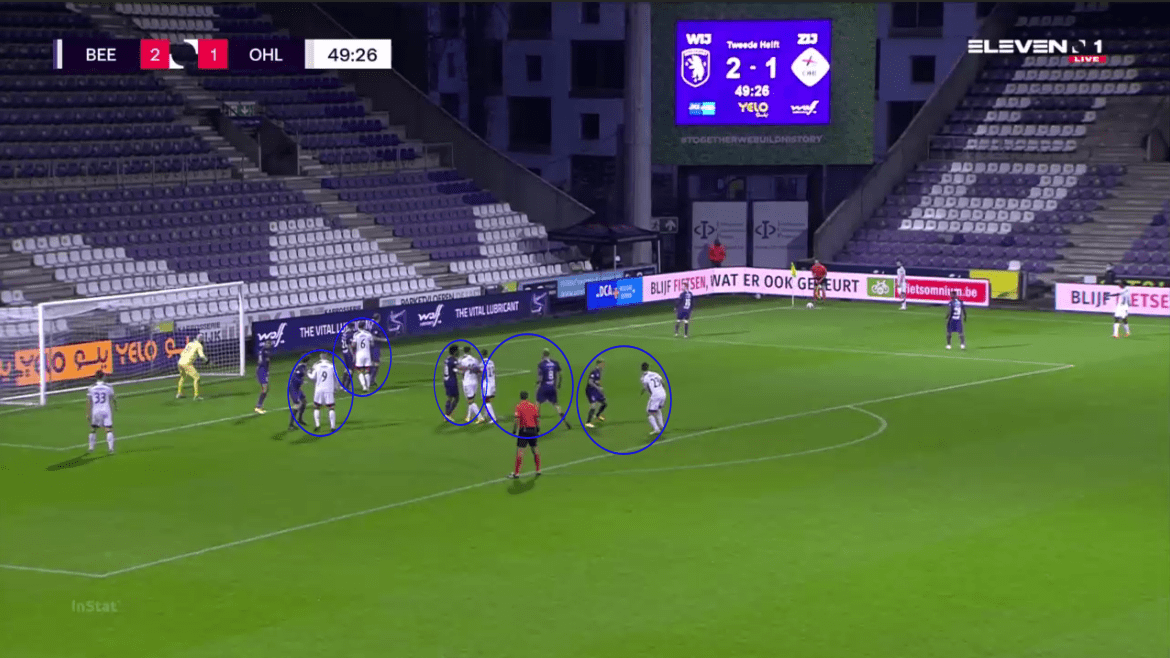
Through movements towards the goal from the marked players, space opens up in the close wide area of the box.
A run from a player from the weak side to the strong side makes it possible to deliver a successful low, pulled back cross into this space.
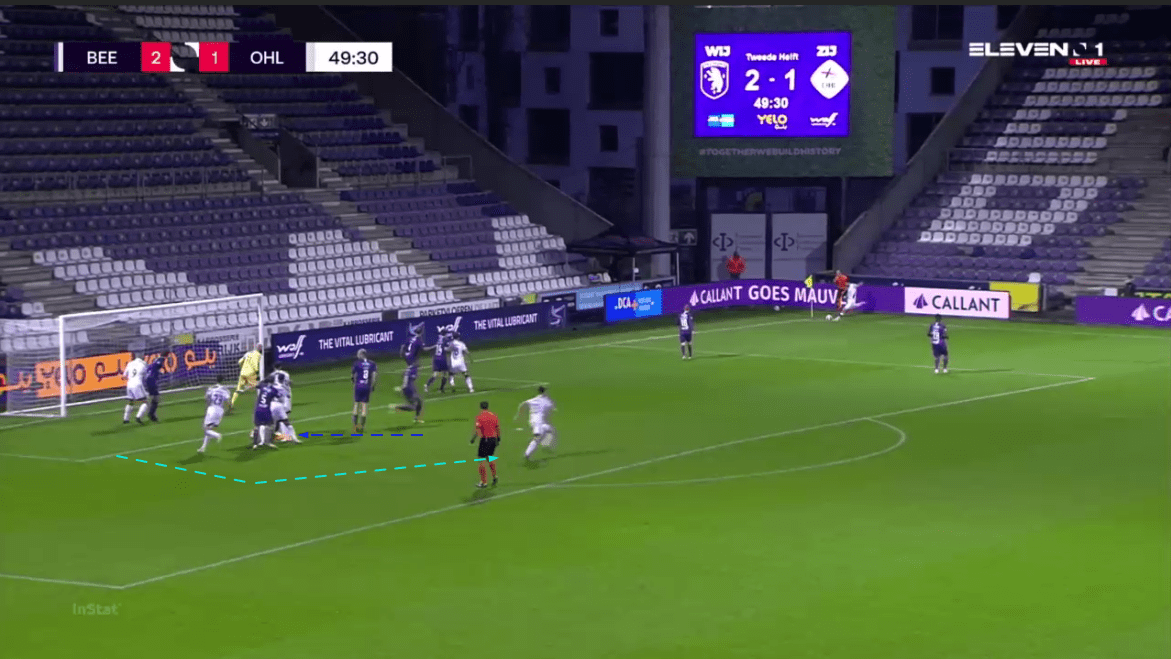
Another example of adapting their corner routine is below.
Former Manchester City captain Vincent Kompany’s Anderlecht use a zonal marking system – the opposite of that from Beerschot.
This means dragging defenders out of position through movements becomes more difficult due to the defenders holding their position.
Thus mostly against zonal defences, Mercier will deliver the ball to the far wide area of the box.
A run to this area will be made to then head it back into the danger zone and find someone to find the net through the second ball.
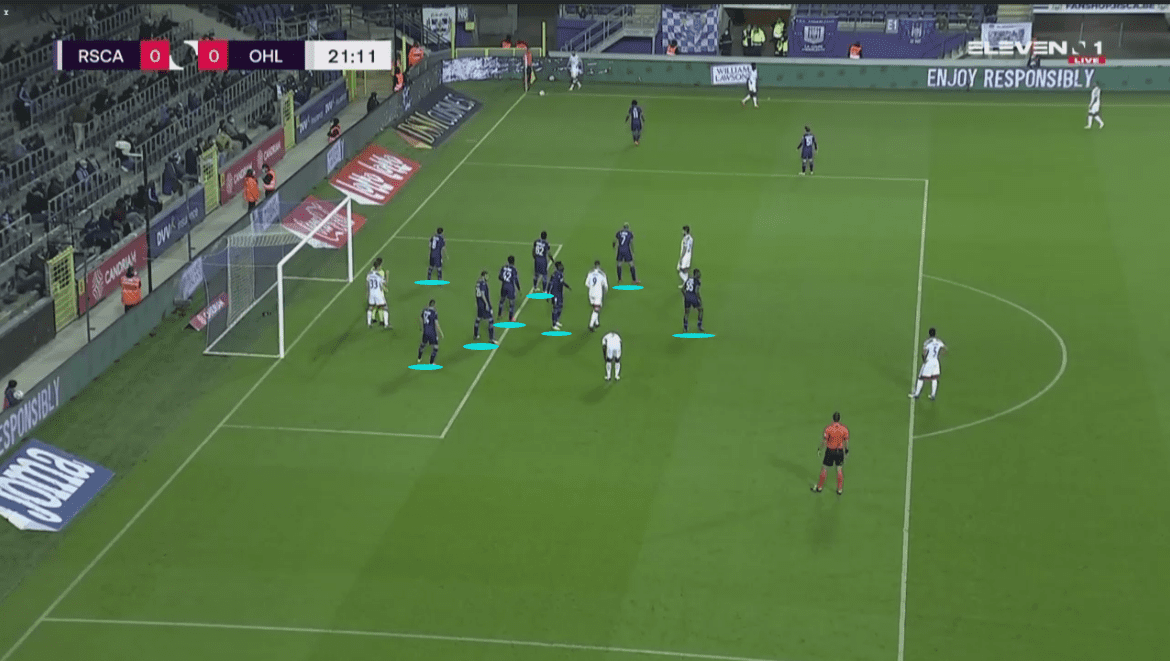
The final routine OHL use is the near-post one.
Here the plan is very clear: ‘create chaos.’ By positioning a lot of OHL players near the first post anything can happen once a ball is played into this area.
OHL look to take advantage of this by using blocking players, opposite movements and decoy runs.
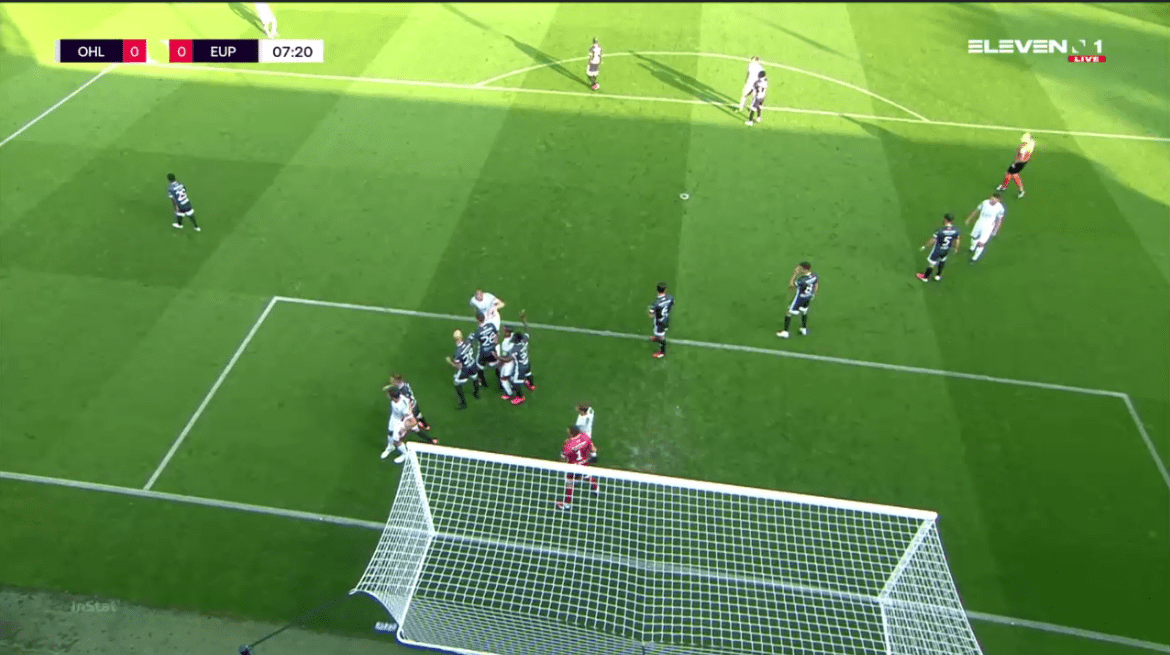
Throughout all corner routines, I tried to look for any signals that would indicate which variant is expected to be played.
It wasn’t easy due to the lack of signs.
But the conclusion is to be found in the positioning of the corner taker and his teammates.
If a short corner is taken, they would overload this area obviously.
When a corner to the near post is coming, Kamal Sowah will mostly take it and the near post would be overloaded.
A corner to the second zone would be typified by the positioning of the attackers more orientated to that zone.
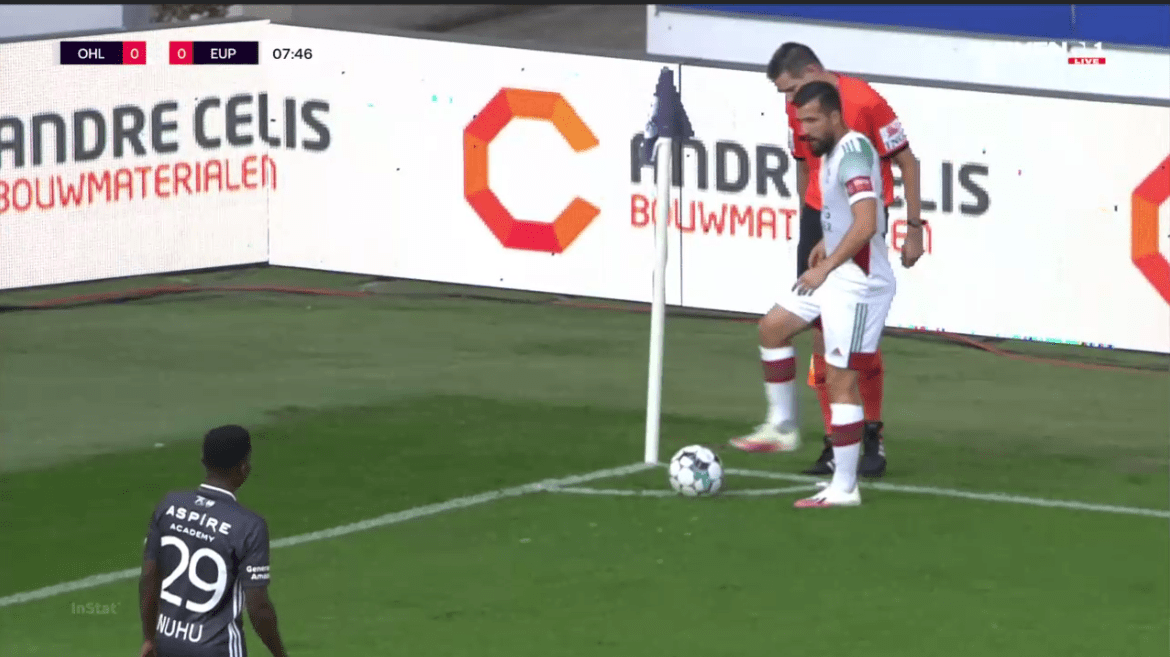
And lastly when the low, pulled back cross is going to be delivered, Mercier will tap the ball before delivering it as illustrated below.
Conclusion
After analysing OH Leuven’s set-pieces we can understand why they have been very successful at them.
A lot of credit has to go the coaching staff implementing these routines and the players executing them perfectly.
Now that their principles, routines and ‘secrets’ have been showcased in this set-piece analysis, maybe it is time to refresh their set-piece approach… Either way, it will be a joy to watch OH Leuven’s set-piece routine for the remainder of the season.



Comments