Waasland-Beveren welcomed Royal Excel Mouscron to East Flanders for a relegation dogfight in the Belgian Pro League matchweek 15. Both sides have struggled to start the season, yet, over their past three games, neither had lost, and both were finally starting to show some form. For Mouscron, since changing manager to Jorge Simao, they had drawn with UEFA Champions League calibre side Club Brugge, and also beaten Sint-Truiden, which led to the sacking of former EFL player Kevin Muscat.
Beveren on the other hand were coming off of an impressive 2-0 victory over a Charleroi side that had, until recently, been top of the league. Therefore, rather unusually for a relegation clash, both sides had some form going into the game. Despite this, it was the home side who came away with all three points, thanks to a 2-0 victory.
This tactical analysis will look at how Beveren were looking to push the wide men high and use the central midfielders to help them. This analysis will also look at Mouscron’s attacking tactics, namely how they tried to exploit the channels. Finally, we will look at the press and counter-press of Beveren, and how this helped to create the opening goal will be looked at.
Lineups
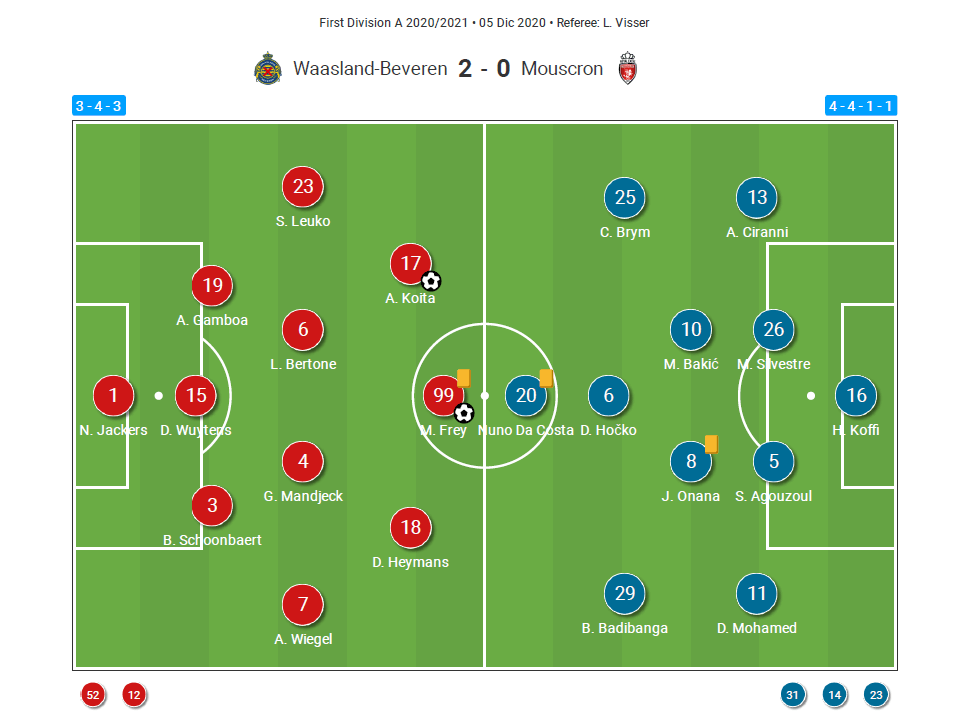
Beveren coach Nicky Hayen went with a 3-4-3 formation, with regular number one Nordin Jackers in goal. The back three was made up of Brendan Schoonbaert, Dries Wuytens and Alexis Gamboa. Experienced Cameroonian midfielder Georges Mandjeck partnered Leonardo Bertone in central midfield, with Andreas Wiegel and Serge Leuko providing the width. Daan Heymans and Aboubakary Koita were upfront, supporting Michael Frey.
Jorge Simao opted for a 4-4-1-1 formation, with the impressive Herve Koffi between the sticks. Alessandro Ciranni and Dimitri Mohamed were the full-backs, while Matias Silvestre and Saad Agouzoul were the centre-backs. Jean Onana and Marko Bakic were the central midfield partnership, with Beni Badibanga and Charles-Andreas Brym the wide men. Deni Hocko was playing just behind striker Nuno da Costa.
Pushing the wide men on
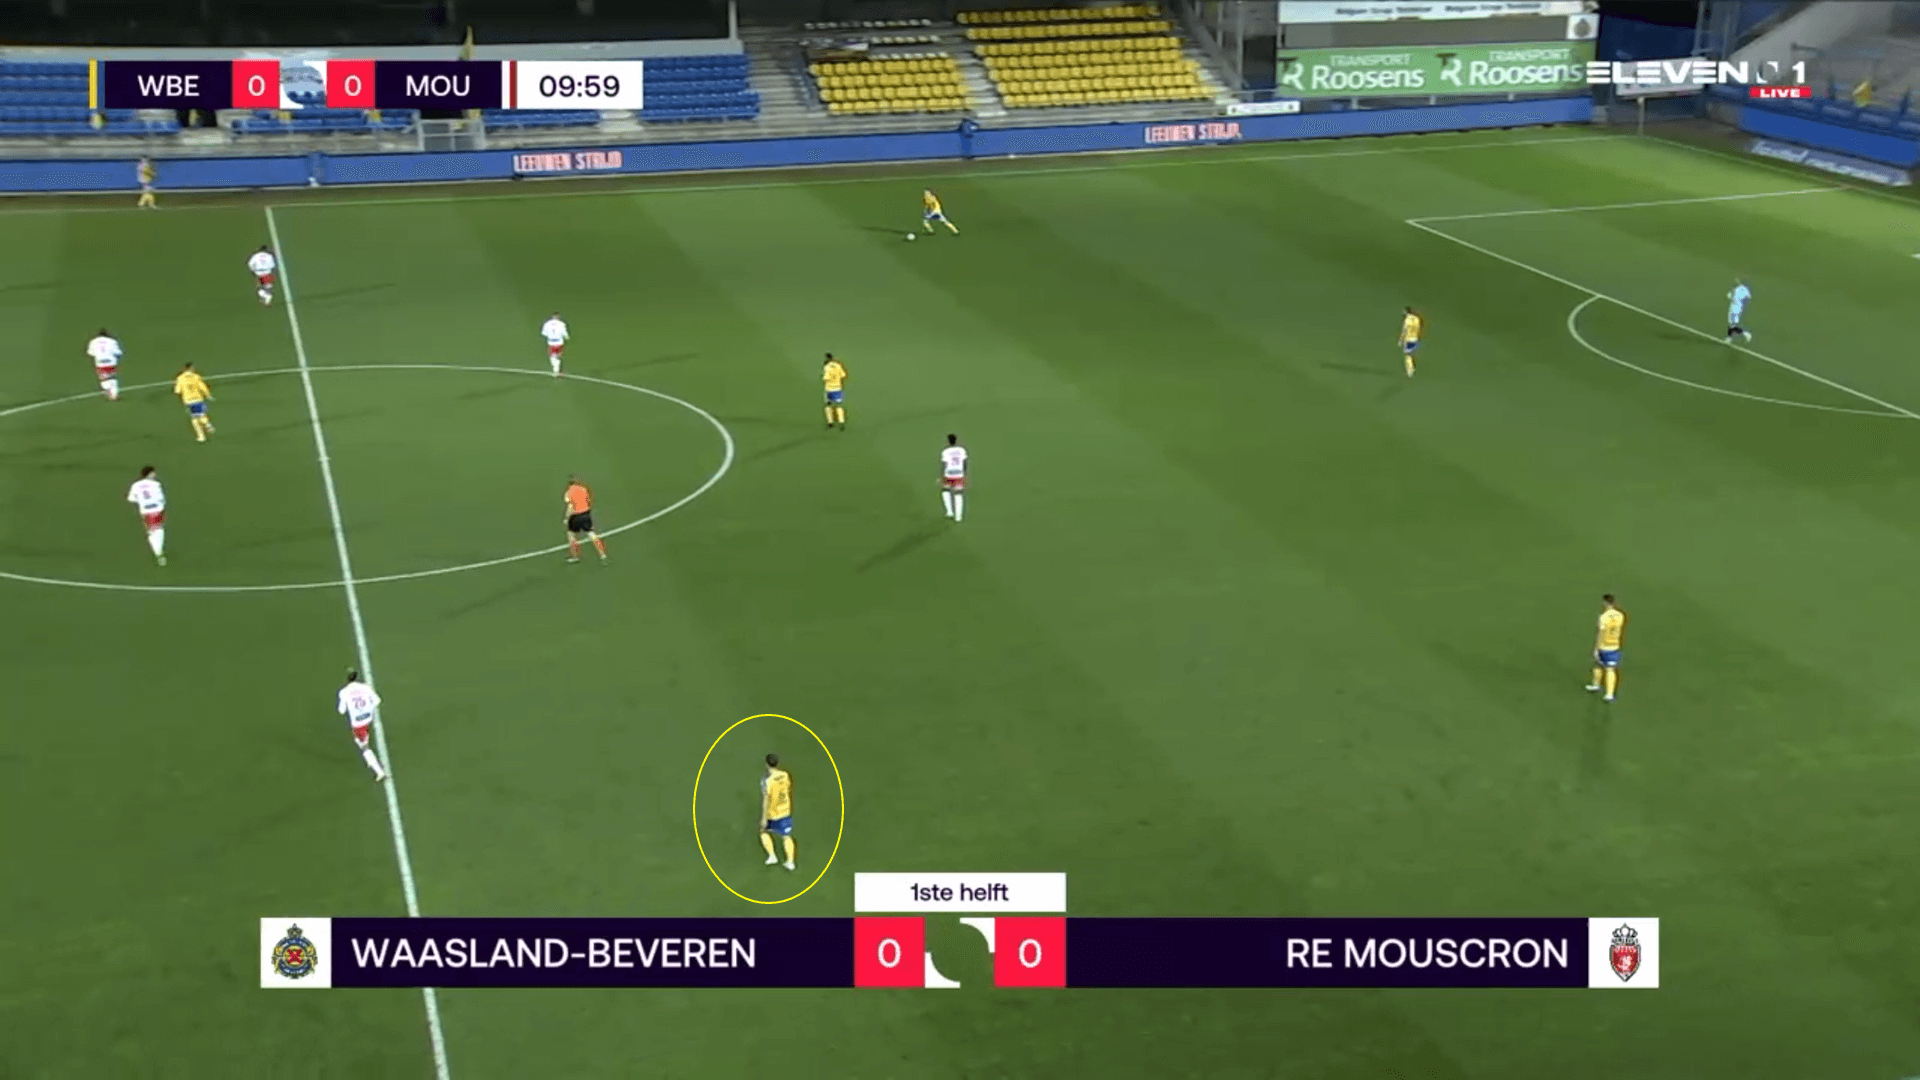
From early on in the game, it was clear that Hayen wanted his wide players, Wiegel and Leuko, to get forward and create mismatches that would lead to chances. In order to push them forward, he needed the central midfielders to help out. Bertone was key in this, especially on the left-hand side of the pitch.
For example, as we see below, he has pulled out wide into more of a full-back than a central midfield position. This happened constantly in the early stages, and led to the midfielder seeing plenty of the ball. Moreover, it allowed Beveren to maintain possession, as Mouscron were not looking to press them too high, instead looking to force them into playing through their defensive blocks.
With Mouscron playing deep and looking to soak up pressure, the home side’s tactics struggled to create the chances that Beveren were looking for. What they were looking to create was a situation that we see below, whereby Leuko is able to pick the ball up in plenty of space on the flank, with three more central attacking players occupying the rest of the defence. Ideally, this would force the Mouscron right-back to come out to defend Leuko, creating even more space inside for these three attackers.

However, in fairness to Mouscron, they were able to nullify this potential threat through their midfield being disciplined and not pressing Bertone when he had the ball, making it more difficult for Beveren to create the above opportunities.
Attacking on the outside
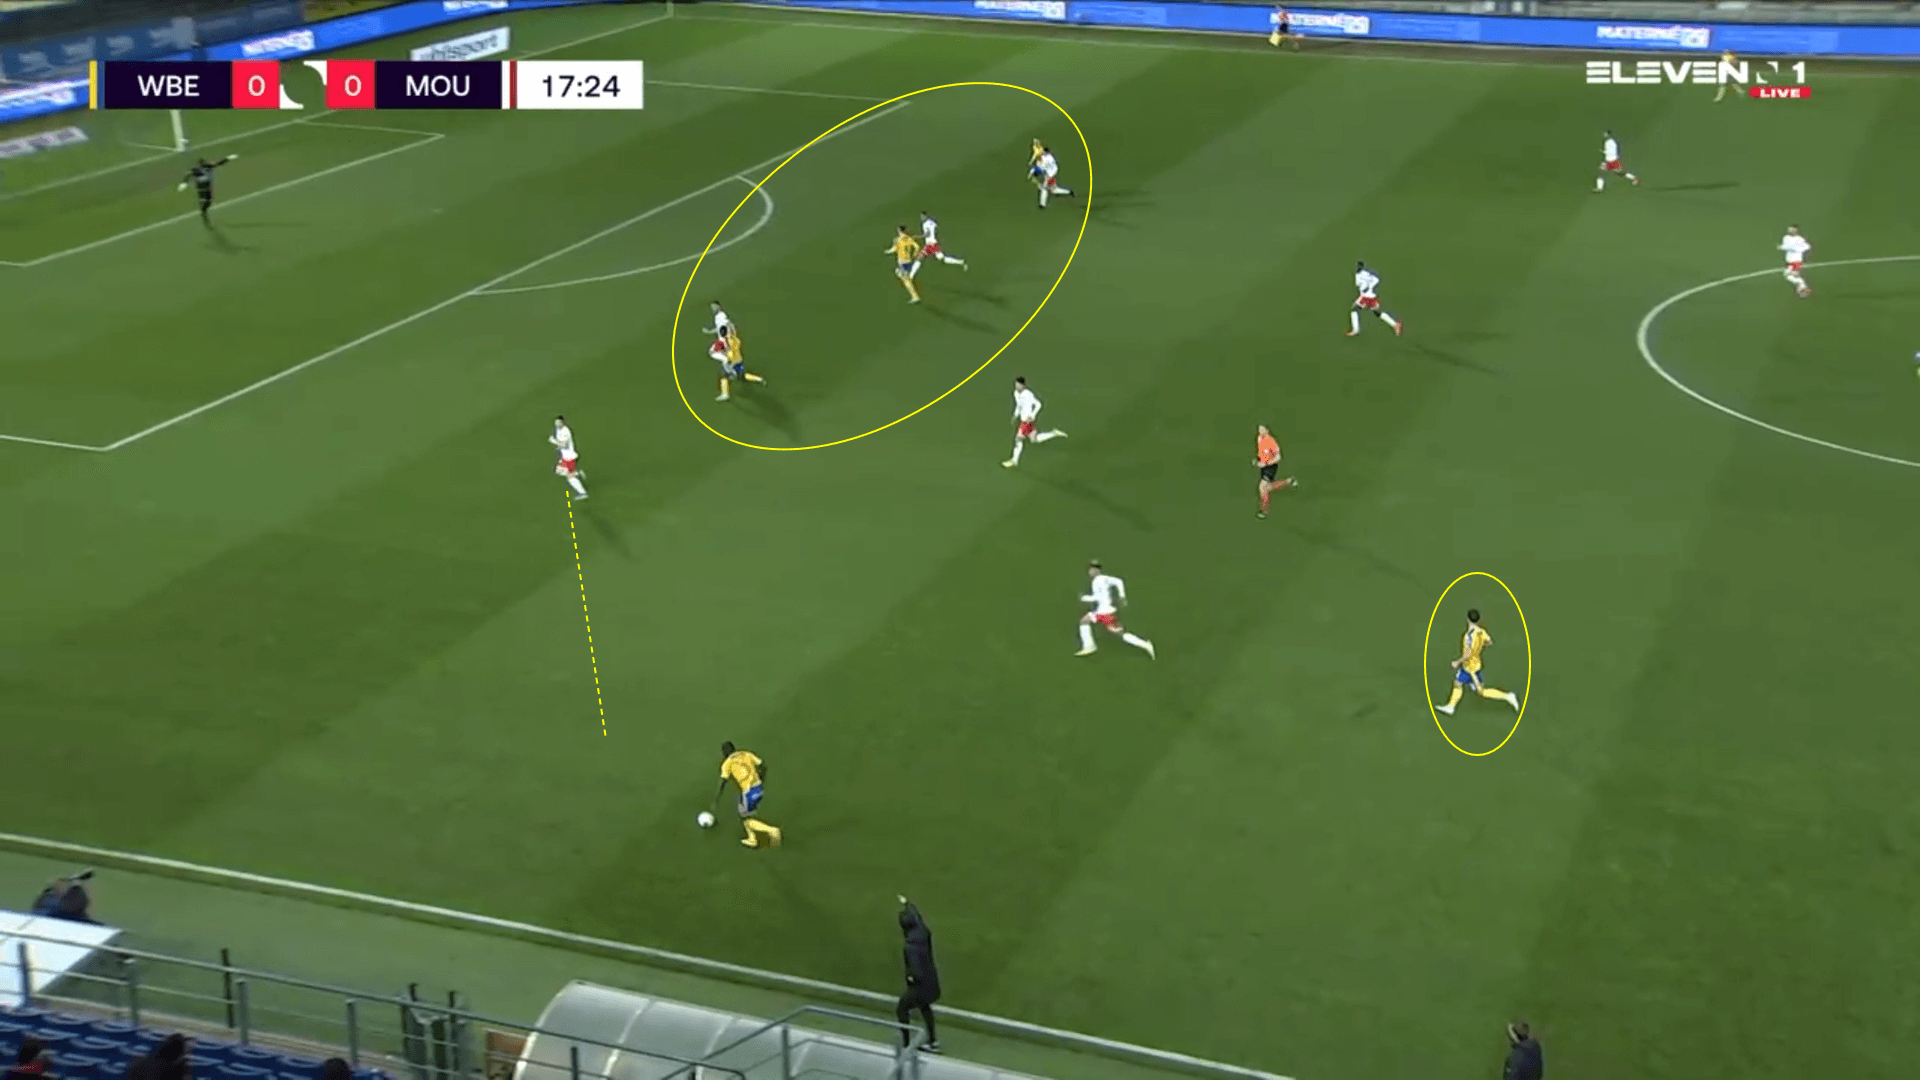
For the away side, it was clear that they wanted to use the willingness of da Costa to run the channels to pull the back three out of position, aiming to exploit the space relinquished in the defensive wide areas by Beveren. The majority of their attacks in the first half involved what we see below; a ball down the line to da Costa.
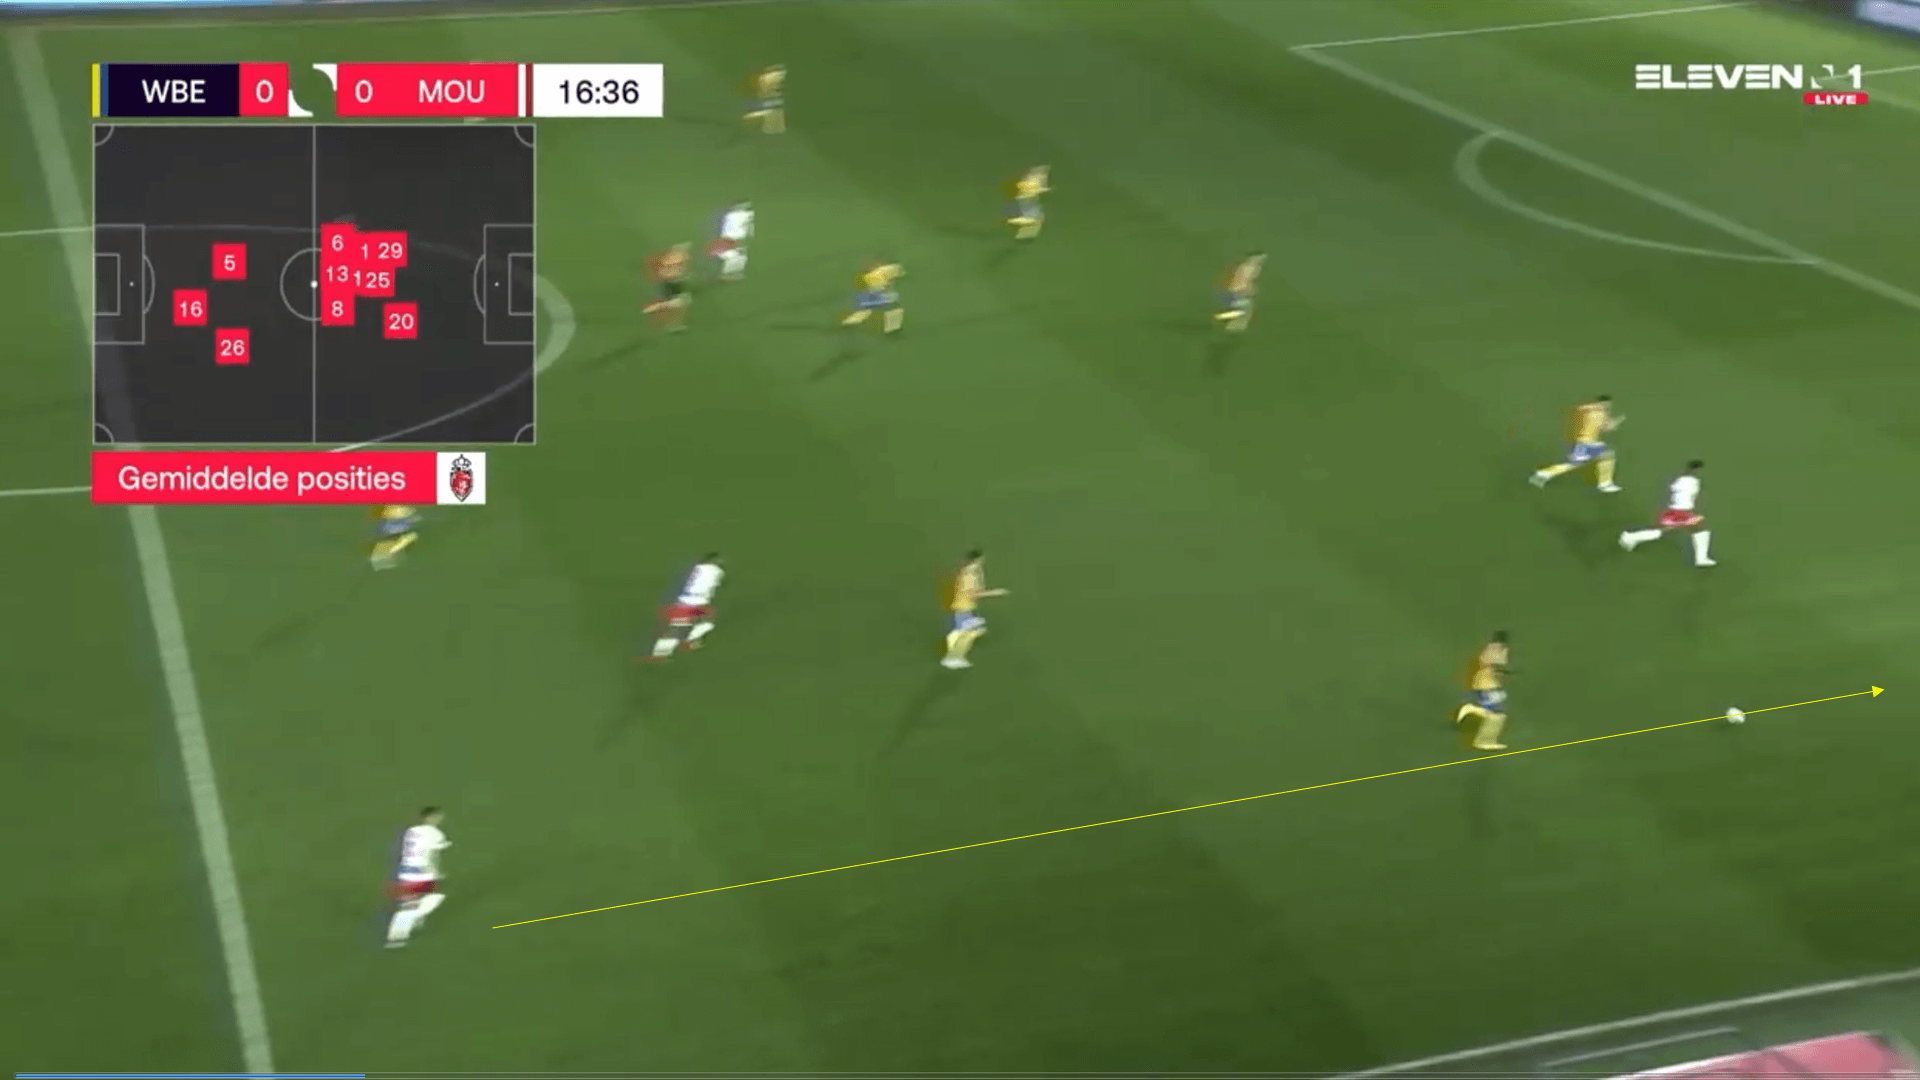
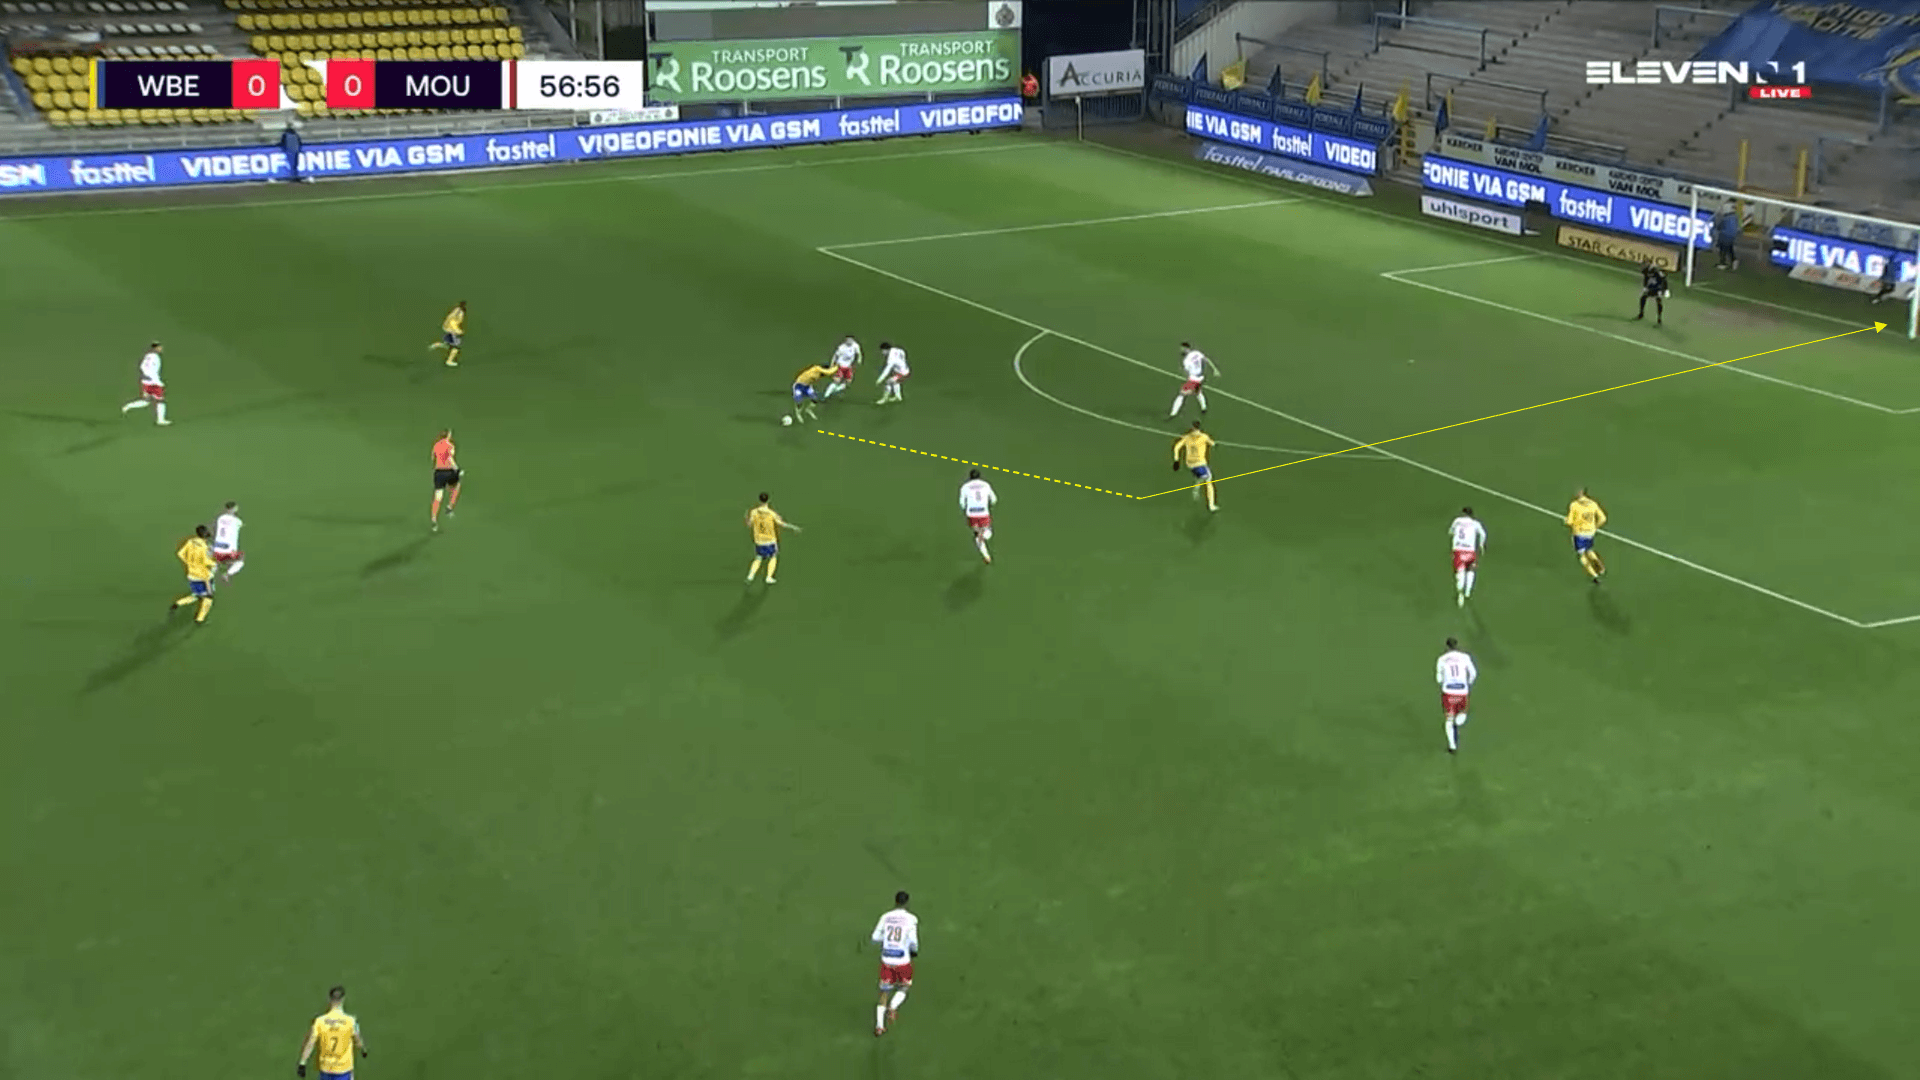
While they may not have managed to score, it was a tactic that did create chances, and, on another day, could have led to more goals. The dribbling ability of da Costa meant that, by running the channel, he was able to get into a one-on-one situation with a centre-back, as he had pulled them wide. In the example below, we see how he has managed to beat his man using his dribbling and has created a reasonably good scoring opportunity.
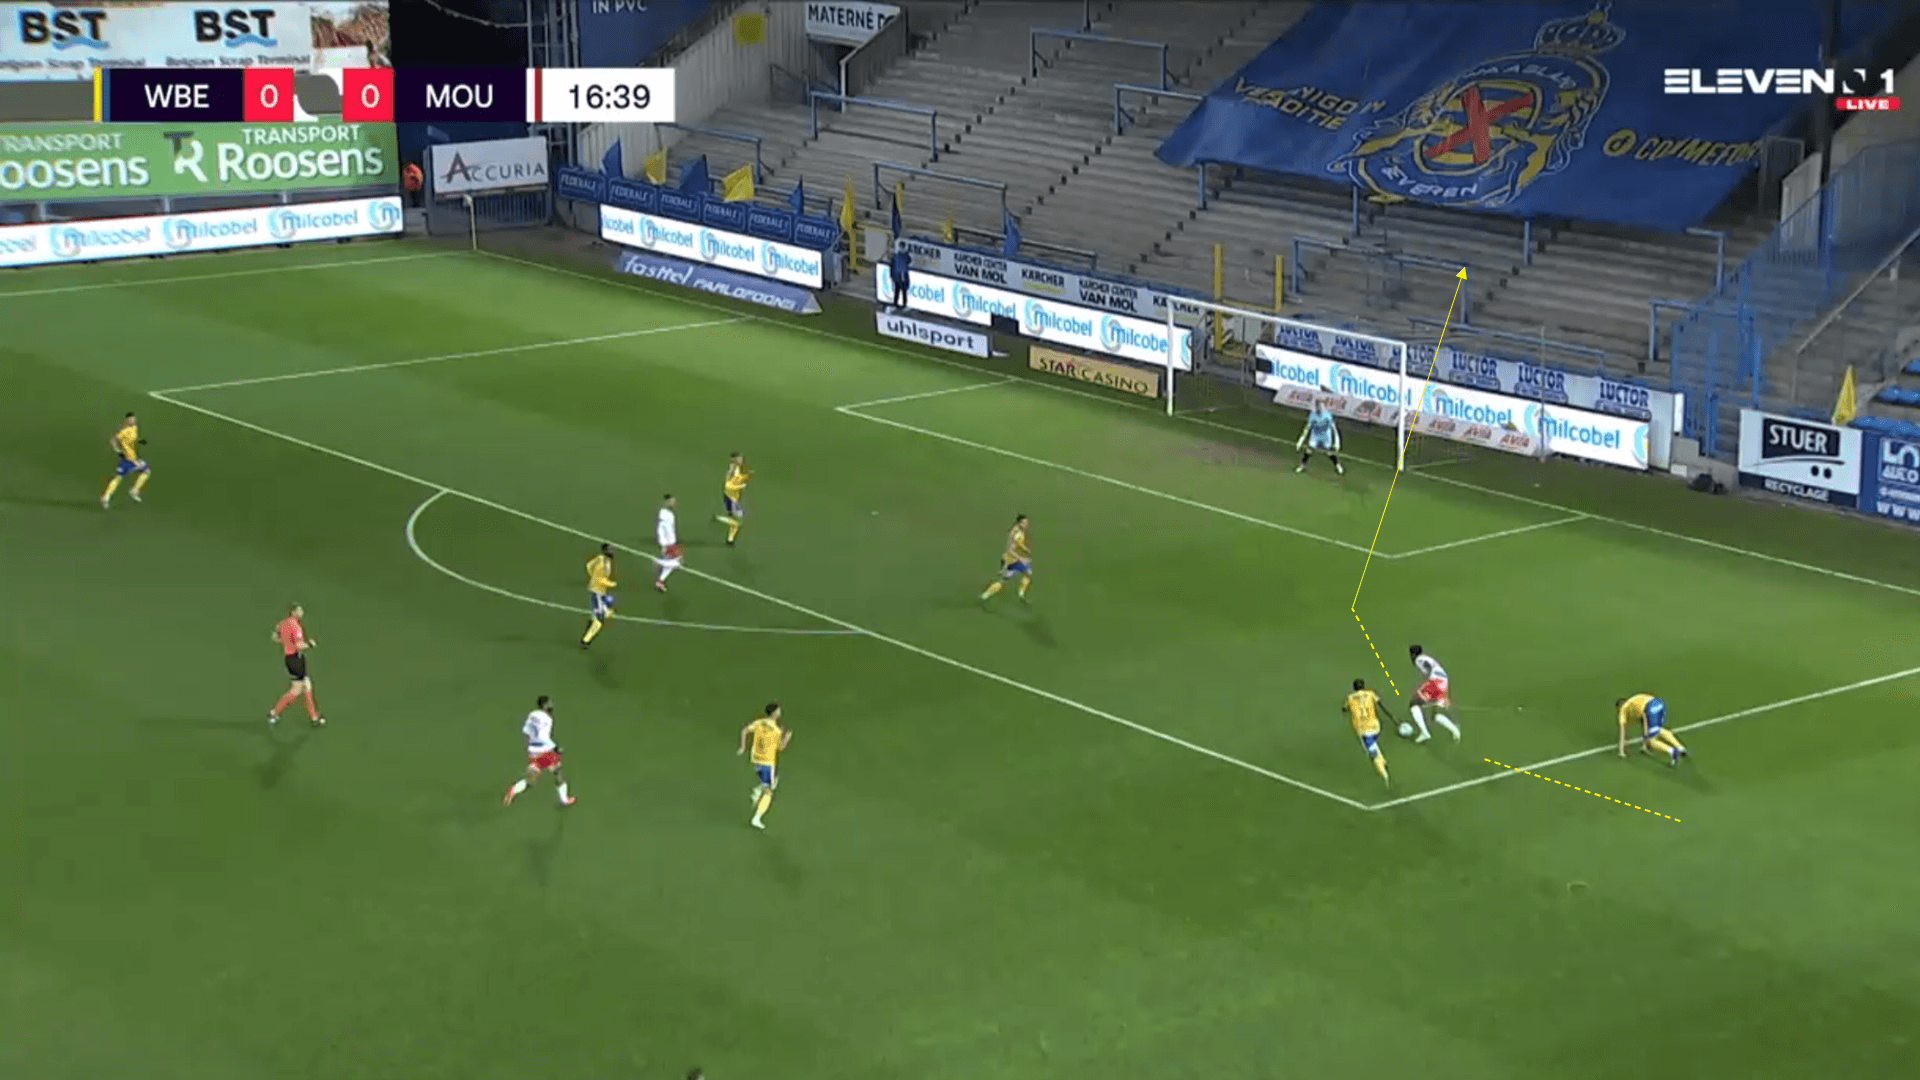
Unfortunately for Mouscron, his finish is subpar and doesn’t lead to the opening goal. However, it was an example of the joy Mouscron got, especially in the first half, when transitioning from their own half via long balls into the channels that the striker was willing and able to run into.
One problem with this tactic was that it relied on mainly the full-backs playing accurate long passes, which proved difficult. Any balls played with height were usually defended with relative ease, especially as these were often underhit. Once Beveren took the lead, it became easier for them to defend these passes, as they could sit a bit deeper and play on the counter, denying the away side the space to play into.
Beveren second-half counter-press
It was the pressing game of Beveren in the second half that led to them taking the lead. Prior to the goal, Beveren had been more intense in their pressing of Mouscron, especially when the away side had the ball deep in their own half. Both Mandjeck and Bertone were pushing forward, trying to regain possession high up the field.
Counter-pressing was key in creating the goal. Beveren had just lost the ball trying to play an intricate passing game on the right-hand side. We see below that Mouscron are in possession, but also that Bertone is pushing up high to press the ball player, whose only option is to go backwards.
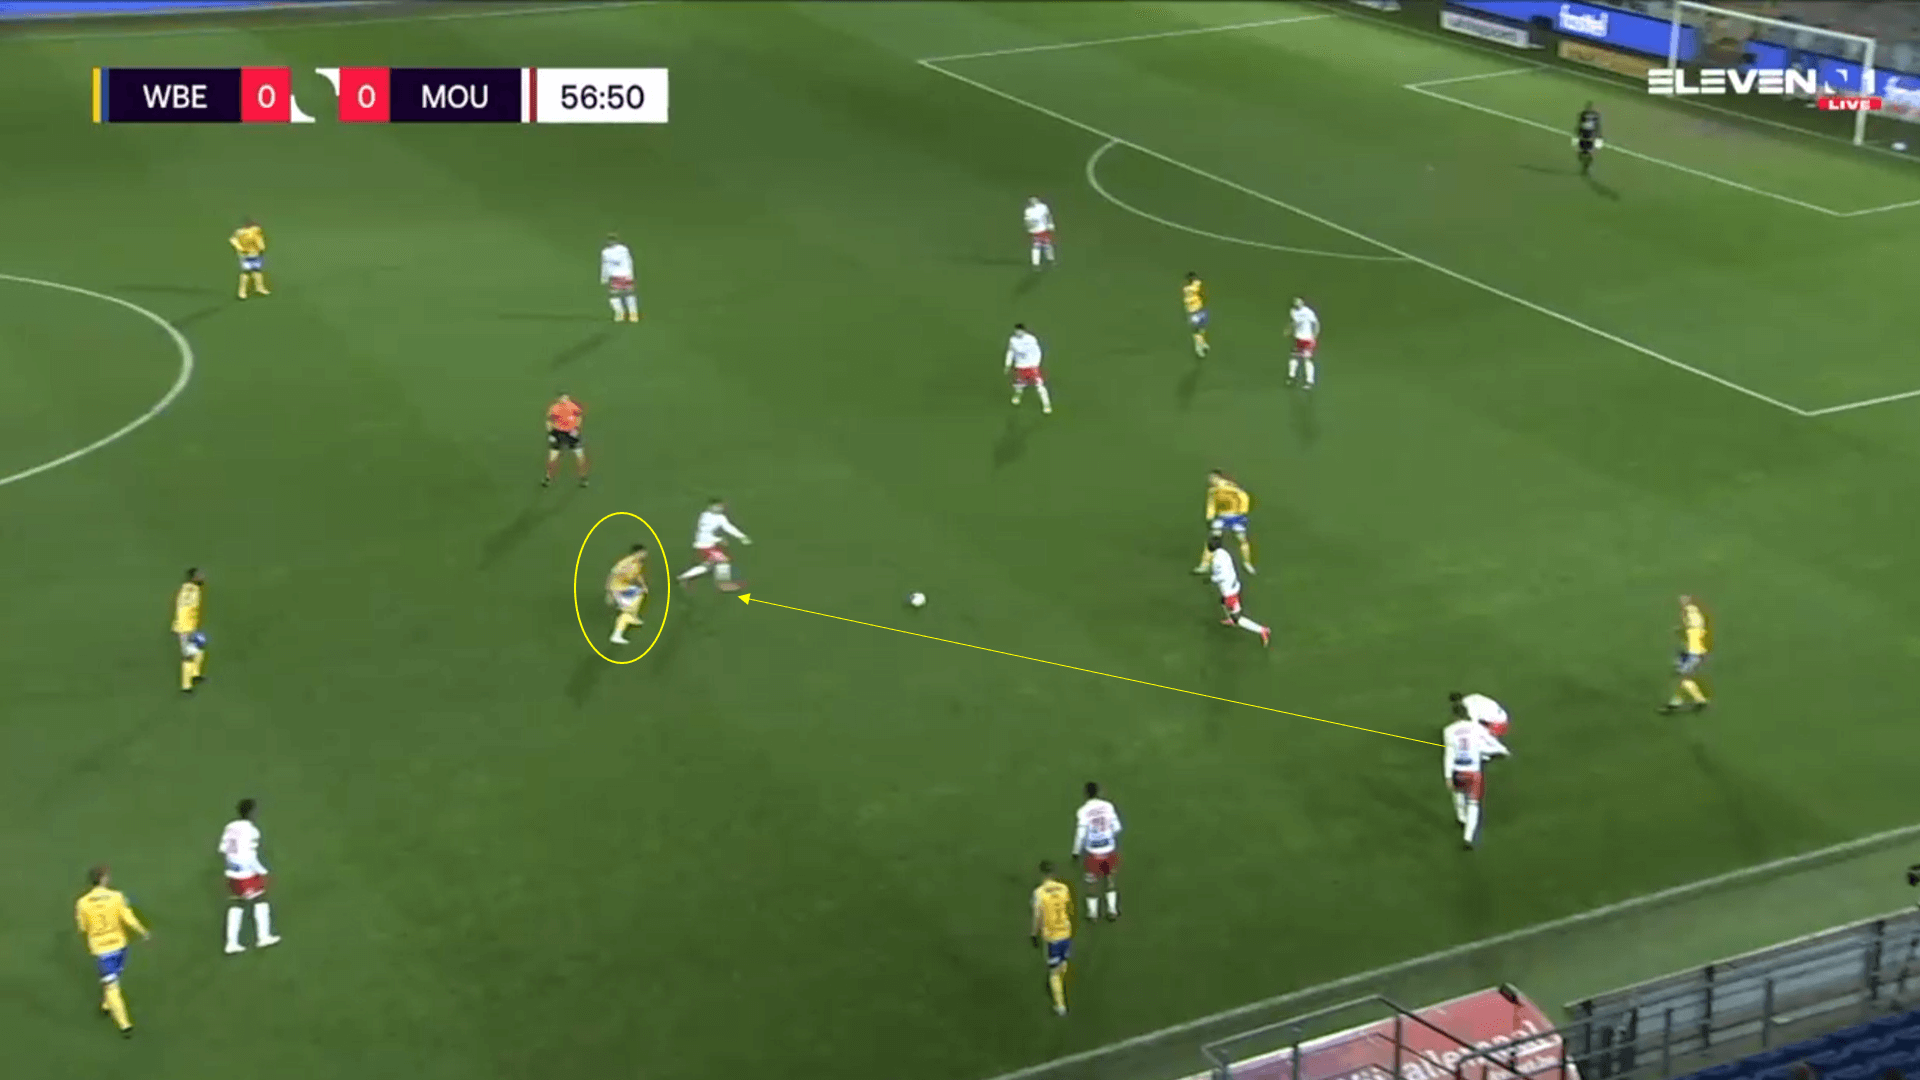
For Onana, we see that the only real place he could safely pass the ball to is backwards, because Beveren have cut off all the other passing options. da Costa, wearing number 20, is also highlighted, showing that the ball over the top wasn’t on, as it had been in the first half, because the striker has dropped back to help with the transition game.
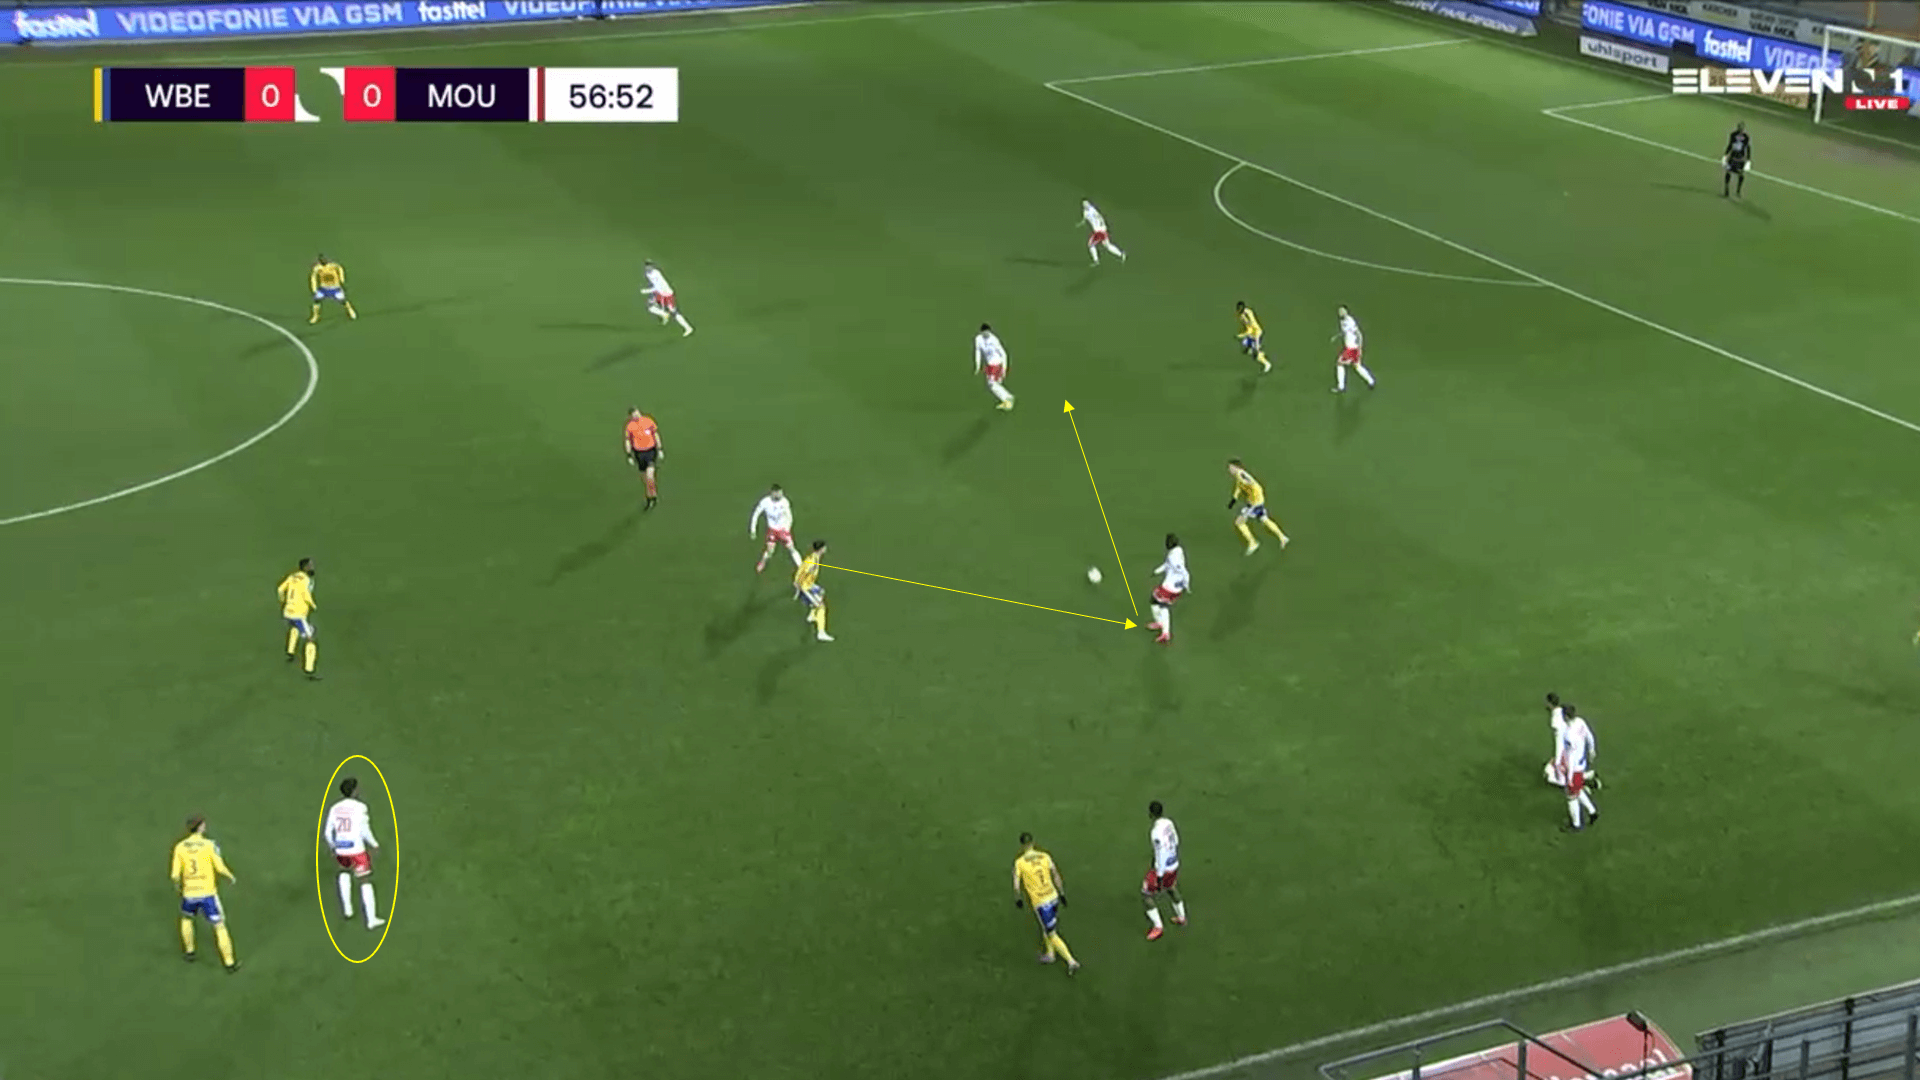
Unfortunately for Onana, his pass is wayward and falls straight to Koita. The attacker still has plenty of work to do, but shows excellent footwork and a fine finish to put his side ahead. This goal all came about because Beveren has decided to press and put emphasis on the counter-pressing game. While it was an individual mistake from Mouscron that certainly helped, this was arguably forced by the Beveren tactic.
Conclusion
In the end, it was Beveren who prevailed in this crucial fixture. Their second-half pressing game was pivotal in them taking the lead, and, once they were ahead, they were able to keep Mouscron out and secure a rare clean sheet. The away side will be frustrated that they weren’t able to continue their recent run of form that had dragged them off the bottom of the table. However, the return fixture will certainly be another key match in the relegation battle that is beginning to take shape in the Pro League.



Comments