After the mid-week journey to Hungary in Europe League, Chelsea bounced back to the Premier League to face Brighton on Sunday.
The home team started with a more defensive shape than they usually do. They formed a 4-4-1-1, while Chelsea operated with their well-known 4-3-3. The biggest changes in Sarri’s side was that continuity in the recently founded system.
Lineups
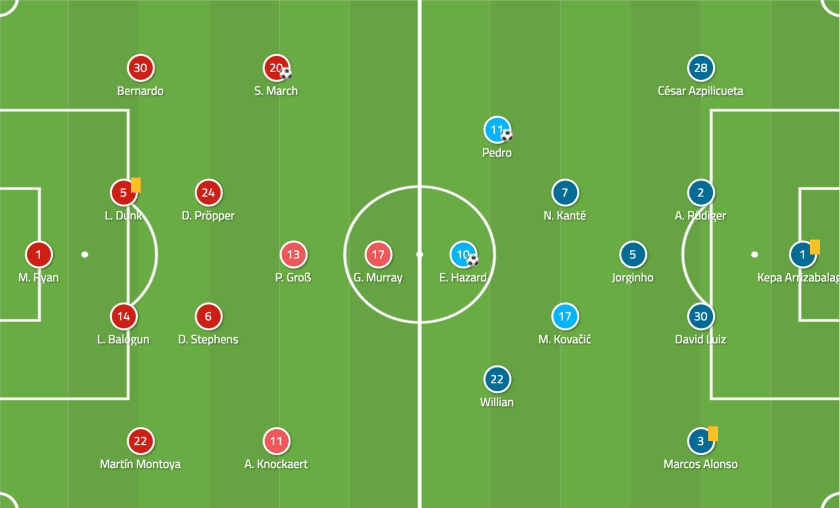
They used the false nine concepts in the attacking department, which means, instead of using Morata or Giroud in the middle of the front line, Hazard playing in the centre-forward position. Since he is not capable of acting like a real striker (physically he does not have the required abilities), his role becomes different compared to the usual centre-forward. Hazard playing in a more flexible way, results in plenty of dropping movement in order to create a connection with his teammates and breaking through the opponents’ lines with combinations. Or he could immediately turn to goal.
Visitors played as a dominant side
In the beginning, Chelsea exercised their high pressing which didn’t allow Brighton to play their game. Therefore, Chelsea quickly became the dominant side with a high possession rate. Even, when the visitors lost the ball they could win it back with intense counter-pressing, thus Brighton was not able to show much offensively.
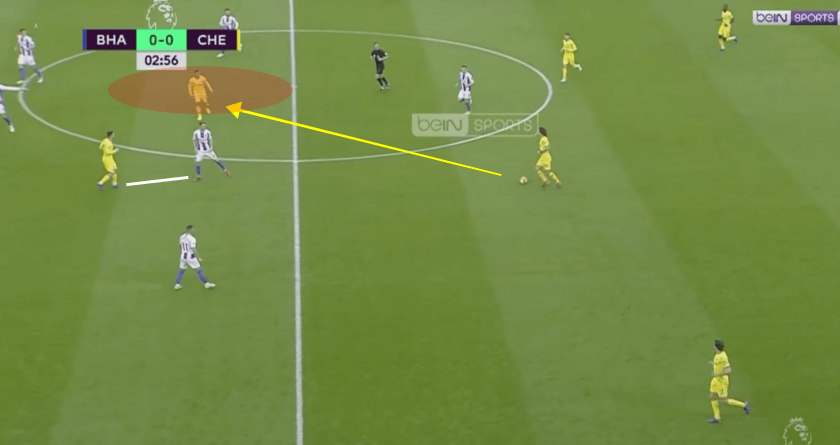
Chelsea operated with the usual 4-4-2-ish system against the ball with Hazard the stable point and someone always joins him depending on the situation and the location of the ball. Here is a common scene, where Kovacic pushed forward to mark the opposing centre-midfielder.
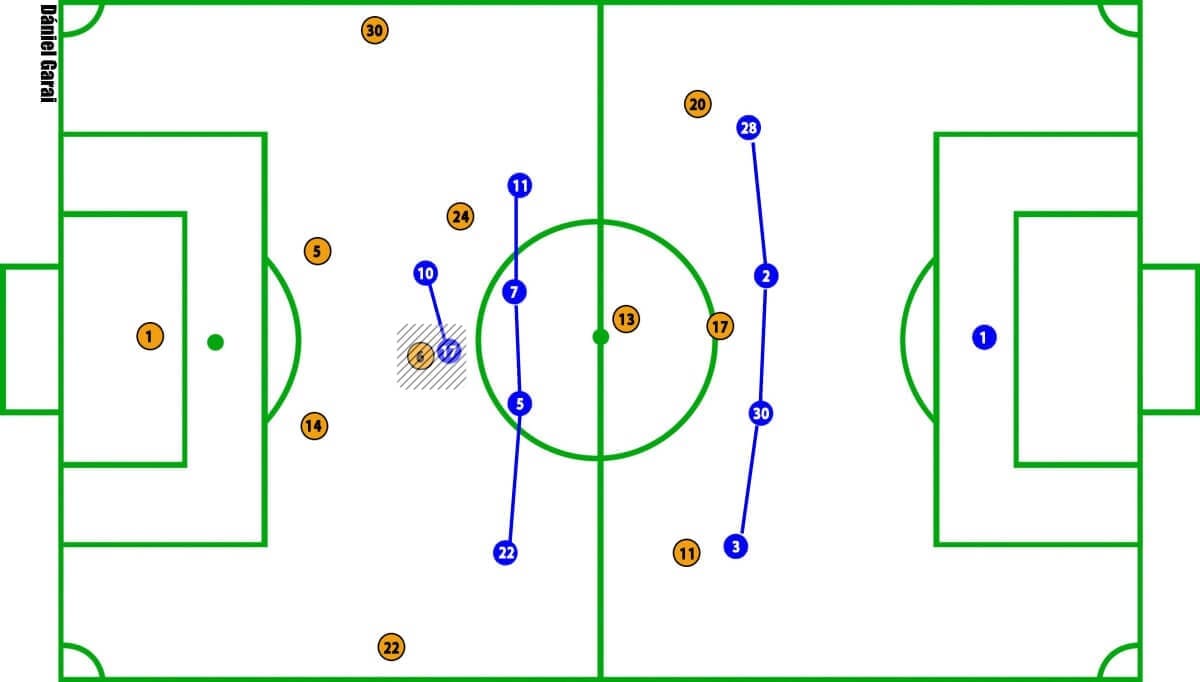
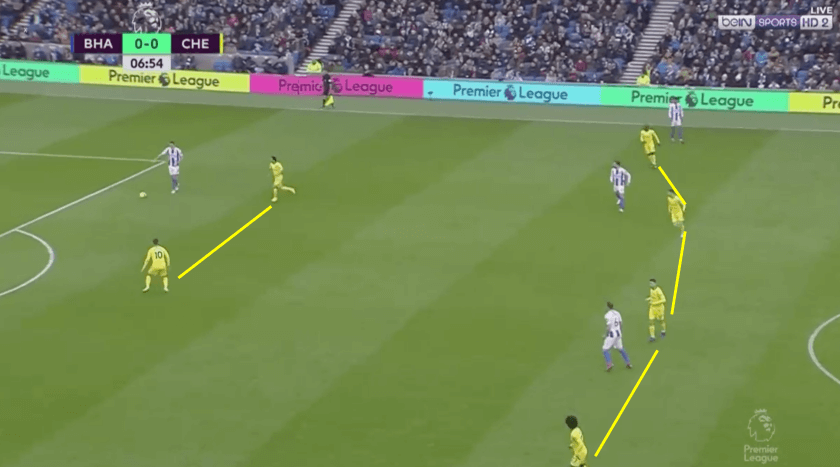
This shape focused on blocking the middle, therefore, the opponent was forced to the wings if they wanted to progress. Then the whole system shapeshifted to the ball-side thus they could stop Brighton’s build-up. Since Brighton’s attackers stay considerably high, six players had the task to beat Chelsea’s press which means it was a 6v6 duel. Unless the goalkeeper joins in to help out. Unfortunately, Ryan did not get involved too much, therefore, Chelsea had an easier situation. In addition, this gives us a reason why Brighton rarely reached the visitors’ final third in the first half.
One possible solution – besides the goalkeeper higher involvement – was apparent in Brighton’s game. (unfortunately just occurred once).
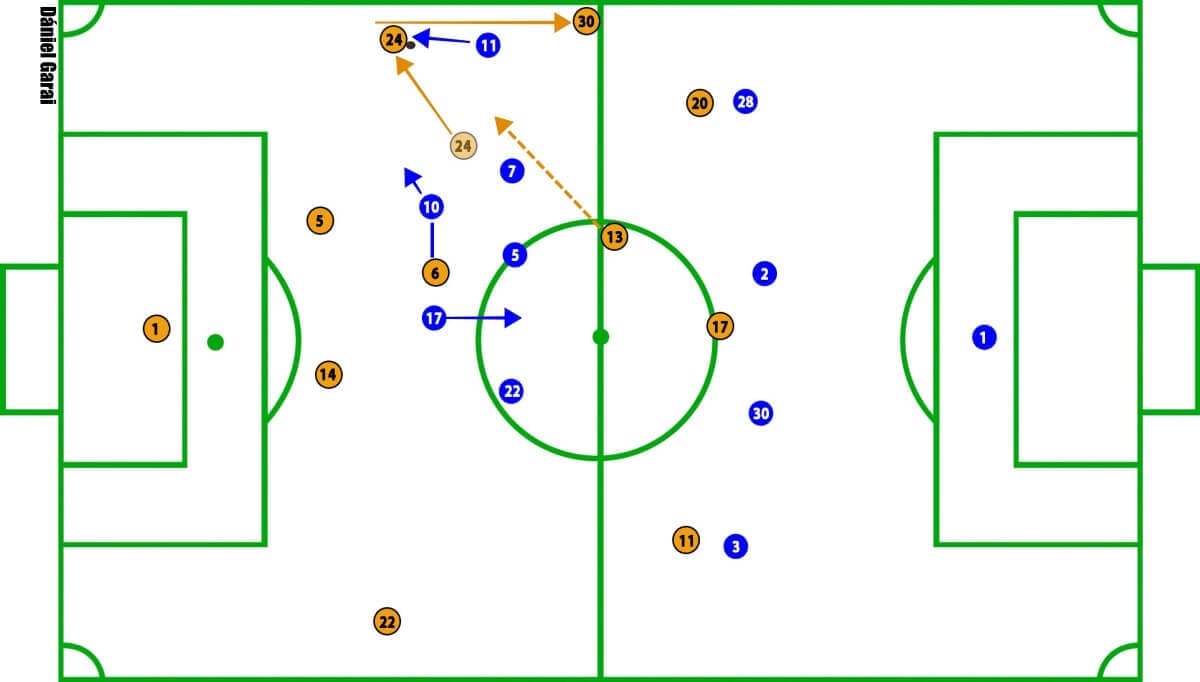
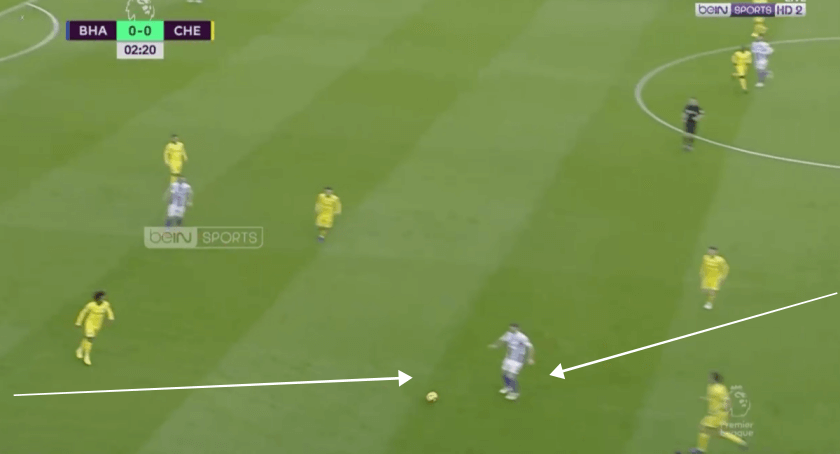
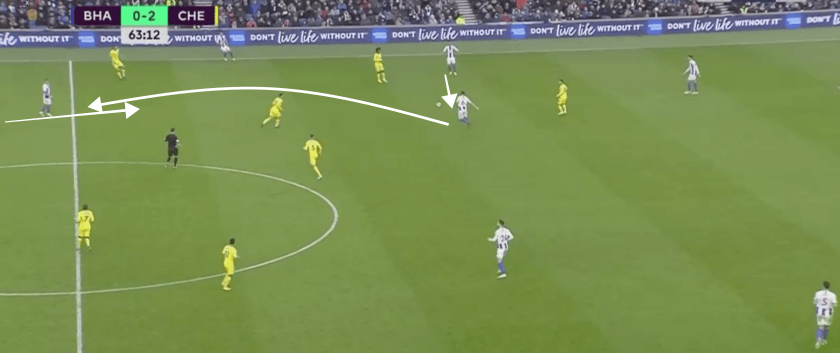
So, when left full-back (Bernardo) moved forward from his base position, the ball-near centre-midfielder (Pröpper) took his position which is kind of interesting since it rather happens in the middle, where the deepest midfielder drops between the centre-backs, therefore, they can move into wider position and still have the connection. But now, it occurred on the wing. However, it did not follow any further movement thus Chelsea’s pressing was effective again and forced them back. Although the potential was there. With Gross dropping into the ball-side and they would able to create an advantageous situation. A combination could have been created in the wing between Propper, Bernardo and Gross.
Brighton did not realise the extra man that Gross could provide with a dropping movement, only a few times, they used that and these were not effective due to bad decisions or wrong pass.
Chelsea escape the home side’s press
In this phase, we will see how the away team were able to bypass the oppositional pressing scheme. Chelsea’s effectiveness relied on two key things.
Firstly, the Kante and Kovacic positioning was essential. In circulation phase, Chelsea used their back formation and Jorginho to build-up from deep whilst Kante and Kovacic moved forward, therefore the opponent had to use the centre-midfielders deeper in order to cover Kante and Kovacic. Thus the four furthest players were able to press in Chelsea’s deep build-up which immediately creates a numerical superiority for the visitors.
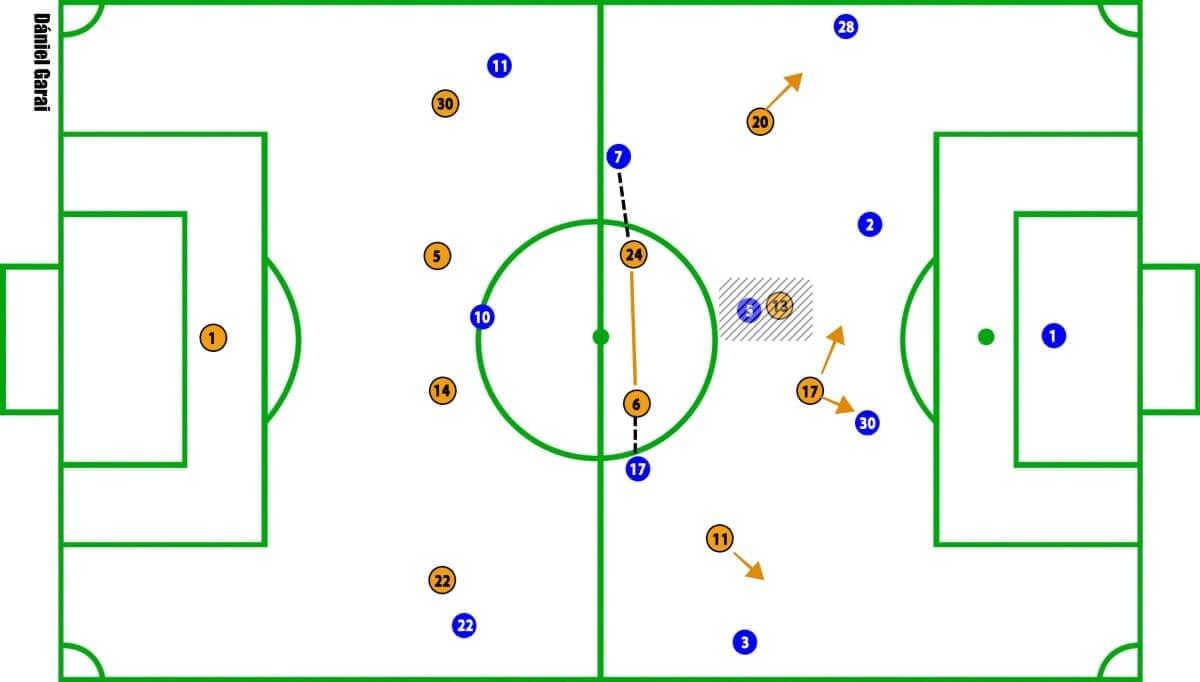
Murray fluctuated between the centre-backs, while Gross marked Jorginho, and the wingers were responsible for pressing Alsonso and Azpilicueta.
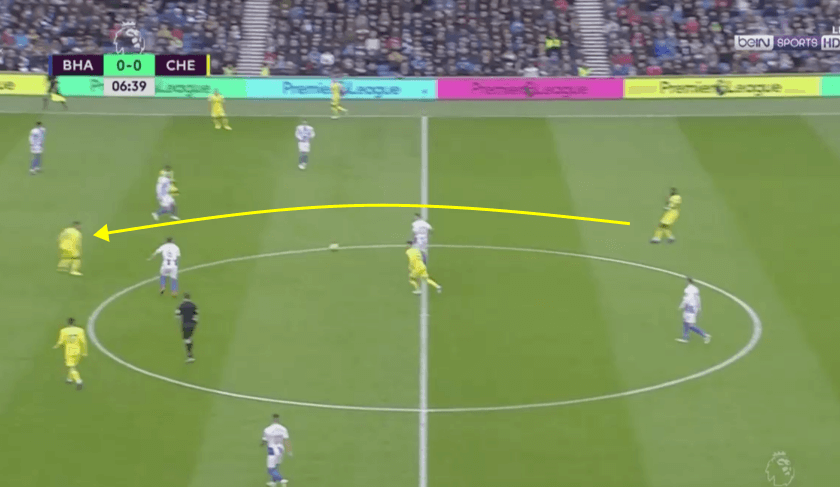
In this manner, Brighton would forced Chelsea to the wing and give up the ball or using long balls. However, here comes the second key feature in play. So on these occasions, the higher players’ dropping movement helped out Chelsea to overcome the home side’s press. On the ball side, the winger and the nearest #8 drops. Despite the marking, they were able to receive a ball due to the reactionary nature of man-marking. Thus Chelsea overcame the oppositional press in most cases with creative combinations.
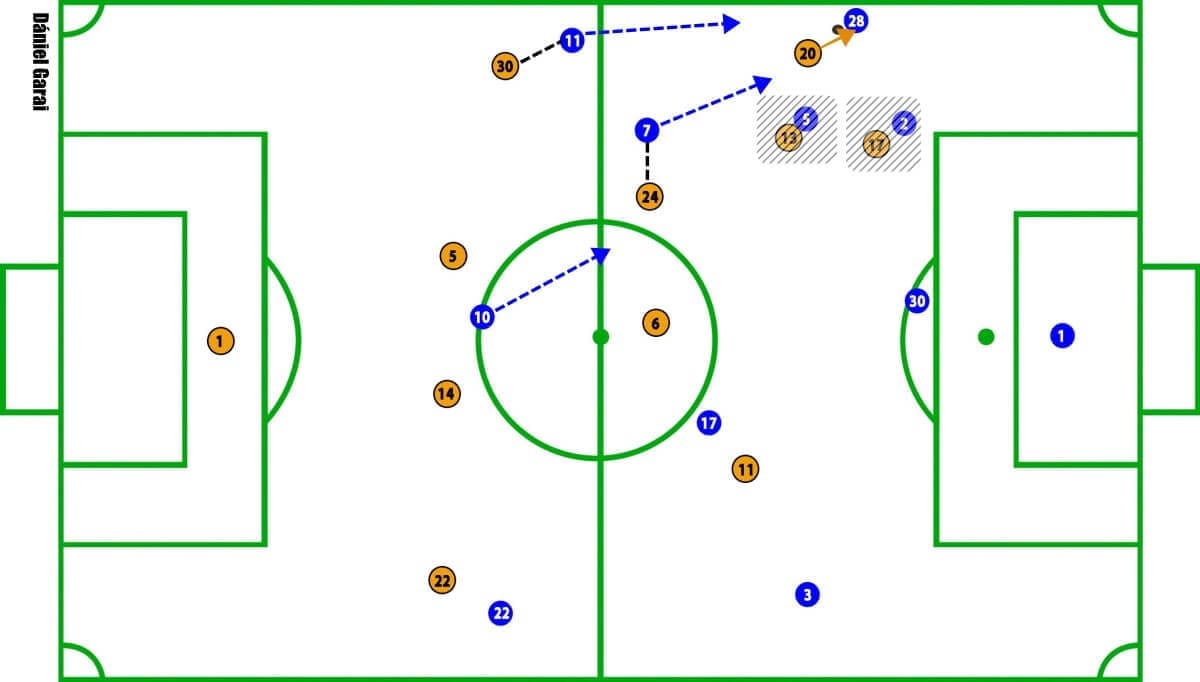
Sometimes even Hazard positioned in deeper to provide an immediate outlet in the middle from the press.
Flexibility creates gaps
Chelsea showed some interesting ways to create gaps in Brighton’s defensive formation. Nevertheless, all relied on the opponent’s ball or man-orientation.
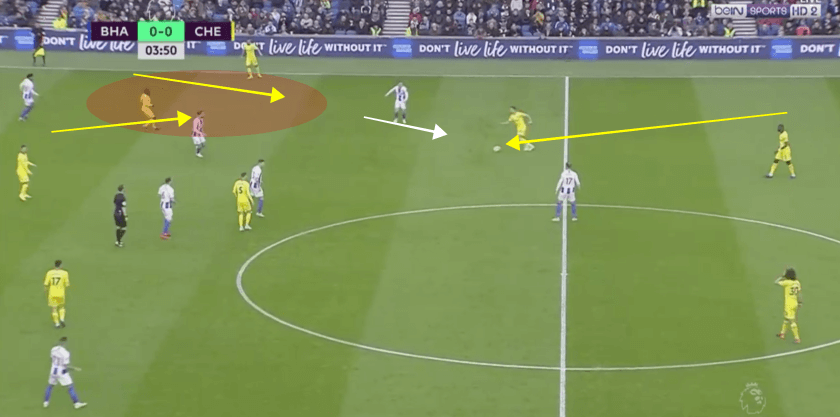
Chelsea frequently used the centre-backs or Azpilicueta to progress with the ball due to the free spaces in the halfspaces. This often attracts the pressure from the opponent. Therefore, when for example the winger moved out to press, Chelsea’s players could drop into space behind the oppositional winger.
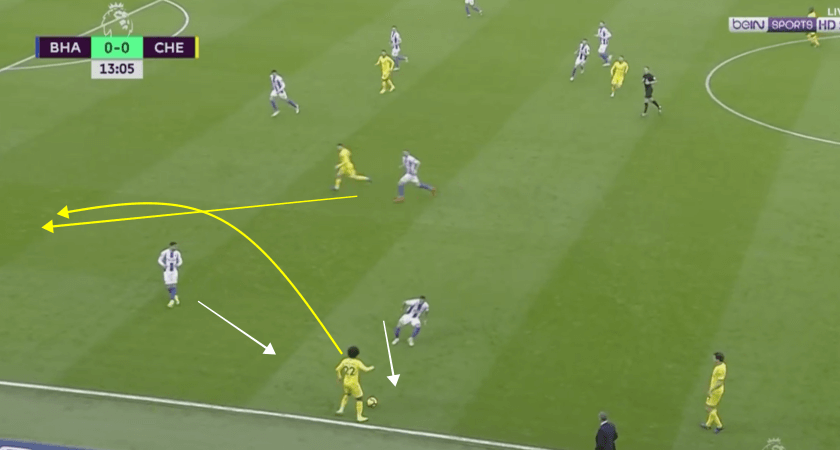
Or a similar instance where a wide pass to Willian which invites the pressure from the opponent. Thus Kovacic was able to run in behind Brighton’s defensive shape and received the ball.
However, the most used pattern was different from the above ones but first, we should understand the visitors’ positioning in possession. As I mentioned earlier, Kante and Kovacic stayed high in order to provide pass options in the oppositional second line. Although Kante moved further up but often dropped to the halfspace to provide an option.
On the other hand, Kovacic mostly stayed in Brighton’s second line and often got marked by Stephens. This stretched the home side’s second line which got utilised by Hazard. He frequently dropped between Brighton’s centre-midfielders and received passes.
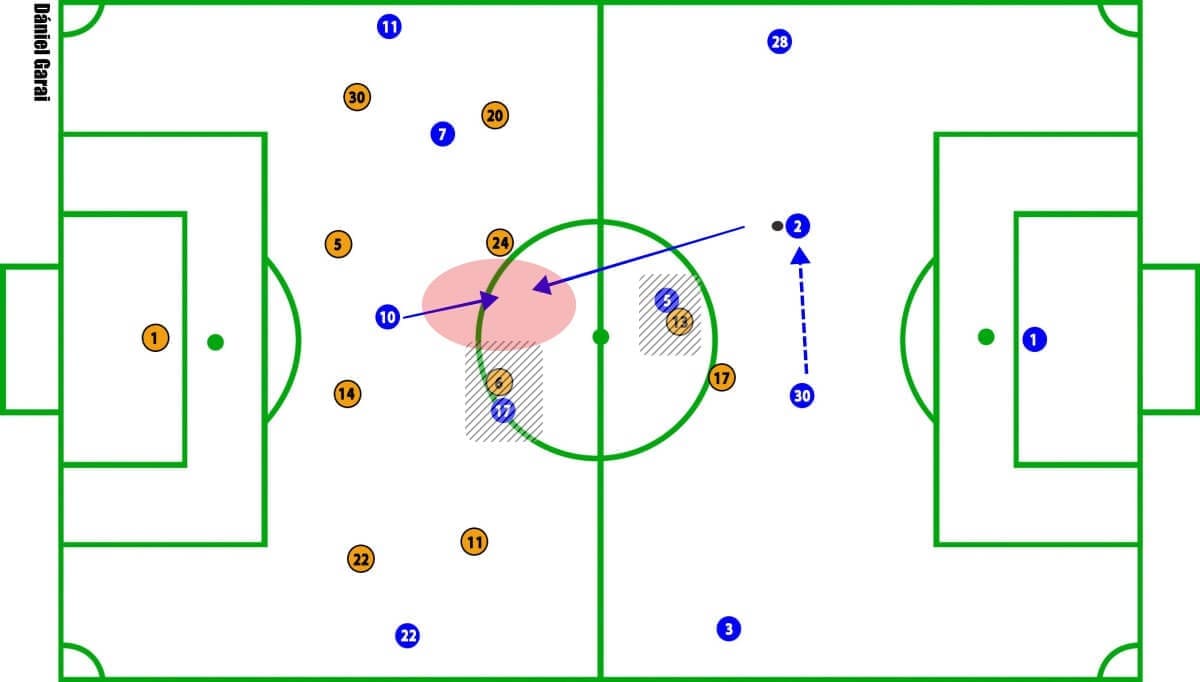
This generated a lot of problems for Brighton that they could not deal with it.
Conclusion
Despite Brighton forming a defensive shape, they could not stop the away team’s attacking game due to the issues that discussed above. However, the goals occurred from different situations. Before the first goal, Chelsea pulled the opponent’s defensive shape to one side then created a combination in the middle which led to a breakthrough into the box. Whilst the second goal was caused by an individual error which came from a counter-attack.
The last couple of games showed that introducing Hazard in centre-forward position is a good idea because it allows more flexibility, which can be really effective in creating space or gaps in the oppositional structure. It will be interesting how far this system gets and what the other changes will be.
If you love tactical analysis, then you’ll love the digital magazines from totalfootballanalysis.com – a guaranteed 100+ pages of pure tactical analysis covering topics from the Premier League, Serie A, La Liga, Bundesliga and many, many more. Get your copy of the FIRST of two December issues for just £4.99 here or preorder the SECOND of the December issues with an annual membership right here.


Comments