Hansi Flick’s Bayern Munich took on Schalke at the Allianz Arena on Saturday evening, with both sides in similar positions in the table. In what looked like a game that was set up to be a very tough test for Bayern Munich against a tenacious Schalke side, the game actually ended up being a masterclass from Bayern Munich in positional play and controlling a match. Schalke made adjustments to their style but weren’t able to prevent Bayern’s dominance in the game, and the technical ability of every Bayern player was on show. In this tactical analysis, we’ll look at how Bayern asserted their dominance, the adjustments Schalke made, and mainly the positional play utilised by Bayern in order to penetrate Schalke.
Lineups
Formations are pretty useless in trying to describe this game from Bayern’s point of view, but Schalke initially lined up in their usual 4-1-3-2 diamond as shown below. Hansi Flick opted for Leon Goretzka over Phillipe Coutinho, while the only surprise player in Schalke’s lineup was 19-year-old Welshman Rabbi Matondo.
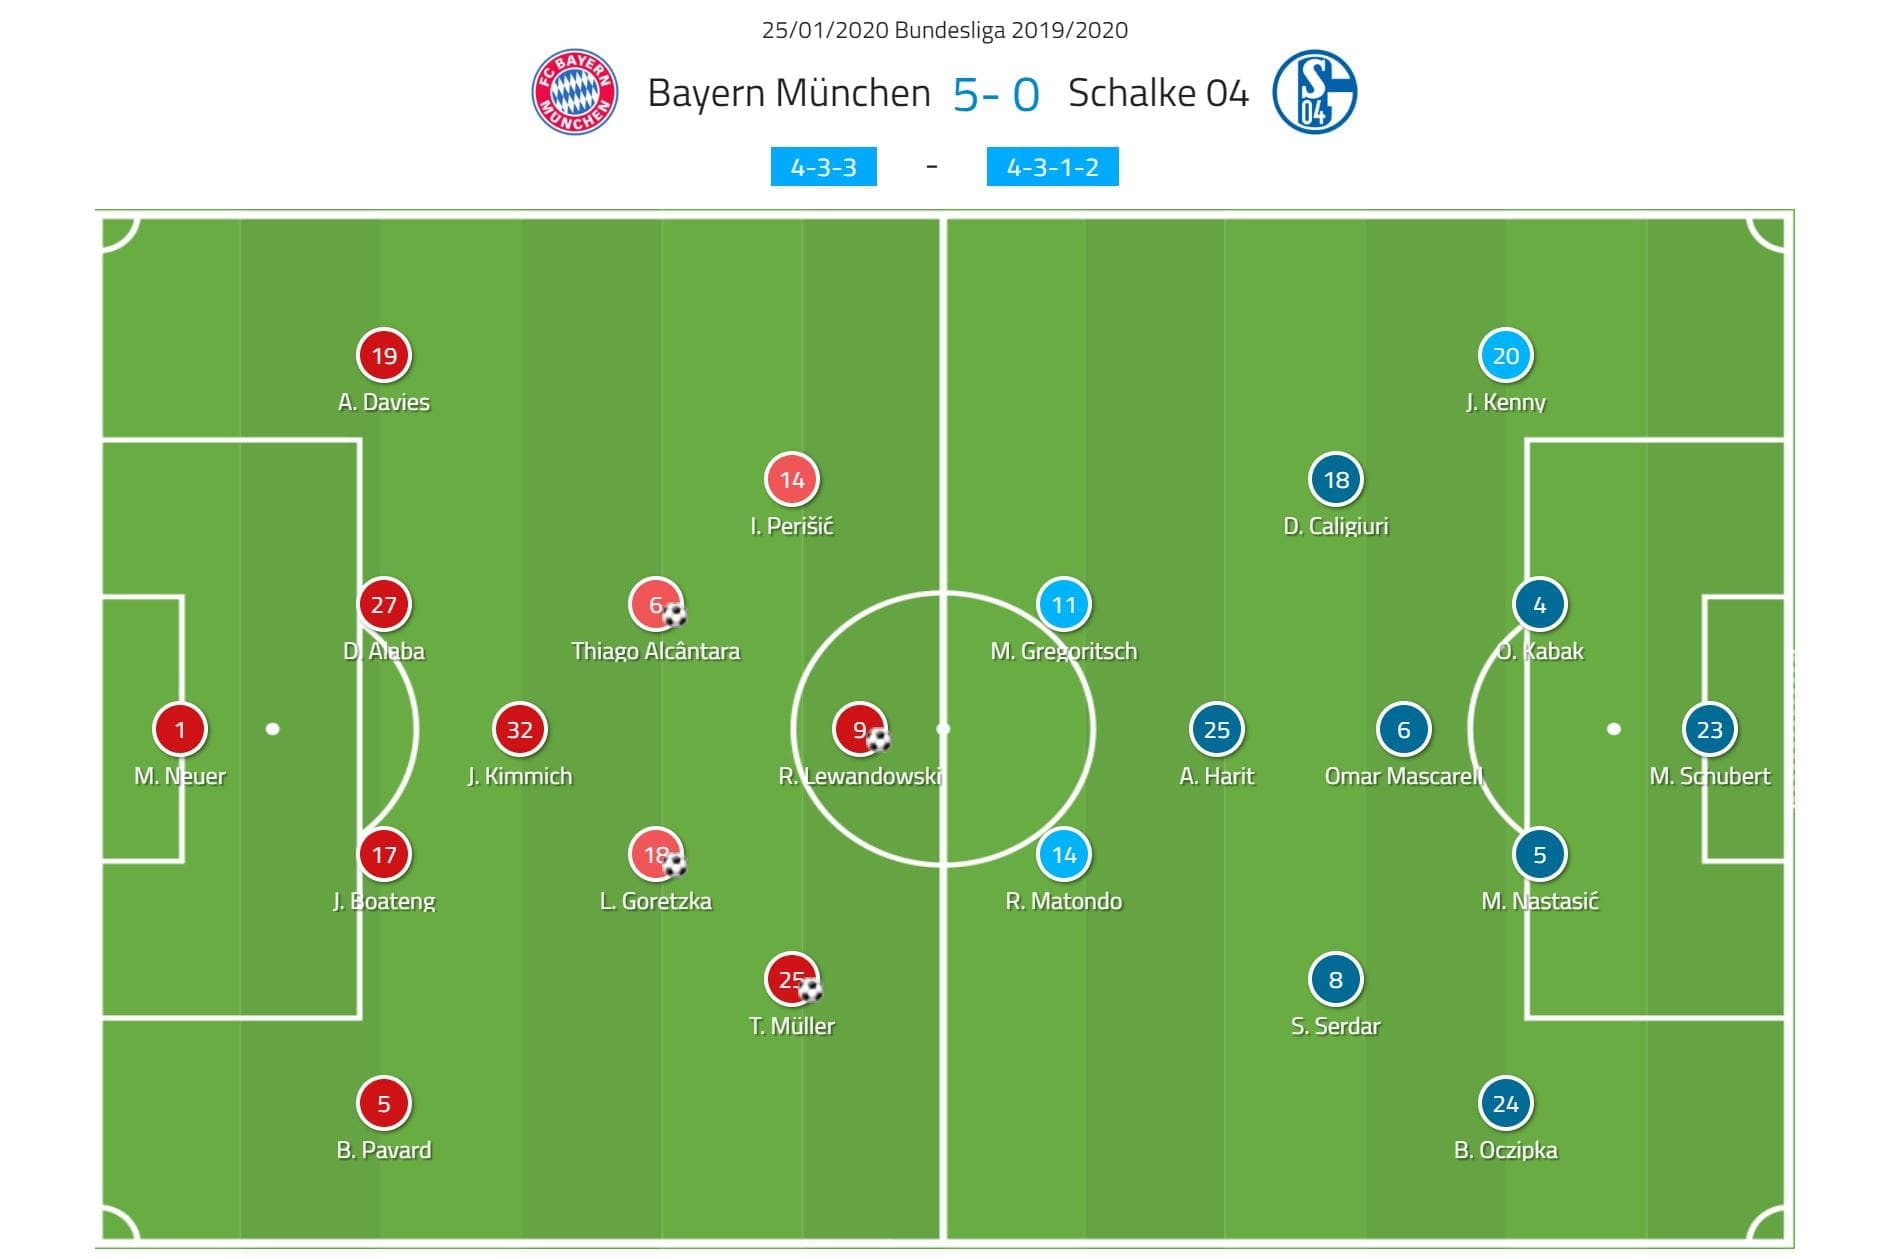
Schalke’s diamond exploited early
Bayern’s famously wide set up under Hansi Flick so far came up against Schalke’s narrow midfield diamond and the result was Bayern dominating in possession, much of which was down to the battle between the Bayern pivot(s) and Schalke’s number ten.
The role of a number ten within a diamond press is usually to press the pivot player, which fluctuated between Thiago and Joshua Kimmich. Bayern’s single pivot, in order to avoid being pressed from behind with no angles to progress the ball, often drops into the defence to form a back three. This allows for the back three to stretch and occupy more space, allowing them to stretch the opposition first line and play shorter, less risky passes into the now higher full-backs.
We can see an example here of this principle, but Schalke are comfortable in this shape and aren’t caused problems. Thiago drops to form a back three and is followed by the number ten who presses him. This leaves Schalke in a 4-3-3 temporarily, and so with the ball on the wings, they can squeeze over and their nearest midfielder ( a number eight) can push across and press the high full-back. Therefore, in this scenario with a single pivot, Schalke are fairly secure.
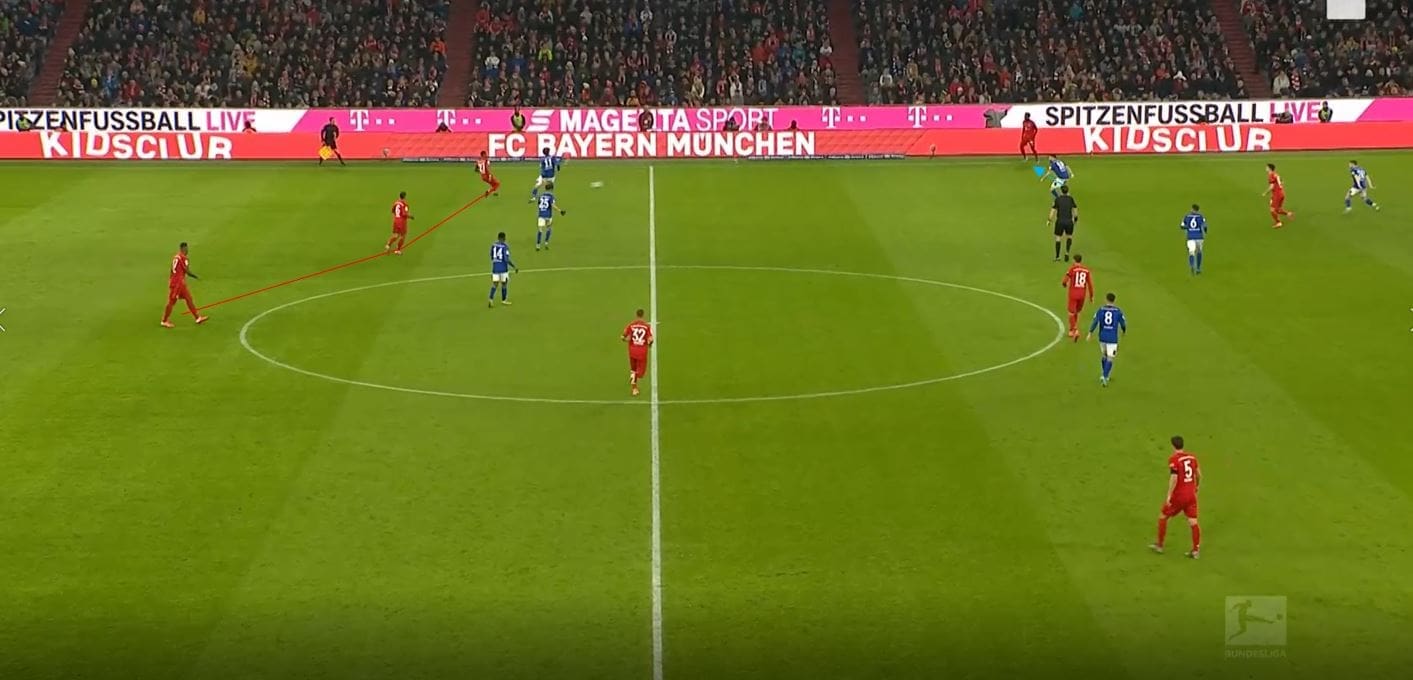
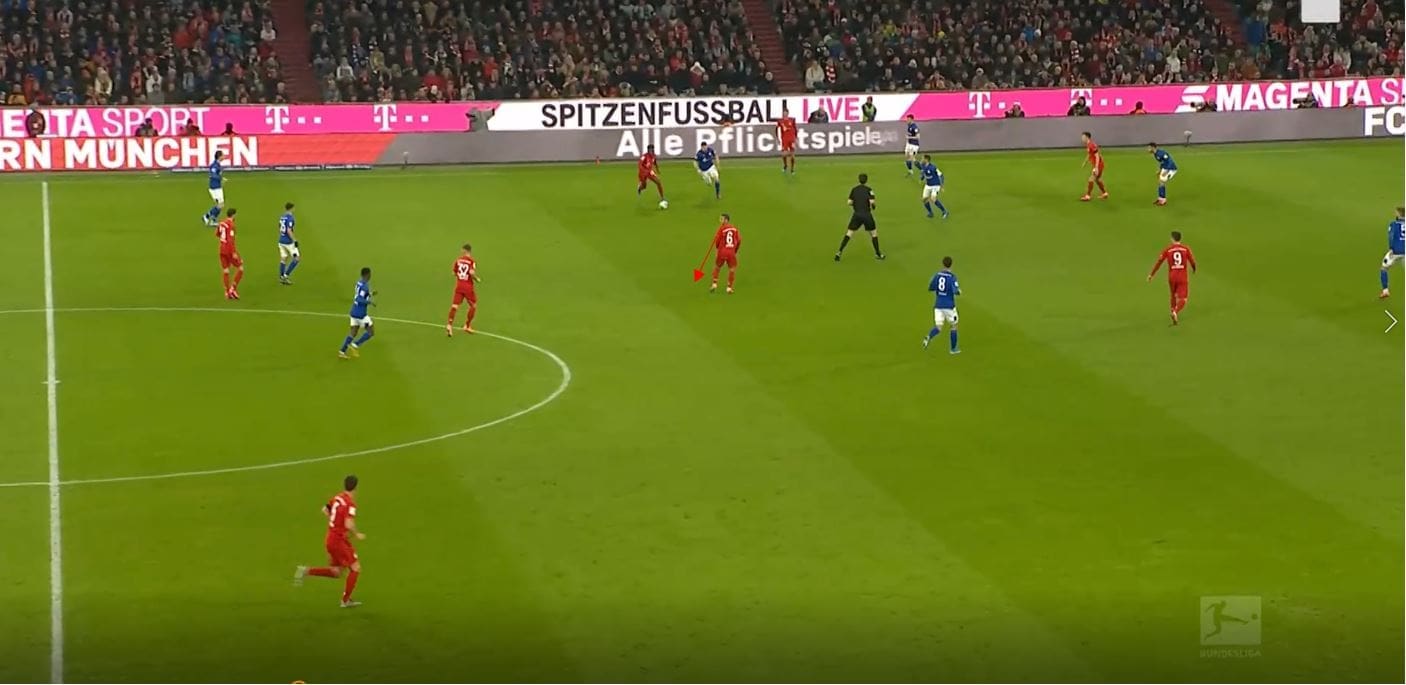
However, if Bayern dropped both Thiago and Kimmich, Schalke had issues as we can see below. Here again, the number ten occupies the pivot but doesn’t press aggressively, instead looking to protect the space behind him. Thiago drops with him and is in a position to receive and turn, and so the number eight presses Thiago. With no real intense pressure from Schalke other than on Thiago, Bayern can simply lay the ball back and then progress wide, with the number eight now occupying Thiago.
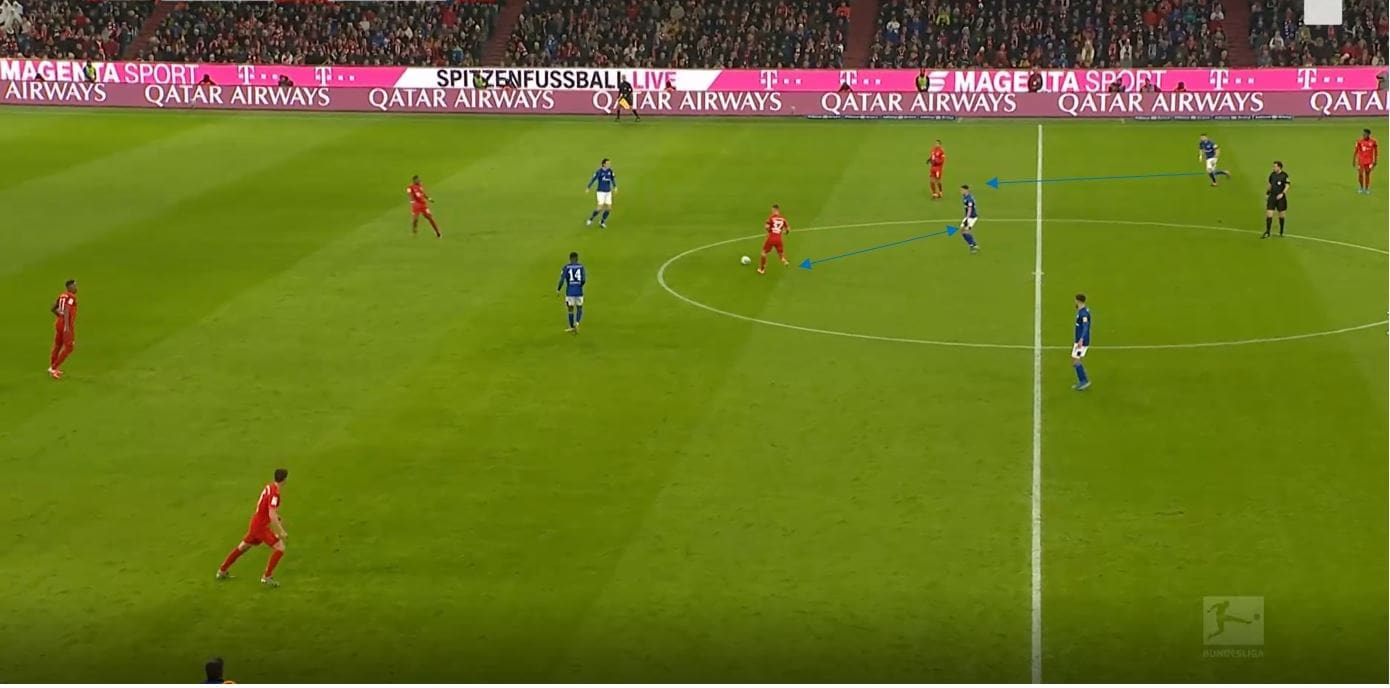
We can see this illustrated here for understanding. The pressing eight, (number seven on diagram) now occupies Thiago(number six on diagram), and so the midfield doesn’t have enough coverage to press the wide full-back should they receive.
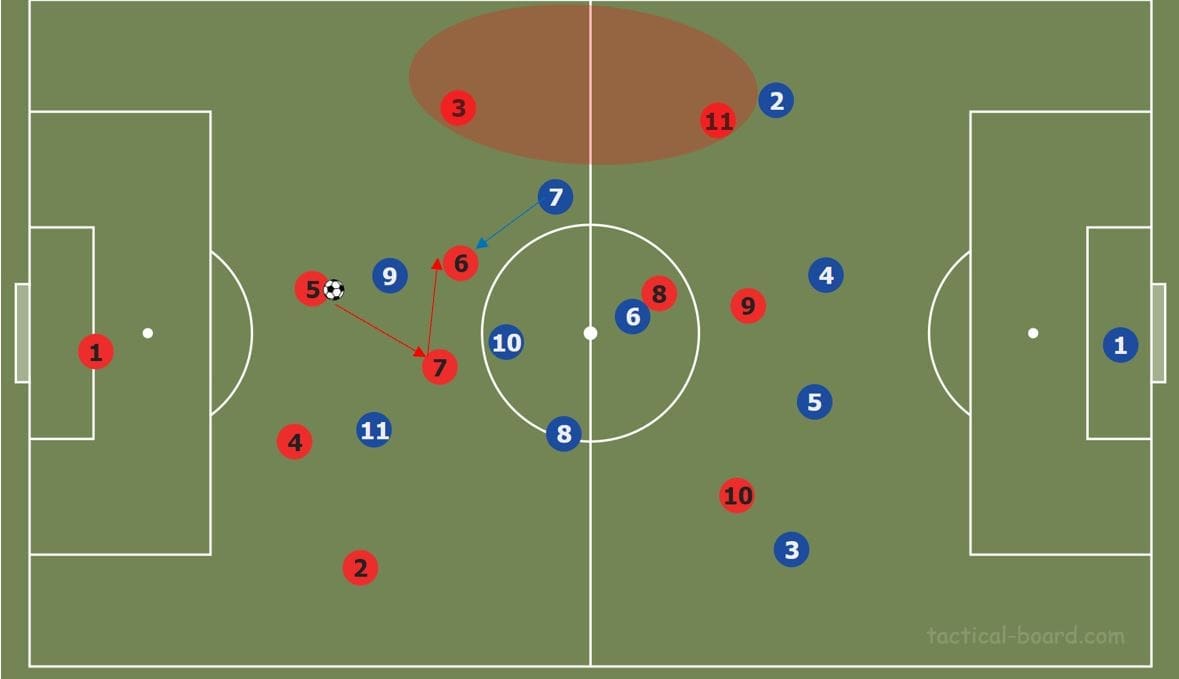
This allowed Alphonso Davies an abundance of space to drive into, which gave him a progressive run total for the game of five. With Davies quicker at progressing the ball by dribbling, Bayern seemed to favour this side for build-up, with 35 positional attacks down the left compared to 21 down the right.
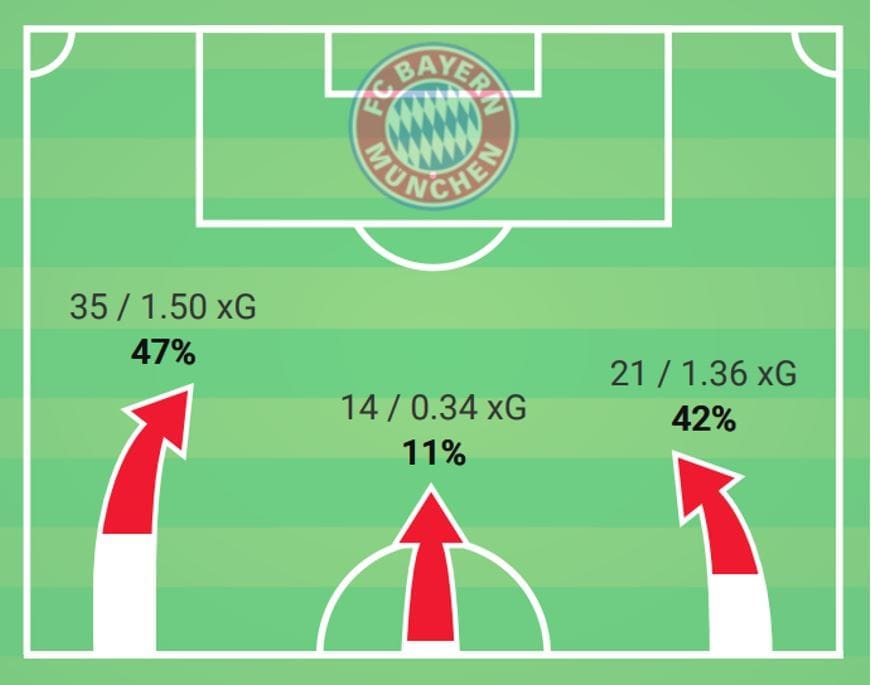
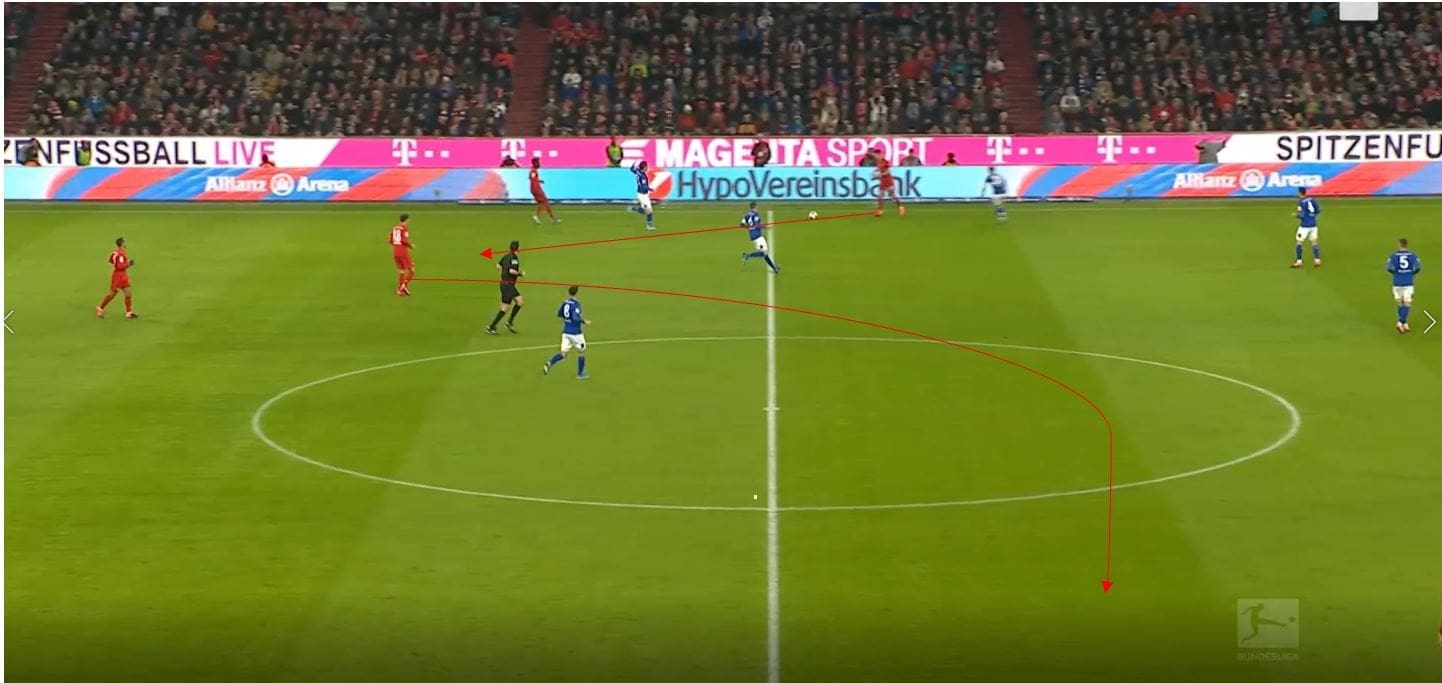
The xG value remains fairly similar, because of the switches of play which came about from these wide areas. We can see an example below of this, with Bayern’s central midfielders constantly positioning themselves in inside passing lanes and then immediately looking to switch the ball to the opposite wide full-back.
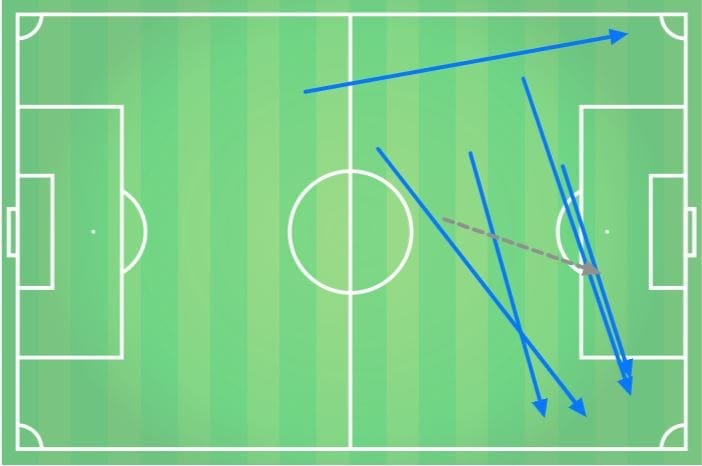
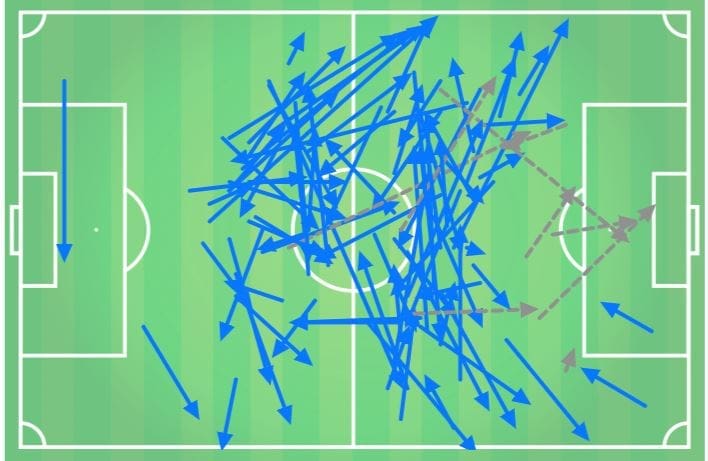
The below pass maps also back this up, with Thiago’s long passing map seen here and Joshua Kimmich’s short passing map below that, with an abundance of diagonal passes.
Schalke go flat
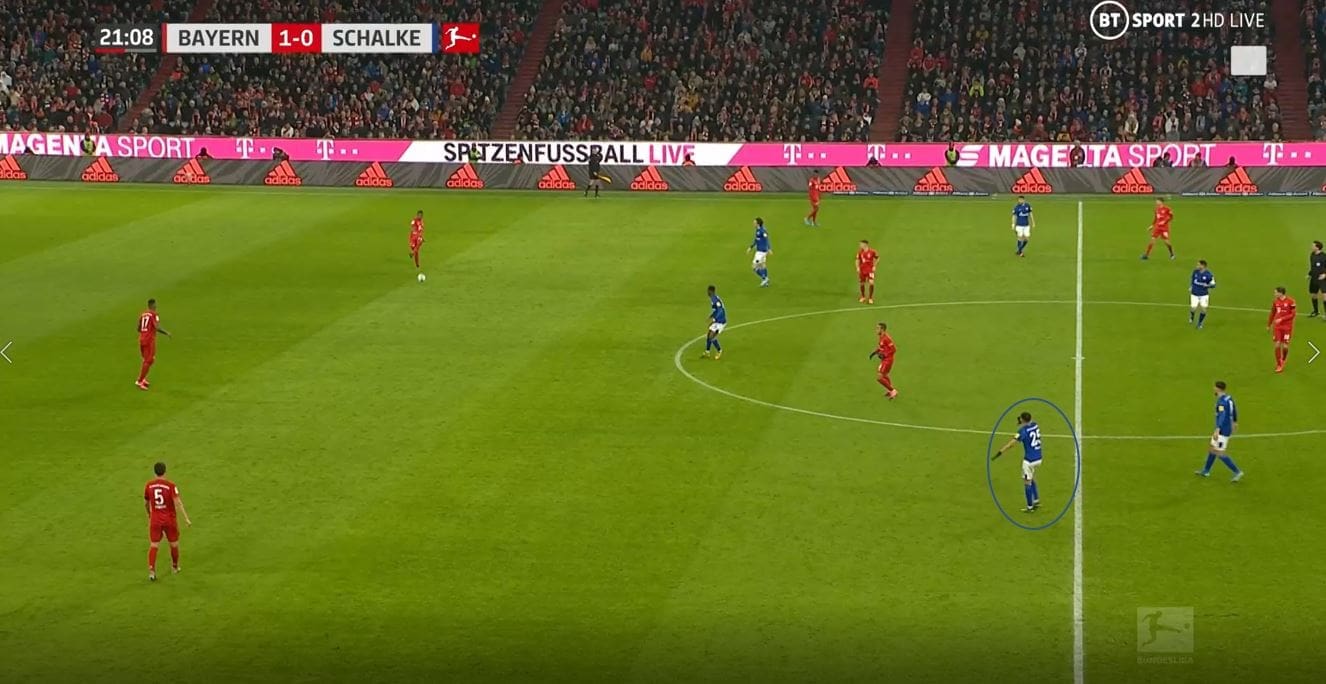
As a result of the problems highlighted, Schalke tried to go to a flat 4-4-2, which still turned into a 4-3-3 with Schalke looking confused of when to press and when not to. We can see here in the 22nd minute, Amine Harit the ten in a diamond pulls wider and signals to his midfield to stay flat, with the aim of providing more coverage and covering the wider areas more effectively.
Thiago Alcântara
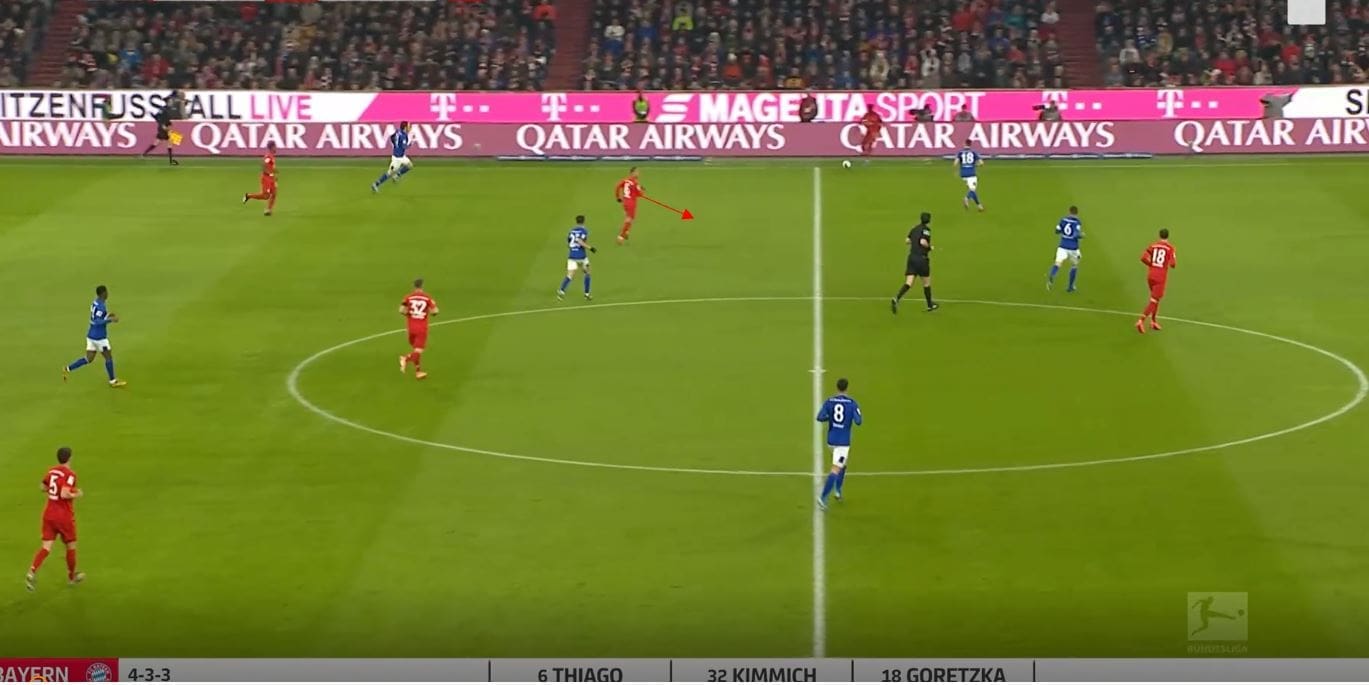
Thiago was simply brilliant in this game, completing 95 of his 98 passes in the game and constantly finding passing angles to receive the ball. We can see a perfect example here of Thiago’s skills as a player, who finds space to receive, scans behind him for the run of Benjamin Pavard, and then switches the ball across. He scans constantly, pretty much every time he receives the ball he scans in a very noticeable way, which gives him the awareness to make quick decisions, all of which is backed up by his technical ability.
We can see again here, Thiago scans prior to receiving the ball and spots the space Goretzka has taken up. When the ball is travelling to Thiago he takes another scan to check Goretzka is still in position.
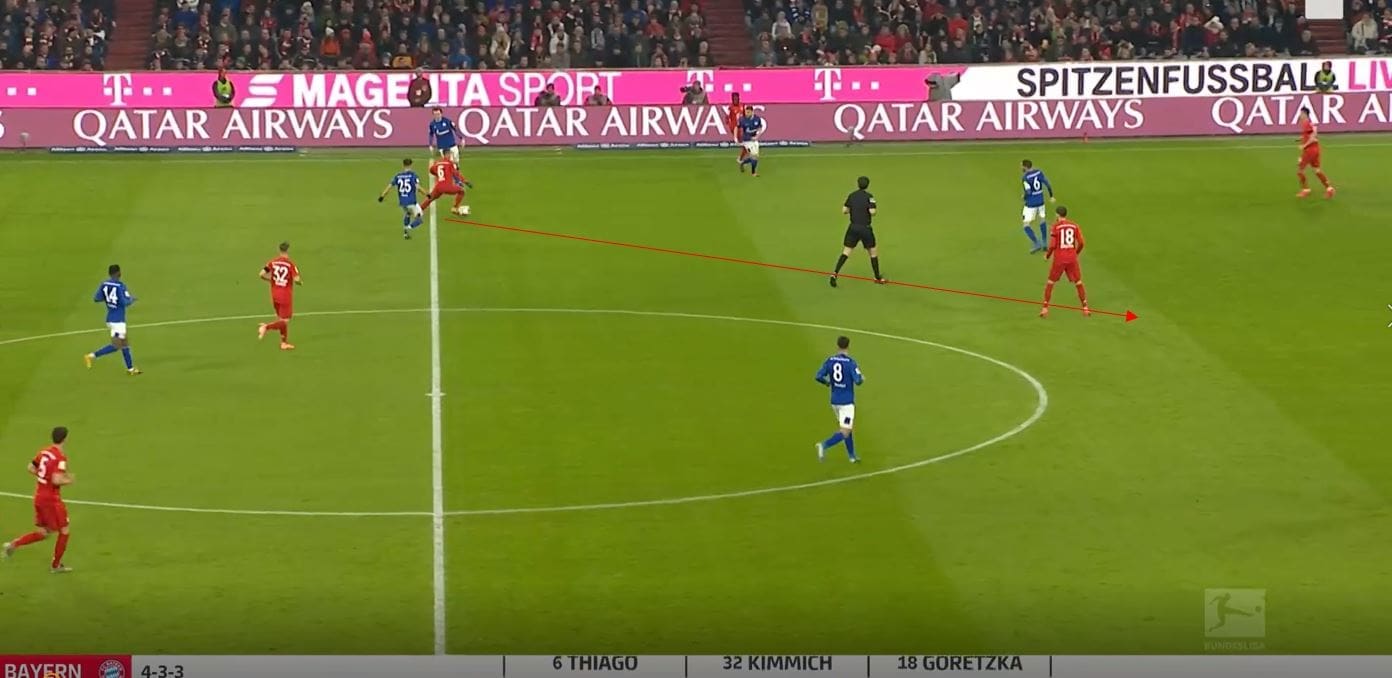
Under pressure, he’s able to drop his shoulder and lose his presser, and then has the awareness from his scanning to play the pass quickly into Goretzka’s space. Both Thiago and Kimmich were excellent throughout the game, and pivotal in Bayern’s positional play higher up the pitch.
Bayern’s higher positional play
A common feature of Bayern’s positional play was the stretching of the half-space by using the wide area, and vice versa. We can see an example of this below, with an overload on the full-back created, with Davies extremely high and on the touch line, while a player occupies the half-space.
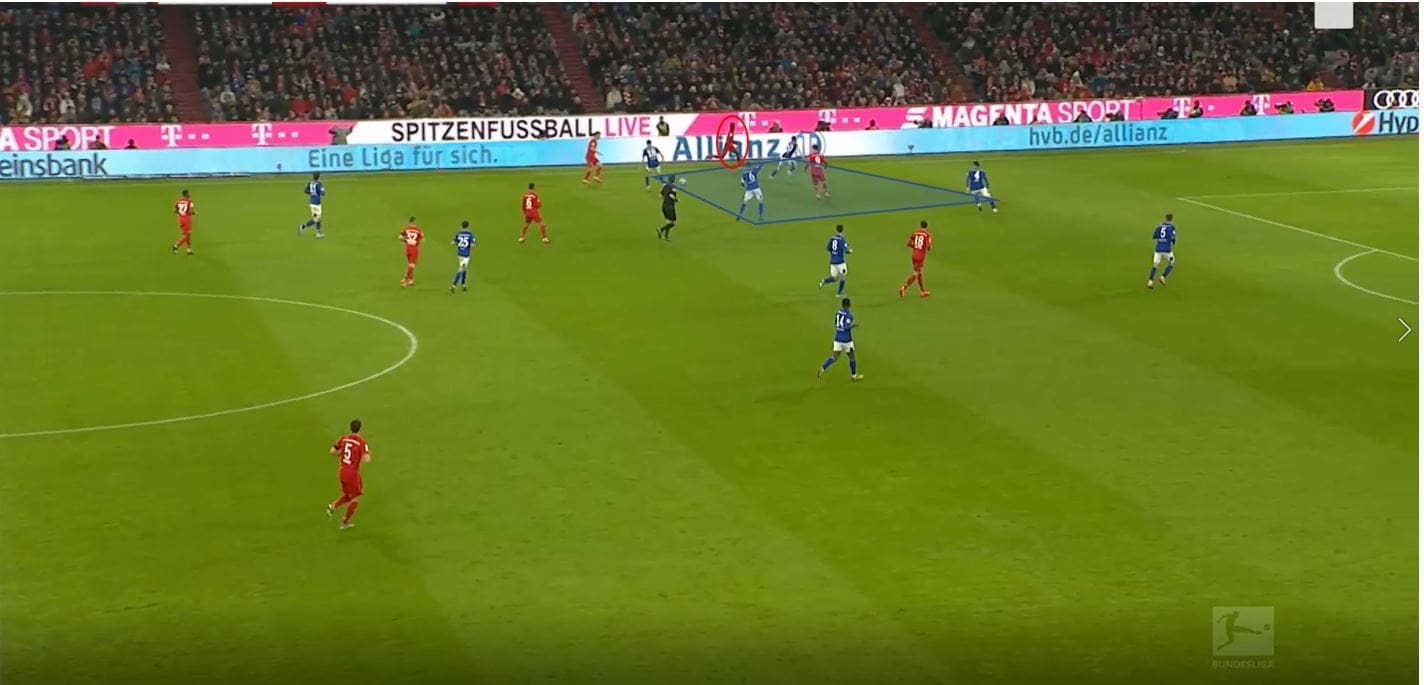
A more clear image below shows us the advantages of such positioning. The right midfielder in the 4-4-2 is effectively caught between covering the wide full-back, and the passing lane into the half-space, and as a result, one lane is always more open than the other. Therefore, space can be created and utilised, and if the ball is played on the wing, passes are available on the inside. The use of the single pivot is now effective, with Schalke much deeper and less aggressive. This particular example is extremely Liverpool-esque, with a central midfielder deeper, a very high full-back, and a winger occupying the half-space.
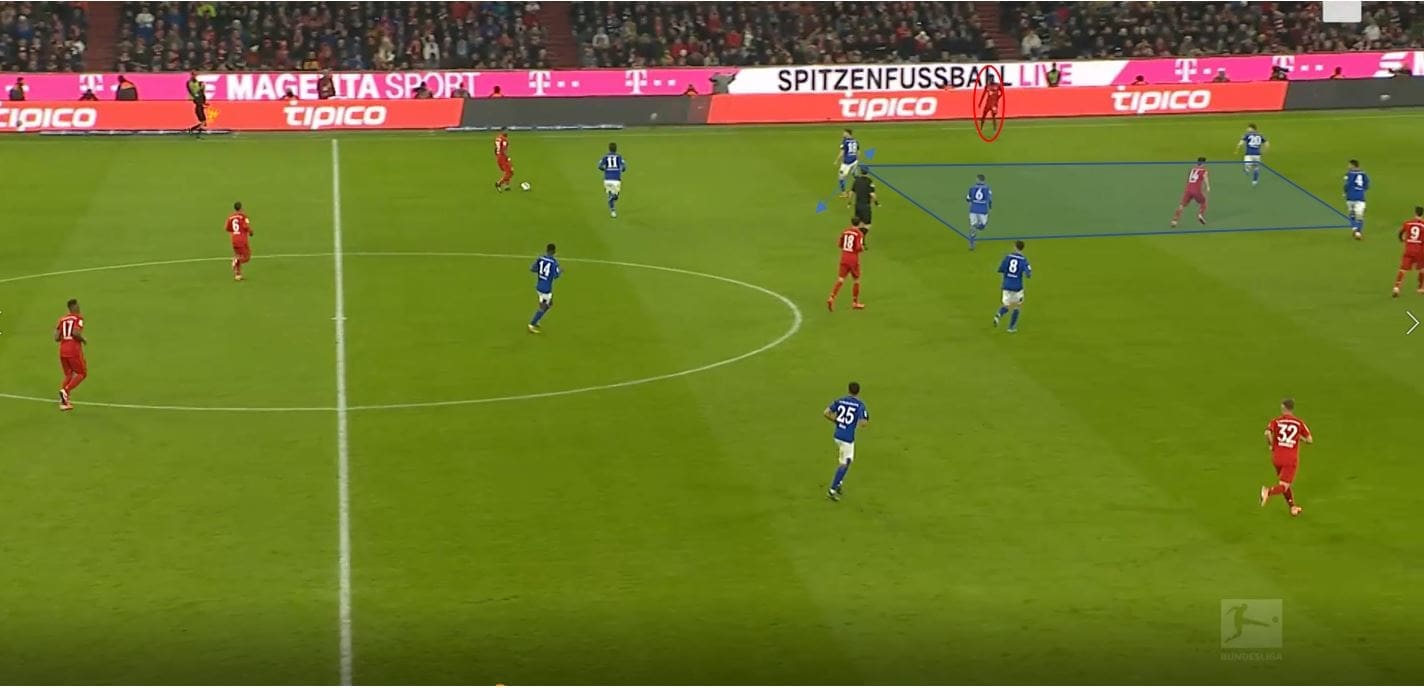
Another way Bayern were able to get the ball into wide areas was through the use of an underlapping full-back at times, as we can see below. Here, Davies occupies the half-space area, and stands on the right midfielder. This occupies the right midfielder, and allows for the winger to drop and receive the ball under less pressure with the right midfielder partially distracted.
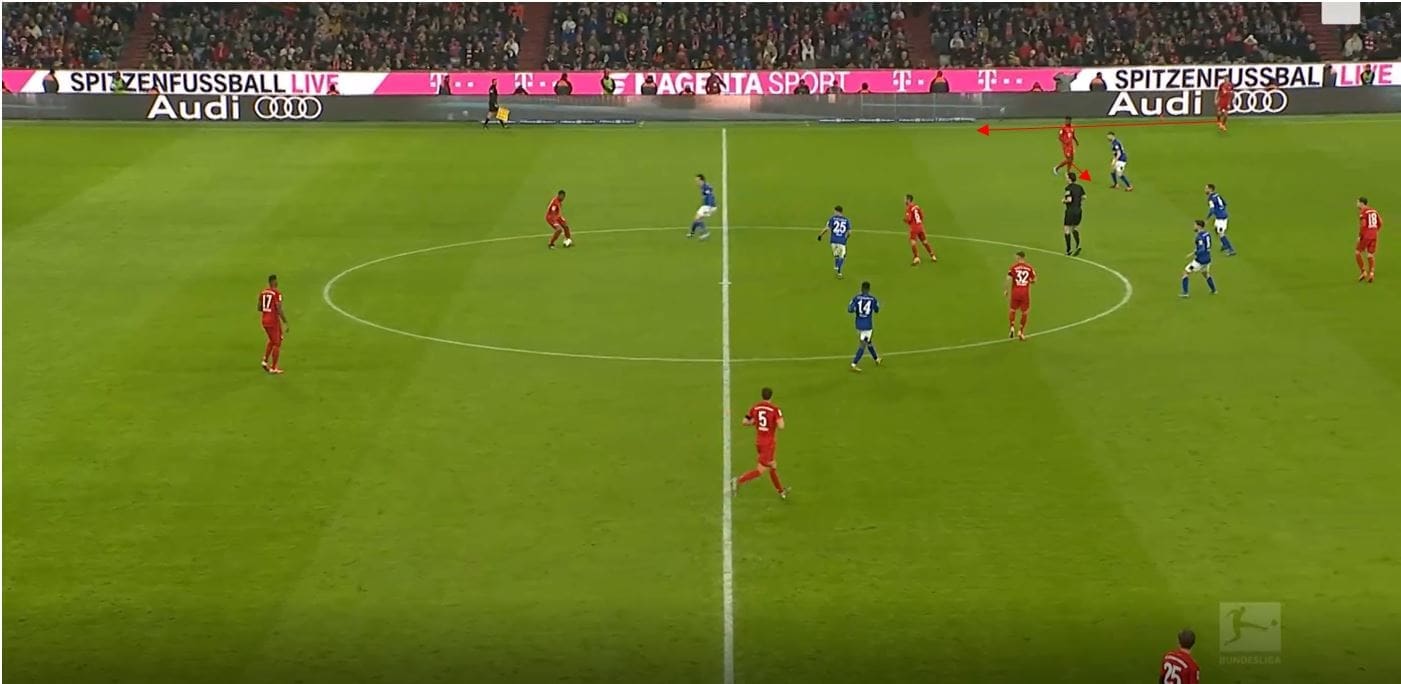
Below we can see an example of movement in order to create space, which usually took place after switches of play. The winger would make a movement down the line, in order to drag the marker away from the centre, opening up space for a central midfielder to arrive into the centre and receive.
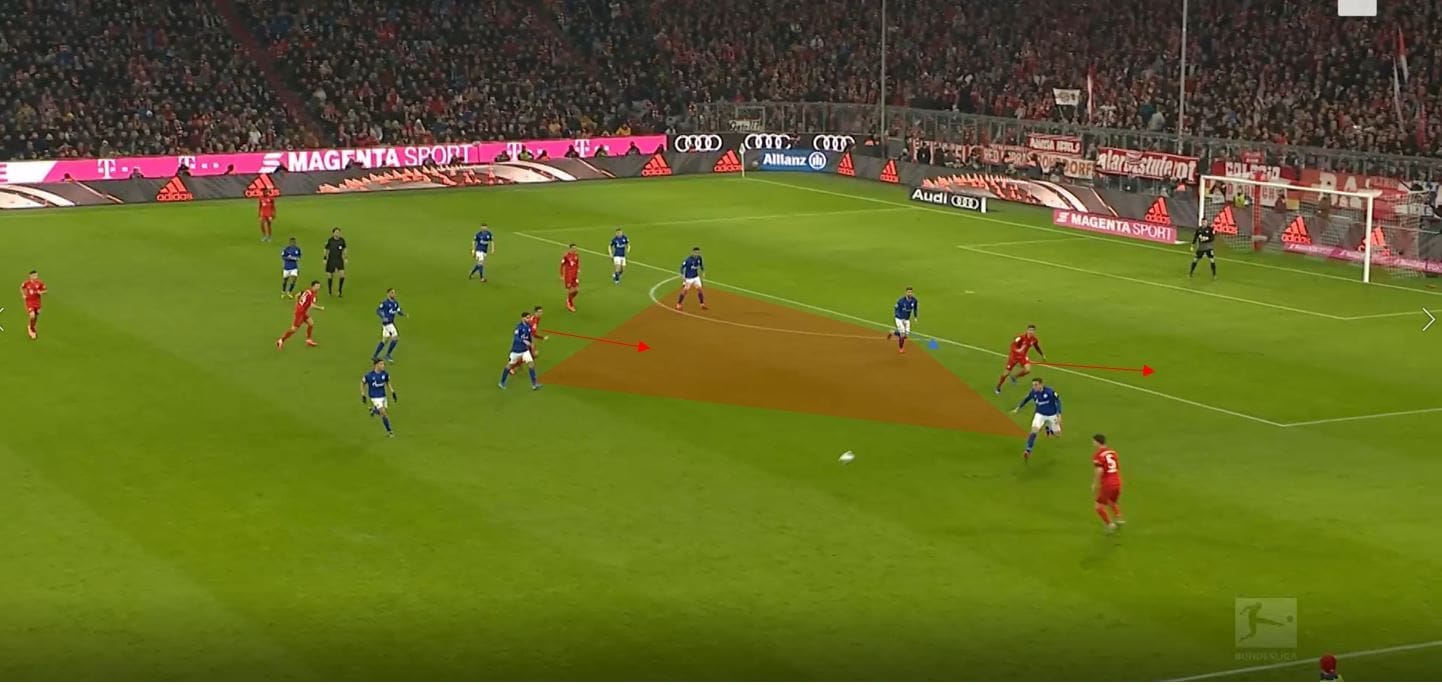
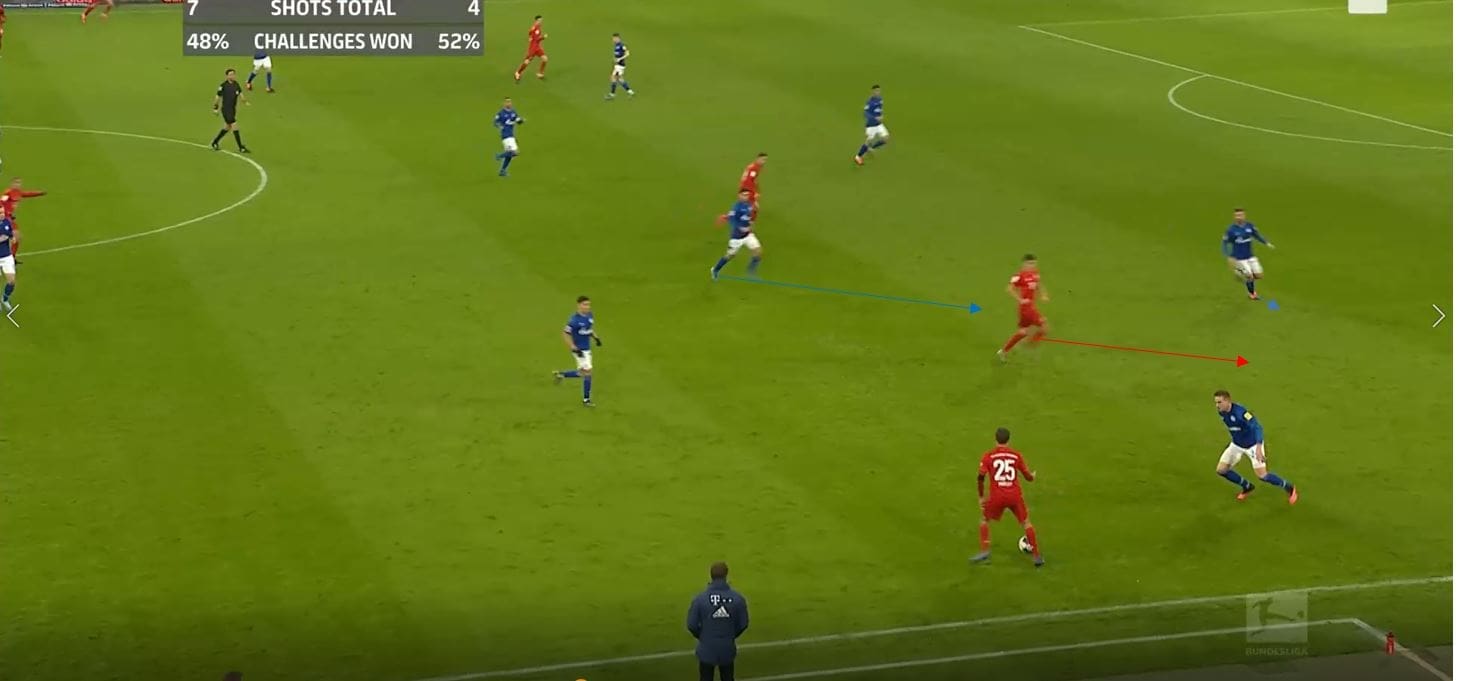
We can see another example of this here, with a slight rotation due to the underlapping of the full-back. Here, the winger is the ball carrier, while full-back Pavard makes the movement wide to create space inside. I would call it a decoy movement but Pavard is still able to receive the ball down the line and deliver crosses sometimes, so it’s not really a decoy.
Conclusion
Bayern looked like the usual Bayern Munich of the Bundesliga in this game, and title challengers Borussia Monchengladbach and RB Leipzig will certainly have watched with some sense of “Oh not again”. Schalke’s tactics and decision to use a diamond was questionable, particularly after Gladbach’s struggles using it in the first half of their game (which I also completed an analysis of), and they didn’t seem to have the tactical flexibility to adjust correctly and maintain some control on the game.


Comments