In probably the most highly anticipated match of the Bundesliga this weekend Borussia Dortmund took on Borussia Monchengladbach, with Gladbach looking to retain their place at the top of the table. Dortmund came into the game looking to improve on three consecutive 2-2 draws in the Bundesliga, and were able to do so by picking up a somewhat fortunate 1-0 win over Gladbach. This tactical analysis will look at the problems Gladbach had in the game, and how Dortmund were able to exploit them.
Lineups
Dortmund lined up in a 4-4-2 while Gladbach took up a 4-2-3-1 formation, which due to its nature saw a constant fluctuation between this and other formations. This was a surprising change from Gladbach’s usual diamond formation, with Rose clearly looking to protect the wide areas more effectively and prevent Dortmund’s offensive tactics this way.
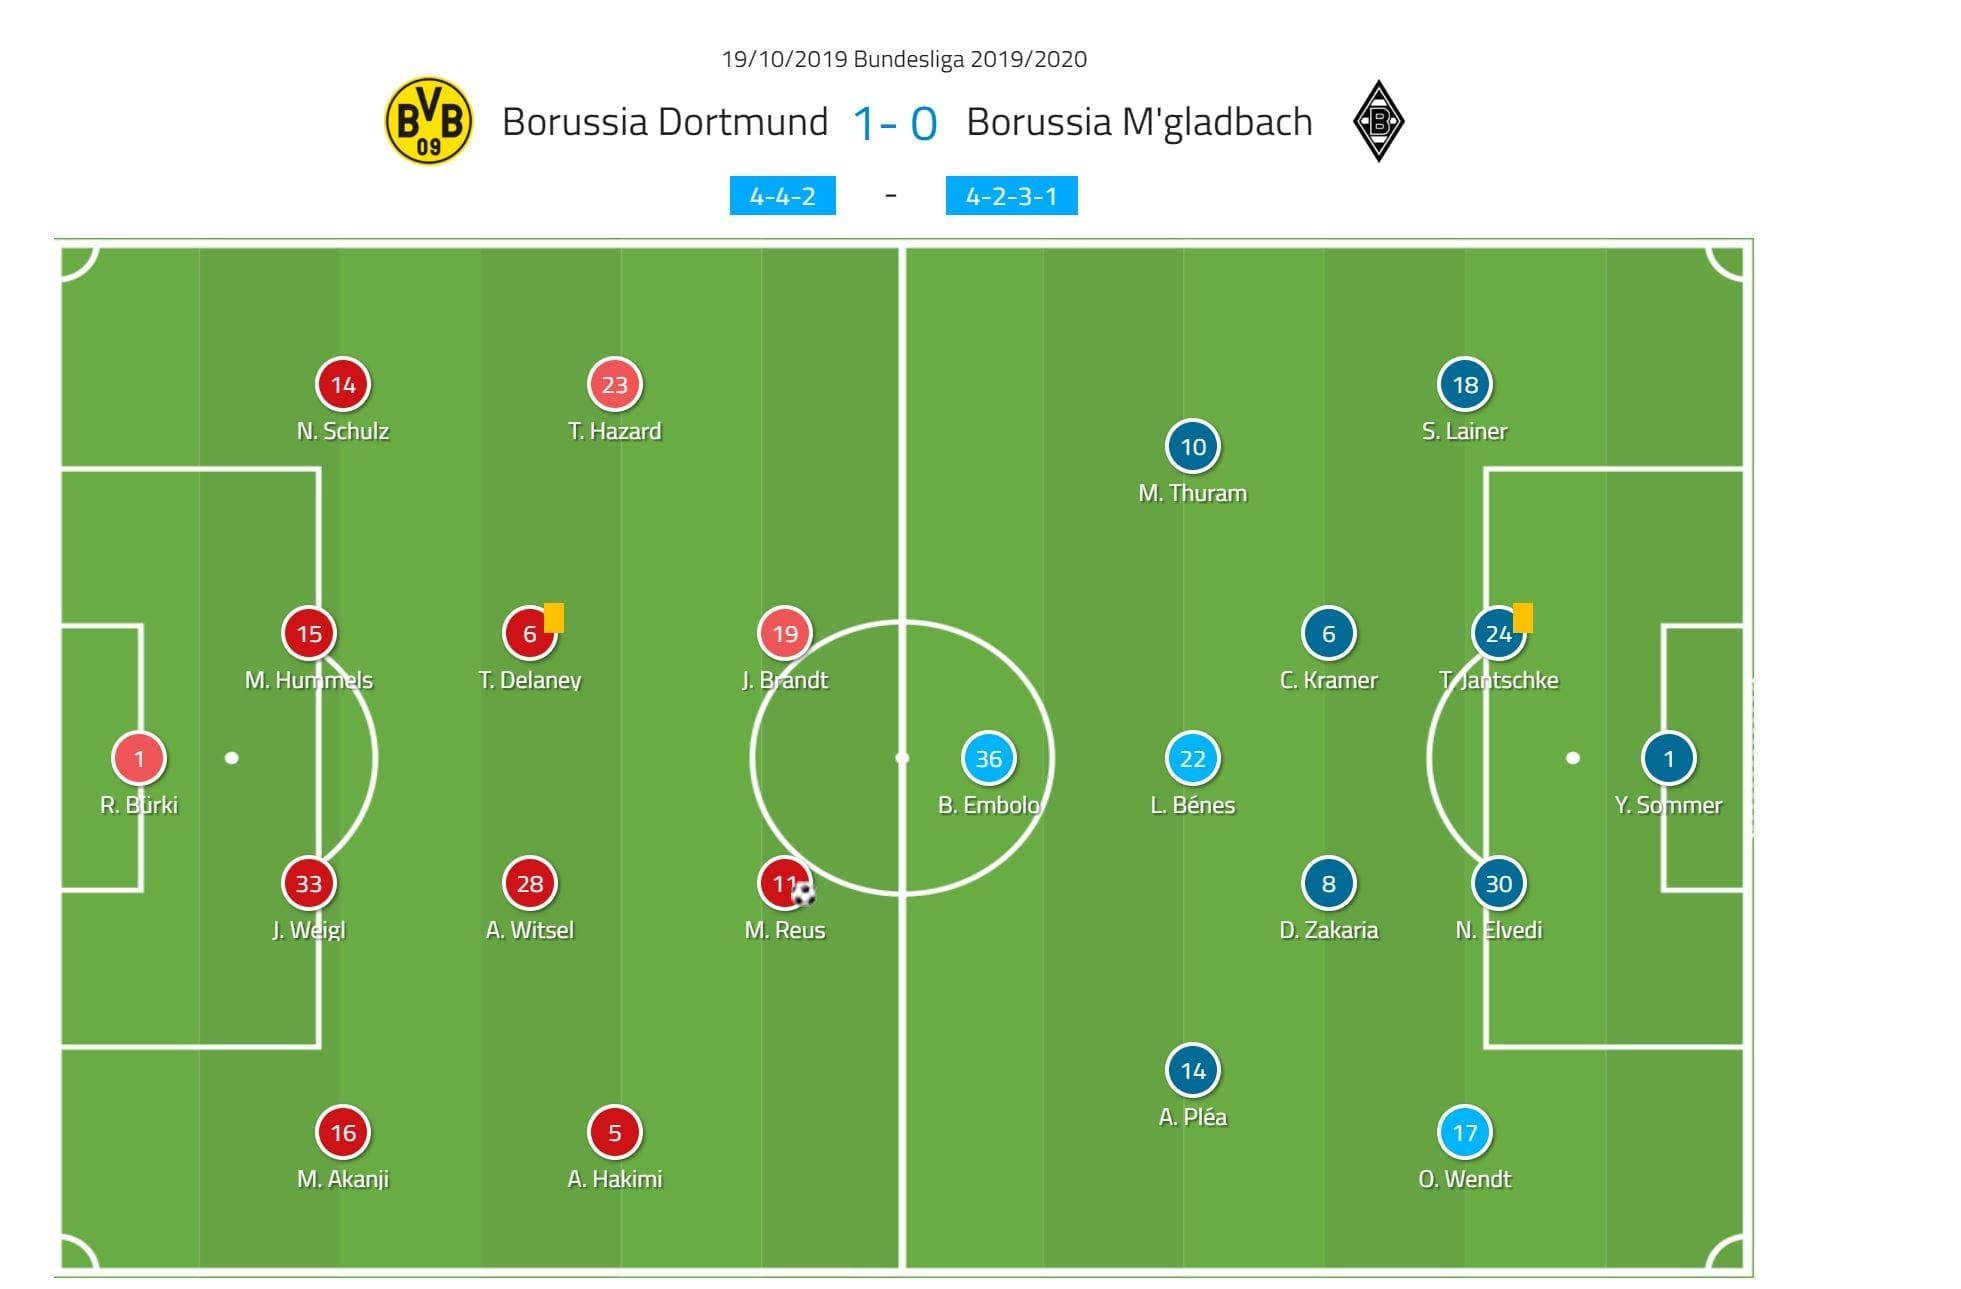
Gladbach’s alternating shape
Gladbach’s shape changed depending on the position of the ball and the type of press they therefore employed. In high areas of the pitch, Gladbach stuck to their 4-2-3-1 as we can see below. This meant that the wide players within the three pressed Dortmund’s full backs rather than Gladbach’s central midfielders performing this role, as they do when Gladbach play with a diamond. This allowed them to stay slightly more compact and to protect the wide areas more effectively, and also allowed an easy transition into their deeper shape.
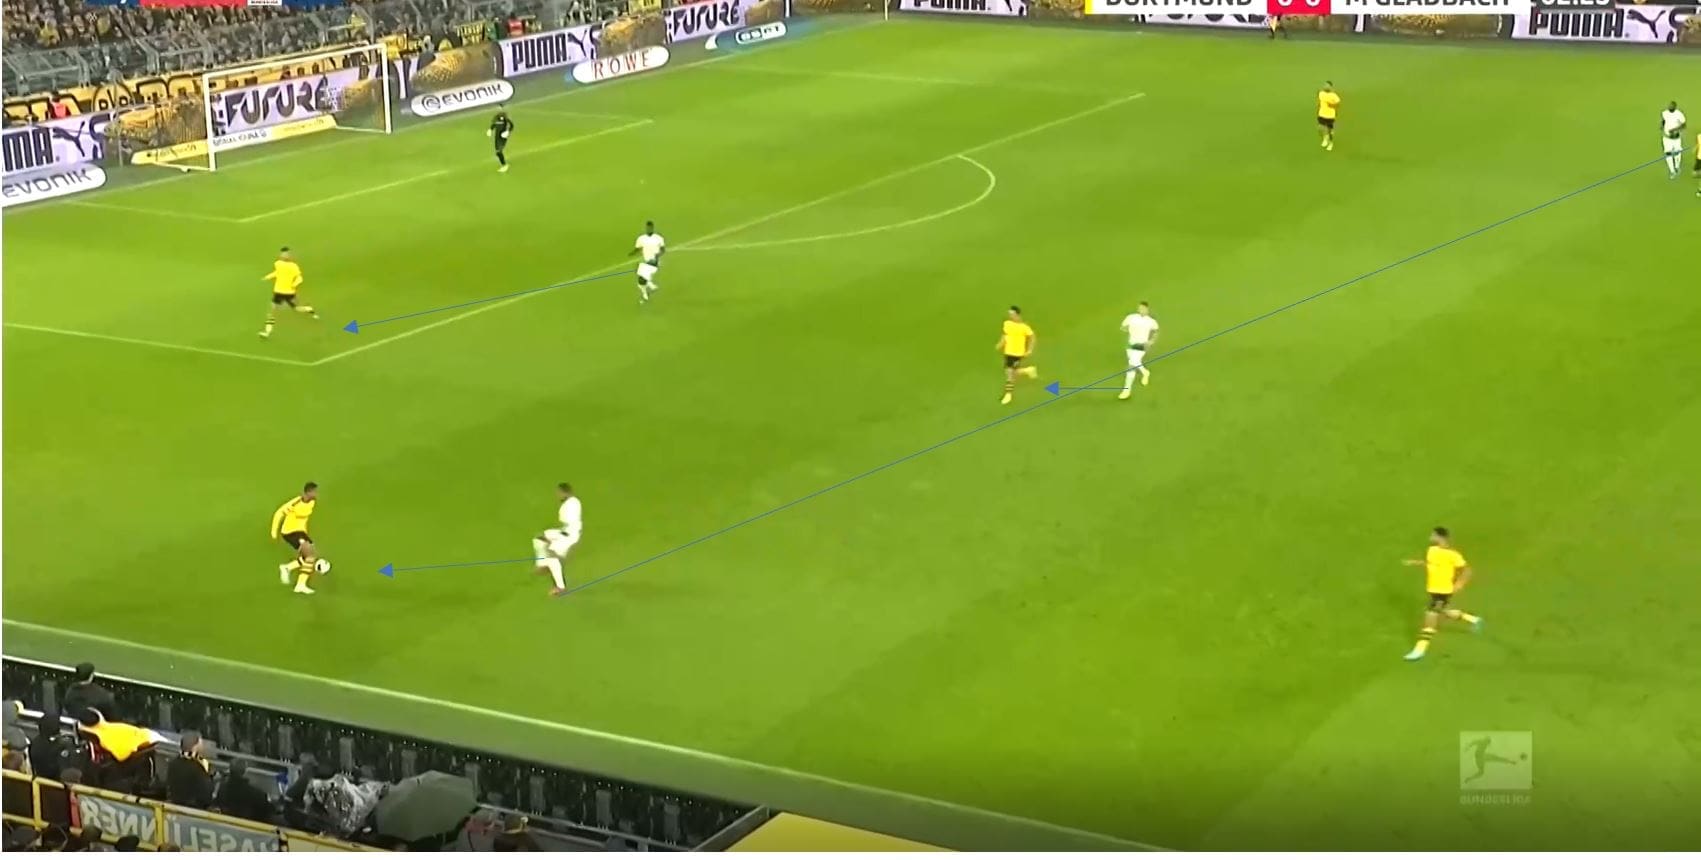
This deeper shape could be seen when Gladbach employed a mid-block, and saw Gladbach drop into a 4-4-2 as we can see below. Dortmund largely struggled to break this structure down, and again although this can be described as a 4-4-2, it had multiple variations, the most common being the winger pressing the dropping central midfielder, while also cutting the passing lane outside, therefore forcing a pass through the middle. The two strikers upfront would press the backline when possible, but Gladbach looked to remain compact against a Dortmund side known for not being too adept at breaking down blocks.
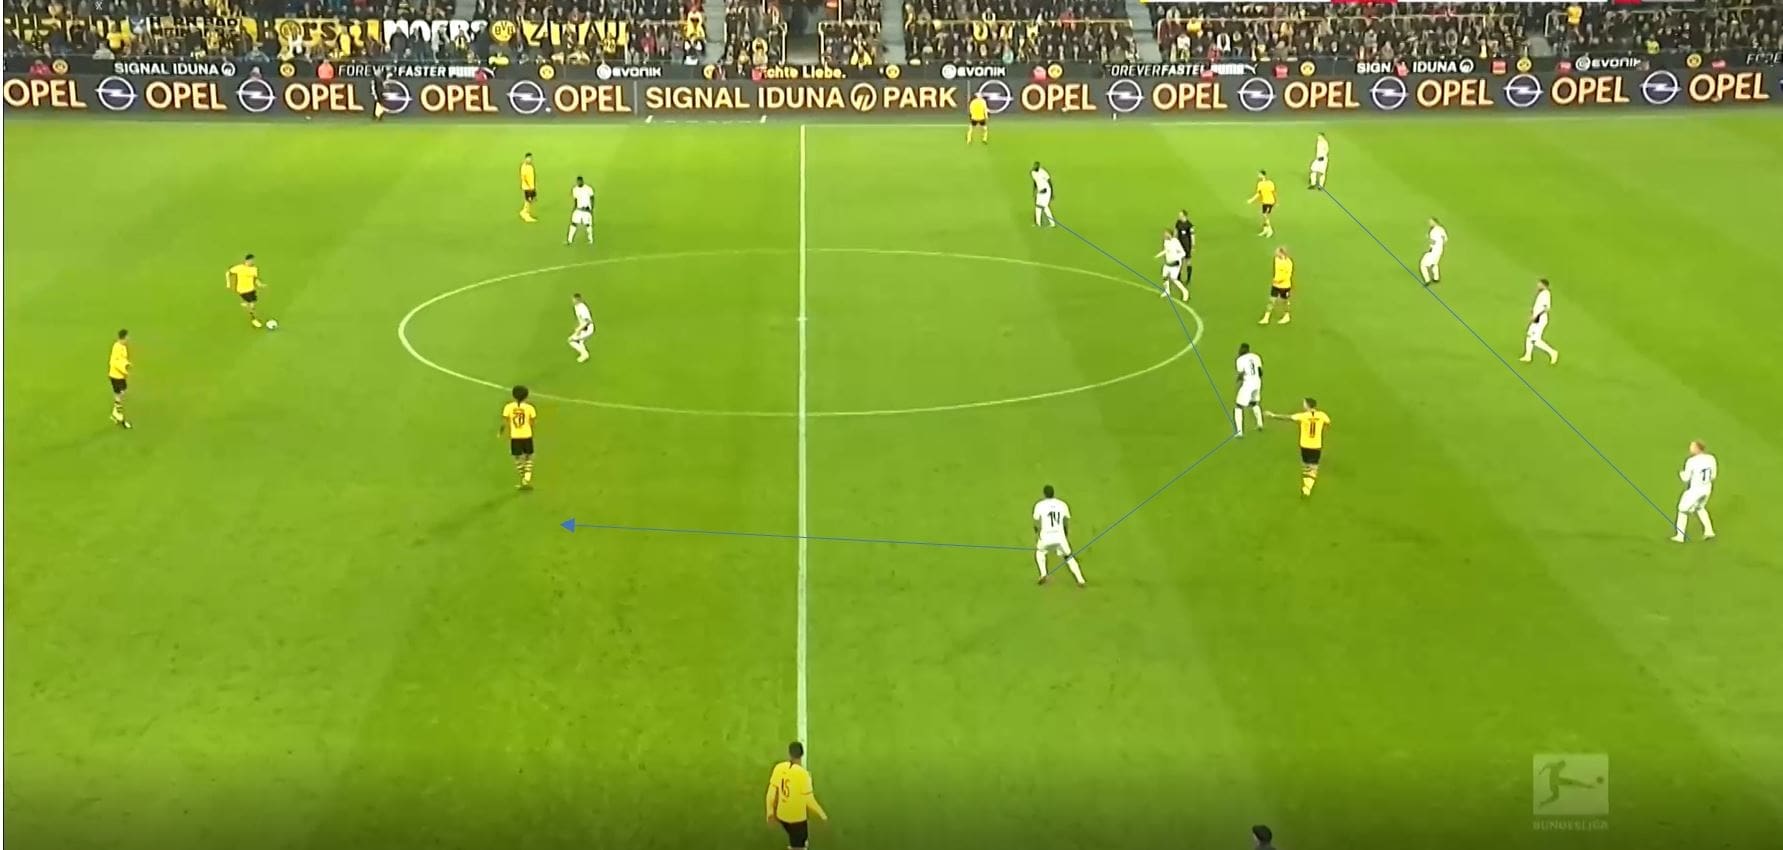
The transition between each formation was largely pretty smooth, seeing as it only takes the wingers to move back for the formation to become a 4-4-2, therefore Gladbach were able to control Dortmund’s offensive threat for large parts of the game.
However, a slow transition between the two and a failure to deal with the immediate threat ultimately cost them the only goal of the game. We can see in this situation below, where we would usually expect to see Gladbach in their 4-4-2 formation, that they are still in their 4-2-3-1. Furthermore, with no immediate counter-press from the front, no passing angles are cut, and the two defensive midfielders are both occupying the same space. Therefore, a pass into space allows Marco Reus to be put through on goal and score.
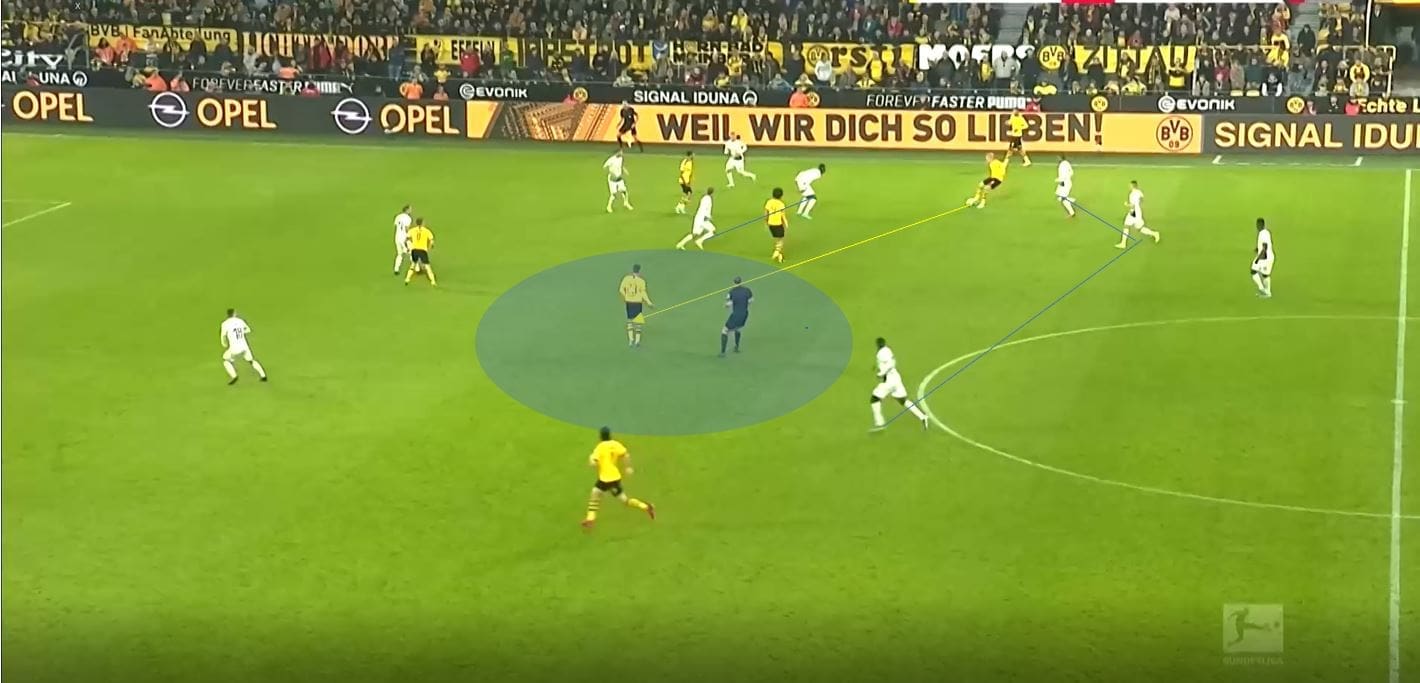
Gladbach’s mid-block and Dortmund’s lack of a solution.
Gladbach did, however, have one particular problem in the game which Dortmund looked to exploit. This problem revolved around the aggression in their mid press, in that at times players would commit and press and were not backed up by teammates, which left space to be exploited by Dortmund. At times it looked as though Gladbach couldn’t decide whether to be aggressive or not.
We can see in this example below, that midfield four highlighted. But as discussed earlier, the winger, this time Thuram pushes out and presses the nearest player. Upon pushing up, you would expect to see the remaining midfield players move up together and either cut angles or mark players, but instead Thuram is left to press on his own while Gladbach sit in this structure. This means a simple pass allows Dortmund the opportunity to play in behind Gladbach’s defence. It could also be said that László Bénes should cut that passing lane through, but when a press like this occurs, a pass through can’t be allowed.
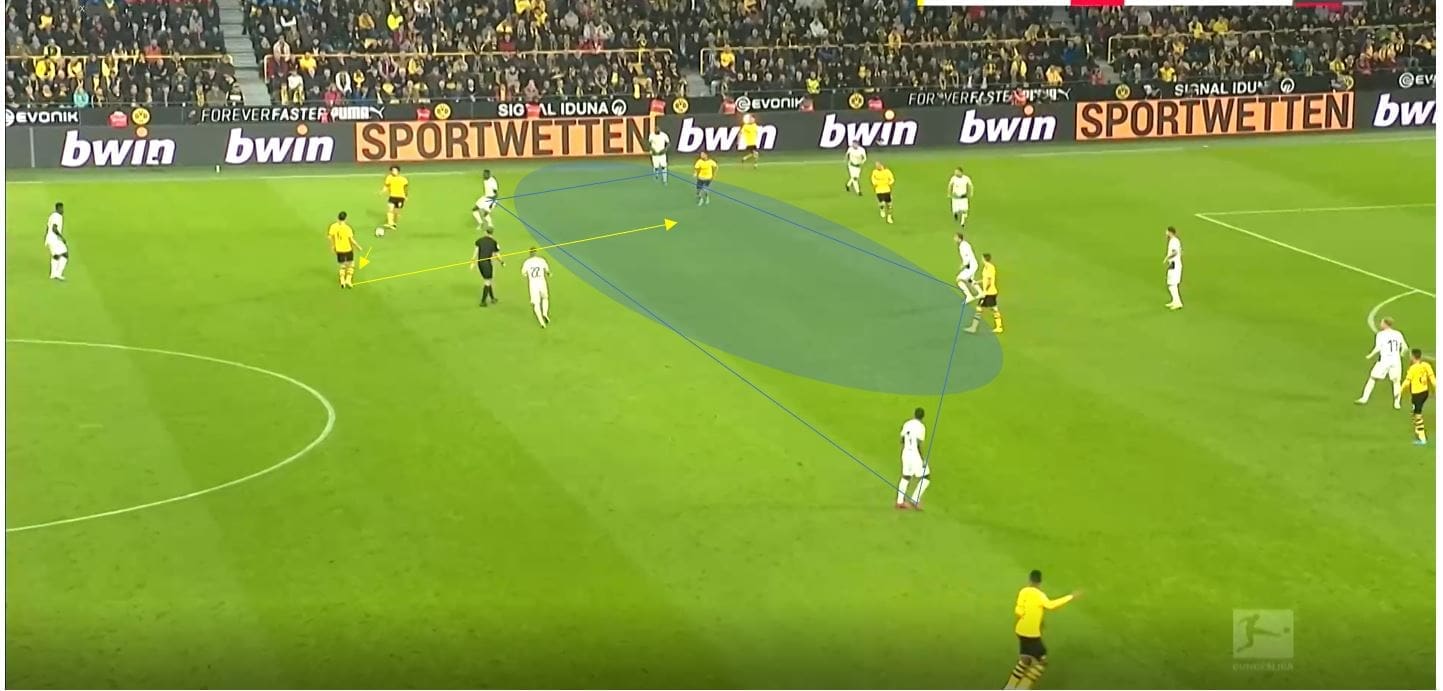
We can see another example of this here, with Gladbach again in that 4-4-2 mid-block. Here, Gladbach do a better job of not allowing the ball through, but poor offensive movement helps them. The space between the defence and midfield is simply too large, and if Witsel picked his head up, he may have been able to meet an intelligent run of a Dortmund player, not that those runs were made either. The lack of a press from the forwards forces the midfield to engage to cut passing angles straight through, and therefore the midfield has to push forward while the defence can’t go too much higher, therefore the sie of the space increases. Some movement from Dortmund may have allowed them to exploit this space in this example.
Gladbach had to set a compromise between being aggressive and remaining compact.
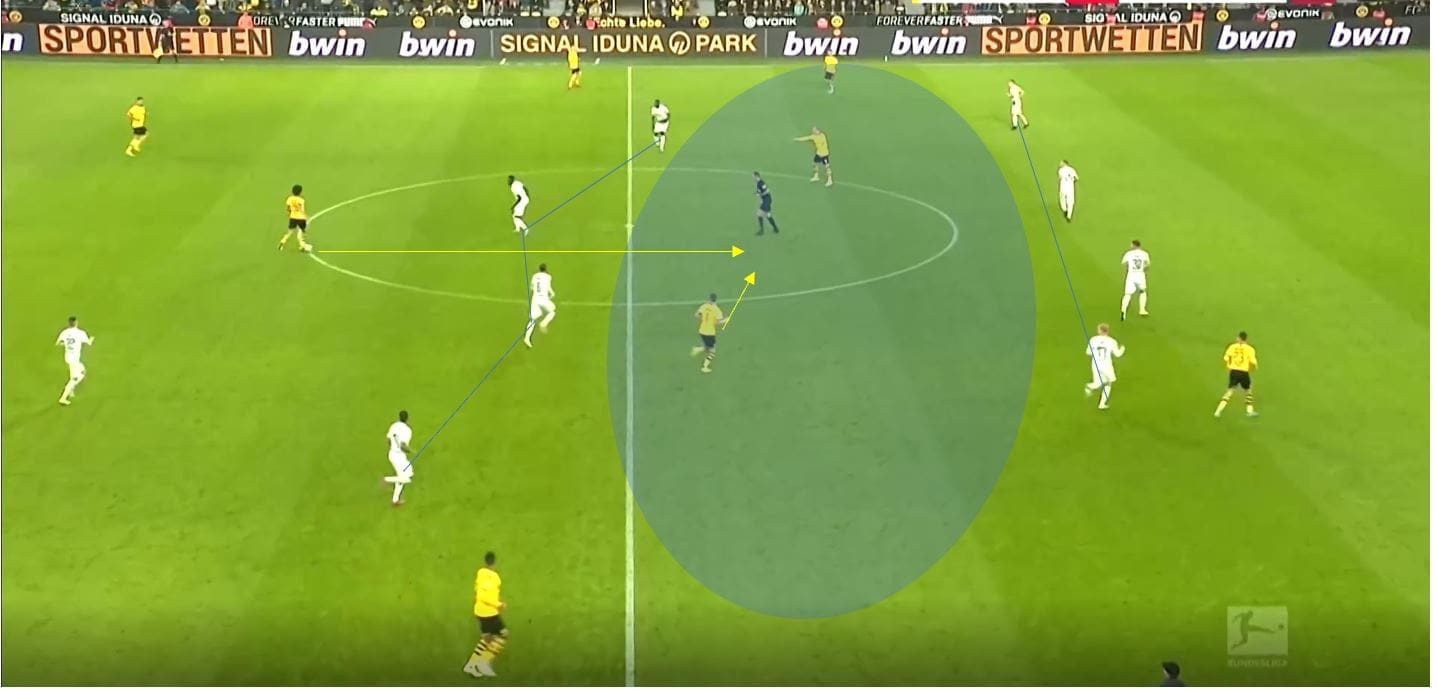
Here is a good example of Gladbach executing this well. Here Kramer steps out and presses, which in turn increases the size of the space behind him obviously. But because there are no alternate, threatening passing options for the ball carrier, Kramer is free to do this, as nobody in behind can receive the ball and exploit this space currently. In other examples, Gladbach have pressed the ball carrier while they have had options, and so with one pass sideways they can move the ball into the space, the first image in this section being a perfect example.
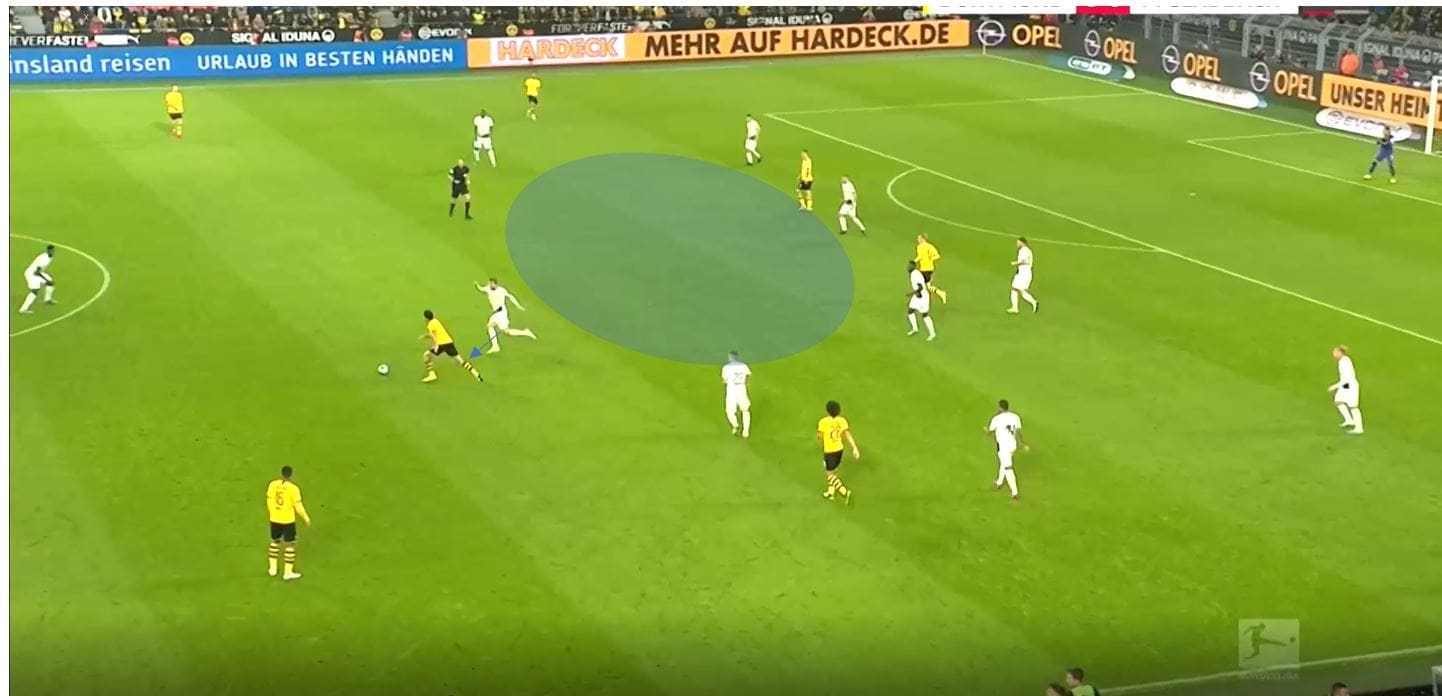
Dortmund therefore perhaps didn’t do a good enough job in terms of providing that short pass to create a passing angle. We can see this again in the image below, with no short pass available in the direction of the ball carrier, which would create an angle to exploit the space in behind.
Gladbach offensive play
The game could have been a much different one had Gladbach finished the chances they were able to create, particularly in the first half. Gladbach seemed to target getting in behind Dortmund, and tried on various occasions in the first half to do so.
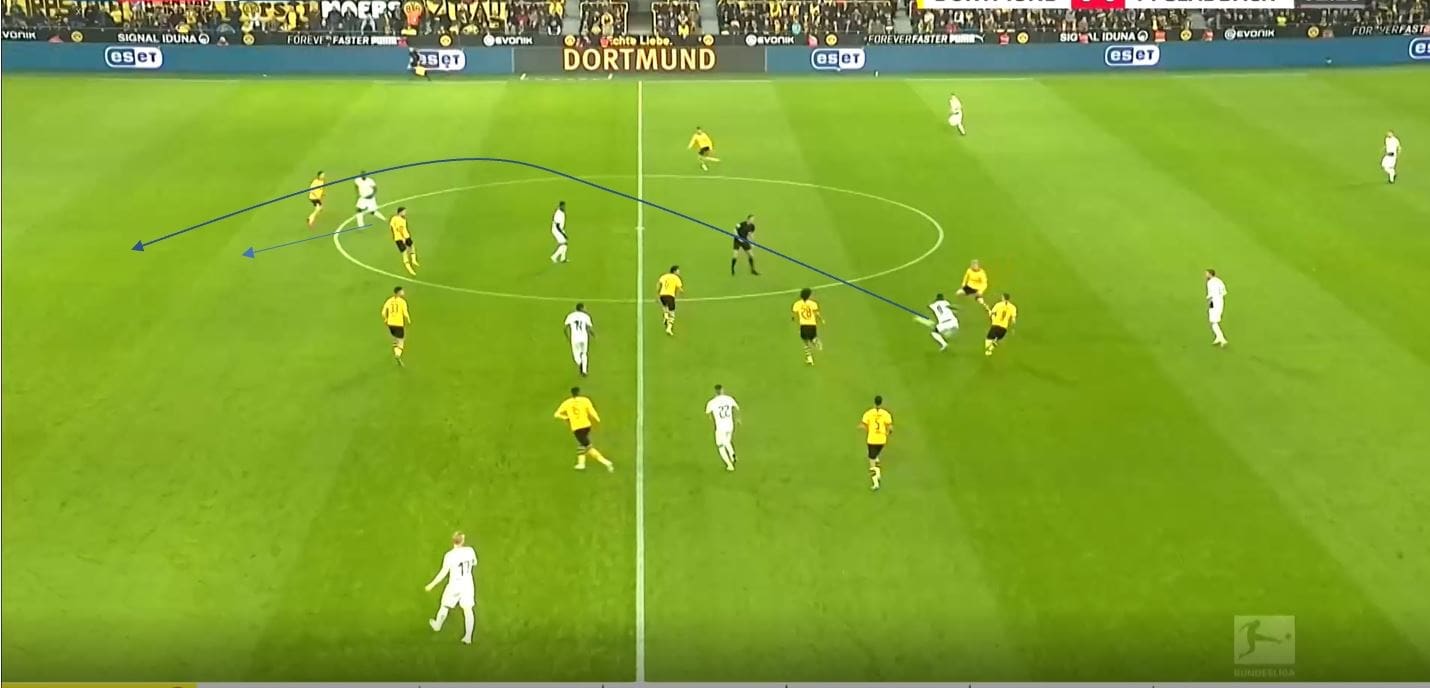
We can see an example of this below, where Embolo makes a run in behind following a lofted pass over the top from Bénes.
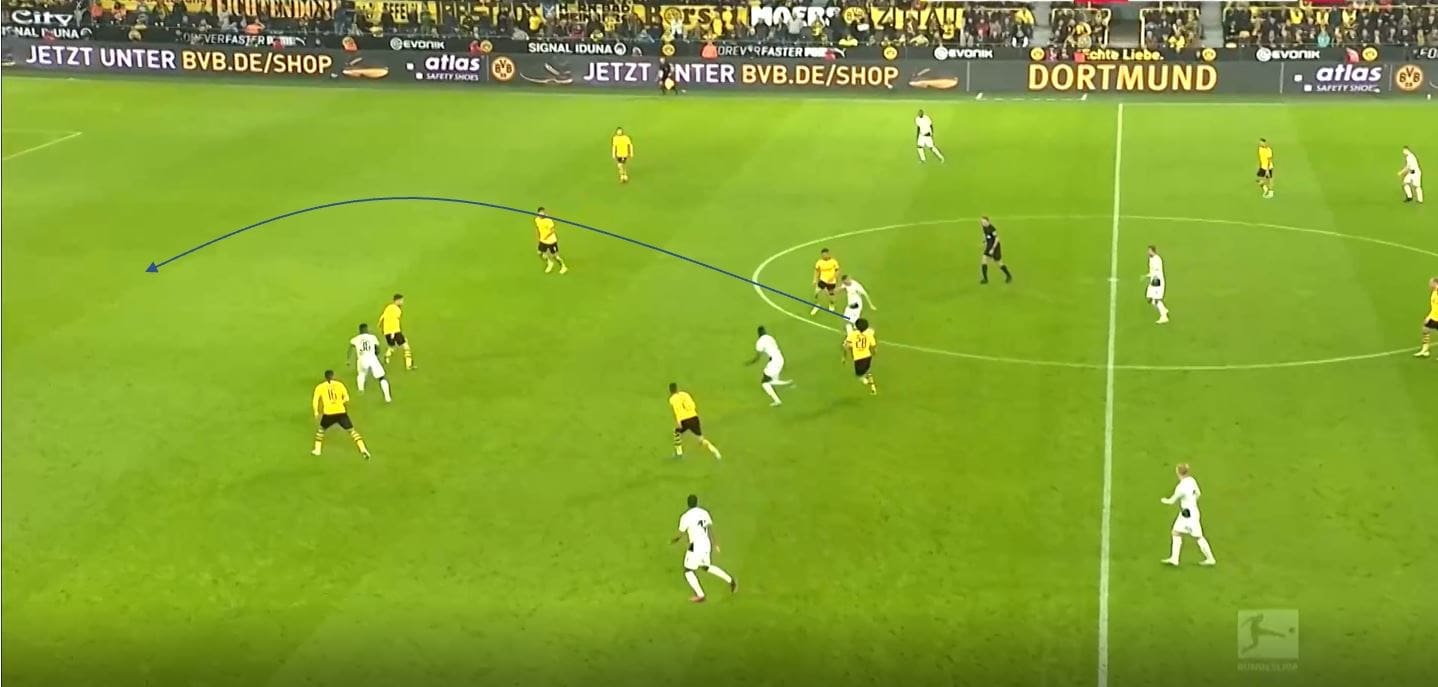
We can see another example of this here, with Thuram this time looking to get in behind after a high pass. This allows Gladbach to bypass the compact press we can see in the image but also relies on the quality of the pass to be there. The space was certainly there at times to get in behind in the first half as these images show, but Gladbach failed to use this to their advantage, with Roman Bürki making a good save from Embolo after he had been put through on goal over the top.
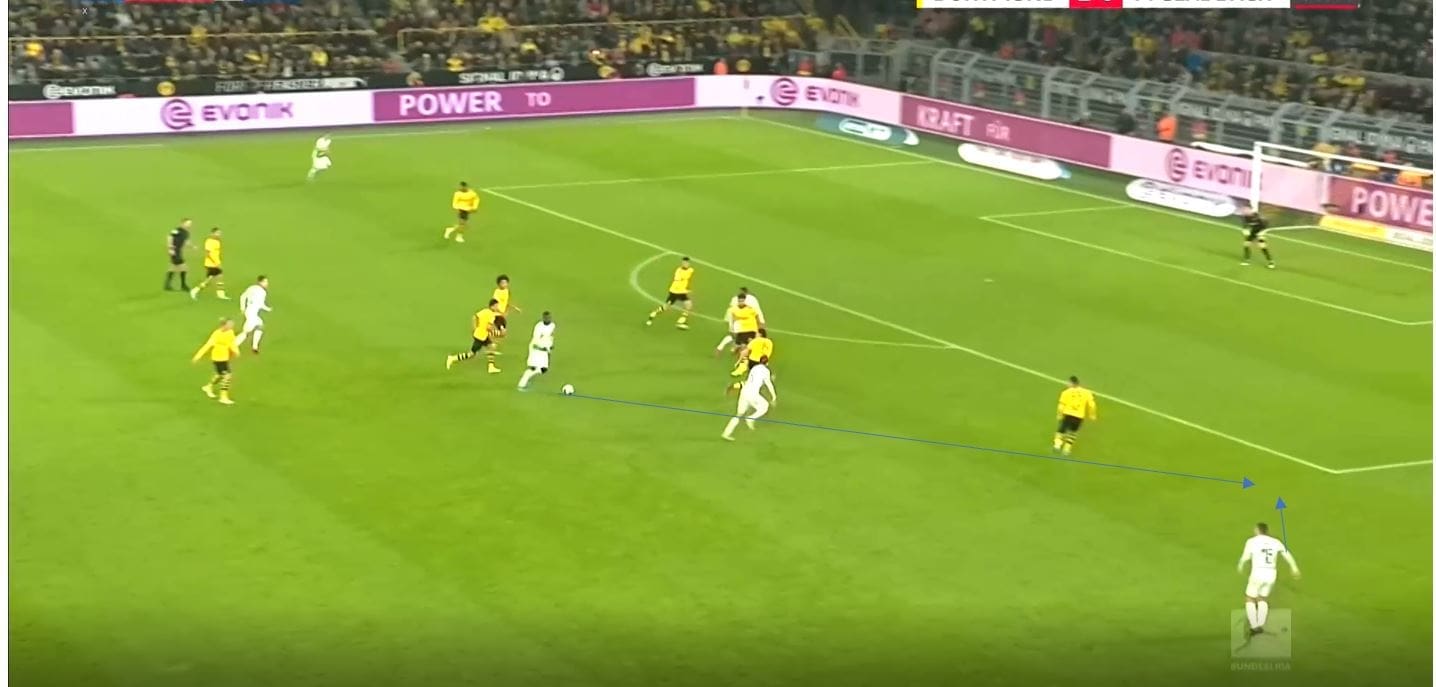
Towards the end of the game, Gladbach began to stretch the play much more and familiar offensive patterns begin to emerge, with Stefan Lainer becoming increasingly involved in attacks. Dortmund began to narrow their shape in order to protect the centre of the pitch, which of course conceded space to any wide players, mainly Stefan Lainer, who could then deliver crosses into the box. On this occasion Lainer uses his signature driven low ball, which sets up Florian Neuhaus for a very good chance. Lainer times his run well almost every time, which maintains the momentum of the attack and prevents the attack slowing down.
Conclusion
In the end, Gladbach simply couldn’t score and Dortmund gained a vital three points. As this analysis shows, neither side played particularly badly, and with both sides getting roughly equal expected goals, a draw would probably have been a fair result. Dortmund created chances and showed they can exploit teams defensively in key moments, but were also saved by goalkeepers Hitz and Bürki in the game largely, and so despite an important win for them, the performance wasn’t anything new.
If you love tactical analysis, then you’ll love the digital magazines from totalfootballanalysis.com – a guaranteed 100+ pages of pure tactical analysis covering topics from the Premier League, Serie A, La Liga, Bundesliga and many, many more. Buy your copy of the October issue for just ₤4.99 here


Comments