What is Zone 14?
In football, there are several different ways to divide the pitch into certain zones.
For this following tactical analysis, we will use the following division and definition for Zone 14:
“On a pitch divided into a six-by-three grid with a central strip as wide as the six-yard box, the Zone 14, also called The Hole, has been classified as the rectangle which helps teams score more goals.” (spielverlagerung.com)
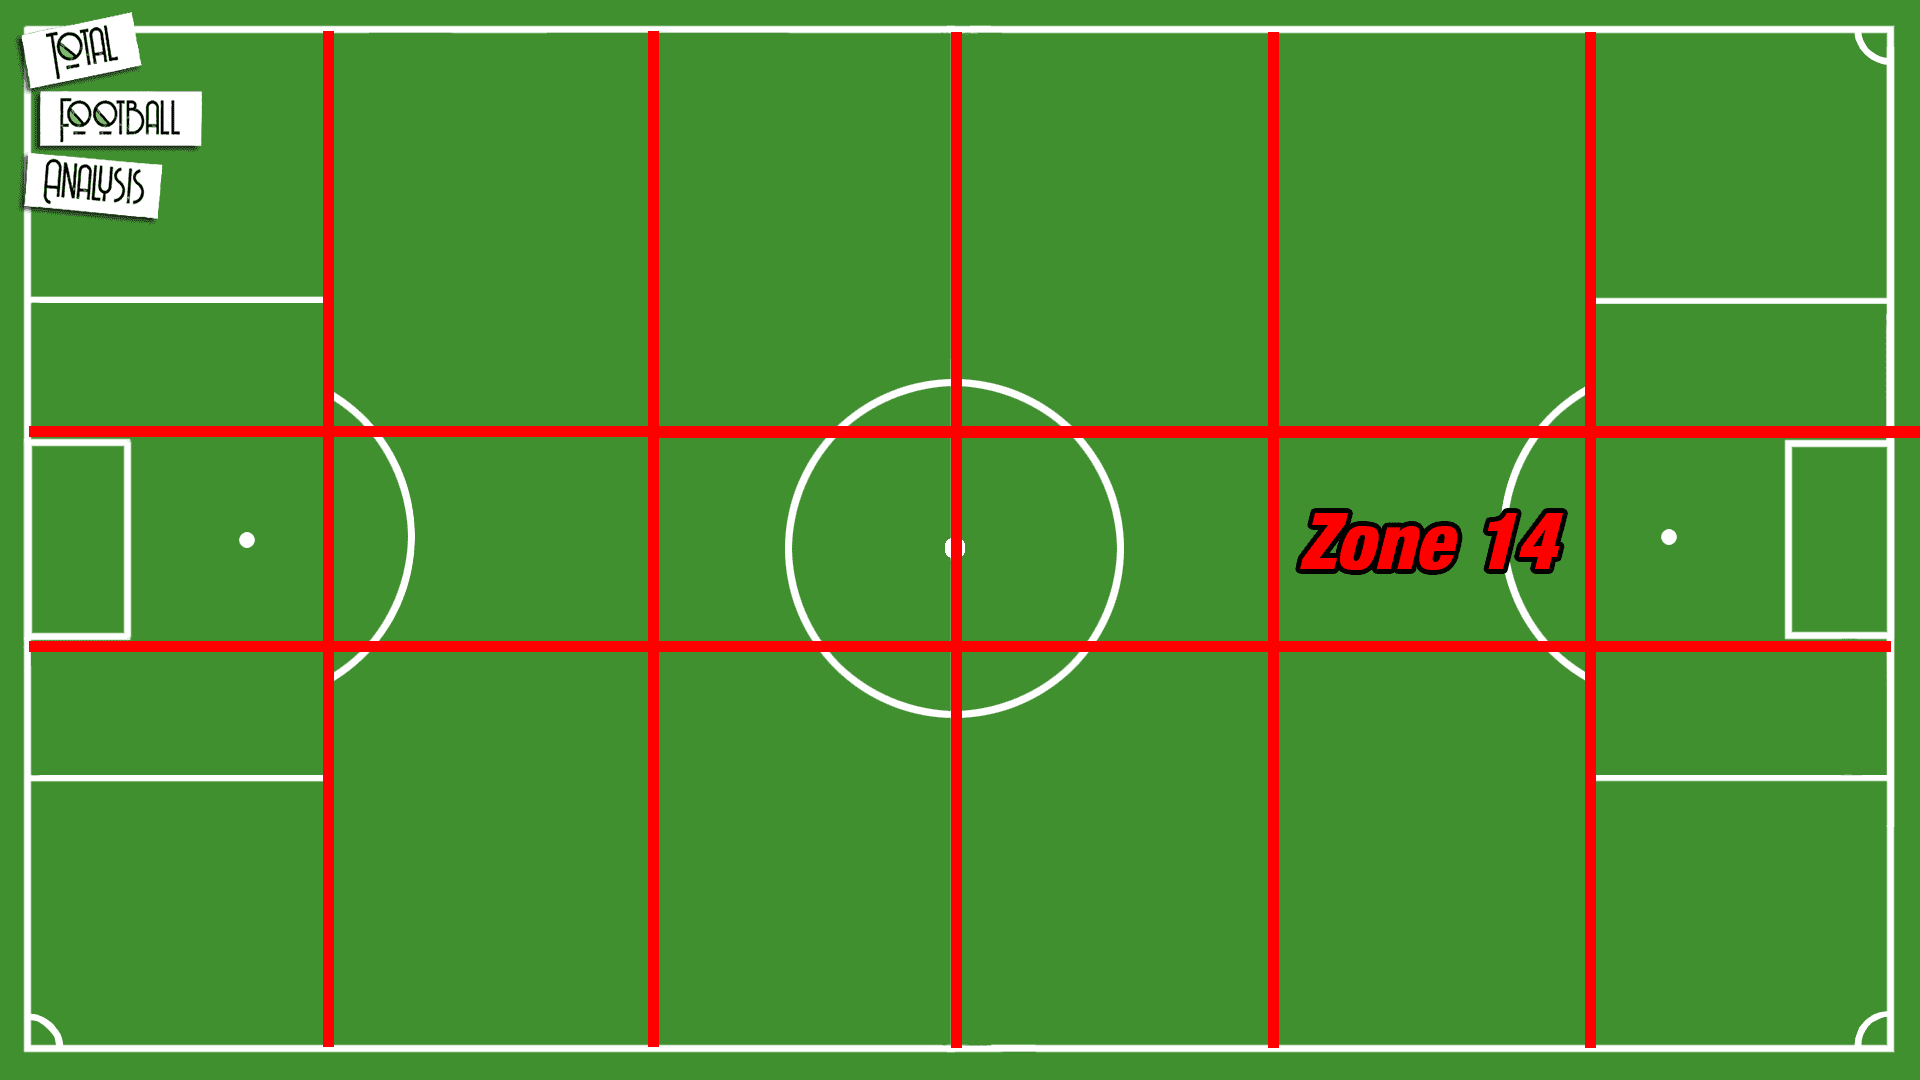
Zone 14 is one of the key areas on the pitch.
Centrally and not far away from the goal, Zone 14 offers several advantages for the attacking team.
Nevertheless, defences obviously aim at closing down spaces in this area as the threat in this zone of the pitch is obvious.
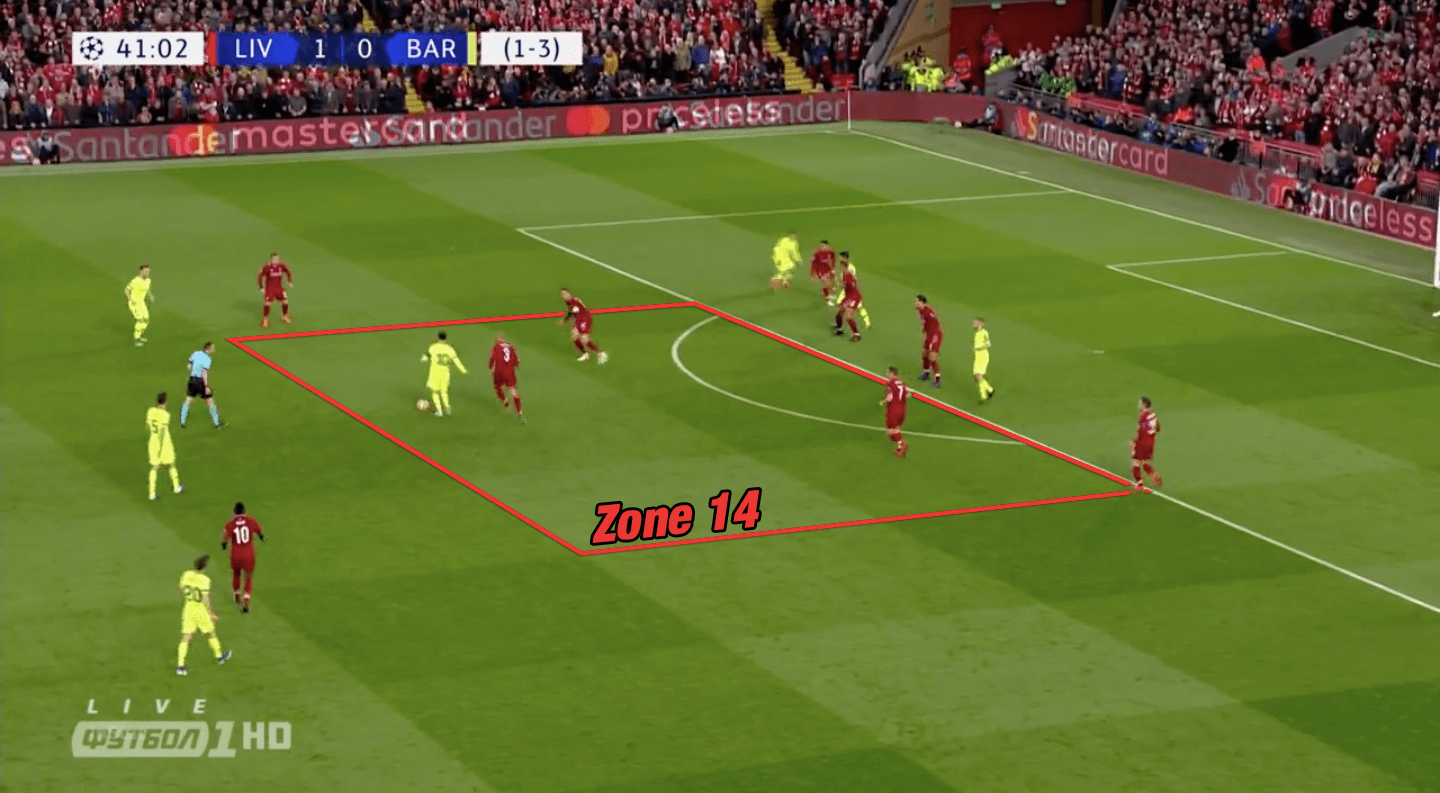
Below, one can see Liverpool closing down Zone 14 with an extremely compact defensive unit.
All of their three midfielders defend Zone 14 with one pressing the ball-carrier and the other two covering.
As this area is often protected very well but still offers much attacking potential, we take a closer look at different ways to successfully create chances through Zone 14 in the following analysis.
Occupation of Zone 14
As already mentioned, due to the threat that comes along with players within Zone 14, the defending side does not offer much space.
That also means a restriction of time for the attacking department.
As a consequence, dynamism plays a vital role when it comes to occupying Zone 14.
Apart from a single attacker constantly providing depth, there should be no player standing within Zone 14 if the aim is to play through this area.
The opposition would simply mark the player and further decrease space in front of the penalty area.
Instead, it is more promising to have players diagonally rotating into Zone 14.
This makes it way harder for the defending side.
If a striker drops, the defender can follow but with a player moving diagonally into Zone 14, it is difficult to decide whether a defender needs to step out or a midfielder needs to drop.
The time which is required to make this decision increases the time window for the attacking side.
This enables better pre-orientation and decision-making.
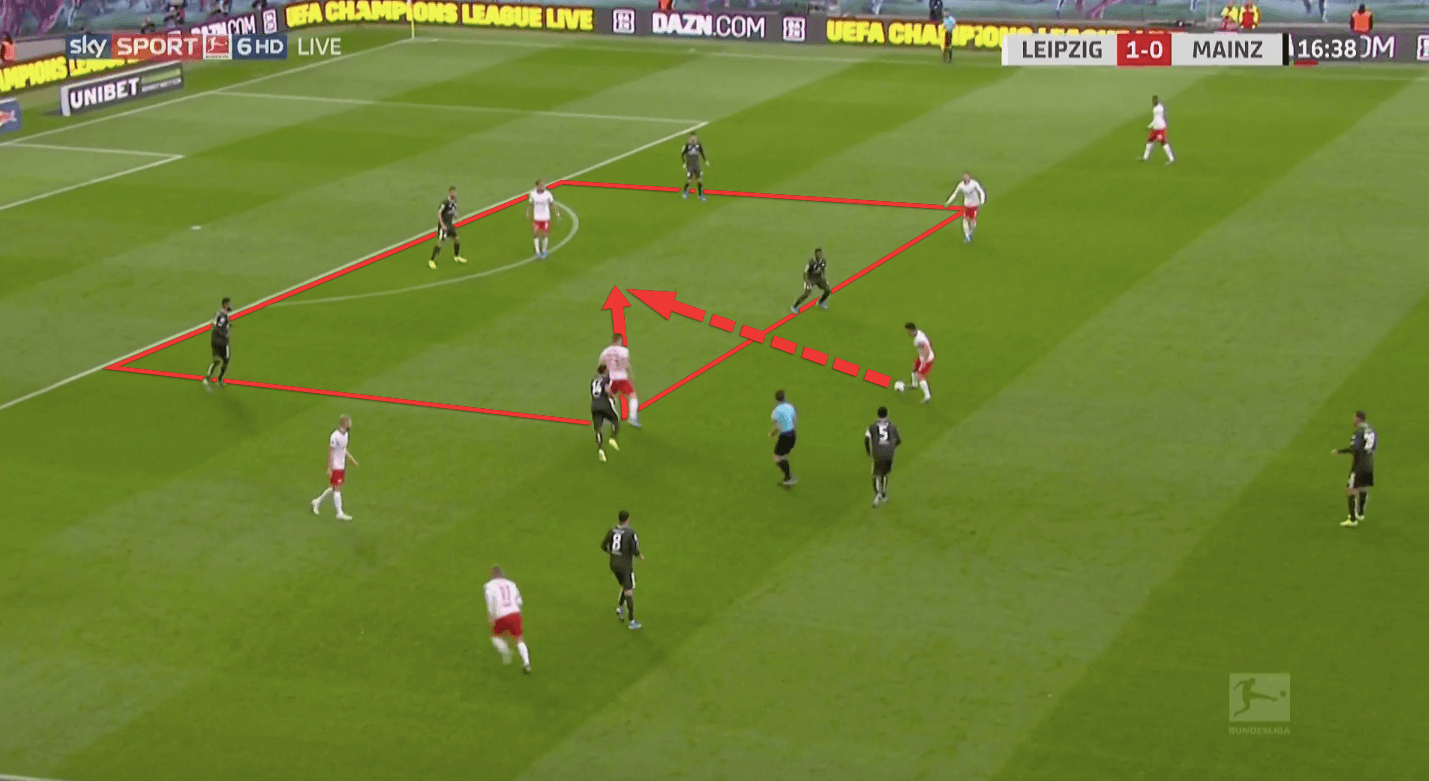
Above, one can see RB Leipzig playing into Zone 14.
With their left full-back who rotated into the left half-space now diagonally moving into Zone 14, the opposition are confronted with a dilemma.
The central defenders are occupied by Leipzig’s striker.
With the quick interplay between Leipzig’s left-back and striker, they can create a promising shooting opportunity.
Wall player enabling up-back-through patterns
Since most backlines do not drop further towards their goal than into Zone 14, there often is not much space to receive and turn.
Therefore, a striker could receive the ball turned backwards to the goal with a defender in his back.
In this scenario, it is important to quickly offer diagonal back passing options.
This allows for quick vertical up-back-through combinations which are difficult to defend.
Again, diagonality is key here.
With players positioned diagonally towards their striker, the vertical passing lane to the number nine is open.
With a diagonal back pass, the ball position changes the attacking angle towards the goal and therewith the angle for a possible through pass.
To defend such attacks the defenders need to reposition in order to intercept the through pass.
If the attacking team can play with only a few touches though, this leaves only a little time for the defensive department to take in ideal positions.
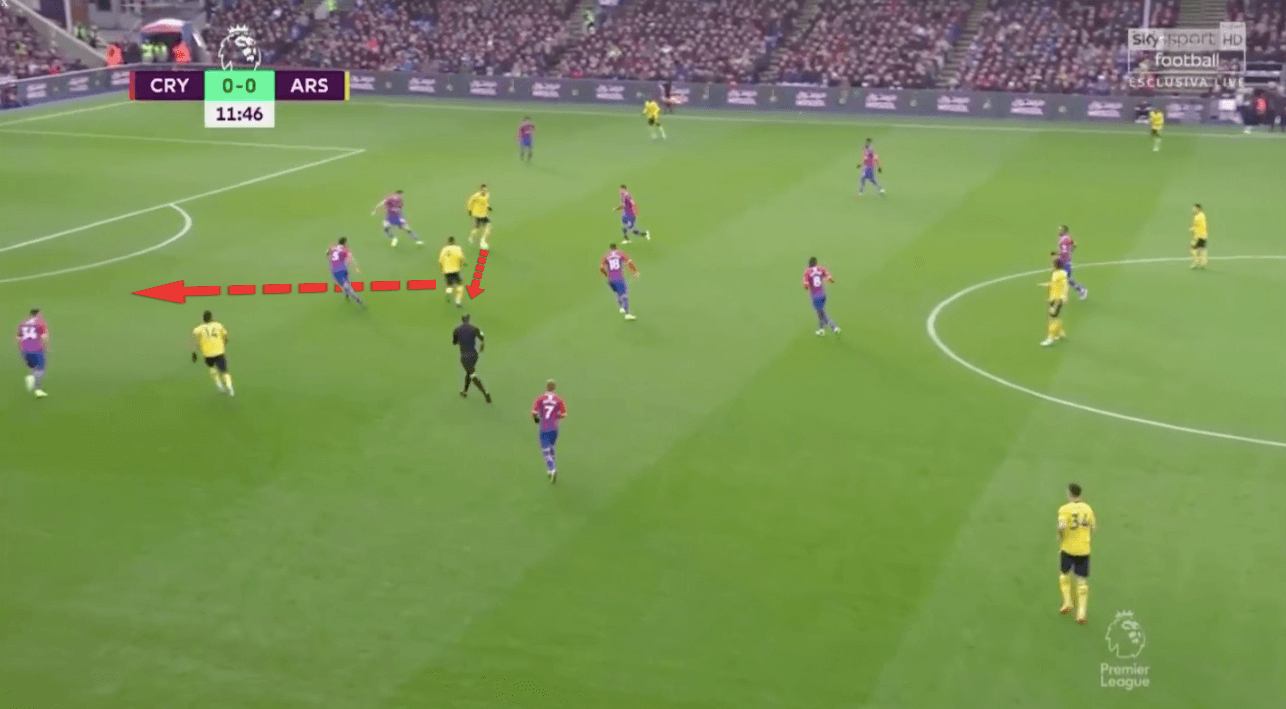
In the example above, we can see Arsenal playing up, back and through in Zone 14.
Although it is not a striker but playmaker Mesut Özil as the wall player, the defence is unable to defend this pattern.
Receive and turn within Zone 14
The most promising way to create a chance through Zone 14 is to get a player within the zone to receive the ball with an open body shape.
Apart from the above mentioned up-back-through patterns, forward passes into attacking midfielders are another way to achieve this favourable situation.
Since most defensive sides have at least one midfielder covering the central space in front of their backline as a “bodyguard” though, it is necessary to overload the centre of the pitch to create a receive and turn the situation for an attacking midfielder.
By playing with a box midfield consisting of a double pivot and two central advanced midfielders or with wingers cutting inside, the centre can be overloaded.
The midfielders would then take up diagonal positions towards the ball-carrier to receive with an open body shape.
The aforementioned dynamism is important here since a static position will allow for the defensive department to close down the player.
Being confronted with several players within this zone due to the overload though, the defensive team might need more time to reposition.
This advantage needs to be used to quickly find a free player within Zone 14 to receive and turn.
Once this pass is played, it is possible to play a through pass or chipped ball to break the last line of defence.
Although the latter one is difficult to play since there is not much space offered behind the backline.
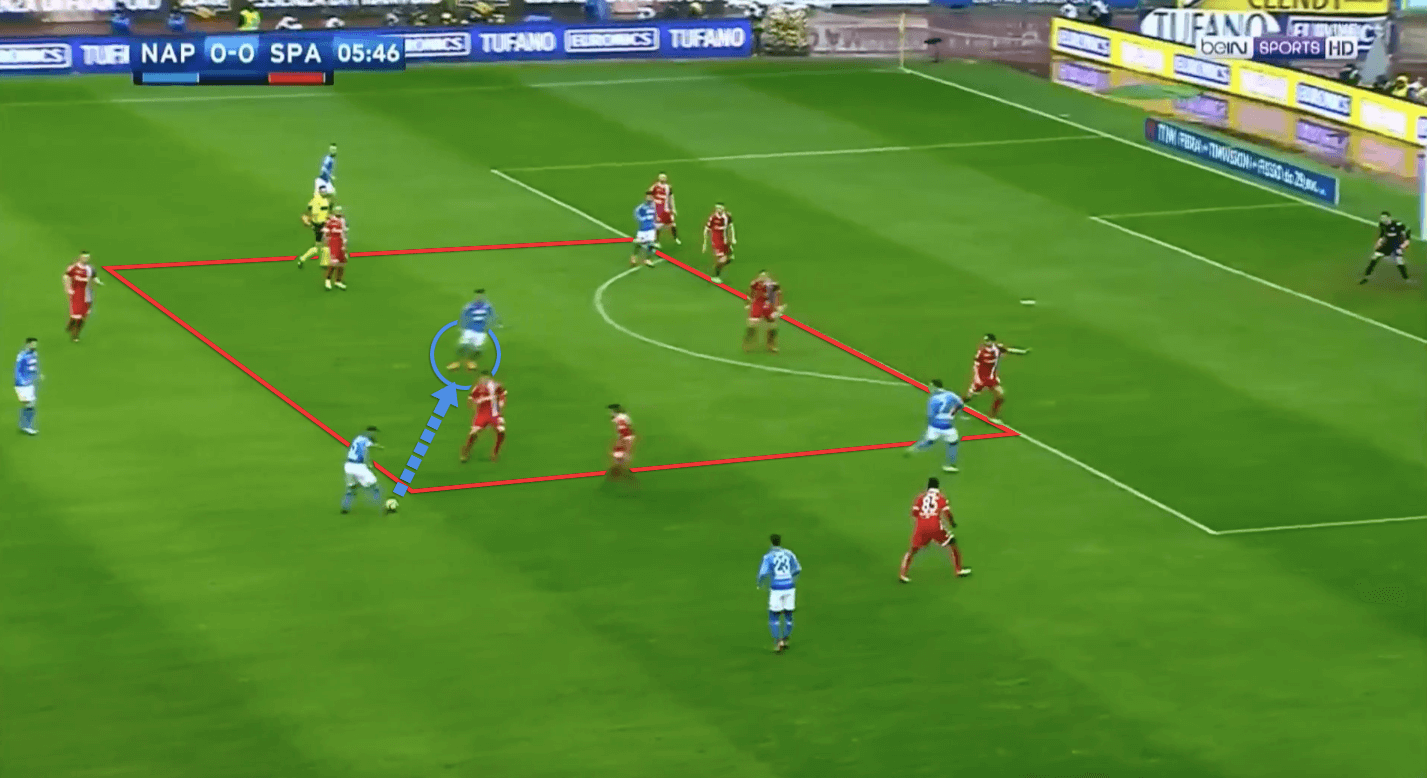
In the image above, Maurizio Sarri’s Napoli can bring an attacking player into a central position within Zone 14 capable of receiving and turning due to their central overload.
Therewith, they can create a goal-scoring opportunity after a through pass.
Shooting from Zone 14
Another option when receiving the ball with an open body shape in Zone 14 is to shoot.
Due to the centrality of the zone, the angle is advantageous for a finish.
Nevertheless, whether this is sensible or not is highly dependent on the opposition defenders and whether they can block the shot.
Due to the fact that defences try to defend the central area in front of their goal with an increased focus, there are many players positioned in this lane.
On the other hand, advantages when shooting from Zone 14 are that the distance is not too far and the goalkeeper might have a limited sight due to the defenders between ball and goal.
In addition to that, a deflection could cause the shot to become even more dangerous.
Conclusion
Since Zone 14 is protected very well by the defending side in most situations, it is difficult to attack through this area.
On the other hand, this zone offers several advantages as mentioned in our analysis.
The chance creation through Zone 14 is possible with different attacking schemes such as up-back-through combinations, receiving and turning situations or shots from this area.
For successful attacks through Zone 14, a well-timed off-ball movement and precise passing under pressure are required though.
To sum up, there is not just one solution to penetrate a defensive unit through Zone 14.
Depending on the opposition defending style and the own attacking philosophy, one needs to find fitting solutions.




Comments