Dundee sit in seventh place in the Scottish Premiership with 21 points from 16 matches, scoring 20 goals which puts them in fifth place in that department while conceding 23 goals — meaning they also have the fifth-best defence, knowing that they played only 16 matches at the time of writing with others playing 19 or 18 matches.
Despite these average level numbers, Dundee showed a sweeping superiority over their rivals in attacking set pieces, as they are the top scorers from set pieces in the Scottish Premiership with 11 goals from the highest expected goals in the league, which is estimated at 8.64, knowing that their closest competitor is Heart of Midlothian scoring only six goals from XG equal to 5.59.
One of the most distinctive things about Dundee is the offensive corner kicks, as they are the highest goalscorers from corner kicks in the league with six goals out of a total of 20 goals, meaning that their percentage of goals from corners is 30 % of their total goals, which is a considerable number.
In this tactical analysis, we will discuss Dundee’s different tactics in the offensive corner kicks, showing how diverse they are using several tactics that achieve the principle of variation to surprise the opponent.
The area after the far post
The first tactic we will explain is targeting the area after the far post. Firstly, we need to know two things: why and how they target this area.
They target this far area to be far away from the zonal players, against zonal or hybrid systems, and also to easily win the first contact against man markers, against man-marking and hybrid systems, by causing an orientation problem to the markers because it is difficult to keep tracking the ball and the attacker at the same time over this long distance the ball takes, especially when they use outswinging and floated crosses.
This outswinging floated cross below takes a long time to land while the ball moves from out to in, so let’s track the targeted player and his marker, highlighted below, to know exactly what the problem is.
In the first photo below, the defender takes a look at the attacker he marks as the taker touches the ball.
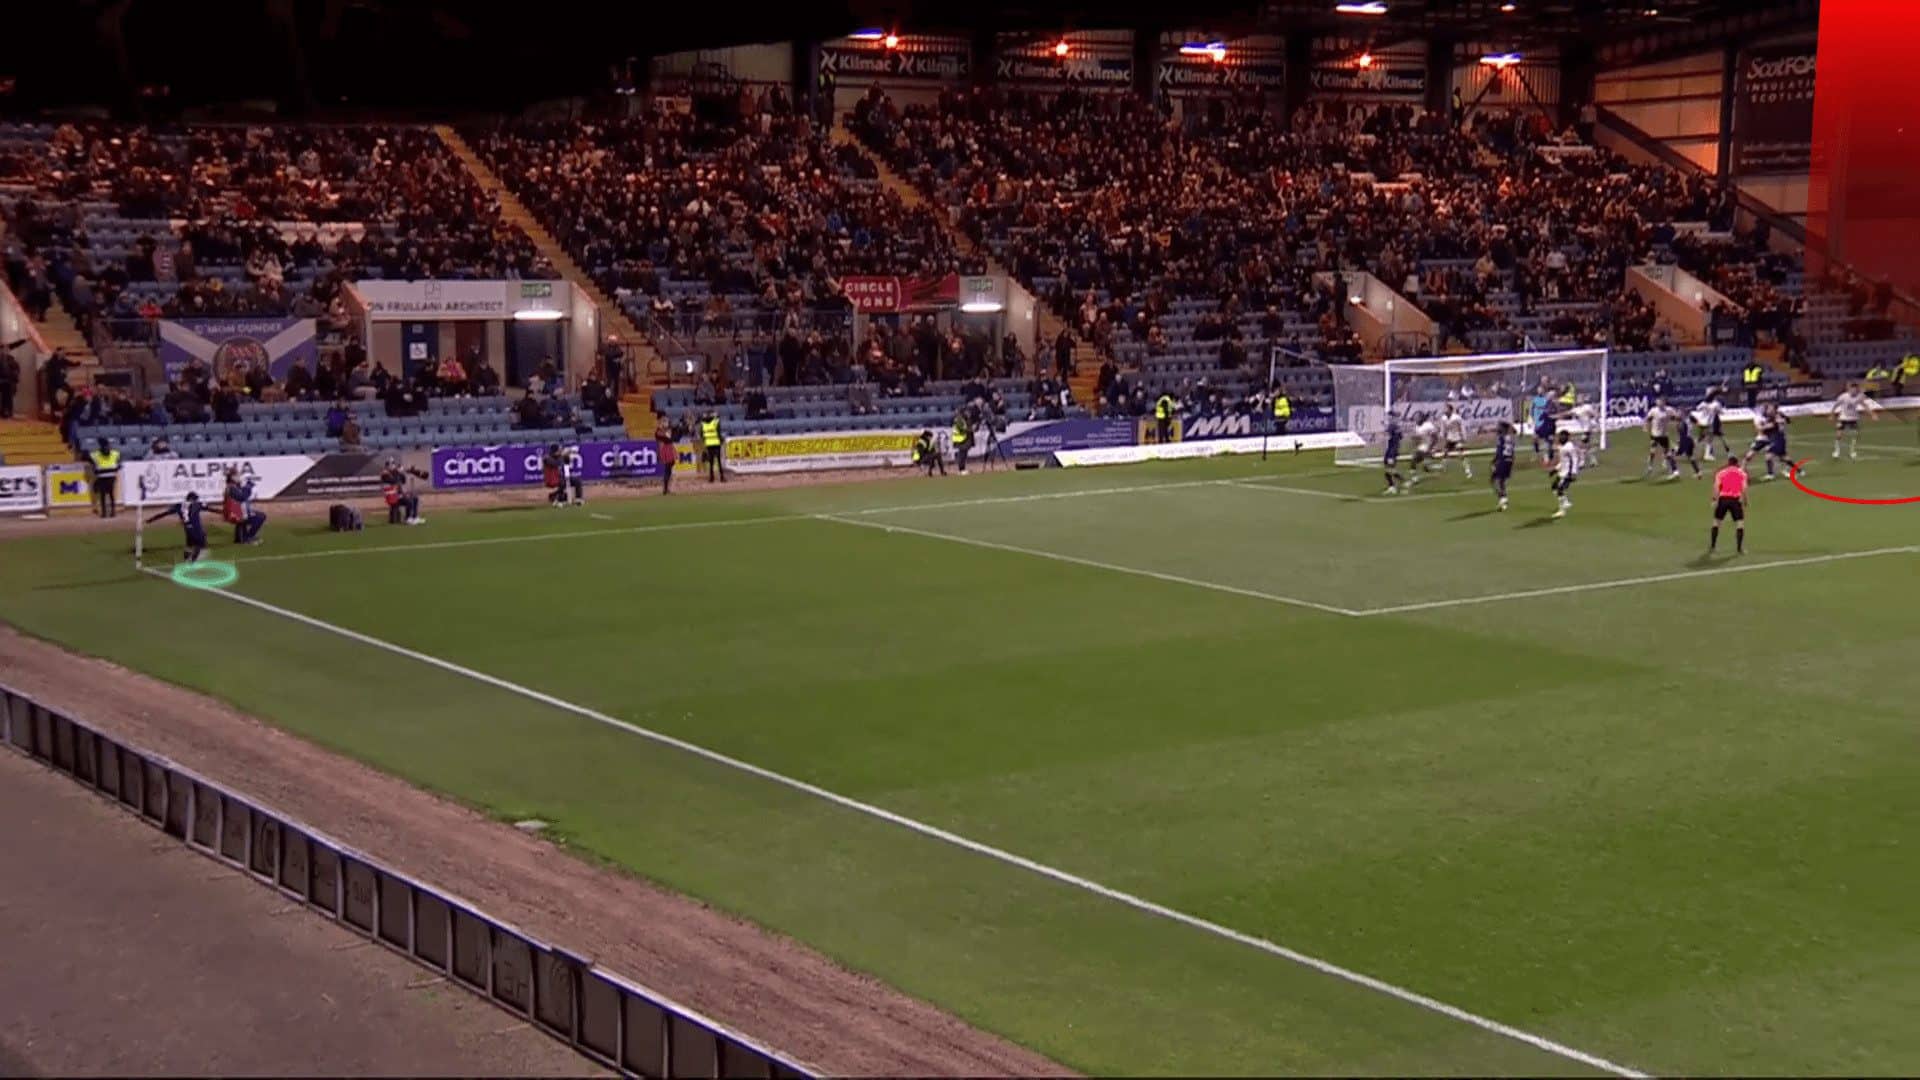
When the taker touches the ball, the attacker moves towards the ball, so the defender goes in this direction, which is good for him because he can take a look at the ball while raising his hands to prevent him from going to the near post.
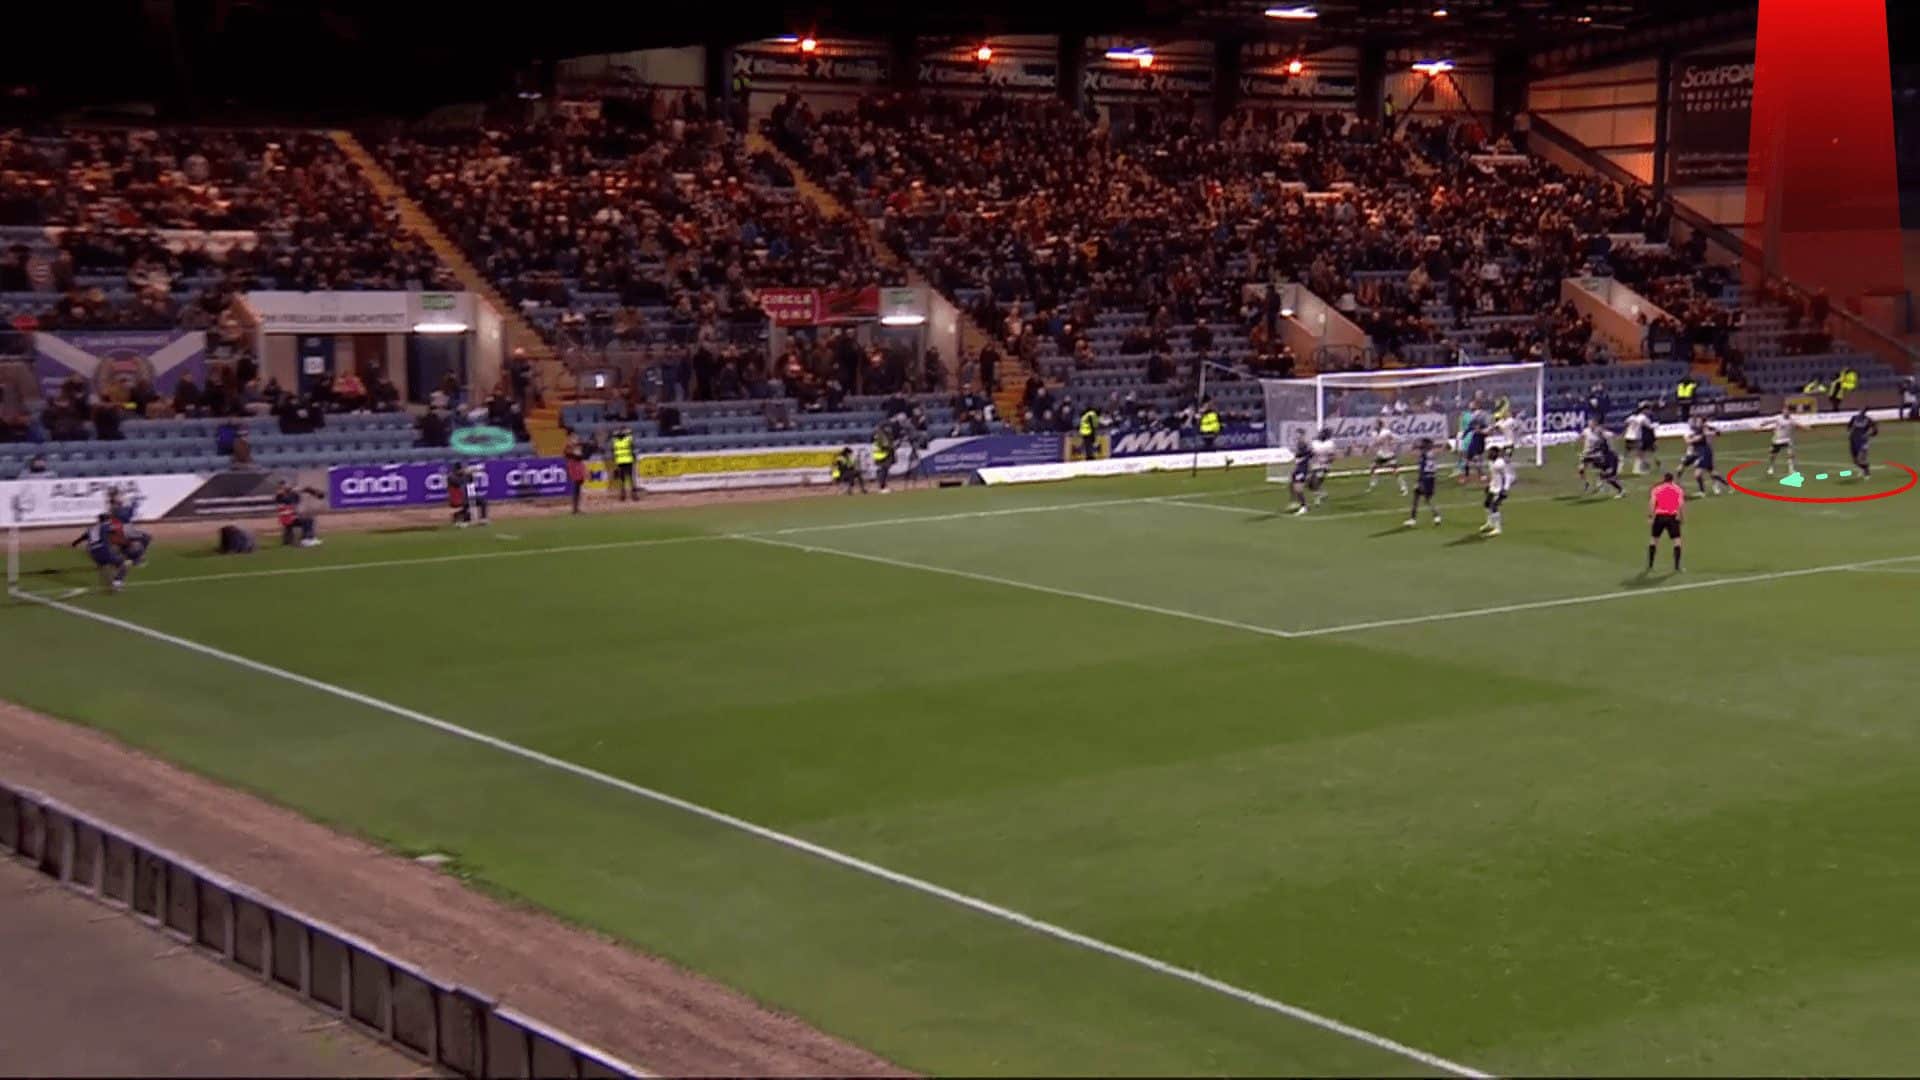
Here, the attacker exploits the defender’s orientation problem, so he stops when the defender loses contact with him, tracking the ball. This problem happens because the out-swinging cross forces him to keep tracking the ball near the line at the first moments, so he has to move his neck to the right, losing connection with the attacker.
The floated cross also helps in this by making the cross take the most possible time and making the ball’s height high to force the defender to raise his neck more and more to allow the attacker to escape behind him, as in the second photo below.

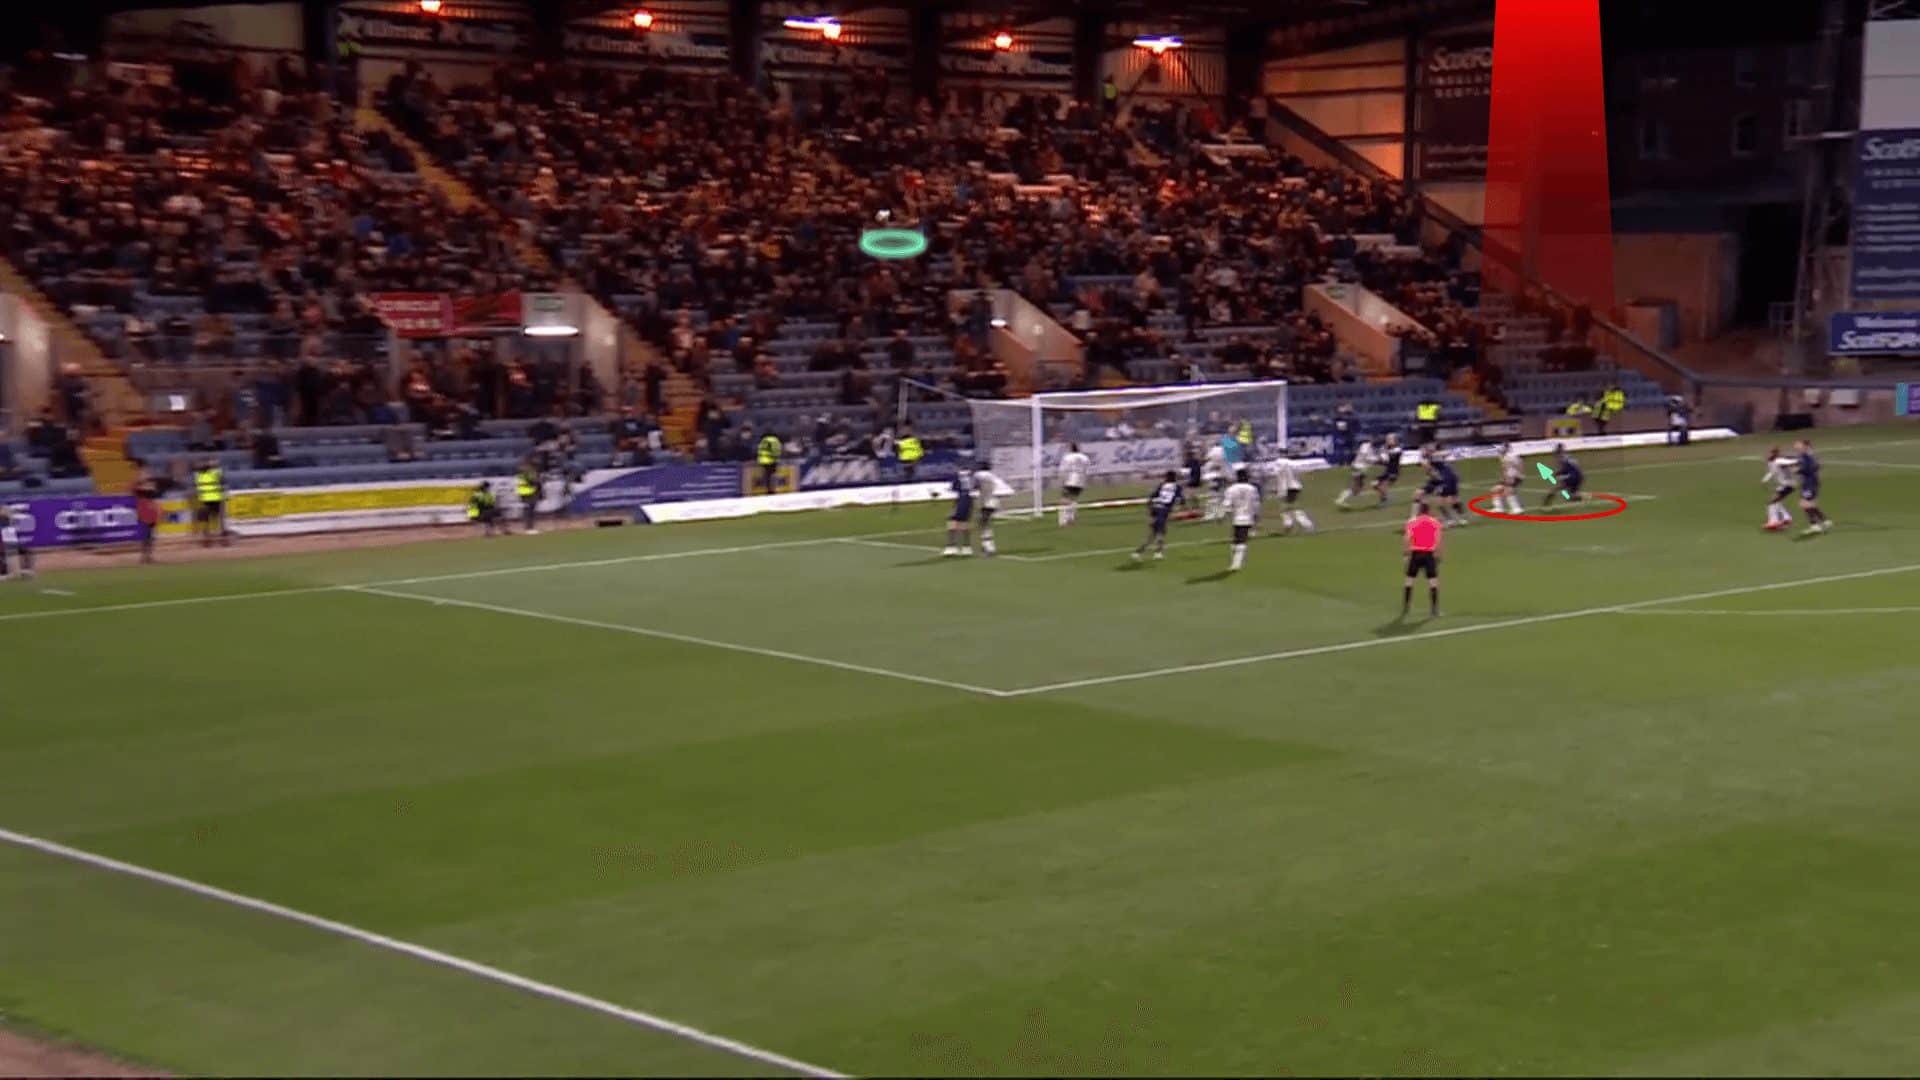
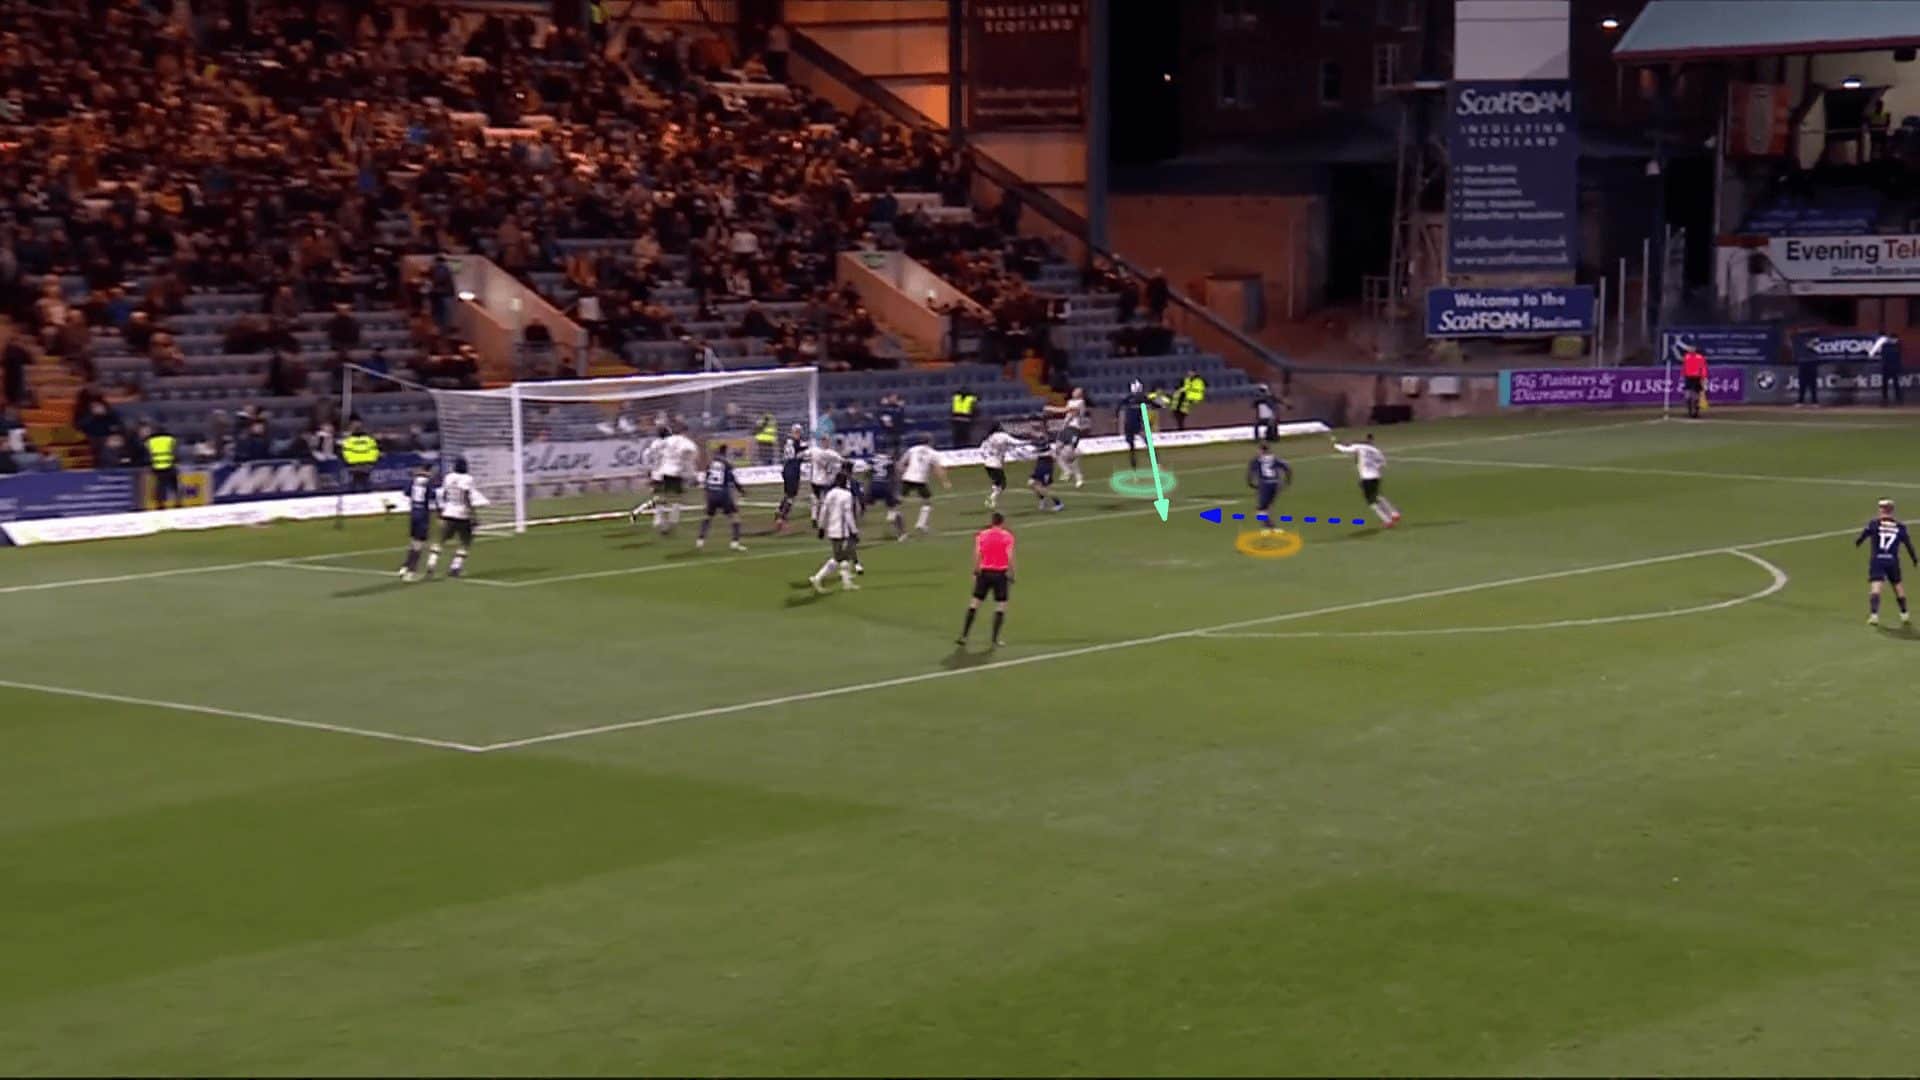
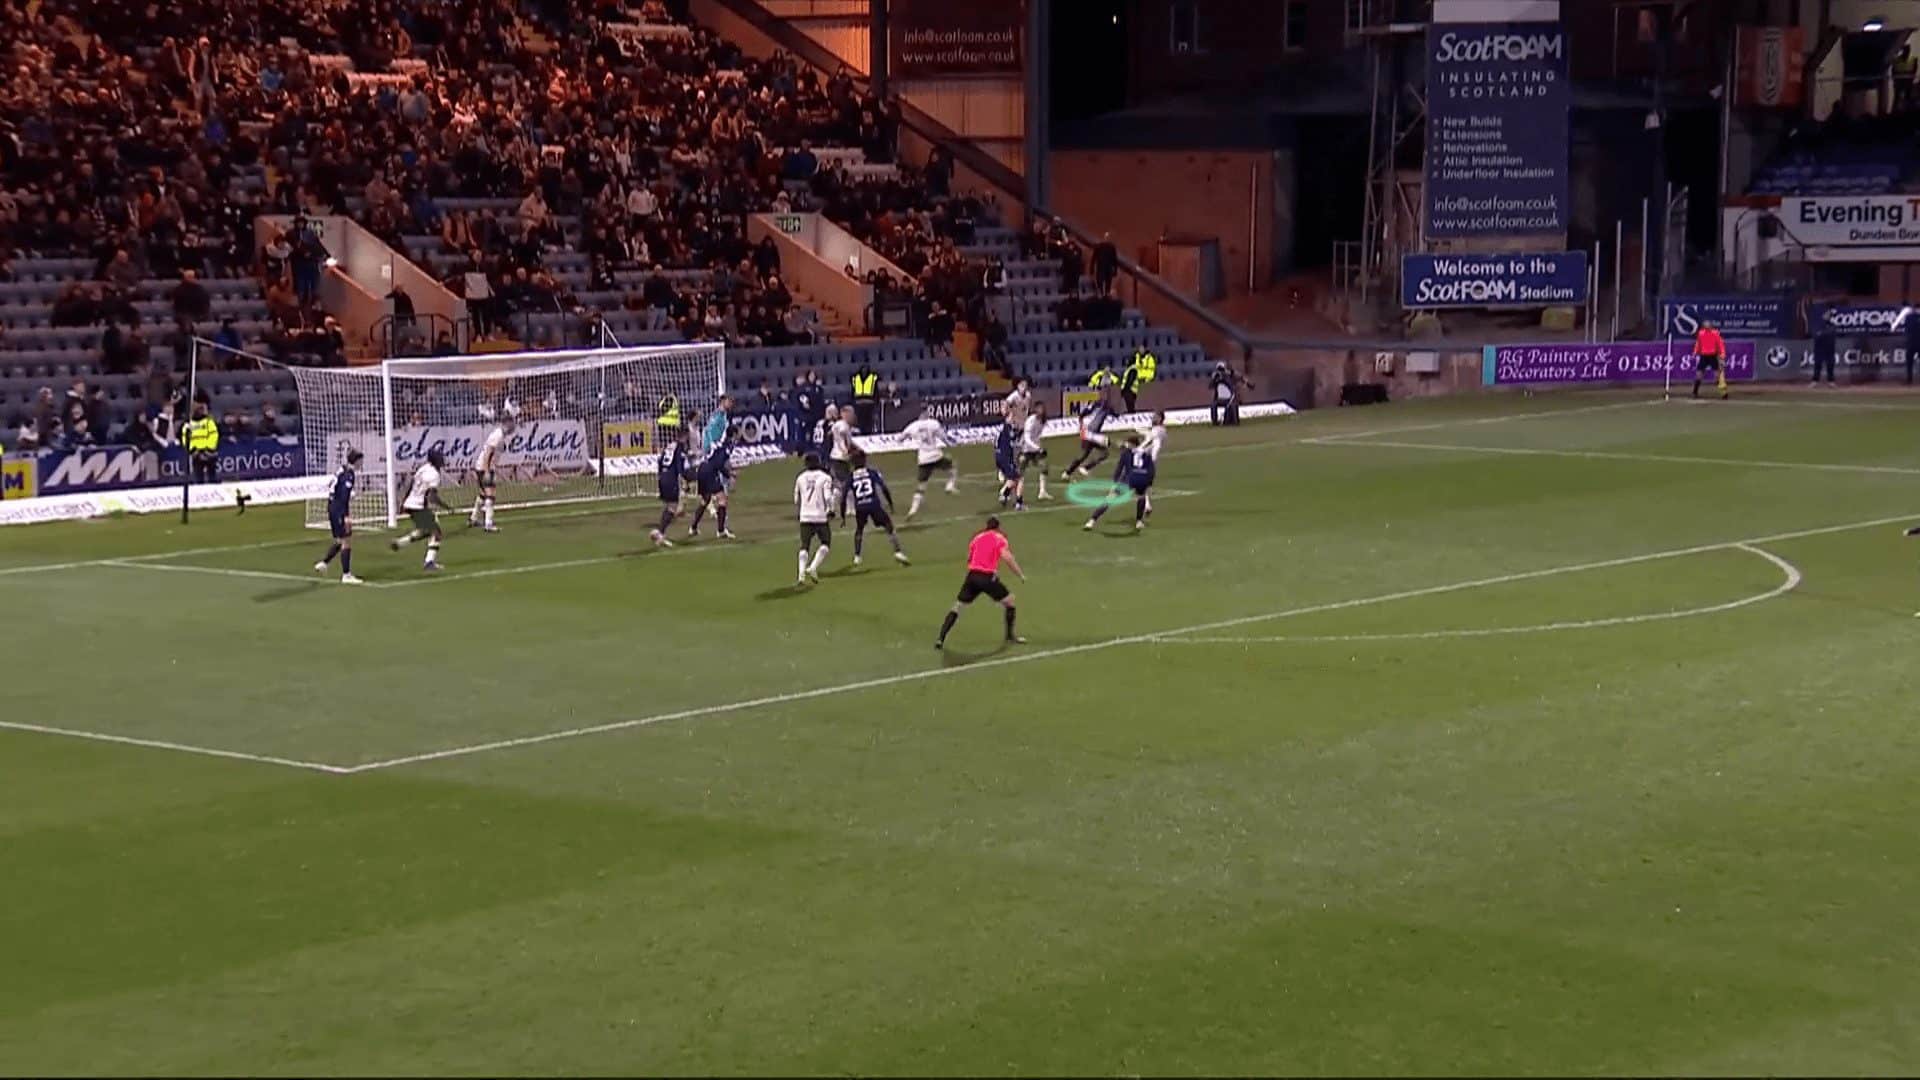
They now won the first contact, but in a far area, so you may ask about the next step to threaten the goal! In this stage, they depend on an important principle, which is framing the goal, meaning that we will deal with the first contact as a headed cross while having many players standing in parallel with the goalmouth, having players on the near post, far post and the middle, as highlighted in green below. They also leave two players, highlighted in red, to get the rebound or receive a cut-back pass.
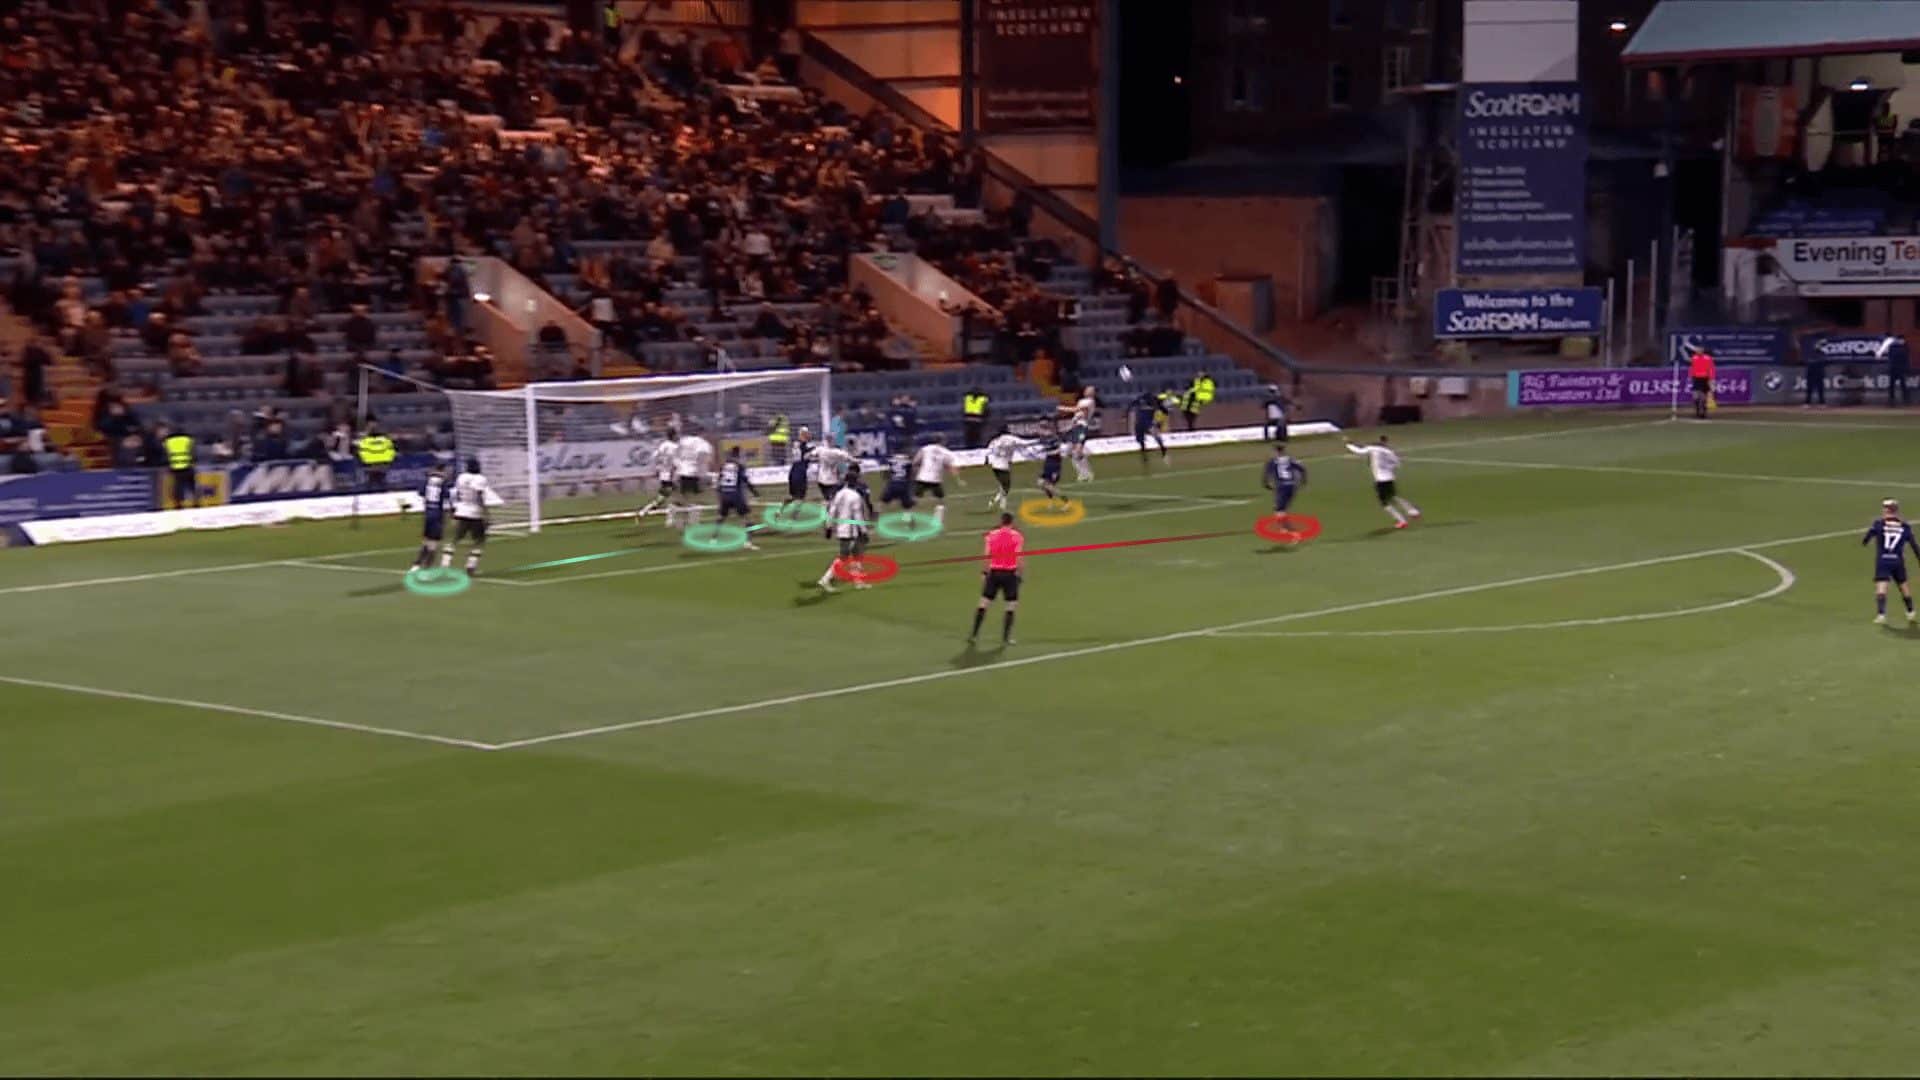
The first-targeted attacker decided to pass the ball back, but a defender came back, kicking the ball away, as shown in the two following photos.
They implemented the same idea against the hybrid system below. Rangers have four zonal players, four man-markers and a short-option defender, leaving a player for the counterattack, as in the first photo below.
The man-markers give priority to the middle, so Dundee have numerical superiority in the targeted area while it is so far for the zonal defenders to go there, so Dundee win the first contact while four players are framing the ball, as shown in the second and third photos.
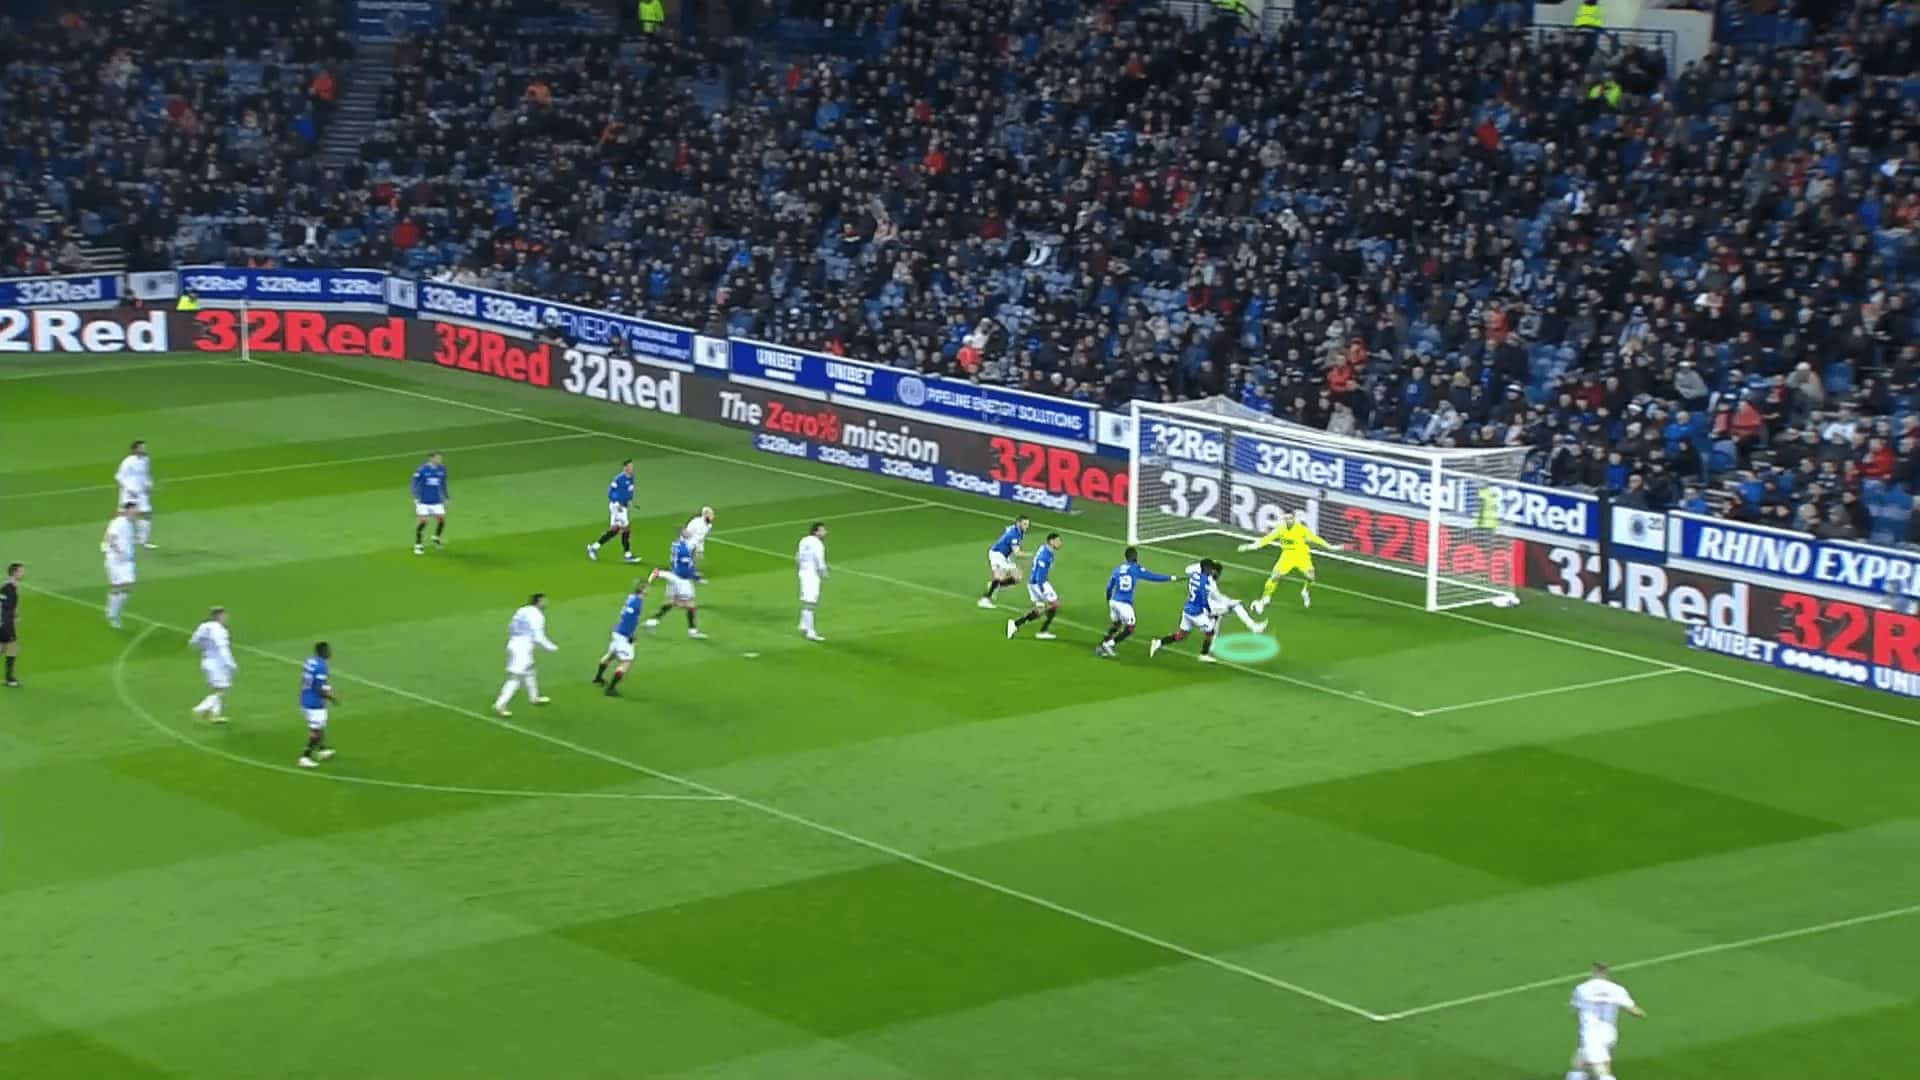
Although they can’t control the second contact, as in the third photo, they keep leaving a player on the far post while two players drop to get the rebound.
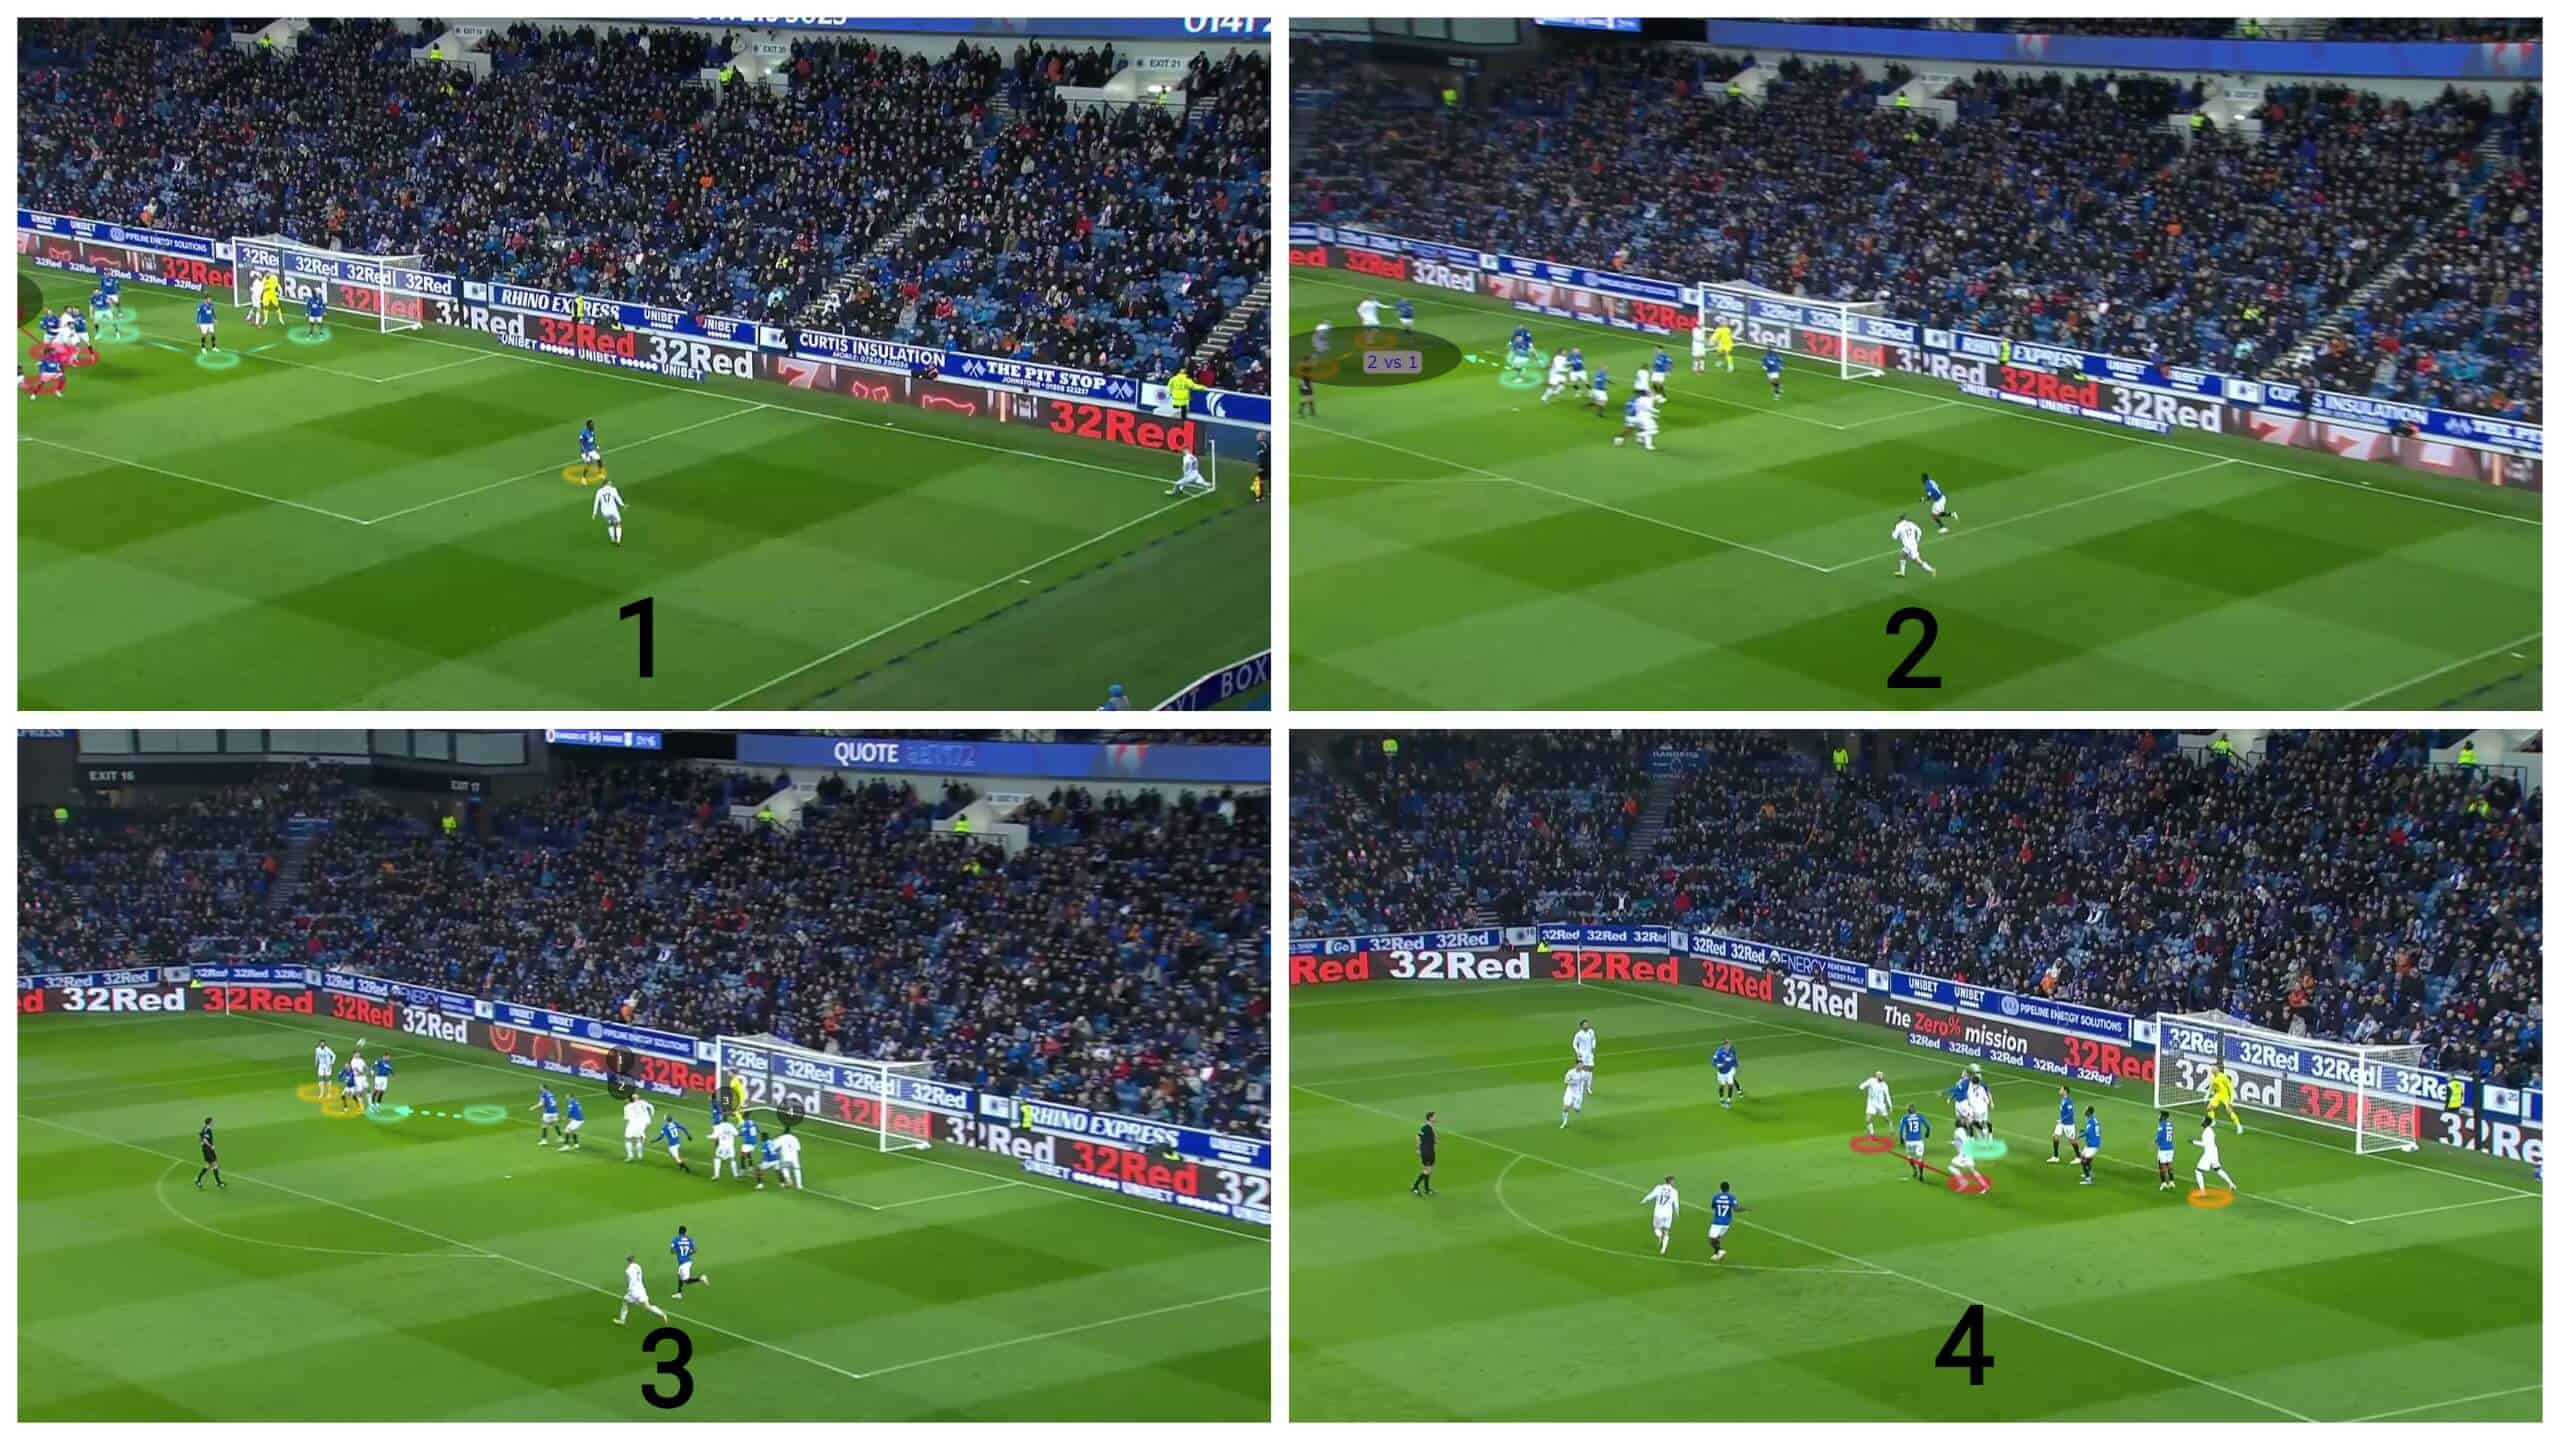
So this player wins the third touch, scoring a goal because of framing the ball, which increases the possibility of getting the contacts near the goal even if you lose one, so we may say that framing the goal helps the attacking team to create organised chaos.
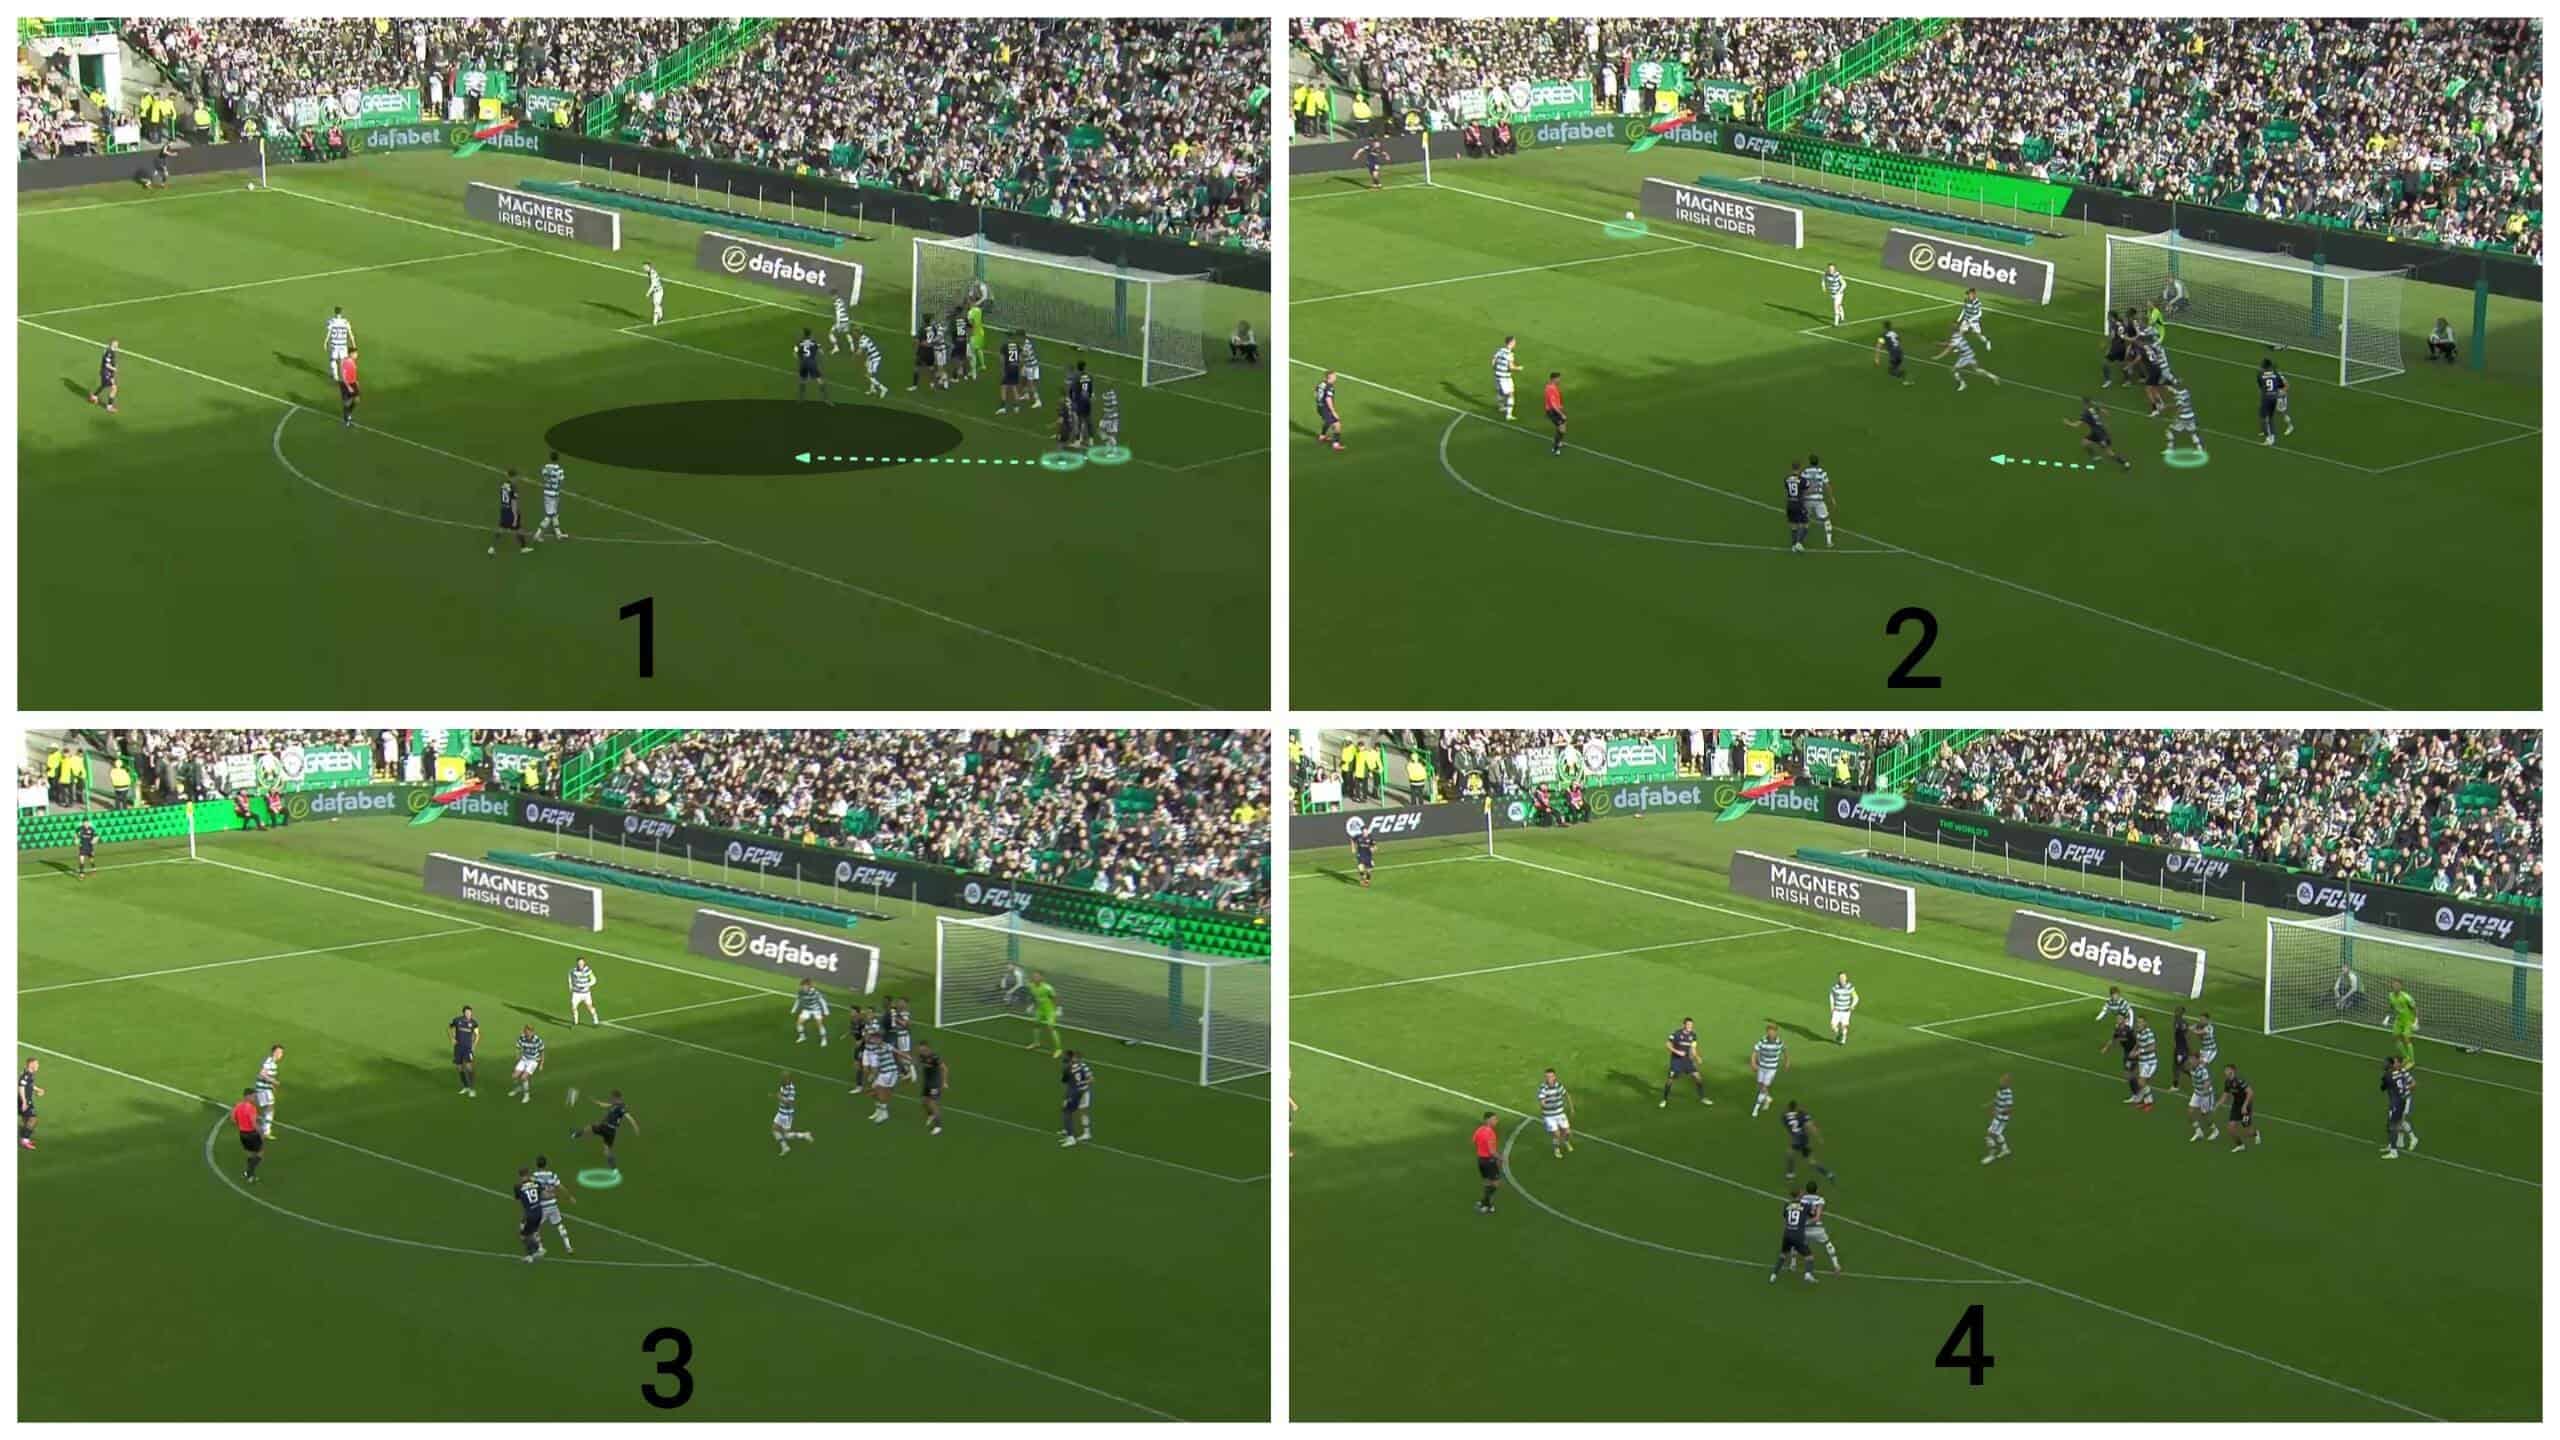
As a variation, they sometimes use this far-targeted player to get to the middle suddenly while his teammates move away, dragging their markers with them to empty this area.
In the first two photos below, you can see that the attacker exploits the same orientation problem to gain a second on his marker, but differently this time by exploiting the moment the defender looks at the ball to run, earning a moment before him. At the same time, his teammates drag their markers, blocking them from emptying the middle targeted area.
In the third photo, the plan works, so he kicks the ball, but it hits a defender.
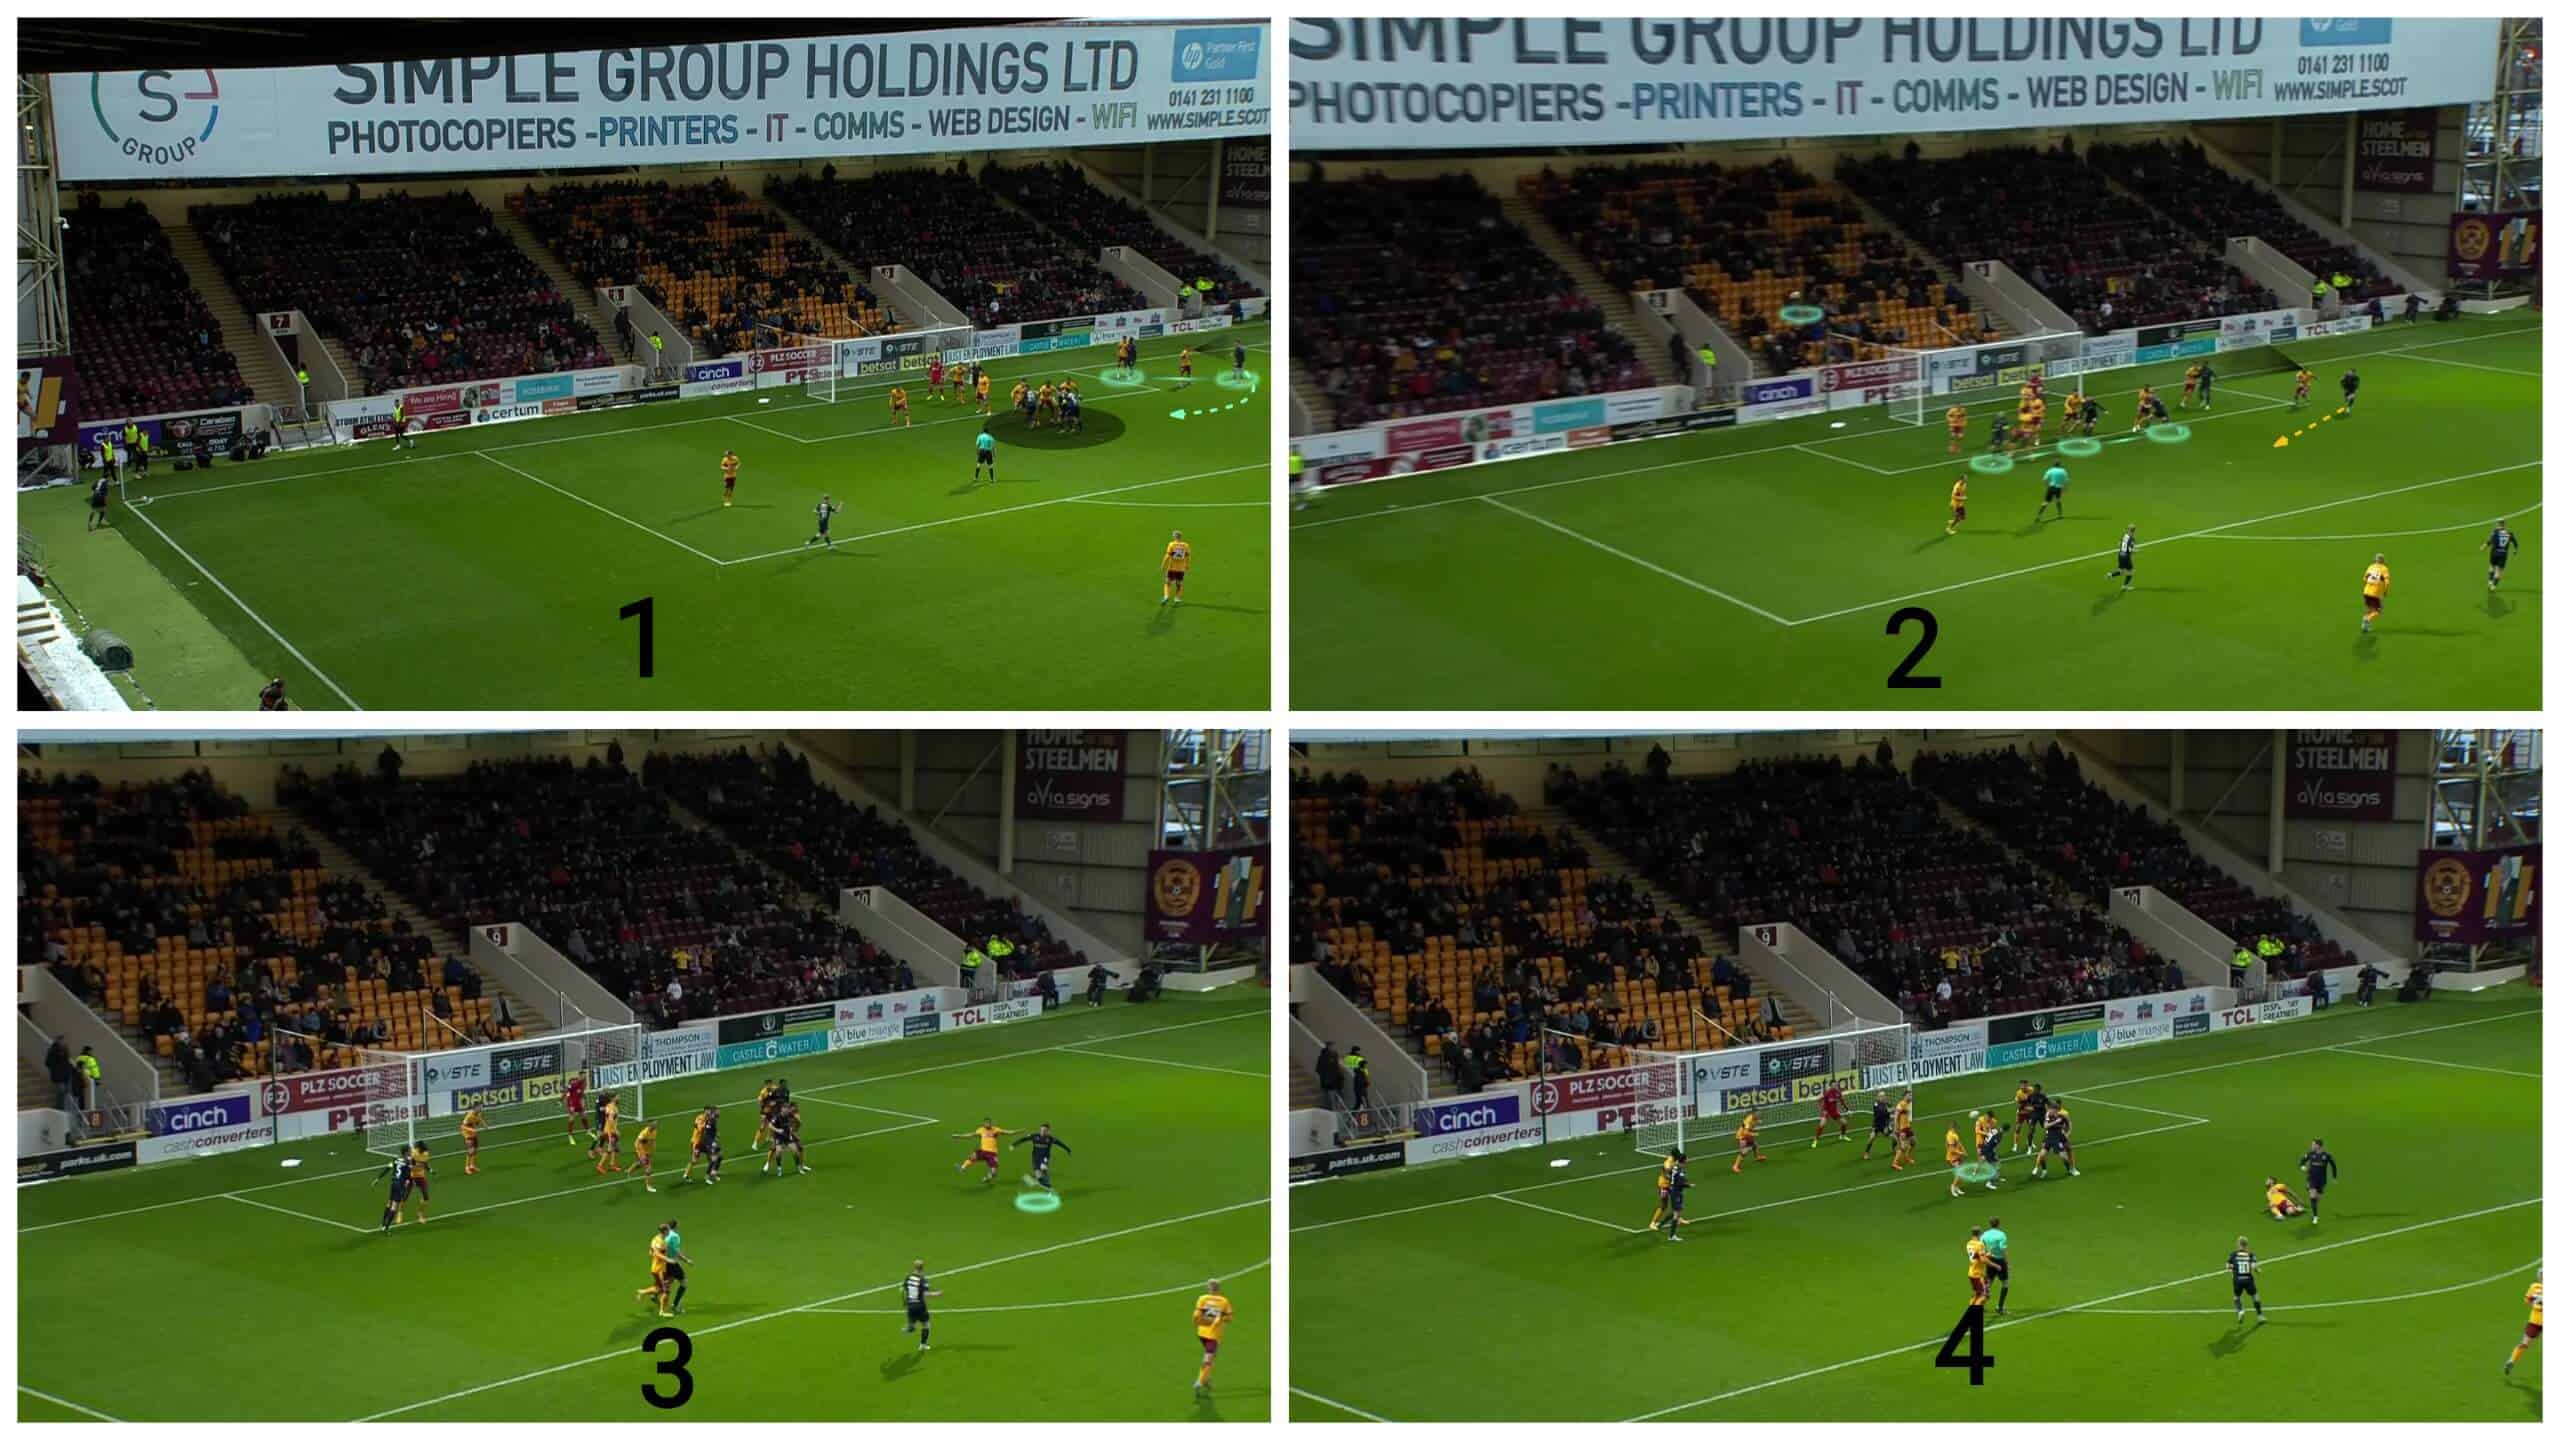
This case below shows that it wasn’t a coincidence because they used the same idea below by exploiting the moment the defender looked at the ball in the air to escape from him and run, but the shot wasn’t accurate.
Flicks
They also can target the far post indirectly by using flicks, as in the case below, so you can see three attackers at the far post, two players in the middle and a player blocking the goal to prevent him from getting the flicked pass.
Here, the first targeted player will run in a curved way around his mate to use him as a screen to escape from his man marker. At the same time, the attackers on the far post exploit that the defenders give all their attention to the ball, so they stand on their backs, ready to receive the headed pass. Still, the headed pass wasn’t accurate, so it hits a defender’s hand to be a penalty.
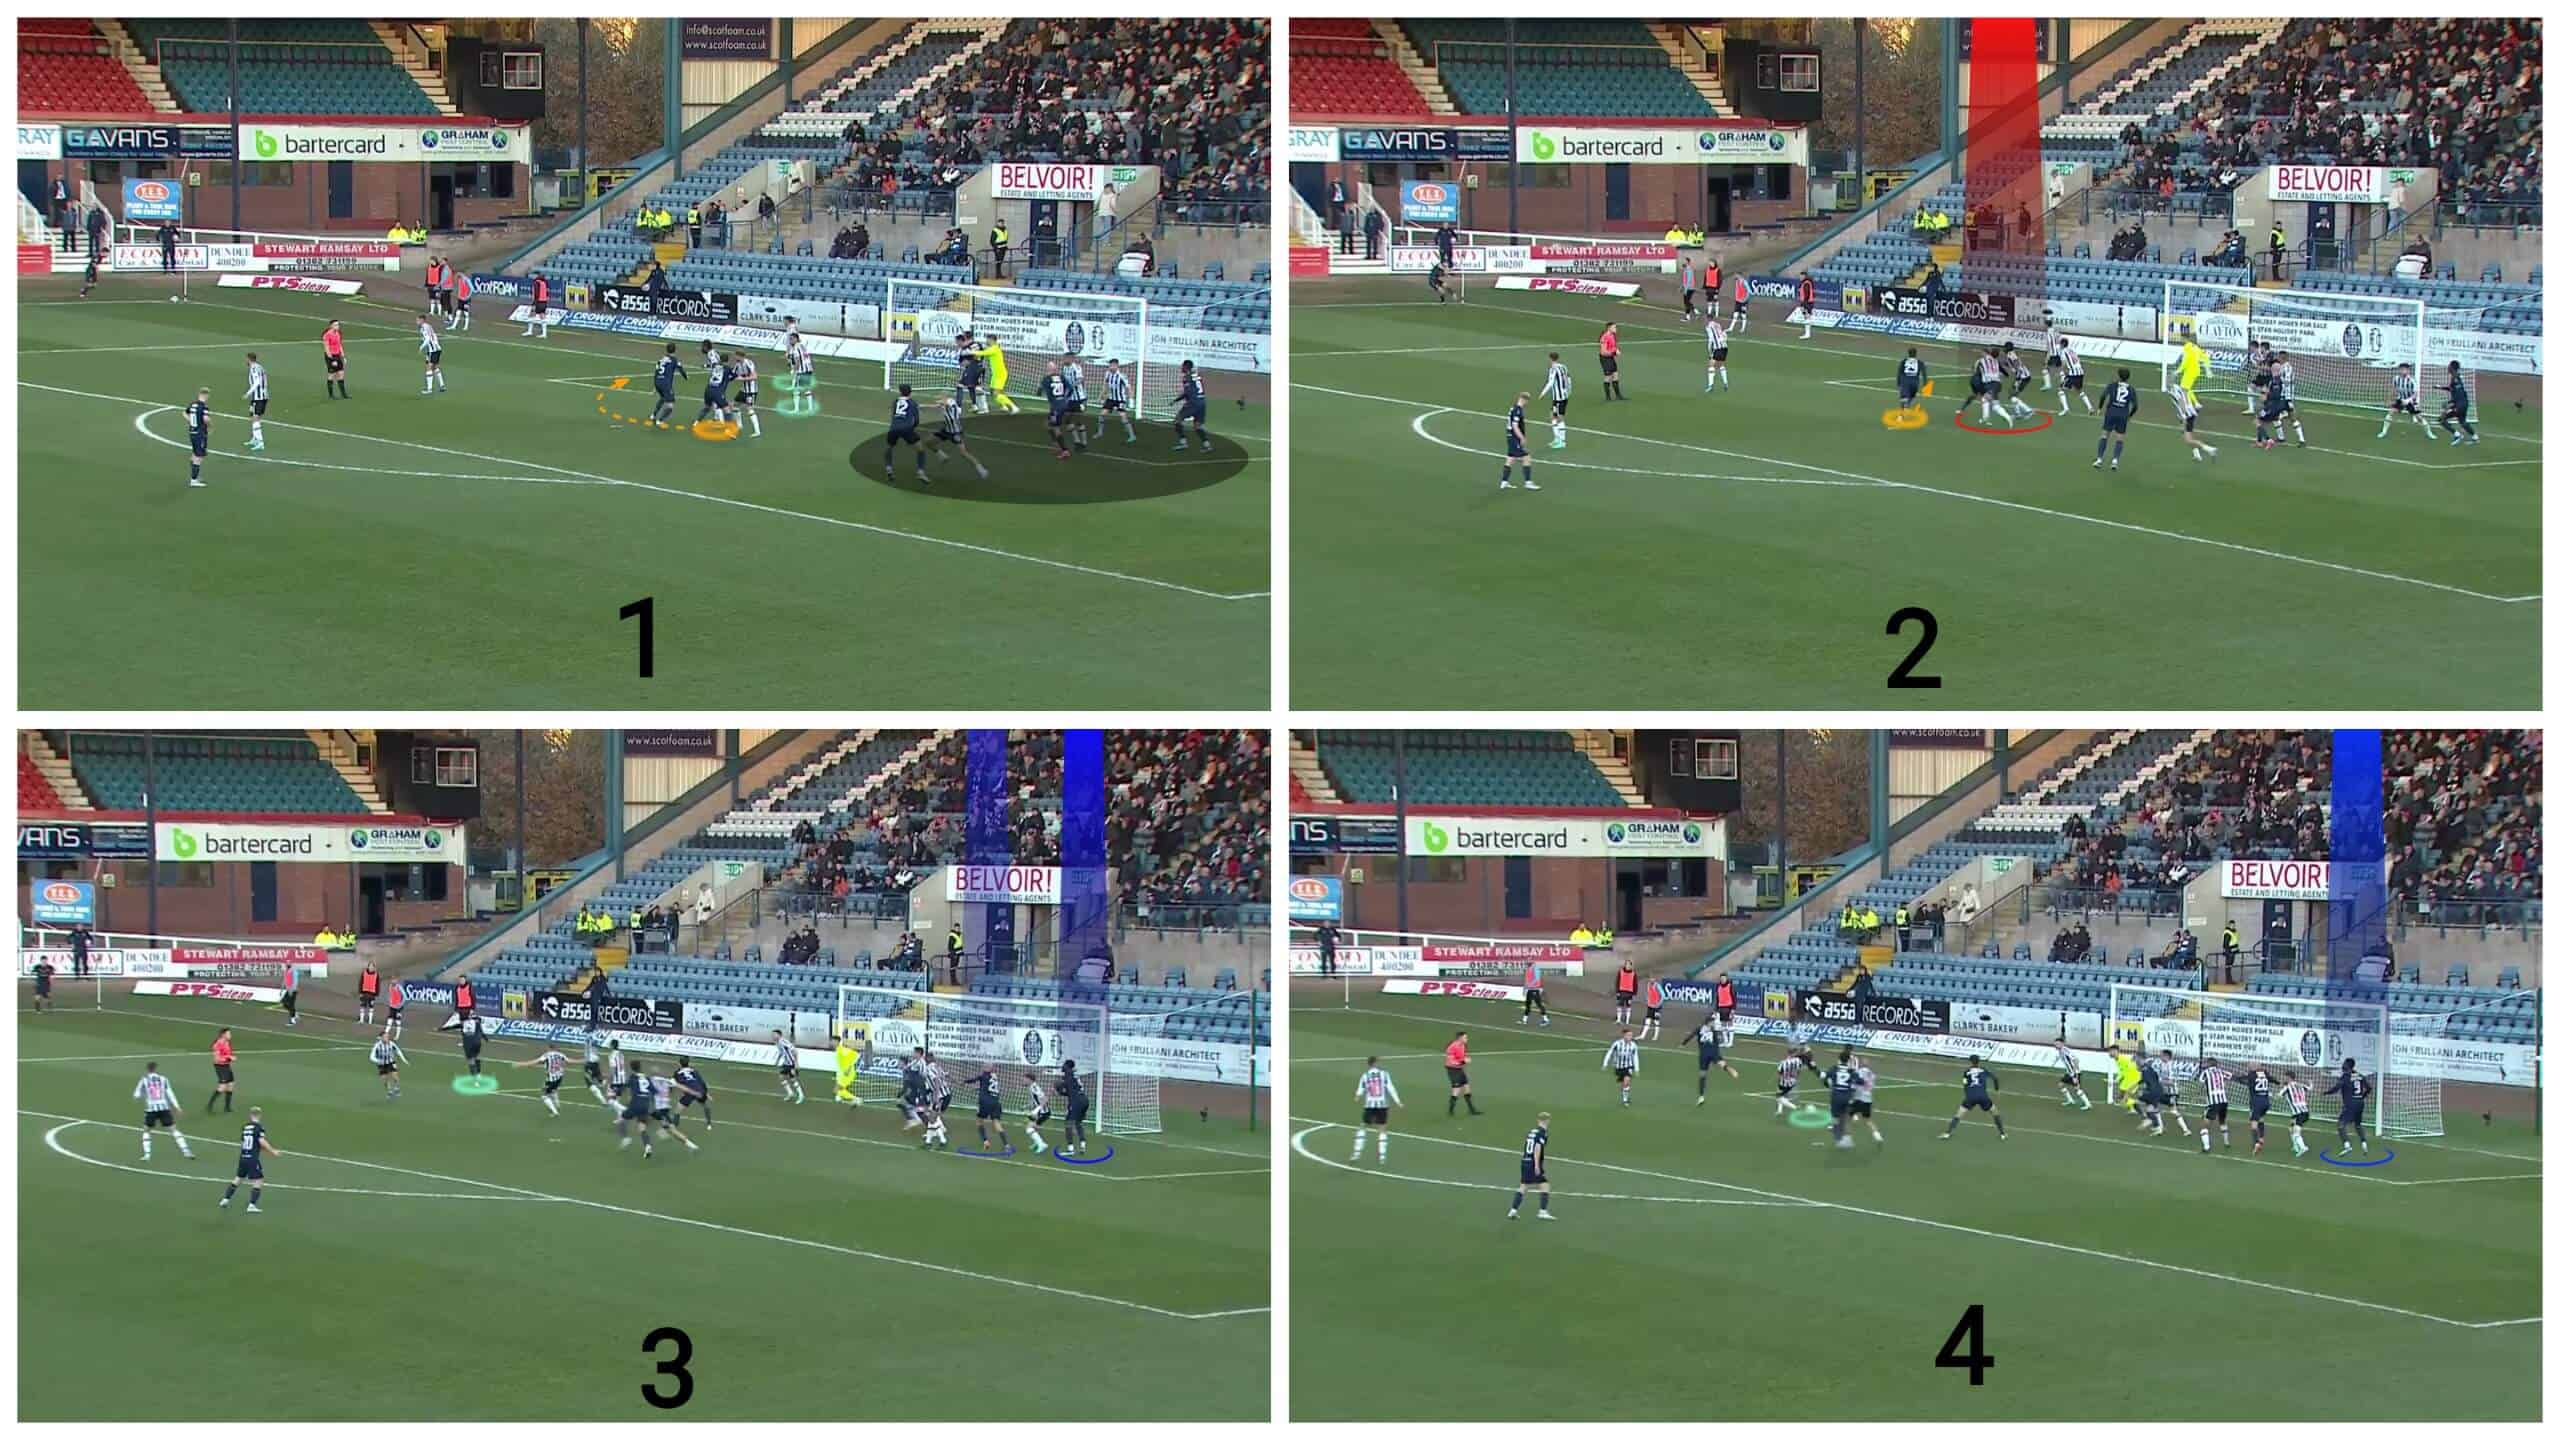
Traffic in front of the goalkeeper
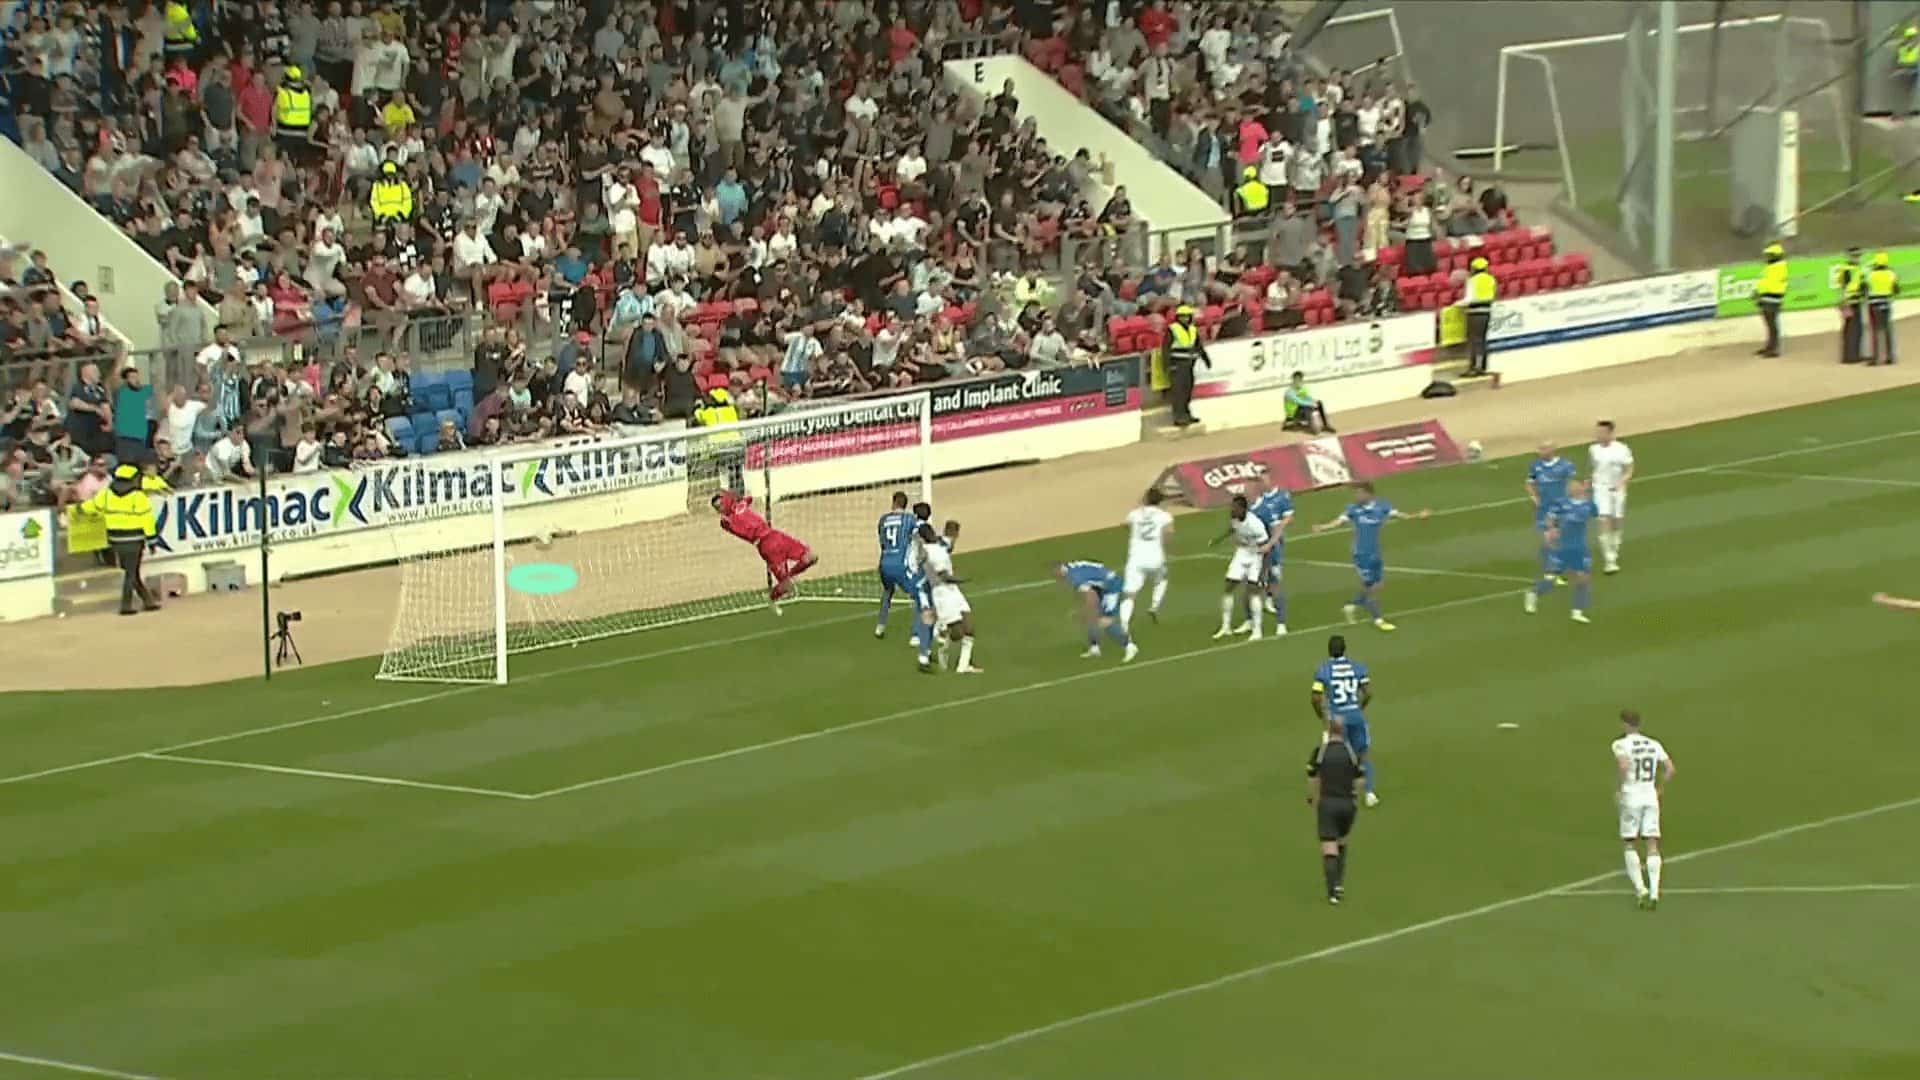
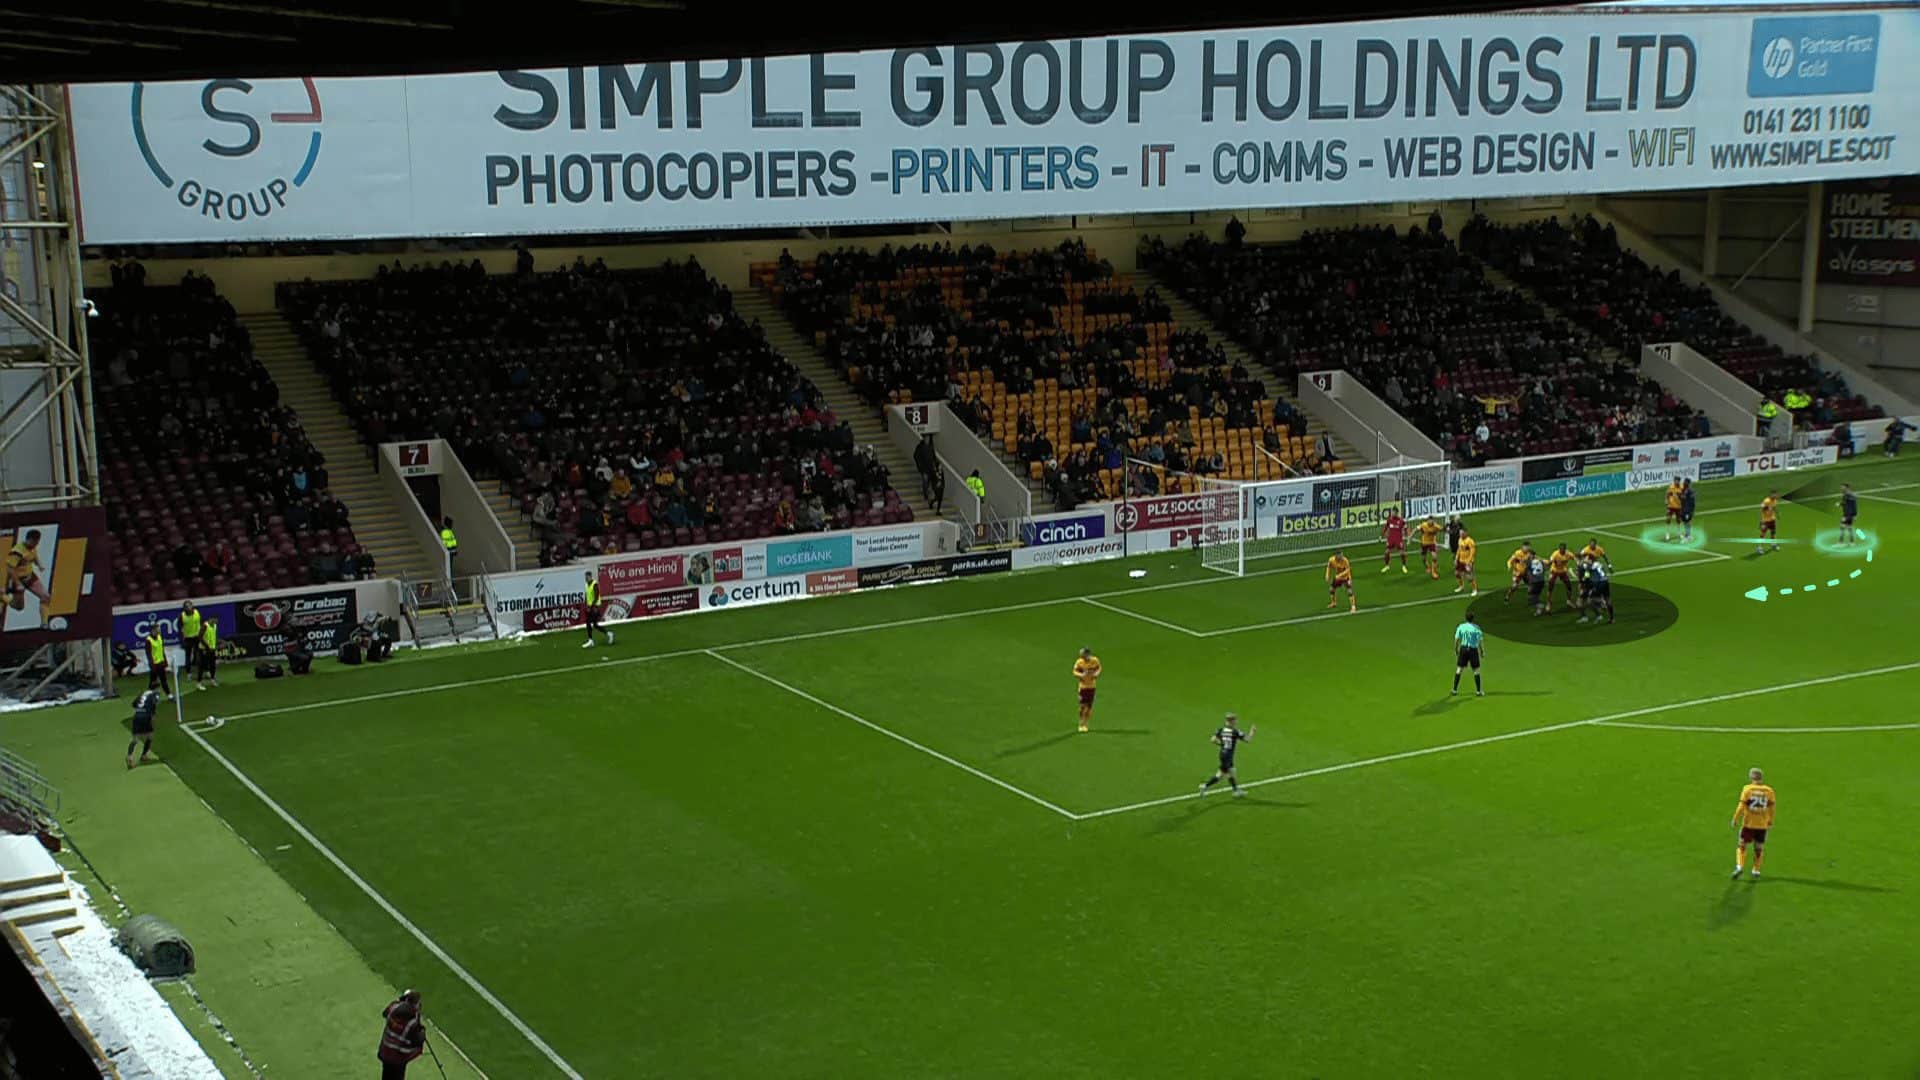
They have a different strategy as a variation. They ask many players to stand near the goalkeeper, causing traffic near the line. We can track these players, seeing that two players in arrows move to the near post. In comparison, two players stay in the middle, blocking the goalkeeper and preventing him from getting out to claim the ball, so the last attacker pushes his marker to the targeted area at the centre of the goal.
The result is a goal, as shown below.
Short corners
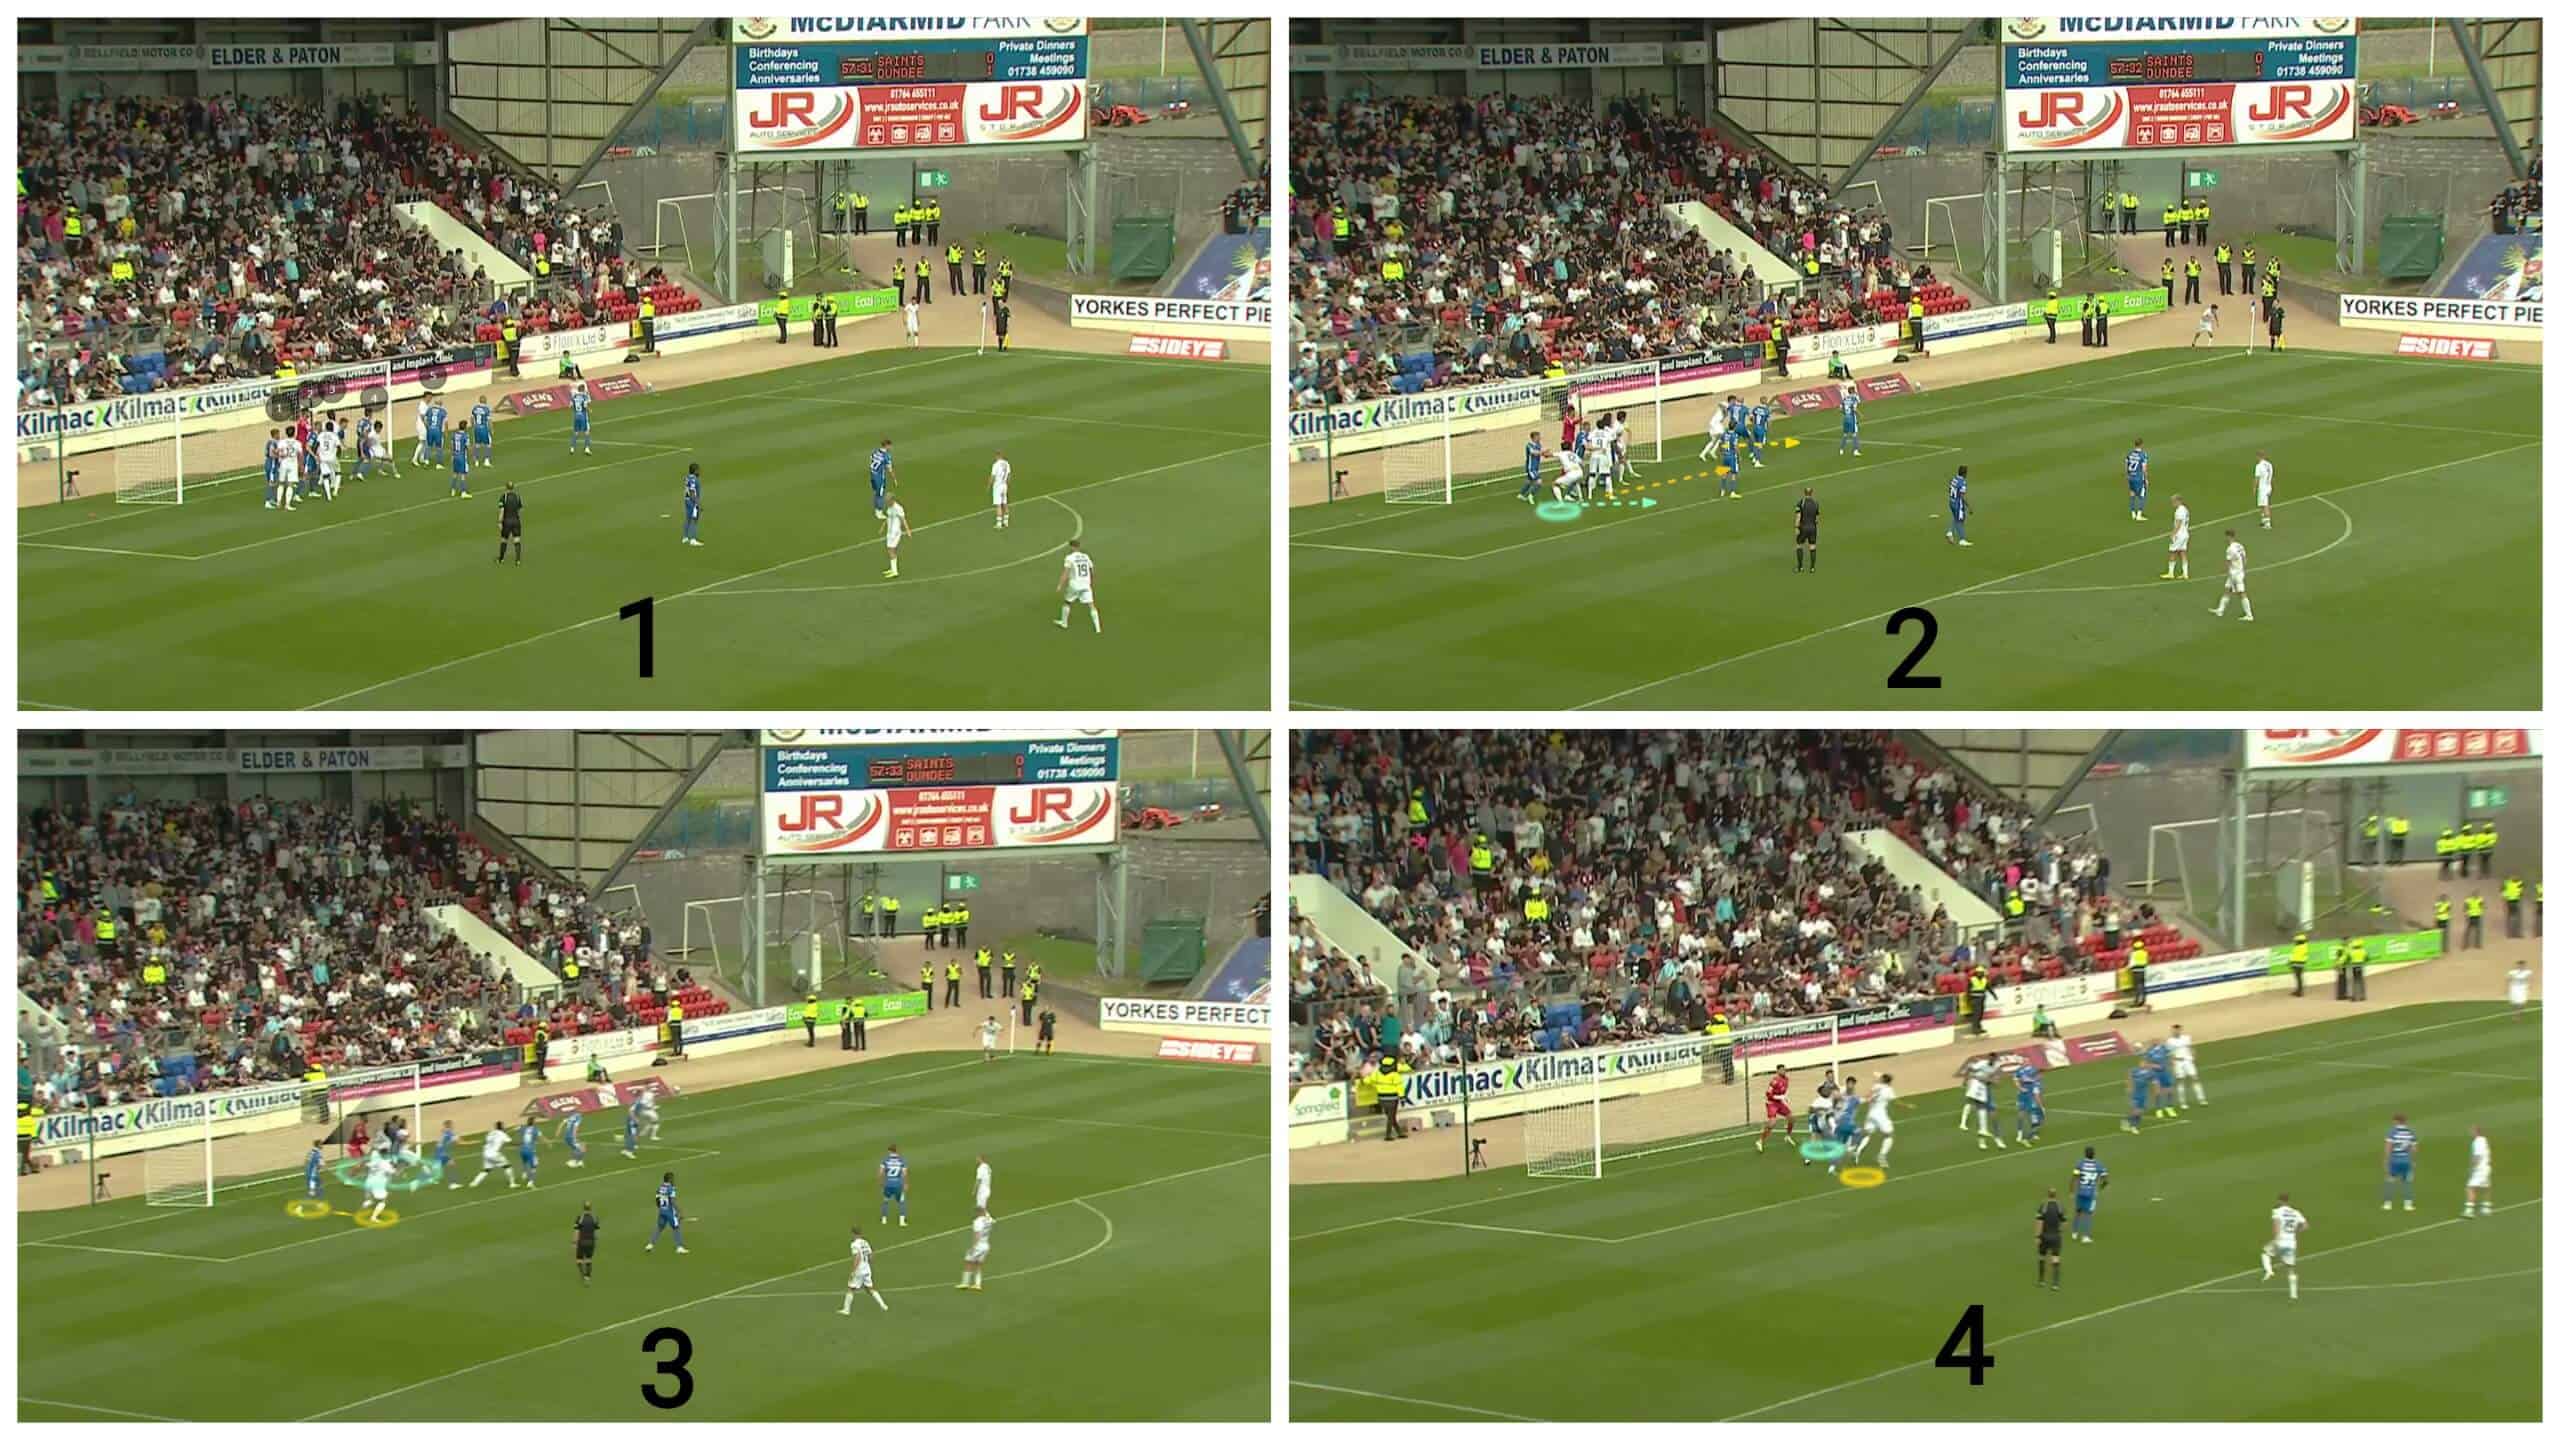
They also use short corners excellently in many ways. The first one is to stand without short options, pretending that they will cross the ball directly to the box, but a player comes suddenly from the back in the large area below. This way pays off when the opponent doesn’t put a permanent short-option defender depending only on the rebound defender.
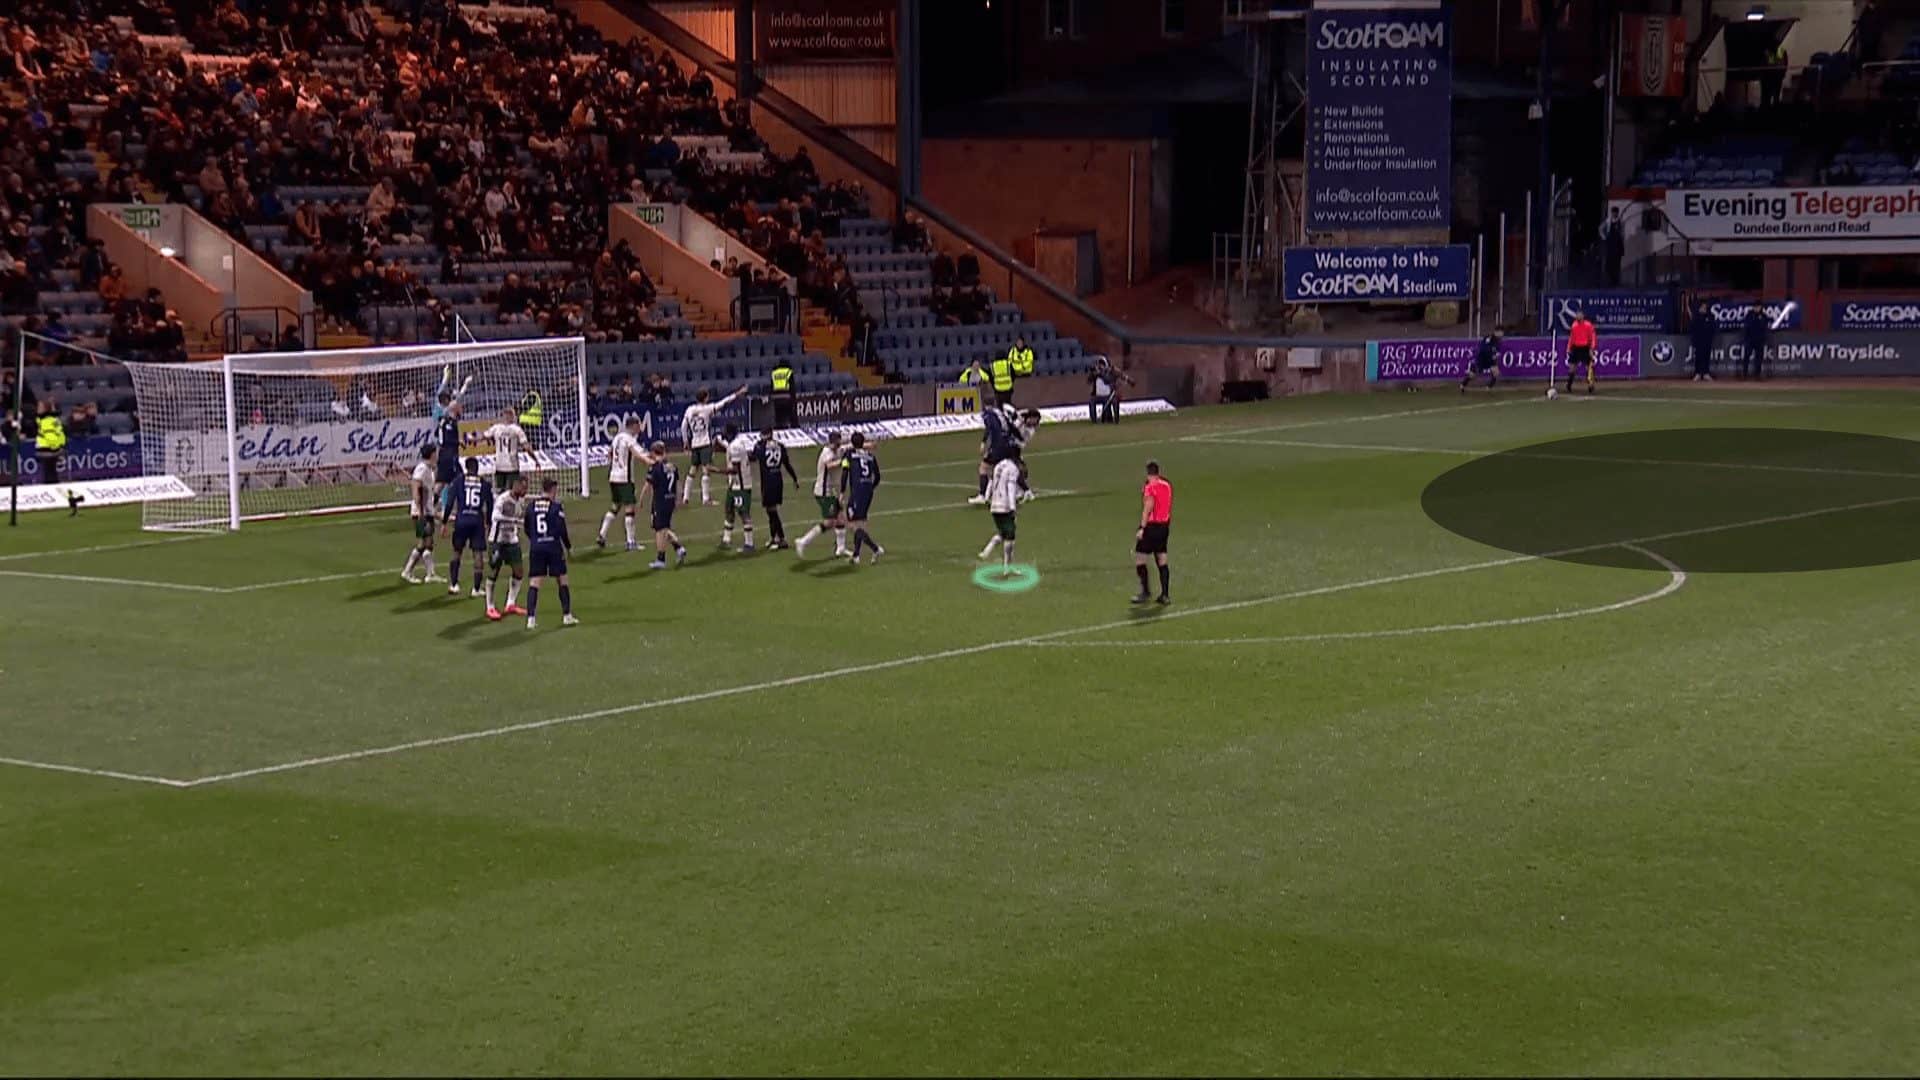
The player receives the ball easily in a large area, so he shoots the ball, but the goalkeeper saves the ball, as in the two following photos below.
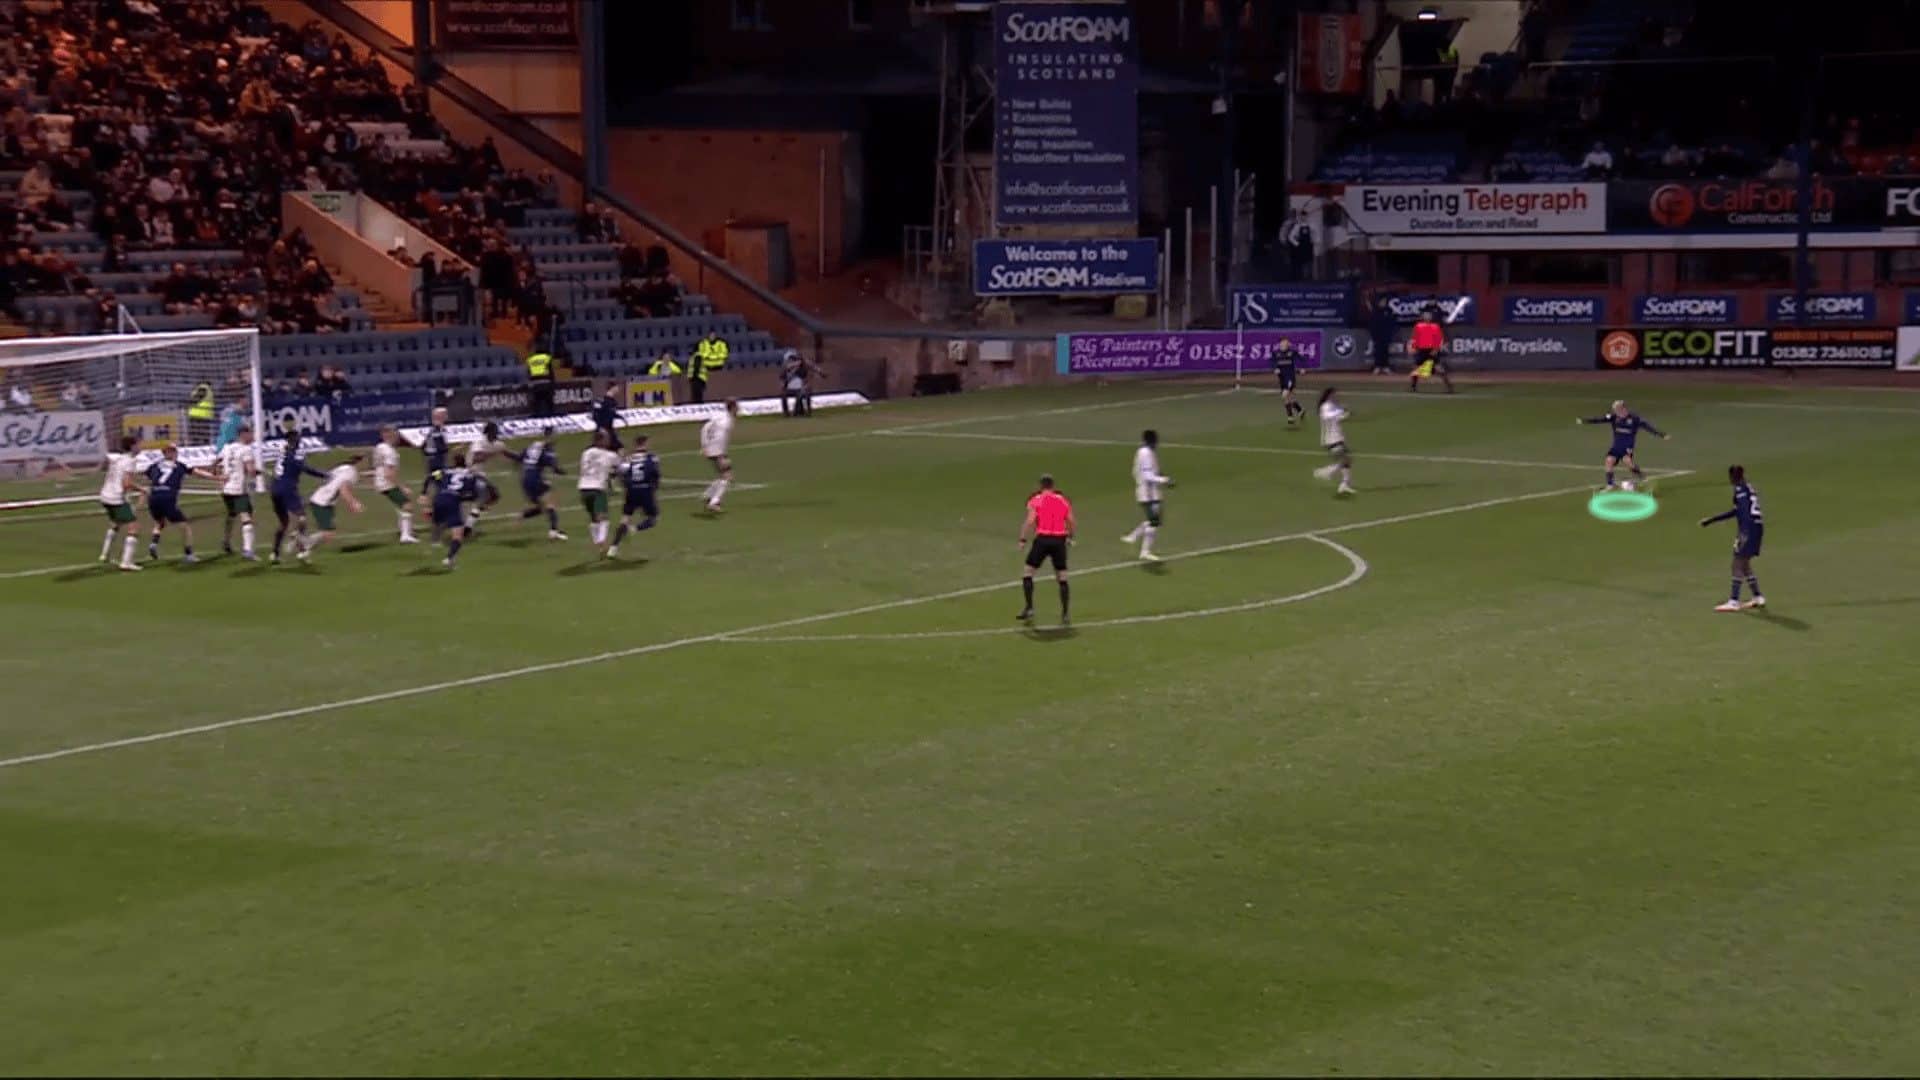
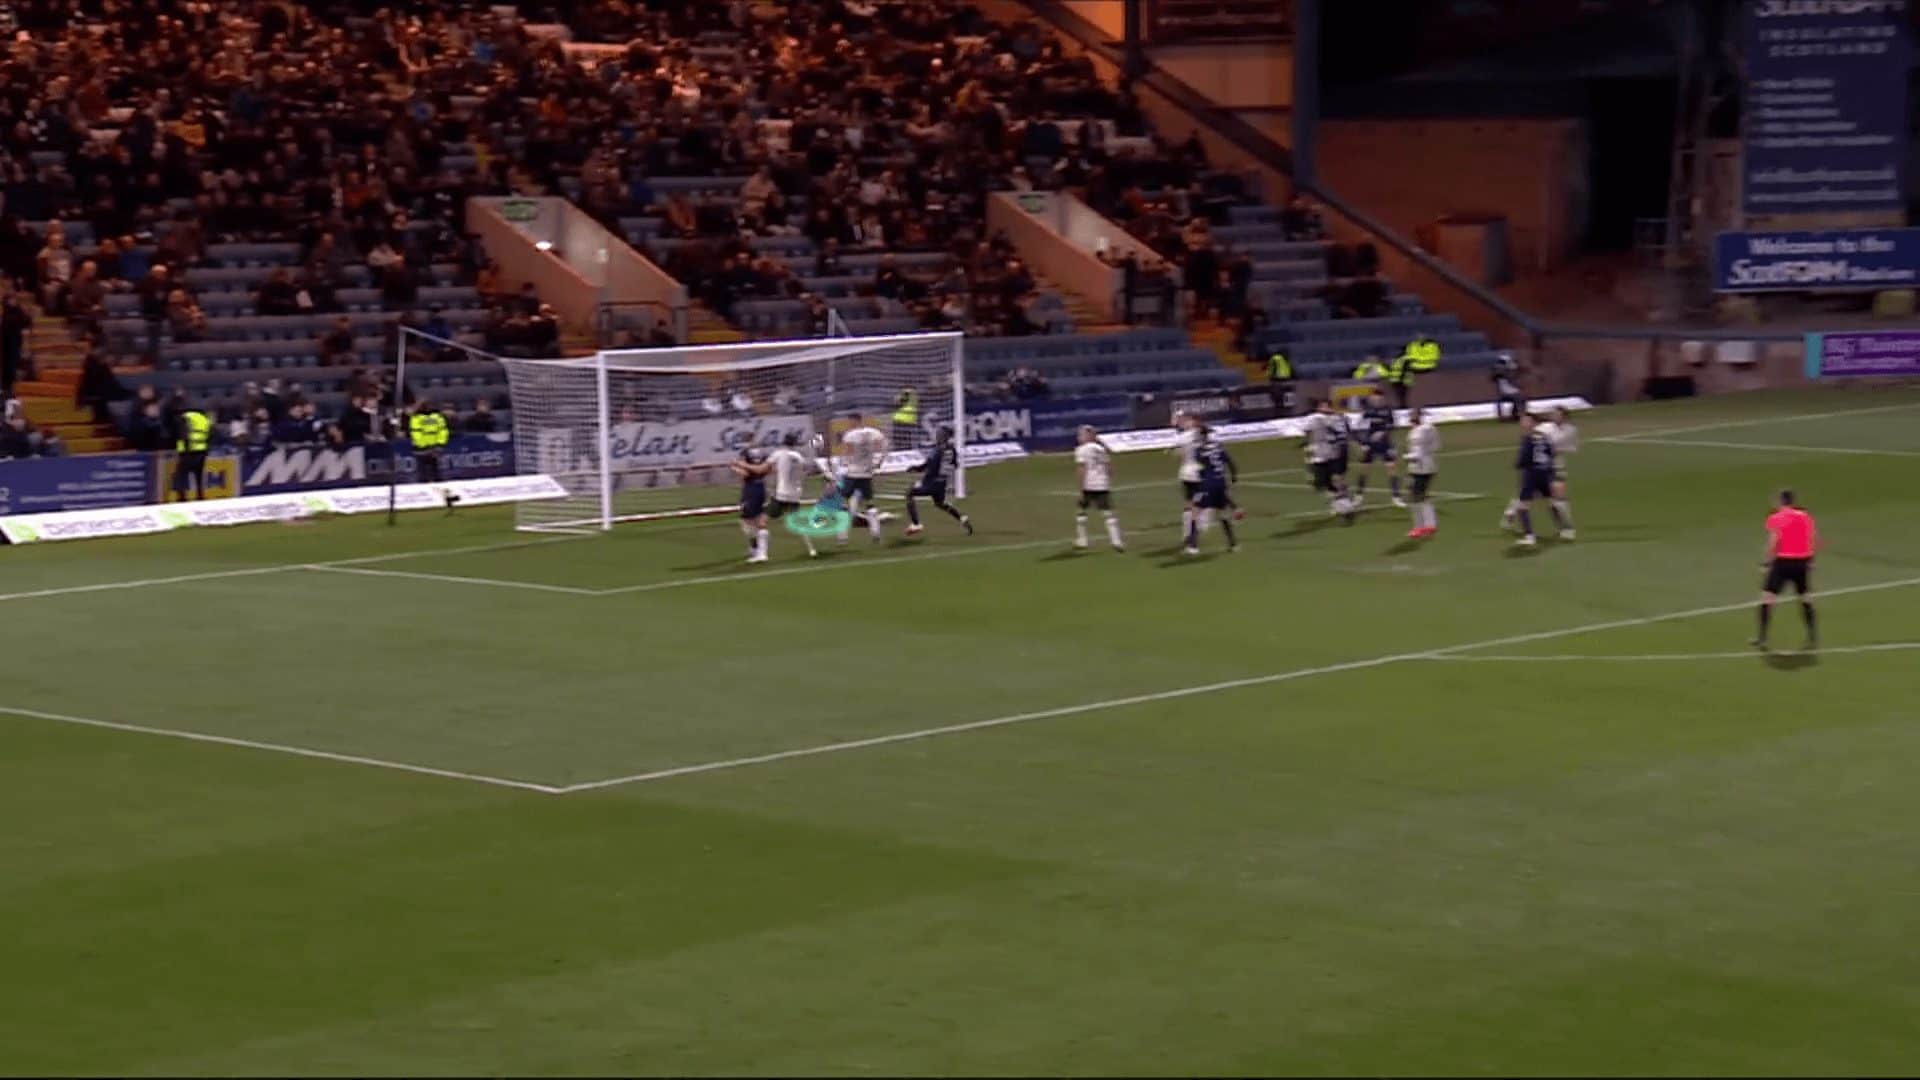
If the opponent puts a short-option defender, they ask the short-option attacker to move towards the line to drag this defender to empty the space for the player coming from the back to shoot, exploiting the long time the zonal player takes to help.
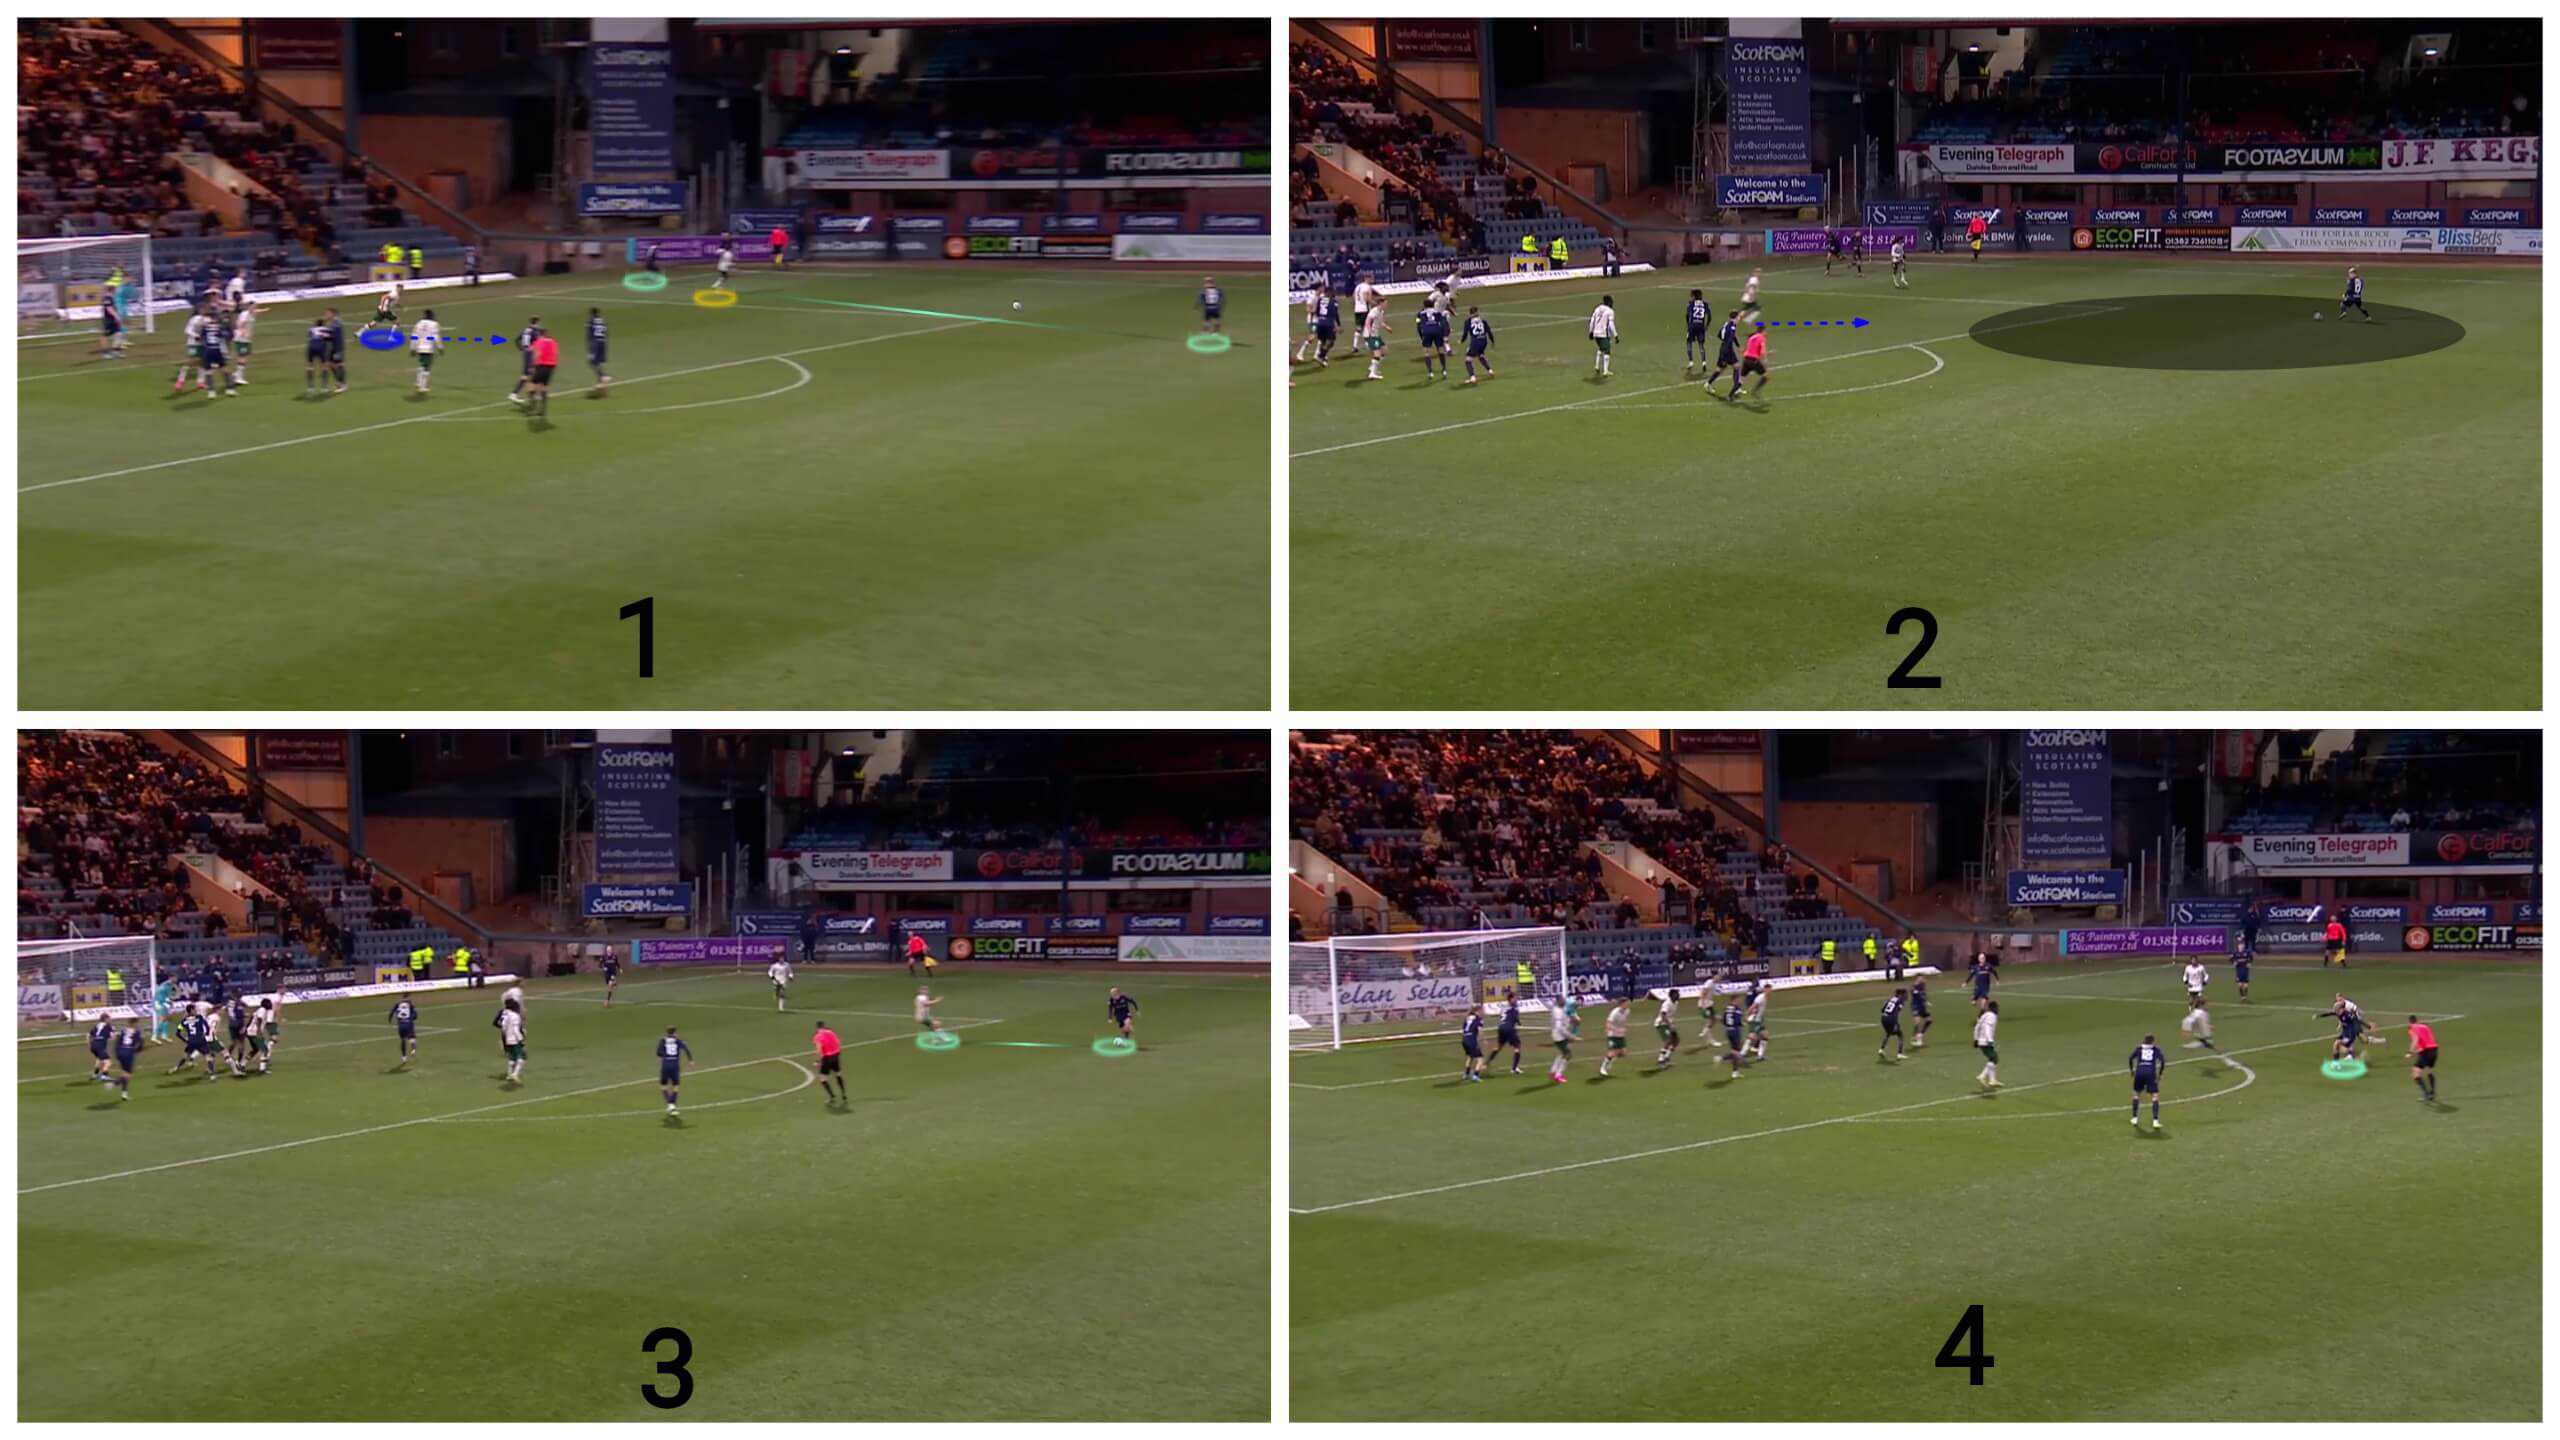
But the shot goes above the crossbar.
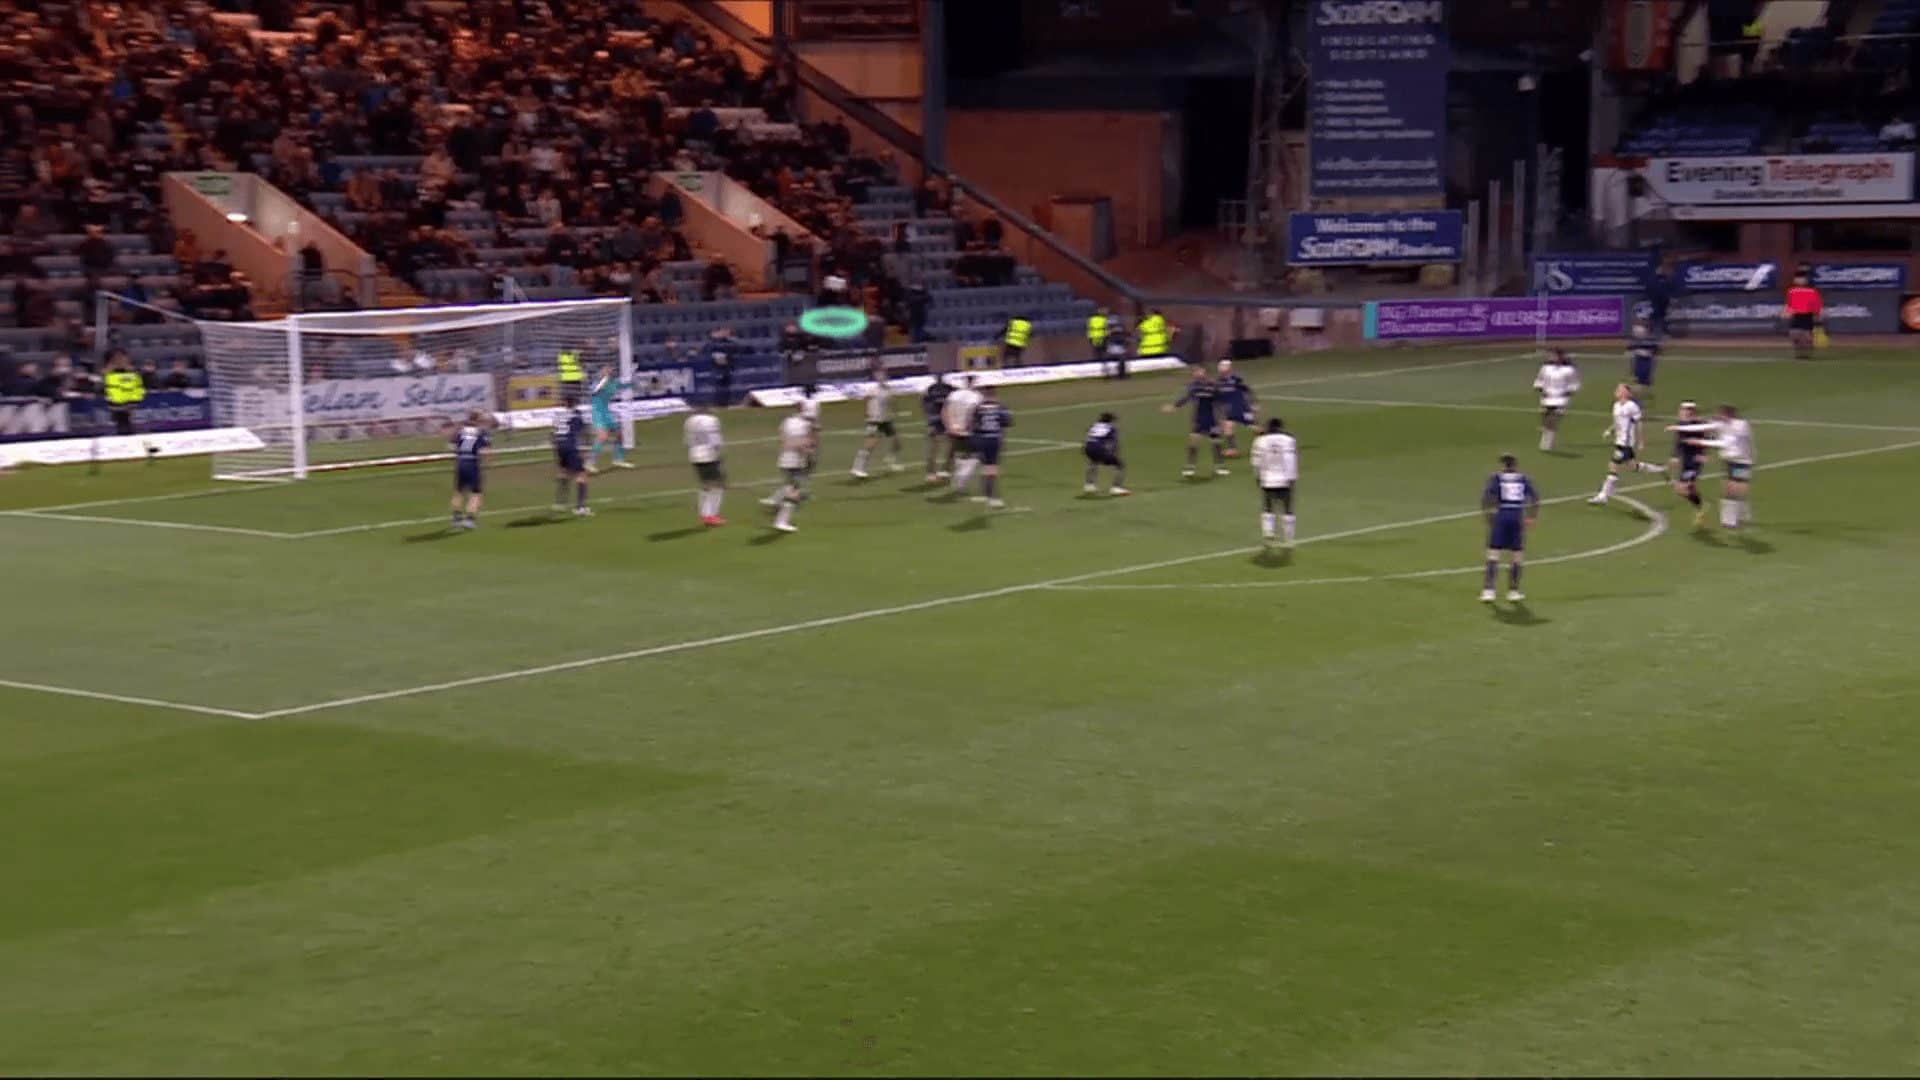
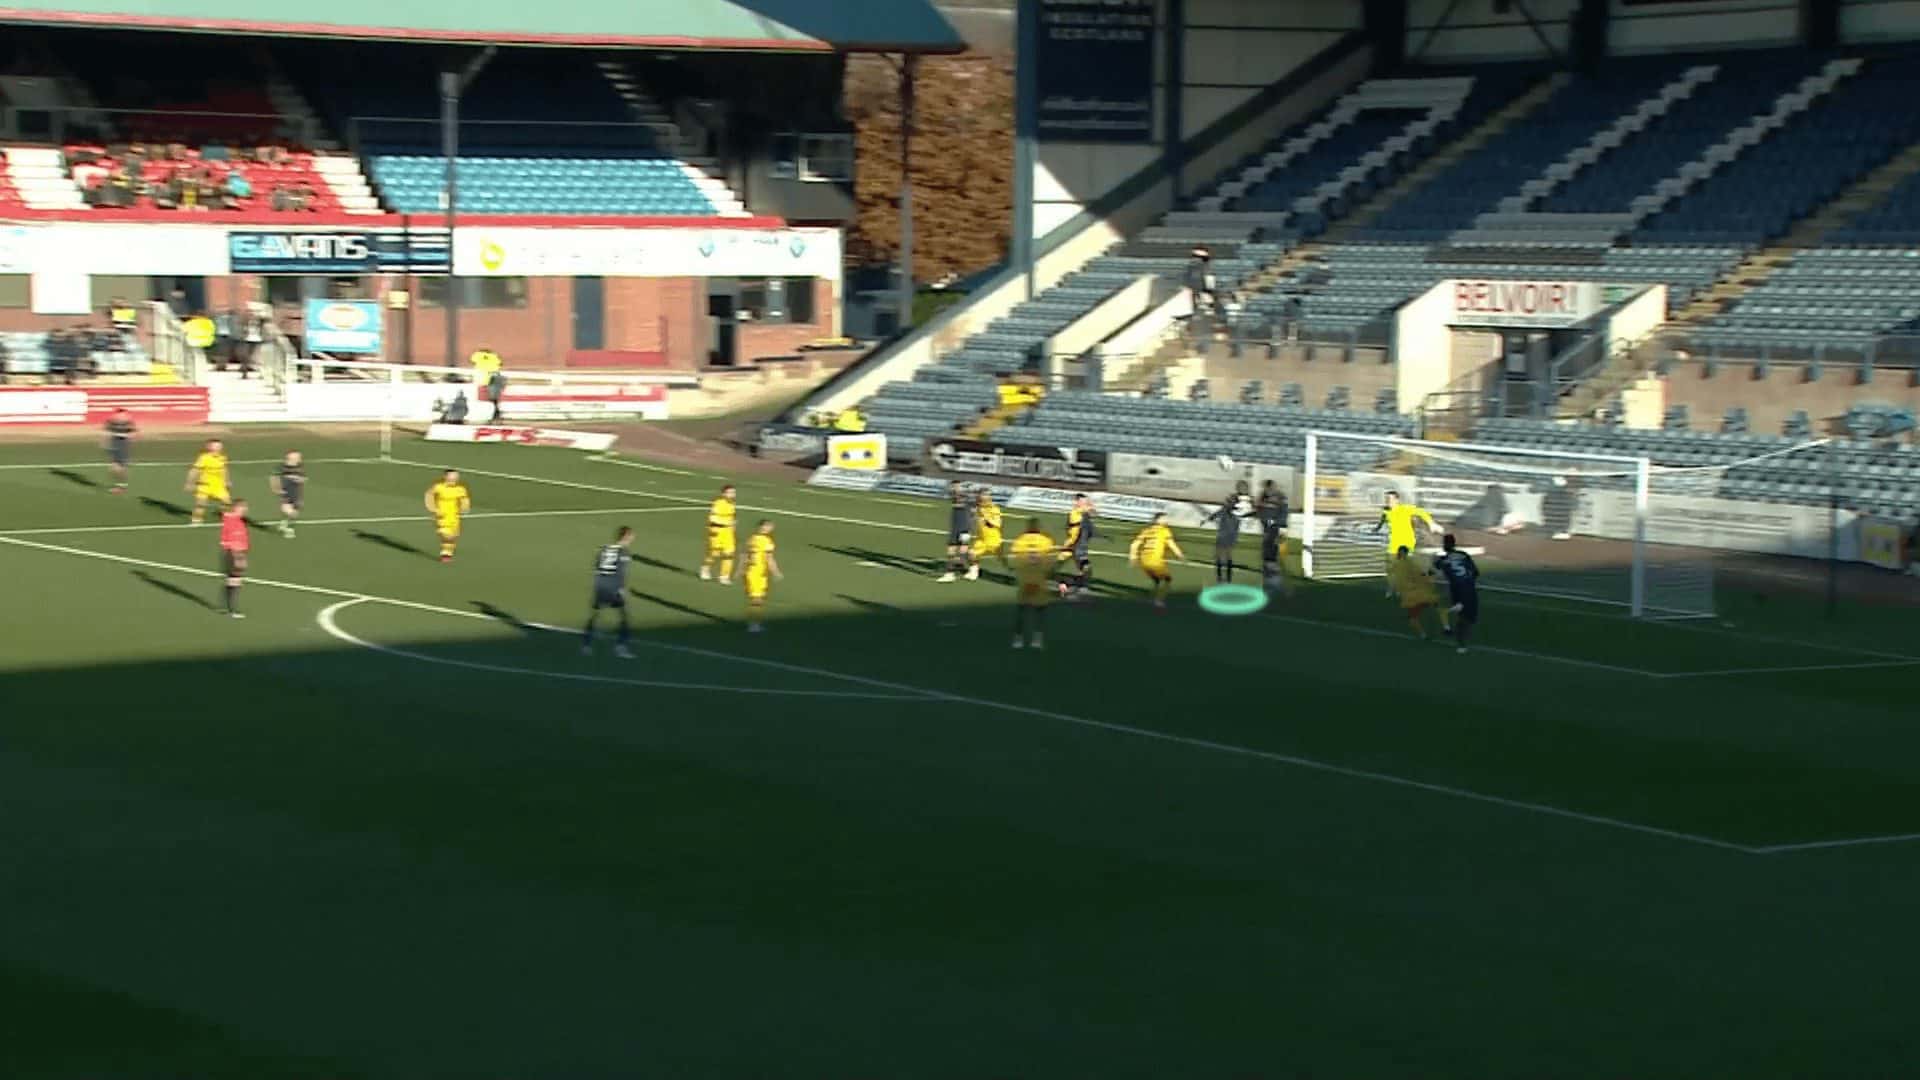
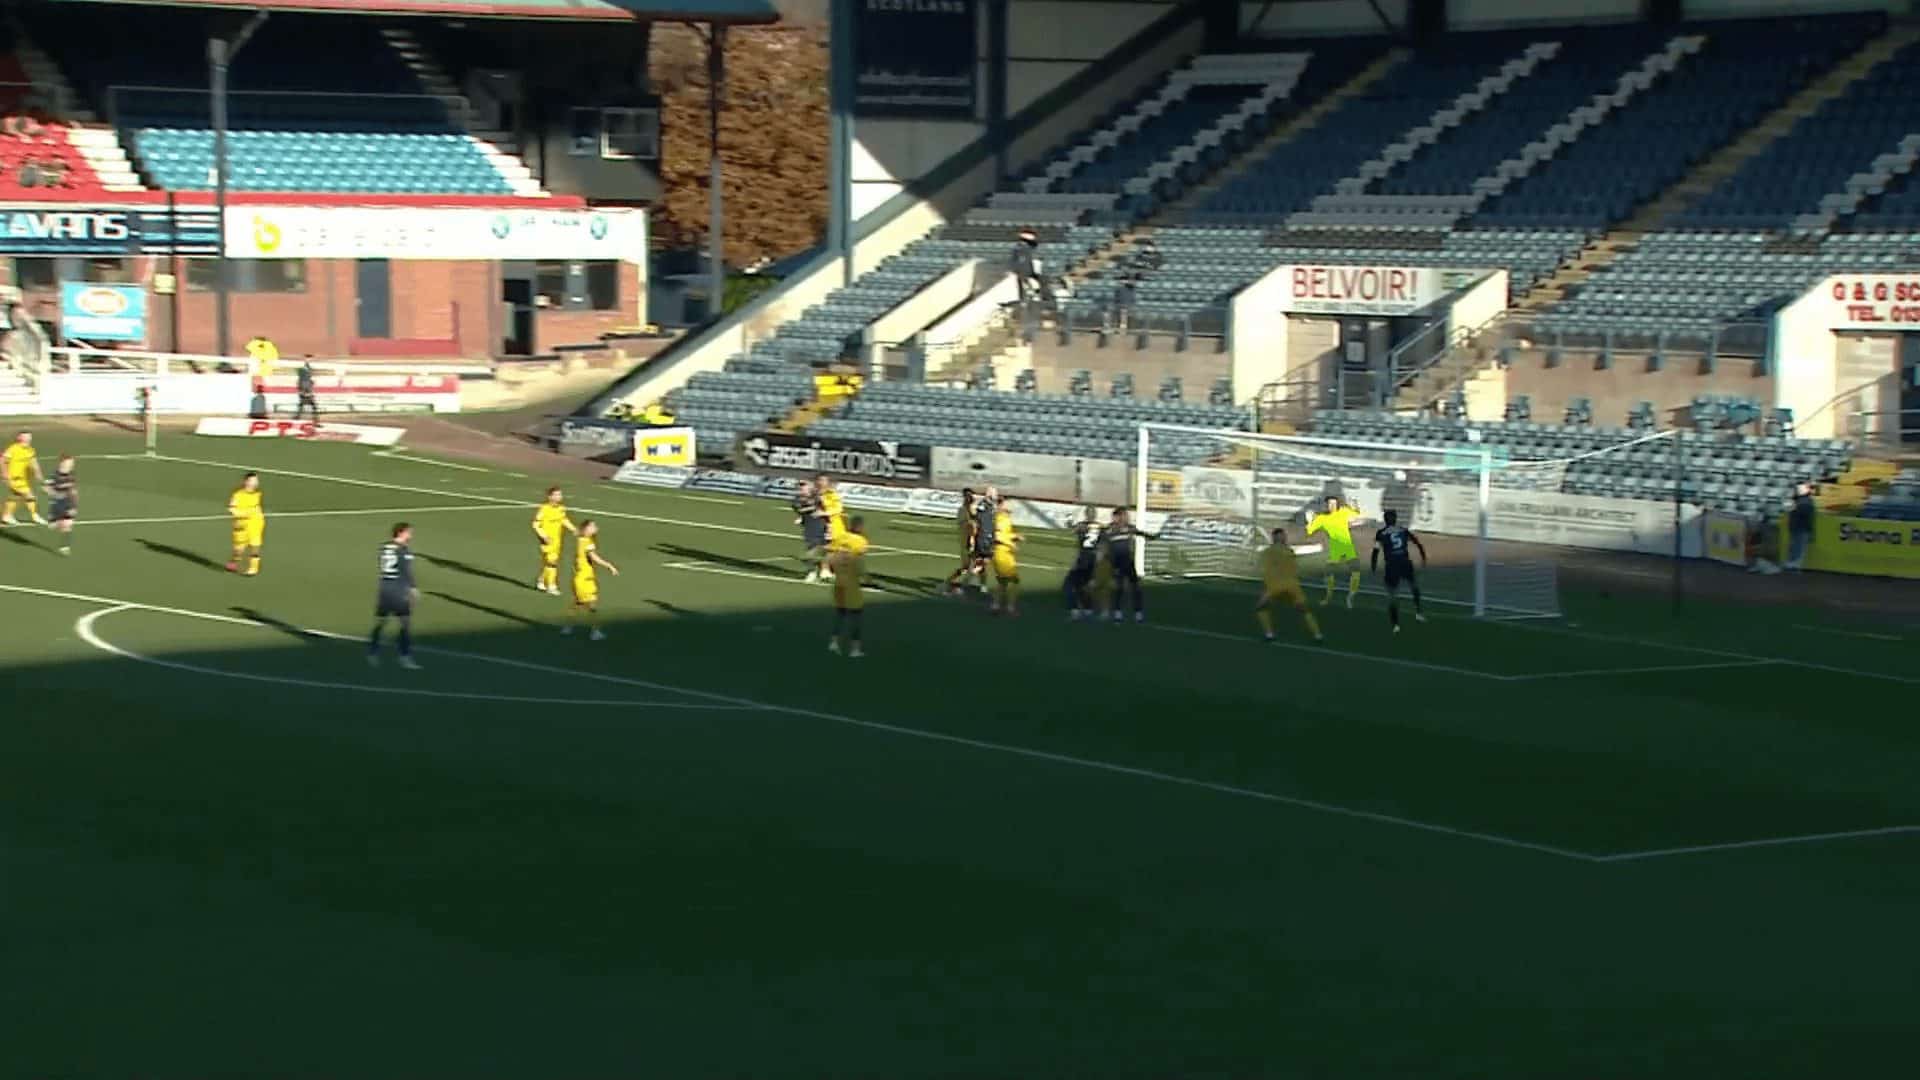
If the opponent puts two short-option defenders, they have no problem creating a 3-v-2 situation. Then, they exploit the disorganised rearrangement while the defence line goes up, giving all the attention to the ball and leaving their markers behind them without an off-side trap.

The plan works, so an attacker succeeds in kicking the ball with his head, but it goes above the crossbar.
Conclusion
In this analysis, we have explained the reasons for Dundee’s distinction in the offensive corner kicks, which made them the team in the Scottish Premiership scoring goals from corner kicks and scoring 30 per cent of their goals from corner kicks.
In this set-piece analysis, we have also explained how diverse they are to surprise the opponent and achieve the principle of variation, as they directly target the area directly after the far post. Sometimes, they target the far post indirectly through using flicks. They also have a usual tactic of crowding in front of the goalkeeper, and sometimes they rely on short corners.



Comments