Two of the former Premier League teams plying their trades in the Championship, Fulham and West Bromwich Albion, faced each other in match week seventh. Fulham had had an average start in their first full season with manager Scott Parker, with ten points picked up from the first six matches. The overhaul summer has brought them some decent additions and their fans expected them to pick up their form when they welcomed West Brom.
For Slaven Bilić’s side, they were the only unbeaten side after Swansea and Charlton lost their ties just a few moments earlier. But their record of three draws had raised some questions among the fanbase about their consistency in those matches. And they have continued that streak by adding to their tally of draws and unbeaten matches with a late salvage goal from centre-back Semi Ajayi.
This tactical analysis will provide an analysis of the draw between Fulham and West Brom. Meanwhile, using statistics, we will point out the standout tactical points of both teams and what aspects of their tactics they could improve.
Lineups
The former Tottenham player lined his side up in a 4-3-3 formation. Harry Arter was Fulham’s only significant absence after he received a red card against Cardiff City. He was replaced by another Cardiff loanee in Bobby Decordova-Reid (or Bobby Reid as you might have known him from his time at Bristol City). Provided the width for Fulham was Reid’s teammate at the Ashton Gate, Joe Bryan, youngster Steven Sessegnon as wing-backs and the winger duo of Anthony Knockaert and Ivan Cavaleiro.
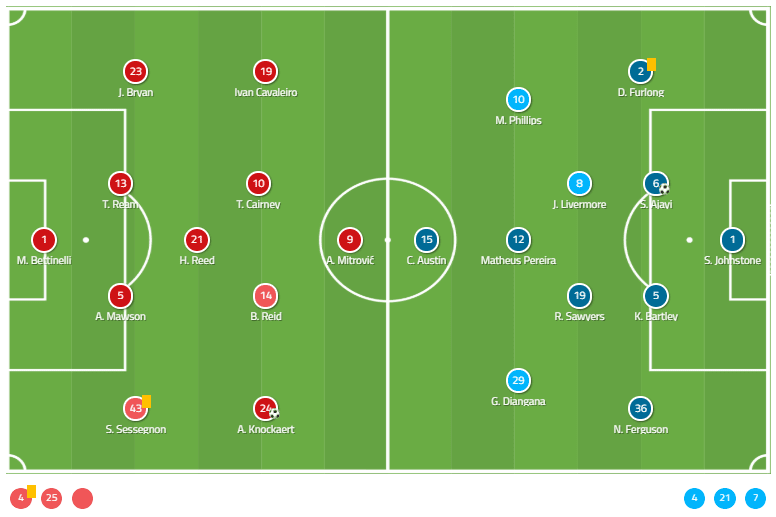
Bilić chose the 4-2-3-1 formation for their trip to Craven Cottage, London. Their pacey attacking line that consisted of new signings such as Grady Diangana, Matheus Pereira and target man Charlie Austin continued to be his first choice. Former Arsenal defender Kieran Gibbs remained doubtful before the match and he was replaced by youngster Nathan Ferguson. Ahmed Hegazi was also another absence for West Brom as the Egyptian defender was still recovering from the ankle operation that he suffered from the African Cup of Nations.
Fulham’s style of play
On the ball, the home side created a four-man build-up to circulate the ball inside the middle third and started to progress it up the pitch. This required the involvement of two central defenders in Alfie Mawson and Tim Ream. Both were comfortable with the ball and the latter could even dribble with it at his feet. They were the first player to receive the ball from goalkeeper Marcus Bettinelli from the new goal-kick strategy and then moved it into the middle third.
There, they linked up with two flying wing-backs on both sides of the pitch and created a passing block on the edge of the halfway line. Sessegnon and Bryan all tended to make overlapping runs into the opposite half and joined the attack. Still, on a few occasions, they remained in their respective positions to offer passing options and picked up the ball to send it towards the attackers.
At times, even central midfielder Harrison Reed could drop deep into space in front of Mawson and Ream to support the build-up. As a playmaker, the Southampton loanee could pick up the ball from deep and made passes to the teammates who positioned inside the final third. He acted as a link between that passing block and the attacking players upfront while remained as one of the key players in the team’s transitioning process by maintained his level of passing and positioning.
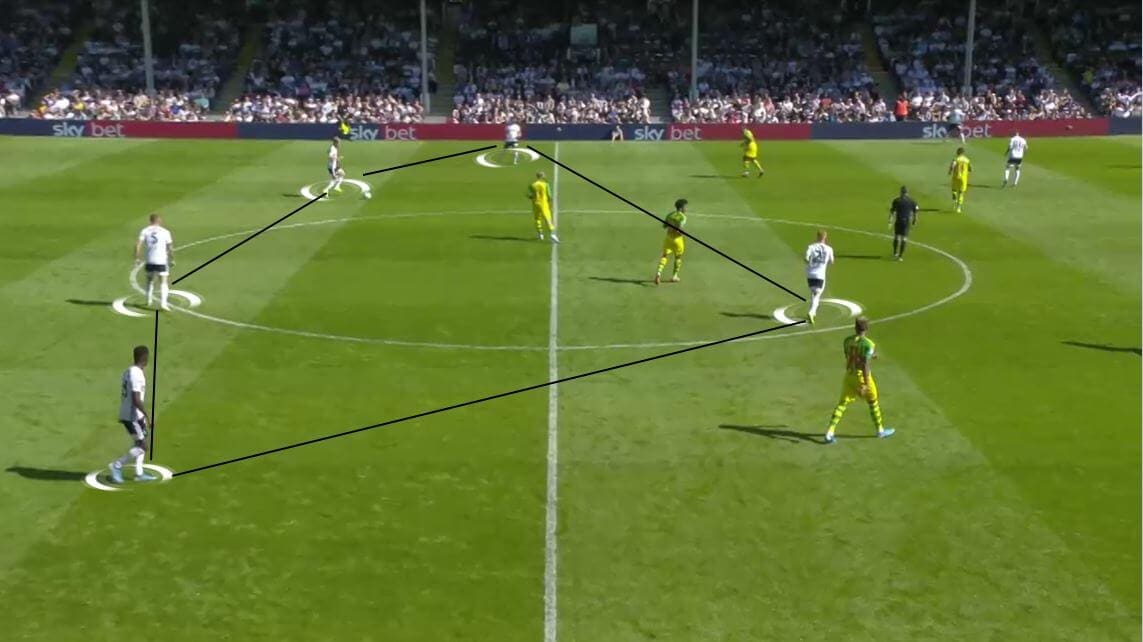
But under the pressure came from West Brom, Fulham players were sometimes got pushed towards the byline with their aim of disrupting the build-up. To counter against this strategy, they created a passing triangle using the positioning of their defenders and the flexible movement of Reed. Inside one of the half-spaces, a centre-back and a wing-back would combine with Reed to bypass the pressure came from the opposite attackers.
In case they were outnumbered in that area, the farthest centre-back would position himself away from the overloaded area. At the same time, he must maintain sufficient distance with his teammates to receive the clearance and continue the build-up process.
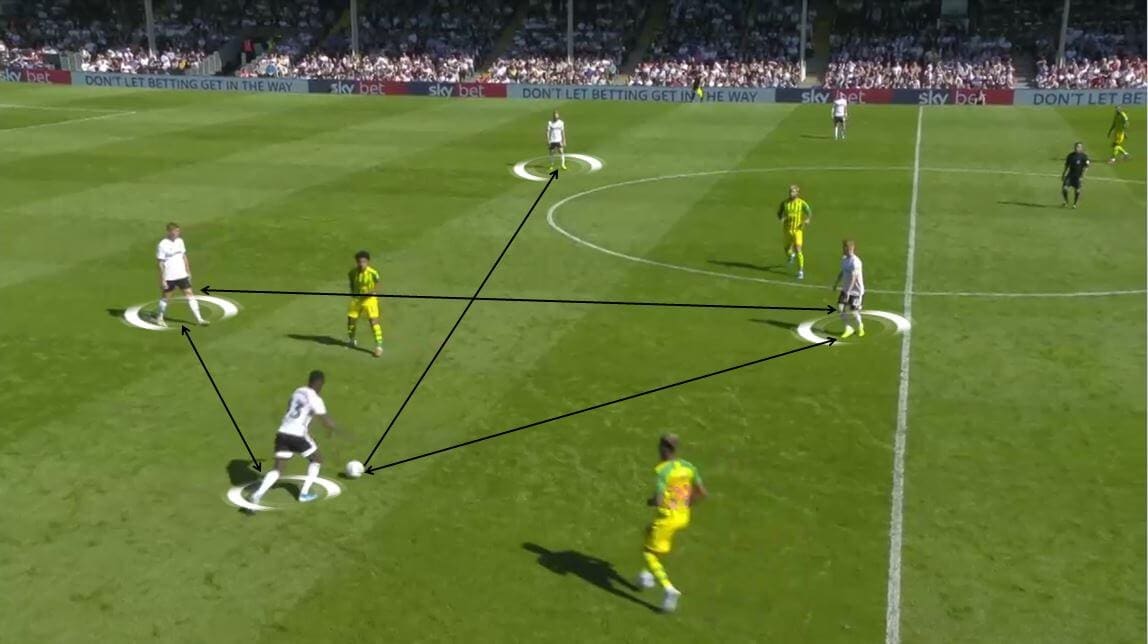
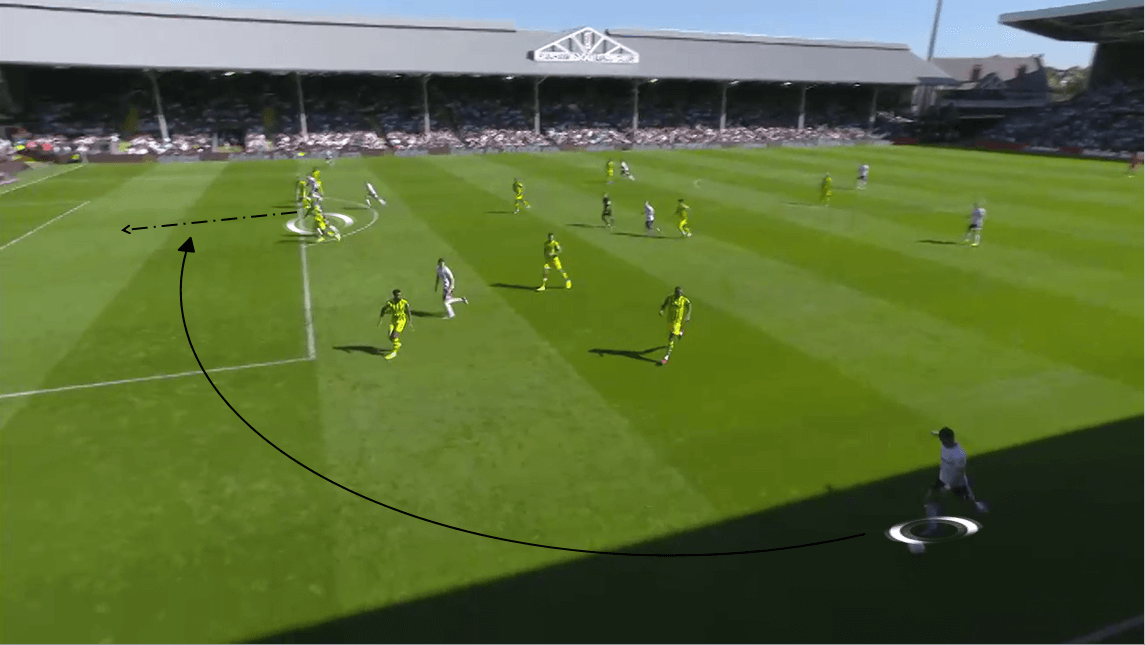
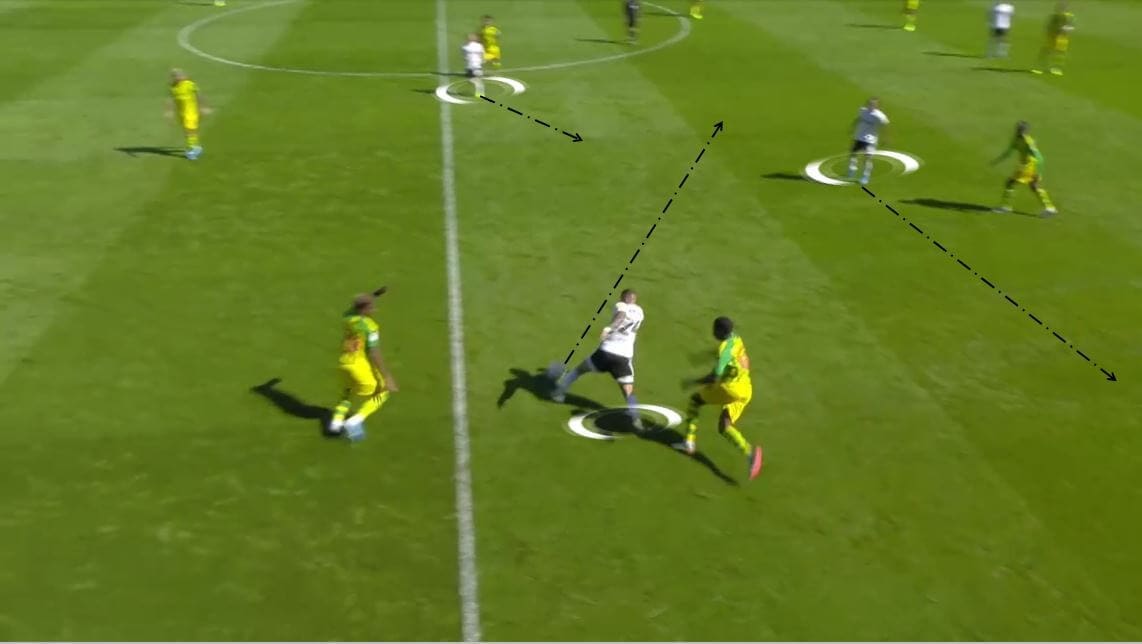
At the other end of the pitch, Fulham had a variety of attacking options that they could choose from. One of them was building their attacks down both flanks using the pace of two wing-backs and the positioning of two wingers. After receiving the ball from the centre-backs, either Sessegnon or Bryan would dribble up the pitch into the space that the winger left behind when they cut inside.
There, the ball-carrying wing-back sent an early cross into the box that would head towards the central area or the far post. This allowed the late arrivals to pick it up and slotted it home in a more efficient way as their movement wasn’t caught the attention of any defenders. It was a very effective method for the home side as they were able to threaten Sam Johnstone’s goal on more occasions. Still, most of their shots weren’t threatening enough that could make the former Manchester United goalkeeper worried.
One of the reasons that they were able to create so many chances towards West Brom’s goal was through quick attacking transitions. It was also the reason why being a wing-oriented team throughout the match benefitted Fulham when they attacked. By using a mezzala in Reid and a playmaker who occasionally drifted wide in captain Tom Cairney, they had more players inside the wide-area to create short combinations in between them.
When the wing-back overlapped and the winger tucked inside, it was capable to vacate the gaps out wide and therefore, allowed the combination to occur efficiently. At times, Knockaert or Cavaleiro had the option of dribbling inwards with the ball and encouraged the nearest central midfielder or the striker to shift wide. This intelligent positions interchanging strategy confused the opposition’s defenders as they didn’t know who to mark, the ball carrier or the potential receivers around him.
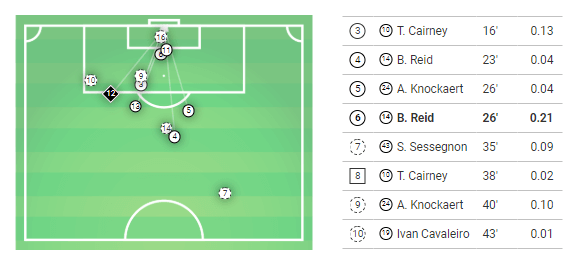
On their shots map from this match, they registered a total of seventeen shots and even managed to get six of them on goal. One more thing that is noticeable from the graph is the tendency of the shots that came from the left-hand side. Five of those shots that they made during the game came from Bryan and Cavaleiro’s side.
But there is one problem remained until the whistle was blown. Their xG rating isn’t high enough and it is inverse to the number of chances that they created. With that number of chances and especially the range of it, you would have expected Fulham to score more than two goals. Still, most of their shots aren’t highly-rated in xG as the highest one was Aleksandar Mitrović’s chance at the 82nd minute, which stood at 0.29.
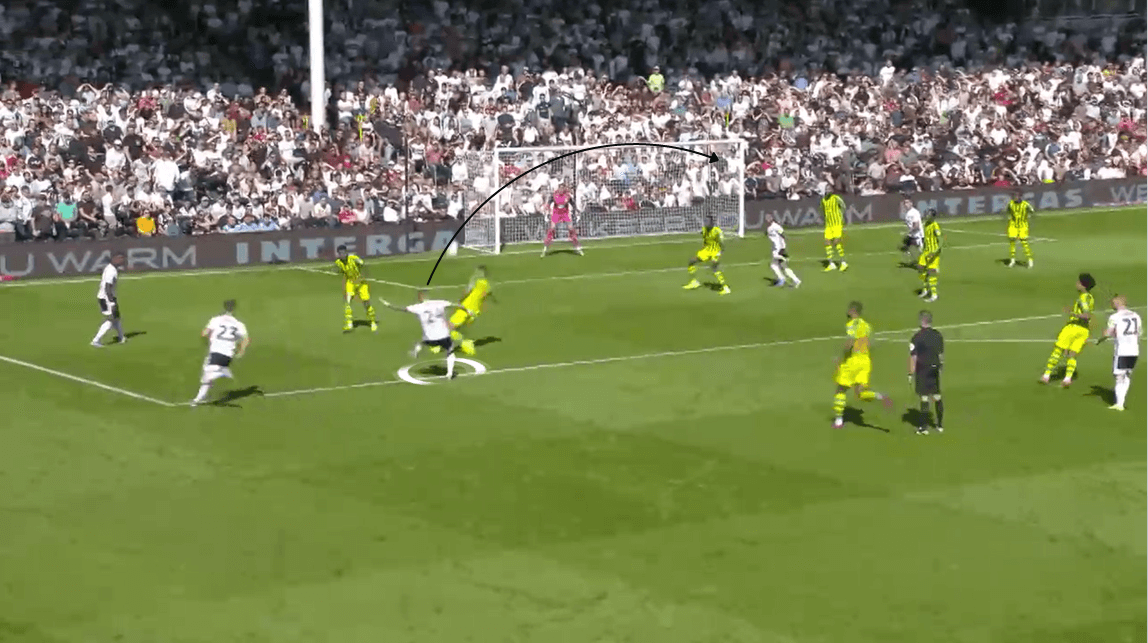
Knockaert’s opening goal of the game wasn’t so highly rated, which only stood at 0.04, but his shot was exquisite. After received the ball from Cavaleiro, he noticed the far post of Johnstone’s goal was free and sent his shot towards it. It went according to his plan as the ball moved directly to the top right corner.
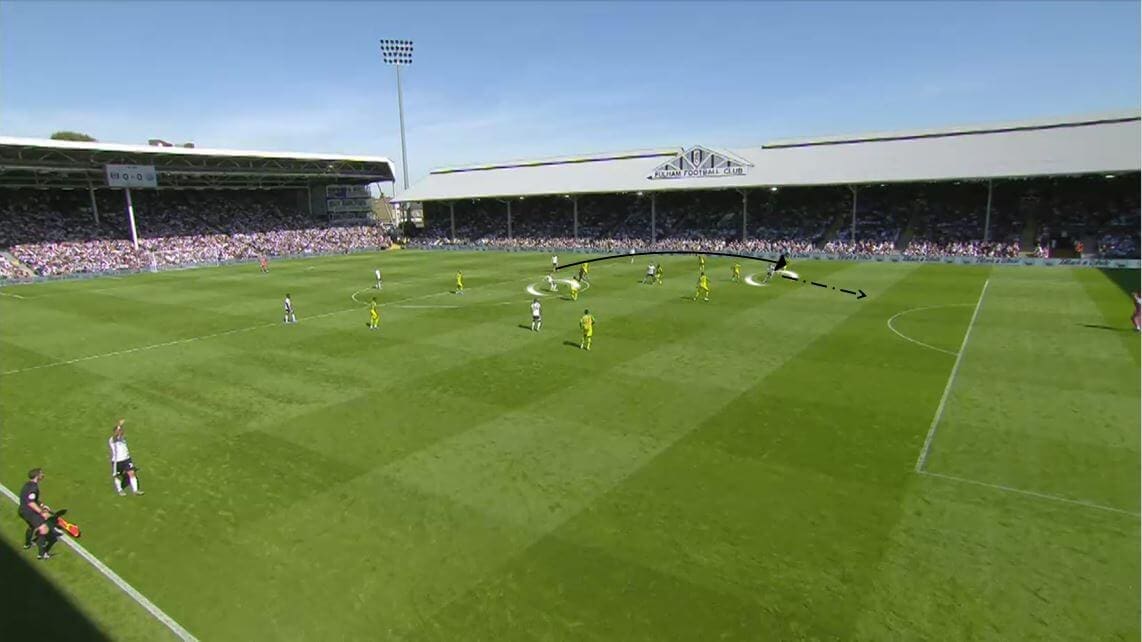
In defence, they formed a 4-3-3 defensive shape inside their half with two separate defensive lines. The attackers formed the first line as they put pressure on the opposition’s build-up. They aimed to recover possession high up the pitch to create a quick counter-attack and threaten their box.
They received support from the midfielders below who formed the second line of engagement. Reid and Cairney occasionally moved higher up the pitch to screen the space behind their teammates. Still, they created little gaps behind their back and prevented the opposition from capitalising it through off-the-ball movements into those areas. Meanwhile, Reed remained deepest in the midfield three to divide the team into two groups that had different responsibilities. He would help the defenders to clear long passes or through balls that came towards them while created a potential attack for his side.
West Brom’s style of play
The away side entered this match intending to do what they did best, employed a high press to recover possession inside the opponent’s half. From the 4-2-3-1 formation, two wingers dropped deep while Matt Phillips drifted centrally to create a duo at the top.
Along with Austin, these two put pressure on Swansea’s centre-backs and prevented them from making progressive passes towards the attackers. Meanwhile, the line of four midfielders looked to screen the gap between Fulham players’ line using higher positioning and remained compact in the central area of the pitch.

When their press was bypassed, a 4-4-1-1 defensive structure would be created inside their half. The midfielders along with Phillips continued to press the opponent with the similar principles and they would push high up the pitch for a counter-attack after the ball was won.
Meanwhile, four defenders positioned themselves on the edge of their defensive third and defended zone 14. They were the last pressing lane in their shape and their responsibility was to clear any potential dangerous passes that came towards them while provided a shield in front of Johnstone’s goal. Still, West Brom have had a tough day defending against the pressure from the opposition’s attackers.
As mentioned, Fulham players used quick, short combinations in between them and positions interchanging to bypass the press and at the same time, progress the ball towards the 16-yard box. While the ball carrier had the ball, his teammates would swarm the surround area and position in between the lines to receive the ball with their back to goal. With West Brom’s man-oriented marking strategy, each of their defenders had to follow one of Fulham’s attackers and this forced them to move out of their respective position on a few occasions. As a result, gaps were created inside their defensive third and allowed the ball carrier to play a lofted through ball and encouraged his teammates to move into that space.
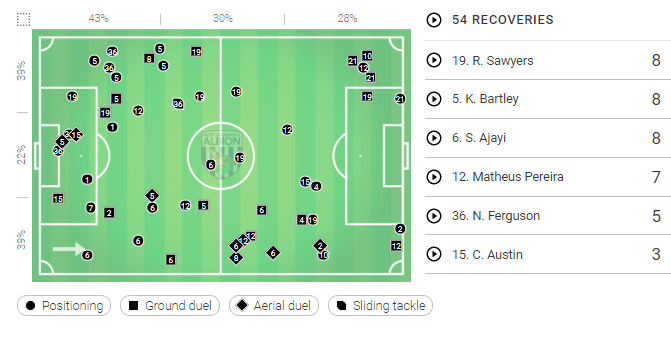
Their recoveries map also showed their strategy of spreading the team’s defensive works to all of their players on the field. While most of their recoveries still focused inside their defensive third, the other two also reached a high number of 30% and 28% respectively.
It’s also worth noticing that two attackers made the most recoveries, with Pereira’s record stood at seven and Austin’s stood at three. This showed how active West Brom were in terms of pressing the opponent and put an emphasis on keeping things tight at their end.
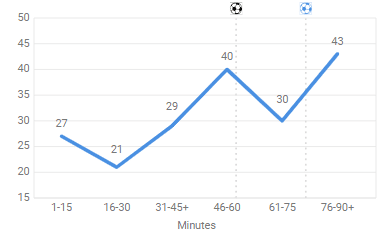
As good as the away side were in defence, they haven’t had a very impressive day when it comes to creating chances. One of the reasons that they struggled to threaten Bettinelli’s goal was holding possession. As their possession graph showed, they only controlled a maximum of 29% of the ball inside the first half. This doesn’t come as a surprise because Fulham tended to circulate the ball among the defenders to break down West Brom’s defensive structure. They were happy to let Mawson and Ream have more of the ball and allowed them to have a wider perspective on the situation for the upcoming penetrative pass.
Things started to get better for Bilić’s side during the second period after a few changes that saw the team took on a more active state. The number did saw a significant rise up to 40% and along with a numerous of chances for the attackers. But they lacked the precision in most of the shots as they only managed to get one of them on target inside the second half, and that was Ajayi’s equalising goal.
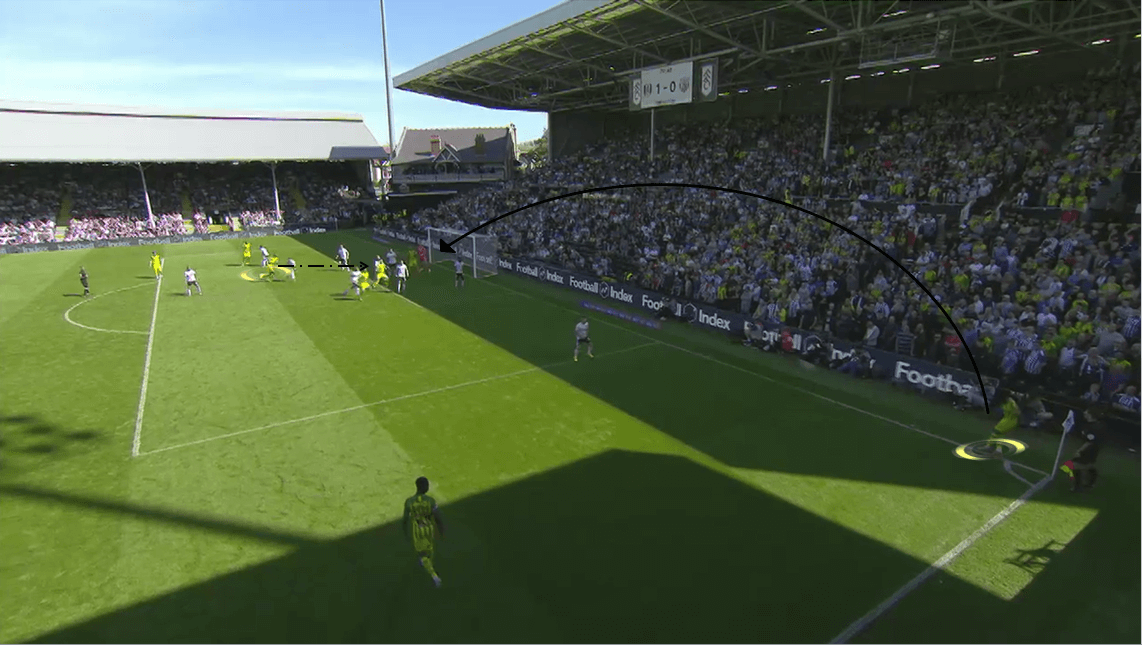
From Pereira’s corner on the right-hand side, he attempted to send the cross into the 6-yard box and Bettinelli had to move out to punch it. Meanwhile, the former Cardiff City defender made a run into the overloaded area without being marked. With three players had him in their sights, Ajayi should have been followed closely or at least the gap in front of him was closed down. Instead, the Nigerian defender continued to approach the 6-yard box and capitalised on Bettinelli’s punch to score the equalising goal.
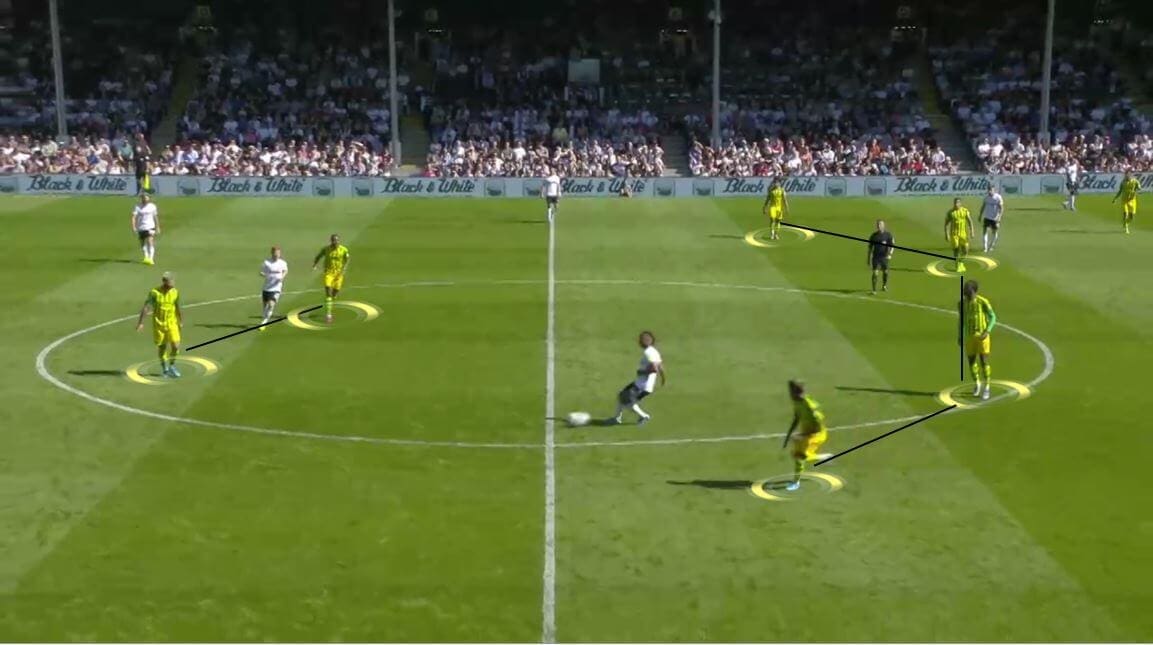
Both teams also attempted to push their players forward to find an equalising goal during the remaining minutes. The appearance of midfielder Josh Onomah for Fulham was thought to bring a freshness to the side and more creativity in their attacks. On the other hand, Filip Krovinović, Hal Robson-Kanu and Kyle Edwards were all subbed on in the second half. But none of those mentioned players left a late mark on the game to bring their side the winning goal, with the match ended in a 1-1 draw.
Conclusion
Although there was nothing to separate the two teams, it was a very interesting match on the tactical perspective. Fulham still have a lot of rooms to improve under the management of Parker. With the names that they have in their squad and the changes to their tactics throughout the season, the London-based club could push for a playoff spot and return to the Premier League.
Maintain the unbeaten streak is something quite difficult, especially when the Championship keeps improving itself every week. But West Brom have become the only team who haven’t lost a match up to now and this draw against Fulham will become a momentum for them to push for their expectations at the end of this season.

If you love tactical analysis, then you’ll love the digital magazines from totalfootballanalysis.com – a guaranteed 100+ pages of pure tactical analysis covering topics from the Premier League, Serie A, La Liga, Bundesliga and many, many more. Buy your copy of the August issue for just ₤4.99 here.



Comments