Back in February, Fulham and Barnsley faced off at Craven Cottage. These two teams are situated at either end of the EFL Championship table, with entirely different expectations and resources. The Cottagers’ sole aim is an instant return to the Premier League, demonstrated by their significant financial outlay in the summer. Giving former West Ham man Scott Parker the job permanently may have been seen as a risk but their performances, if inconsistent at times, have seen them reside in the upper echelons of the table.
Barnsley’s strategy is very much different. Their association with Billy Beane attracts much interest, as does their recruitment – heavily focusing on younger players whom they hope to develop into sellable, valuable assets. After a poor start to the campaign, Daniel Stendel left the club. Indeed, Barnsley beat Fulham in the reverse fixture at Oakwell on the opening day. Nevertheless, Stendel’s departure led to Gerhard Struber arriving from Austrian side Wolfsberger AC, a rather left-field appointment. However, there has not been a drastic turnaround in fortunes with the club sitting bottom currently.
In this tactical analysis, I will conduct analysis to look at the tactics that helped Barnsley surprisingly beat Fulham so convincingly.
Line-ups
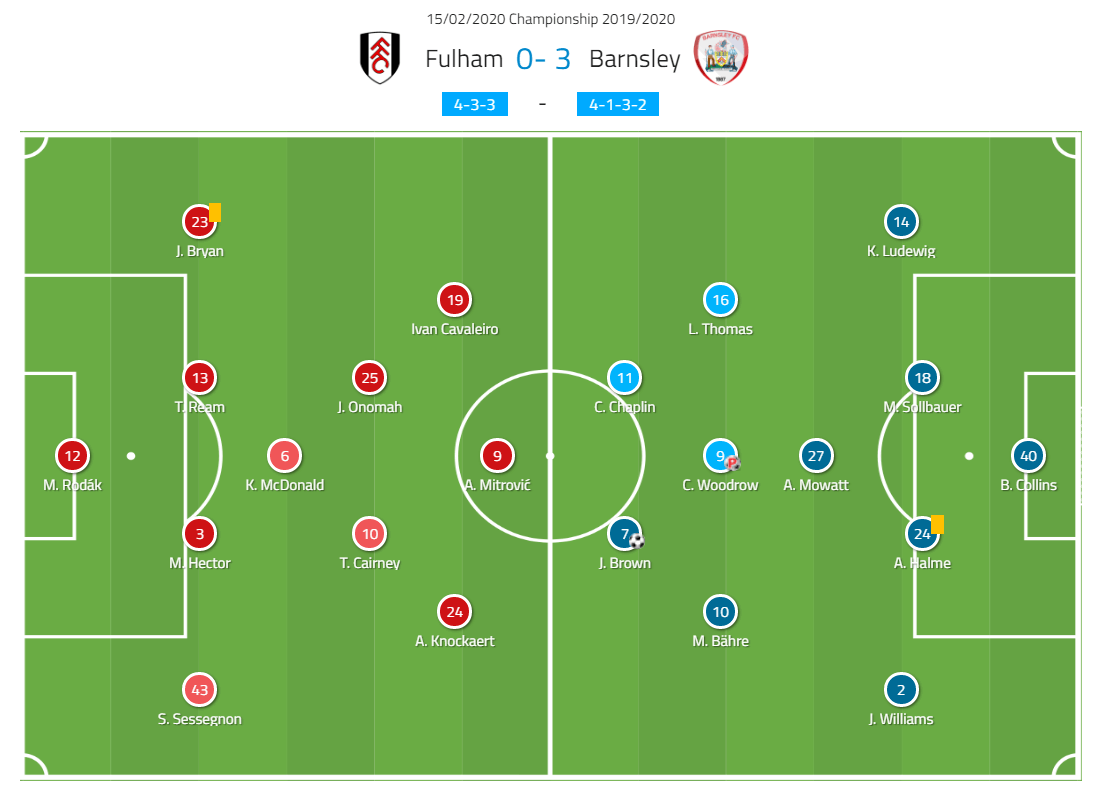
Parker had several of his talented, offensive players in his starting 11. Using a standard 4-3-3, the front three consisted of Ivan Cavaleiro, Aleksandar Mitrović, and Anthony Knockaert. The threatening Tom Cairney was also behind them in midfield but was allowed the freedom to contribute to offensive phases of play. Joe Bryan started at left-back while youngster Steven Sessegnon was on the opposite flank at right-back.
Struber’s preferred system is the 4-1-2-1-2 diamond. Alex Mowatt is a key component as the pivot, and has stood out in a weak team. Similar to their opponents their attack is where their strength lies. Cauley Woodrow and Conor Chaplin have 14 and 10 goals respectively. Jacob Brown, meanwhile, has eight assists to his name.
Barnsley’s Press
Struber’s favoured formation lends itself to being an optimal pressing structure. The occupation of several, staggered lines allows for a more compact shape that is harder to bypass successfully. It’s seemingly becoming more popular as Marco Rose at Borussia Monchengladbach also uses this specific formation, with success.
In the first half particularly Barnsley pressed intensely, seeking to disrupt the rhythm of Fulham’s build-up and prevent them from progressing the ball through the thirds to their offensive dangerman, such as Knockaert. This led to the Tykes’ PPDA being 4.7 in this period. An intense press is a hallmark of Struber’s tactical philosophy.
Barnsley pressed in a man-orientated way. Their chosen formation and its subsequent pressing structure lines up well against such a 4-3-3 that Fulham play. The two strikers Brown and Chaplin pressed the centre-backs, Woodrow pressed Kevin McDonald, the pivot, and the widest central midfielders went out to press the full-backs. The numerical equality prevalent in the first phase for Fulham meant that the ball was commonly played into the full-backs where there are fewer passing options owing to the reduced space in these wide areas.
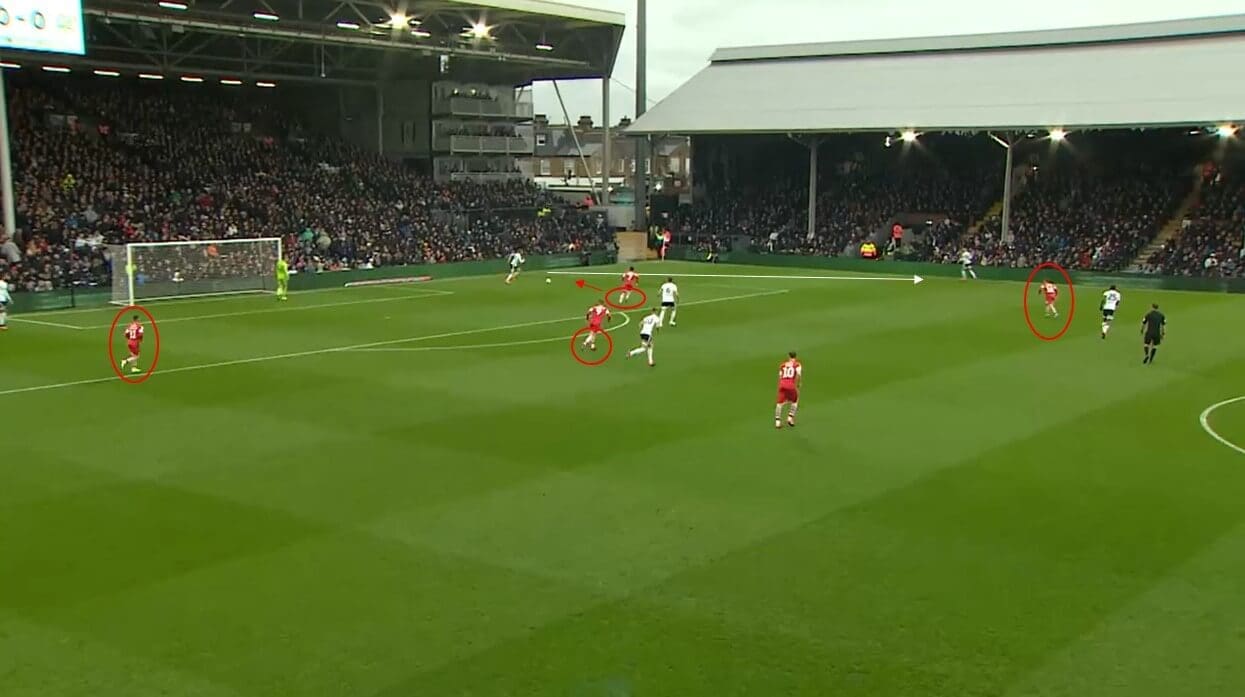
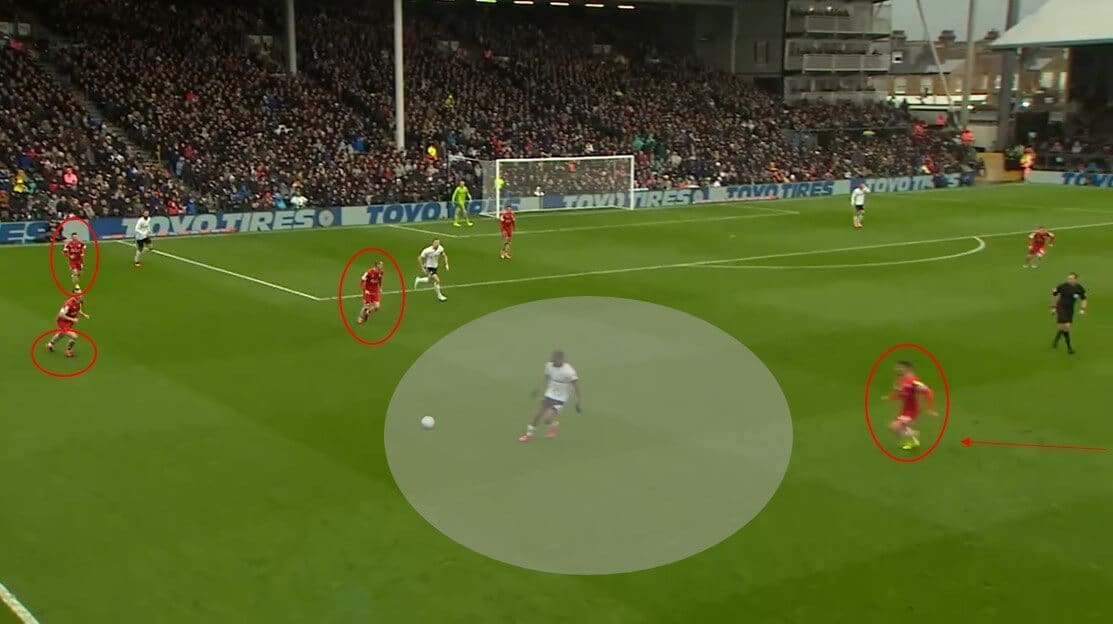
The image above portrays this structure. Left-centre-back Tim Ream has received possession, instigating a press off Brown, who has McDonald in his cover shadow. Additionally, because of Brown’s positioning, Woodrow is capable of stepping out to pressure the keeper. Ream’s body orientation indicates an imminent pass to Bryan, the left-back. This pass into a wide, deep area acts a trigger for Barnsley – below this is visible.
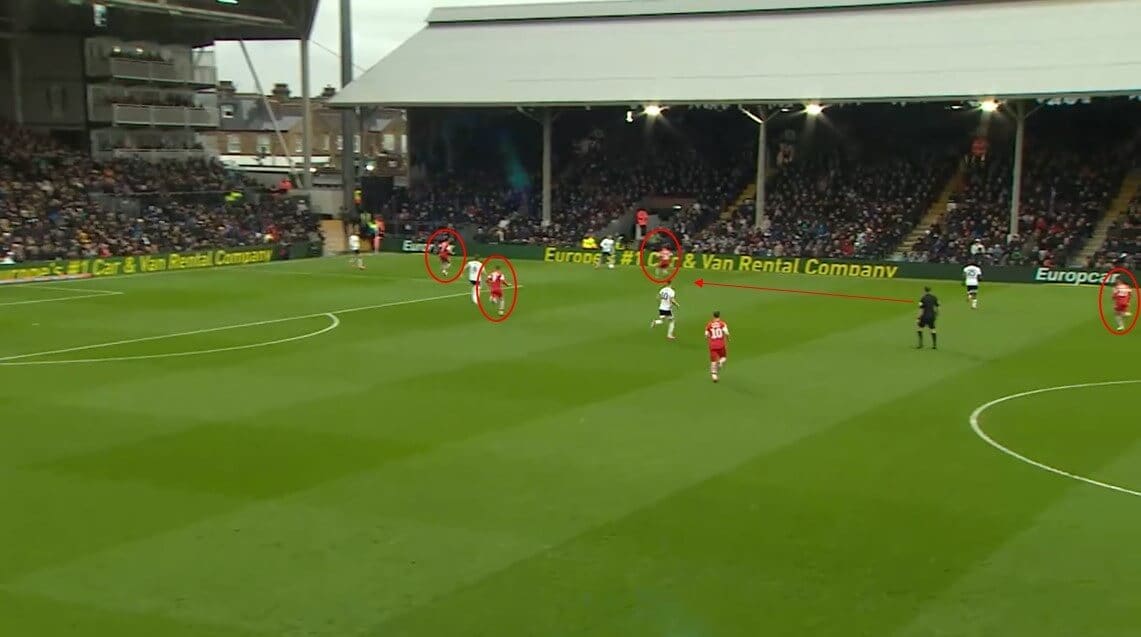
The wide-right central midfielder Luke Thomas then immediately presses Bryan to shut off the diagonal or vertical passing lane. What is also important to note is how Mowatt advances as well, keeping Barnsley’s press unified and compact. Otherwise, Joshua Onomah could receive freely in the half-space. Maintaining this shape is of paramount importance as otherwise, their physical exertions will be of little worth.
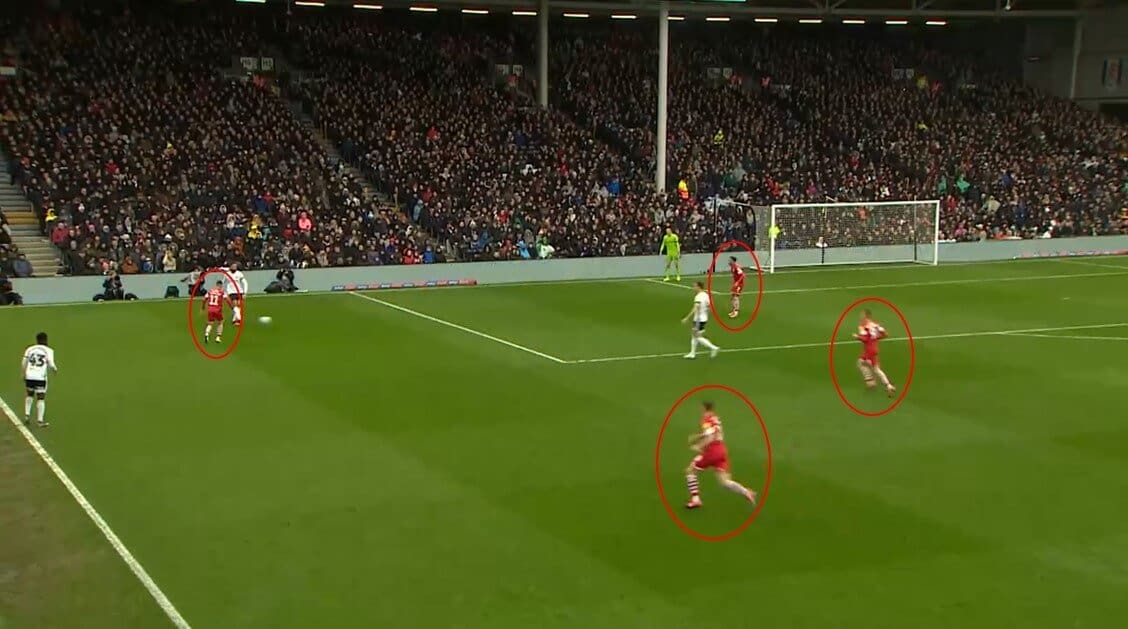
This next instance, however, demonstrates when Mowatt doesn’t push up in time with his teammates. There is the standard pressing quartet consisting of the three main attackers and the outer centre-midfielder who have applied pressure deep. However, as you can see below, Mowatt is delayed in his pressing movement. Therefore, Onamah has increased time to assess his options and retain possession. Consequently, Mowatt gives away a foul due to the increased space Onomah has to operate in.
Fulham build-up
This aforementioned press from the away side interrupted Fulham’s attempts to progress the ball cleanly. The numerical inferiority present in midfield caused consistent problems for Fulham. The movements made by Barnsley’s widest central-midfielders in particular blocked access to the half-space, and with the Strikers man-marking the central defenders, passing options were minimal. This, therefore, meant that turnovers were frequent.
As I’ve mentioned, Barnsley’s pressing structure is particularly good in the coverage of space. The various lines make it harder to disorganise the shape and create sufficient space. With the Fulham centre-backs being matched up by Chaplin and Brown, play often levitated to the full-backs. Such a sideways pass was a pressing trigger for either Thomas or Mike Bähre to engage.
However, these players have greater distances to cover compared to natural wingers. Furthermore, they need to be aware of their arc to ensure an optimal cover shadow as well as their speed to prevent them from not being able to adjust their body orientation quickly. Thomas’ and Bähre’s roles saw them vacate space that Cairney and Onomah could subsequently exploit with correctly timed movements.
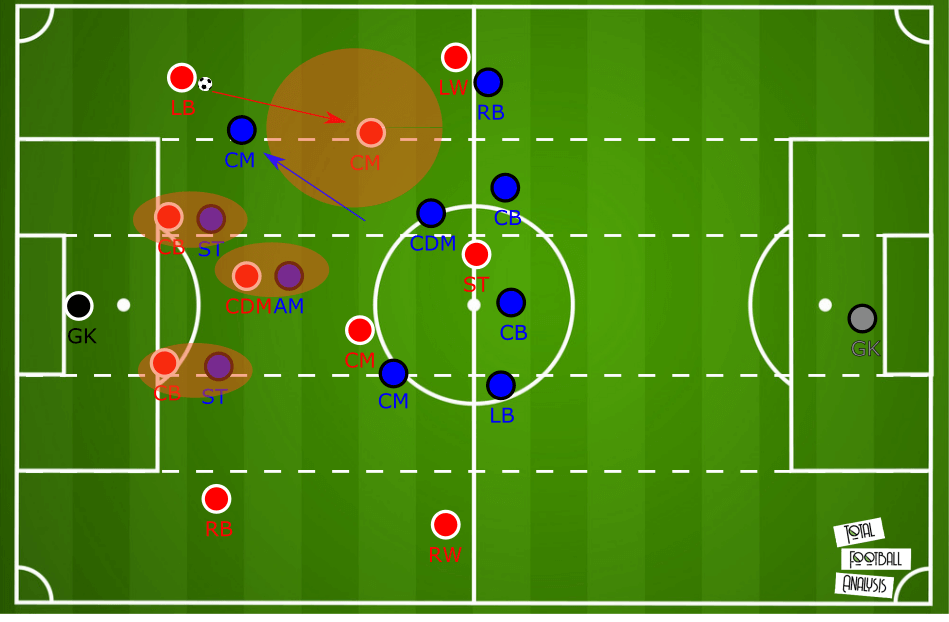
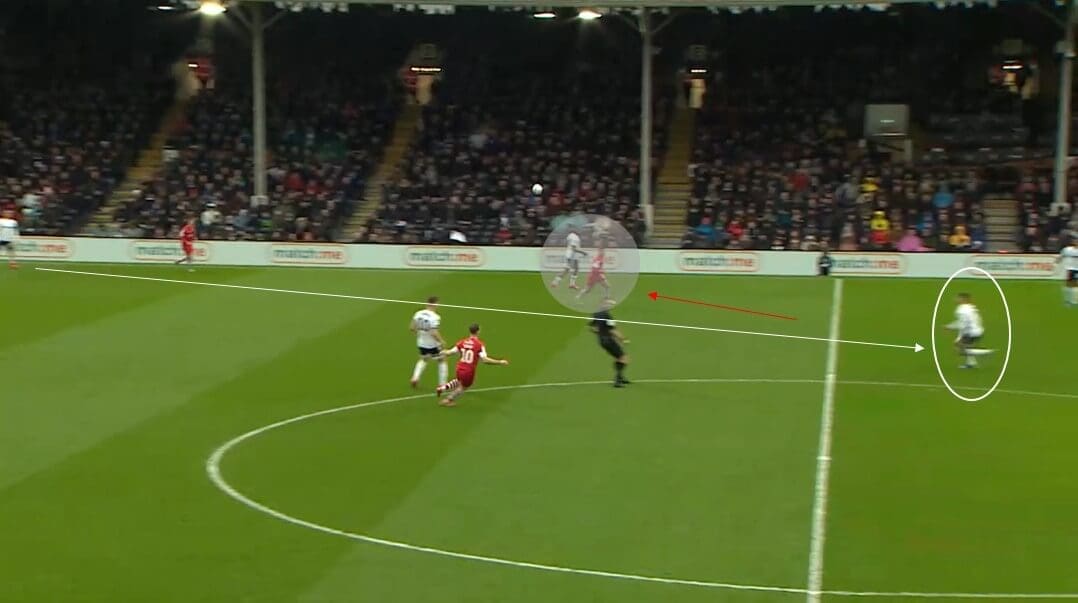
This image above illustrates this sequence, which occurred many a time and should have been utilised more effectively by the home side to escape the press. In this instance, with left-back Bryan now in possession, Thomas steps out to press and reduce Bryan’s time on the ball. Onomah, however, can capitalise on this. Ideally, the left-winger (Cavaleiro) will pin his full-back and the striker (Mitrović) can pin the pivot, thus giving Onomah more space. Having the ball-far winger wide will help stretch the defence laterally and give the possibility of a switch pass to isolate him 1 v 1 vs their respective full-back.
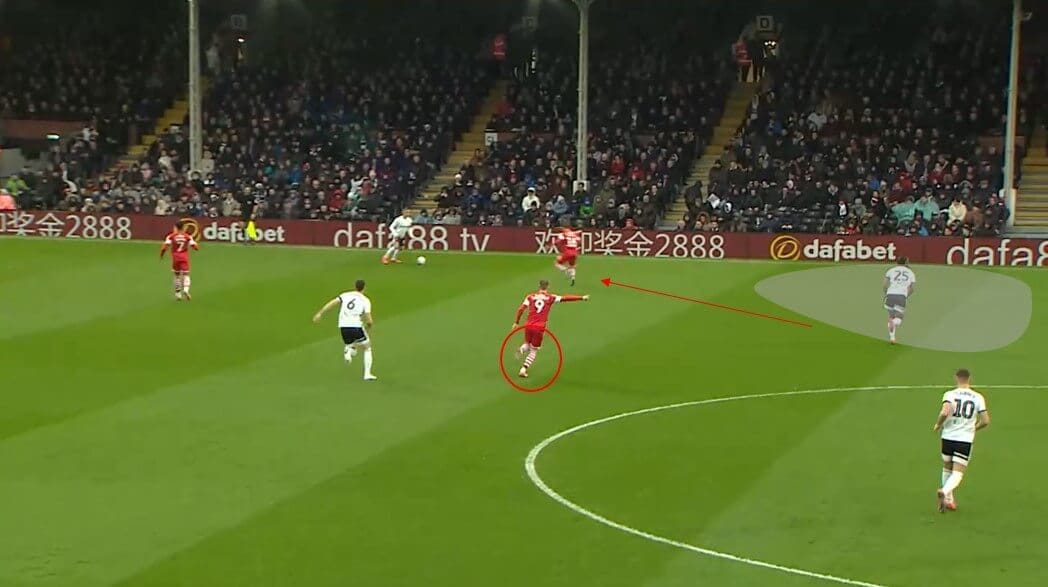
This example above portrays this occurring in the game. Thomas does indeed engage Bryan, therefore vacating the half-space and wide channel. Woodrow as the ‘10’ encounters a decisional problem: both McDonald and Onomah need marking to prevent them being a viable passing option.
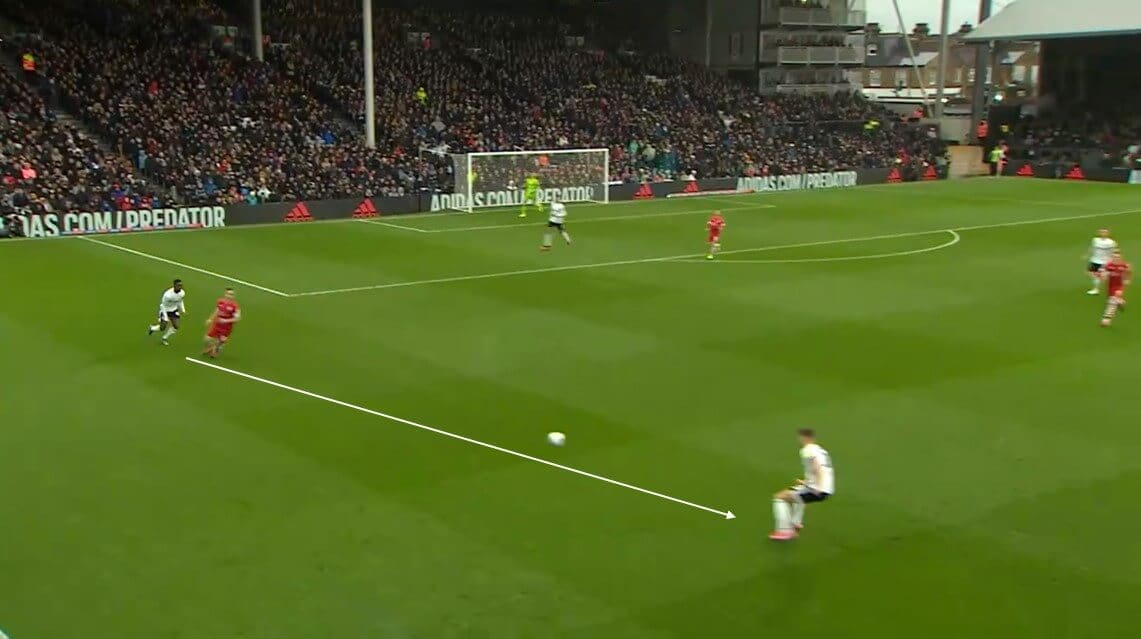
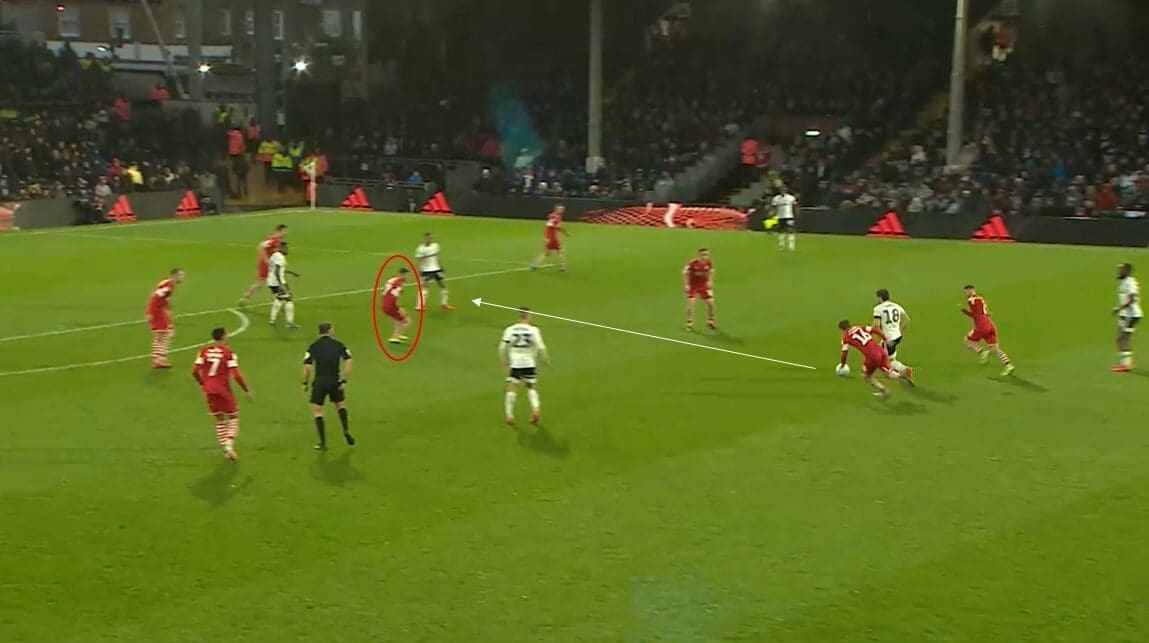
Something similar happens here above on the opposite side. Again, Bähre moves out wide to pressure Sessegnon. Nonetheless, with the Knockaert on the right effectively pinning the right-back, Cairney can move across into a wider position and receive off Sessegnon. Below the sequence of events continues. Barnsley’s left-back does advance and apply pressure onto Cairney. This emphasises the importance of providing support options, thereby exploiting space released by opposition pressure, especially when the ball-far winger is near the touchline in space.

Another dilemma is whether Mowatt jumps out. This is demonstrated below, whereby the ex-Leeds player has a decisional problem. Onomah has once more participated in the aforementioned build-up pattern, and to inhibit this, Mowatt has pushed up out of his designated area. The passing lane into Mitrović has opened up due to this. But again, you need teammates to either be available for a lay-off pass, or running beyond. A lack of this, and moments of poor technical ability, allowed Barnsley’s defence to be their best form of attack.
Fulham’s half-space focus in the second half
Considering the sheer quality of their offensive players Fulham’s attack was wholly ineffective in the first 45 – they registered just 0.16 xG. This was much improved in the second half, however, with 1.70 xG.
One way they did this was to overload the half-space. This area provides superior angles and can create numerous dilemmas for the opponent. Here below we can see this. Cavaleiro, Mitrović, and Knockaert are all located in the right-half-space, thus overloading Mowatt who cannot cover all passing lanes. Furthermore, Mowatt being a lone pivot means it is easier to progress the ball into these areas, especially when the other central-midfielders should be being pinned by Fulham’s own. However, particularly in an attacking sense, it is important to maintain optimum spacing and coverage. Additionally, this would help keep a solid, compact rest defence, thus also keeping a good counter-pressing structure to sustain attacks.
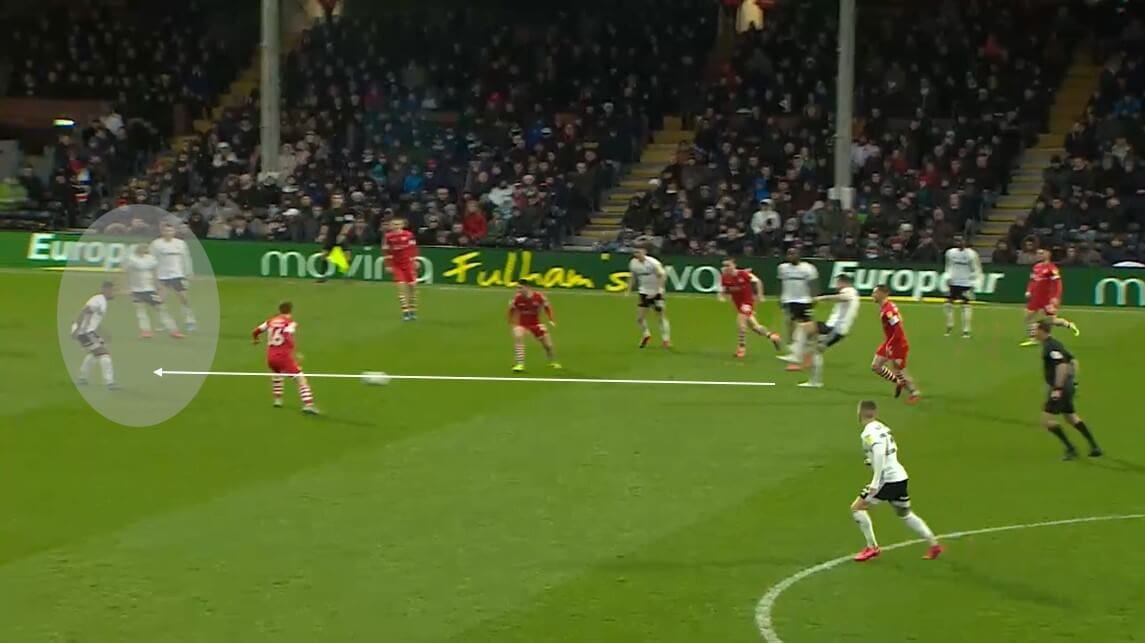
In the 54th minute, Parker made a double change, switching to a 4-2-3-1 in the process. This gives greater central occupation in the final third. Bobby Reid replaced Tom Cairney to play in the ‘10’ role. Reid’s presence and effect are visible below. Cavaleiro initially receives off substitute Harry Arter but can then combine with Reid to release into space. Such a movement will inevitably see space emerge somewhere, depending on the opponent’s defensive style and actions.
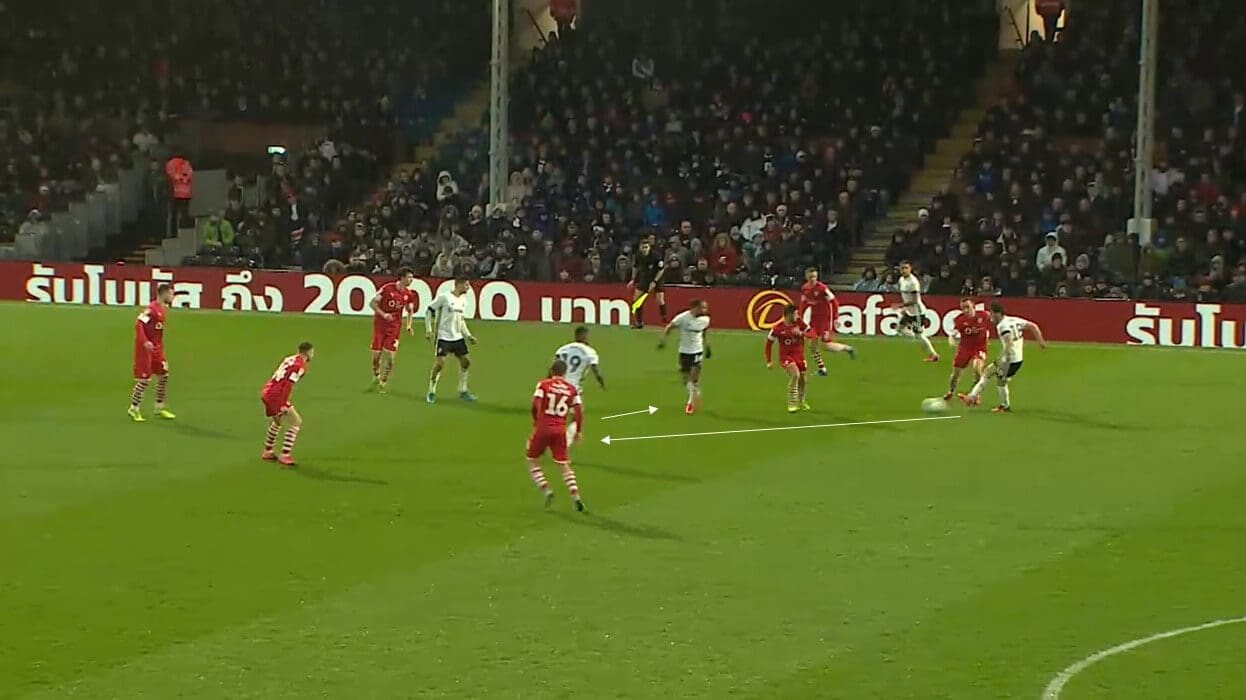
In this final example here, a similar situation again arises. Arter is driving forward, with Reid having positioned himself in a neat – half-space – pocket. Cavaleiro is located more centrally but is also occupying Mowatt, therefore allowing an open passing lane to Reid. Fulham needed to utilise this tactic more in chasing the game as it usually resulted in space being created or a decent attacking chance.
Conclusion
In the context of the league, this was undeniably a hugely surprising result. The xG, however, indicated that despite the Whites’ poor first-half performance the scoreline may have been fortunate on Barnsley’s behalf. In the end, the xG scoreline was 1.86:1.26 (with a penalty). This may show why there has not been the desired upturn in form since Struber’s arrival in November 2019. Nonetheless, with the talent at Parker’s disposal, this should have been a routine victory, but the EFL Championship doesn’t work like that.


Comments