In the 9th game week of the 2020-21 EFL Championship, newly relegated Bournemouth hosted Wayne Rooney’s Derby County. The former Premier League side sit at 2nd with 5 points behind Reading and one point ahead of Swansea City.
Derby meanwhile has been in an extended run of poor form with only one win this season and winless in their last 4 matches. This tactical analysis discusses the tactics deployed by both teams. Let’s begin the analysis.
Lineups
Bournemouth lined up in the 3-4-1-2 system that they have been using regularly under Jason Tindall. He made two changes to the lineup that beat Bristol City last time. Joshua King and Dan Gosling made way for Arnaut Danjuma and Philip Billing respectively.
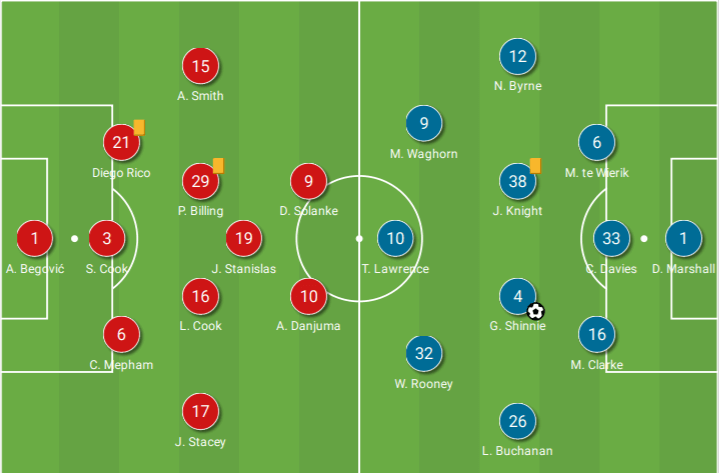
Derby, on the other hand, a lineup in the same 3-4-3 formation that they have been using off late. They also made a couple of changes as Wayne Rooney and Mike te Wierik was brought in by Phillip Cocu in place of Kamil Jozwiak and Andre Wisdom respectively.
Derby with possession
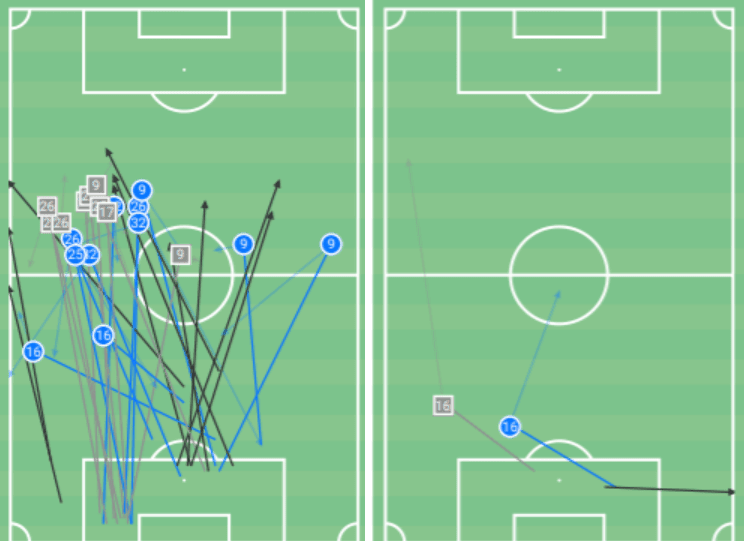
Derby with possession was very direct in their style of play and were happy to have less possession (only 30%) throughout the match and tried to hit Bournemouth during counter-attacks. In total, they attempted 65 long balls in the match compared to Bournemouth’s 52. Even with less possession, they had a high share of long balls with the long balls with 22.3% of their passes being very direct.
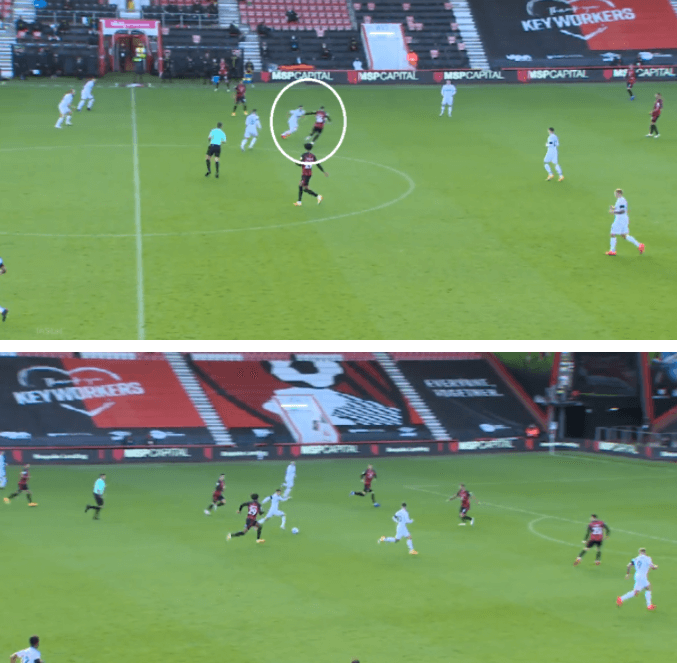
Their plan was to hit Bournemouth in counter-attacks when they had their wing-backs and the forwards pushed forward. The example shows where Derby break the play and they immediately counter-attack. This leads to a free-kick just outside the box from which Derby took the lead through Graeme Shinnie’s strike.
Their directness is evident in the image below as we can see the number of long balls attempted. Also the short passes completed by the keeper is also given by the side that shows the directness in play from Derby.
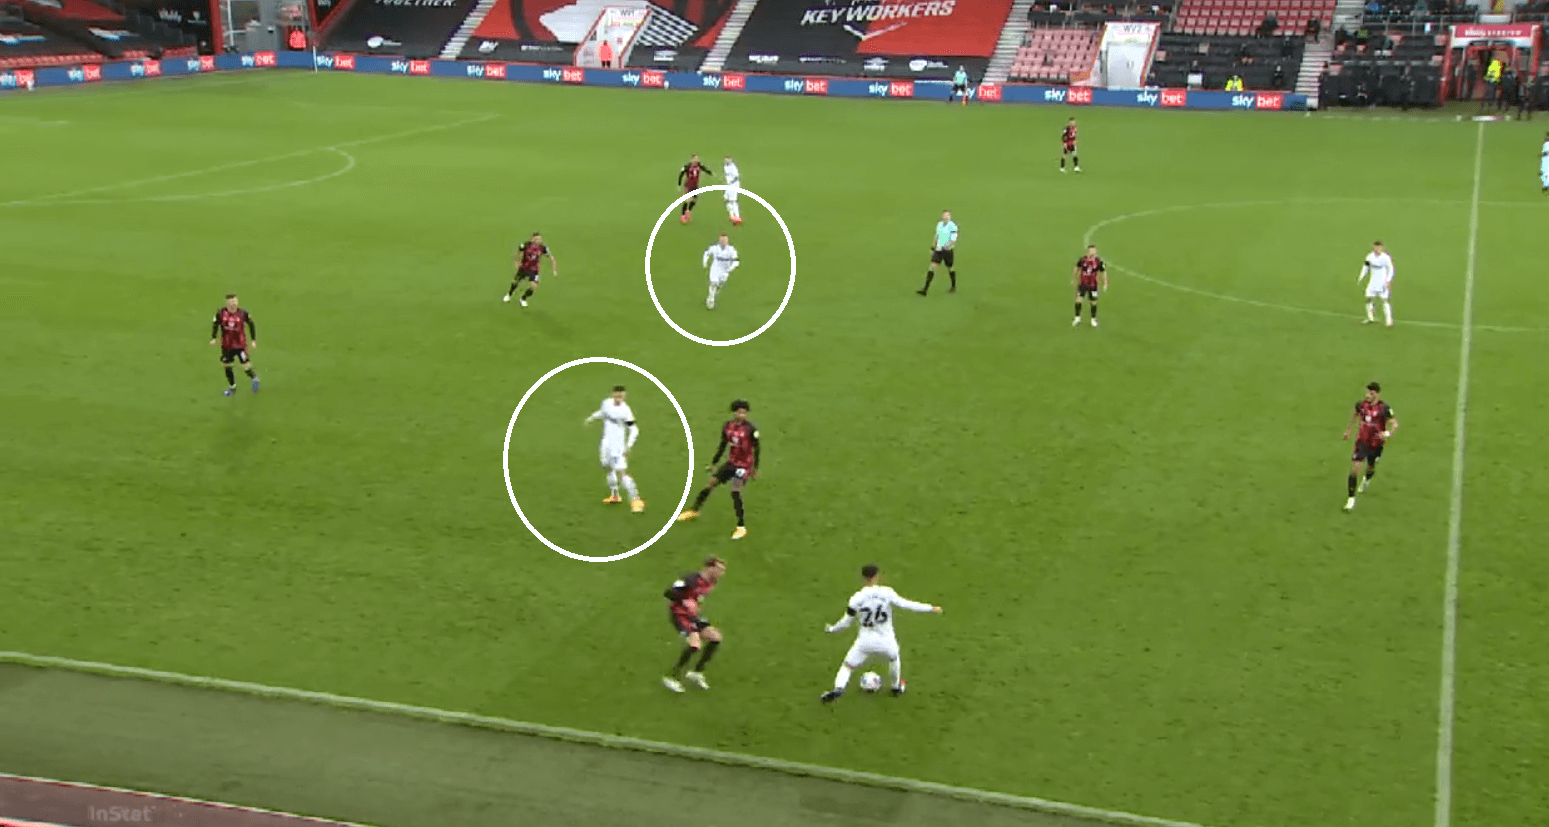
The front three kept constantly interchanging positions as each of them are very flexible and can play as a striker. Initially, Wayne Rooney started in the left-wing but also played centrally when Lawrence moved wide too. An example of this is given in the image below.
Bournemouth without possession
Bournemouth without the ball formed a 3-4-3 shape and tried to press high whenever Derby had the ball deeper in their half. Stanislas who played as a CAM/false-9 when they had possession pressed as the central striker. Their PPDA value in the match was 8.9 and was lower when compared to that of Derby’s (11.6).
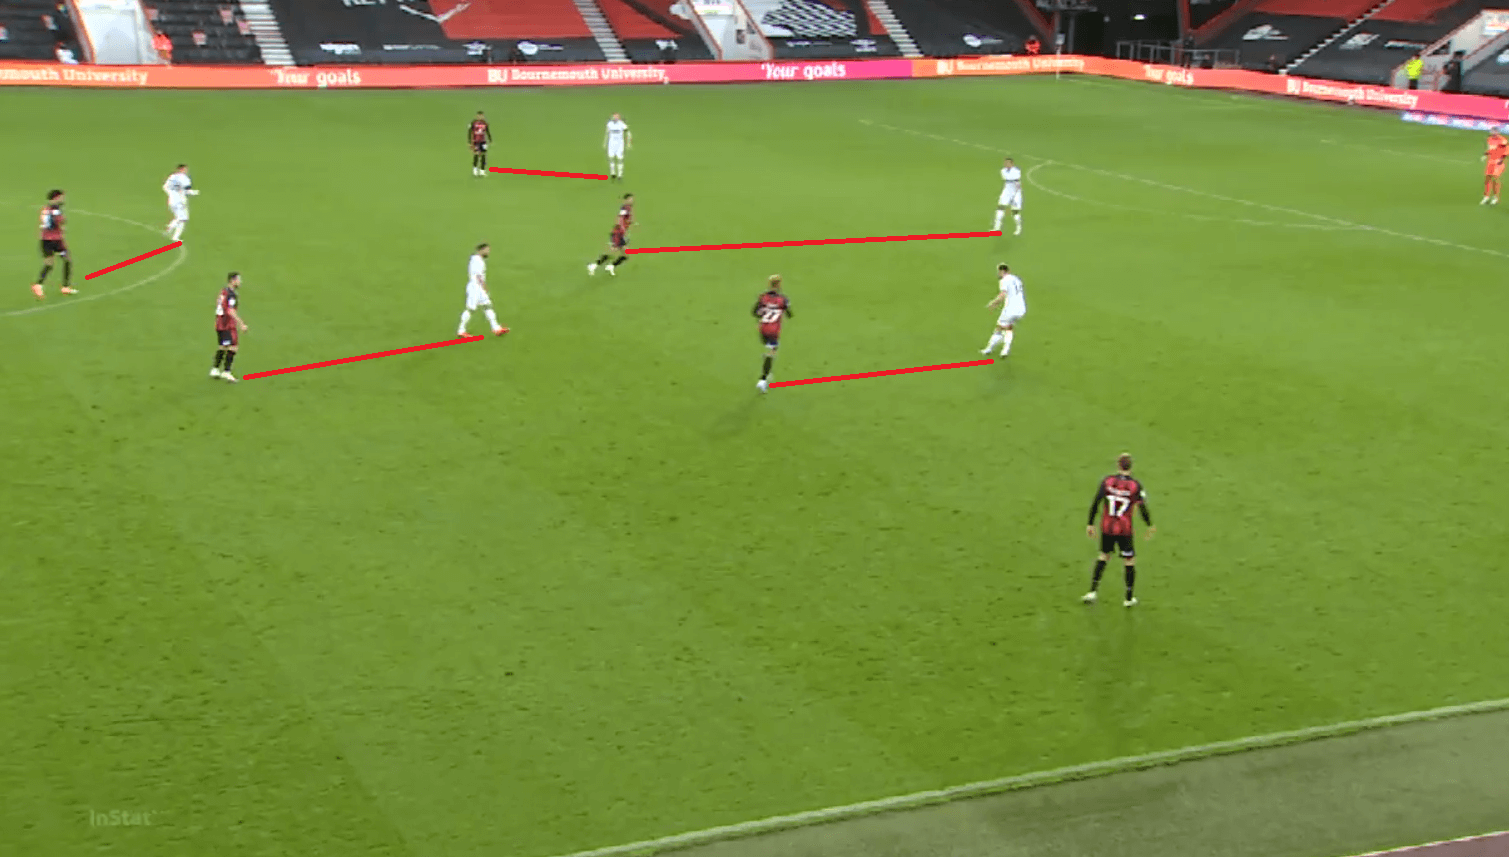
With their system mirroring the system of Derby’s they deployed man-man across the pitch and each player looked to force a turnover and win the ball back. The example of their man-man system is given below.
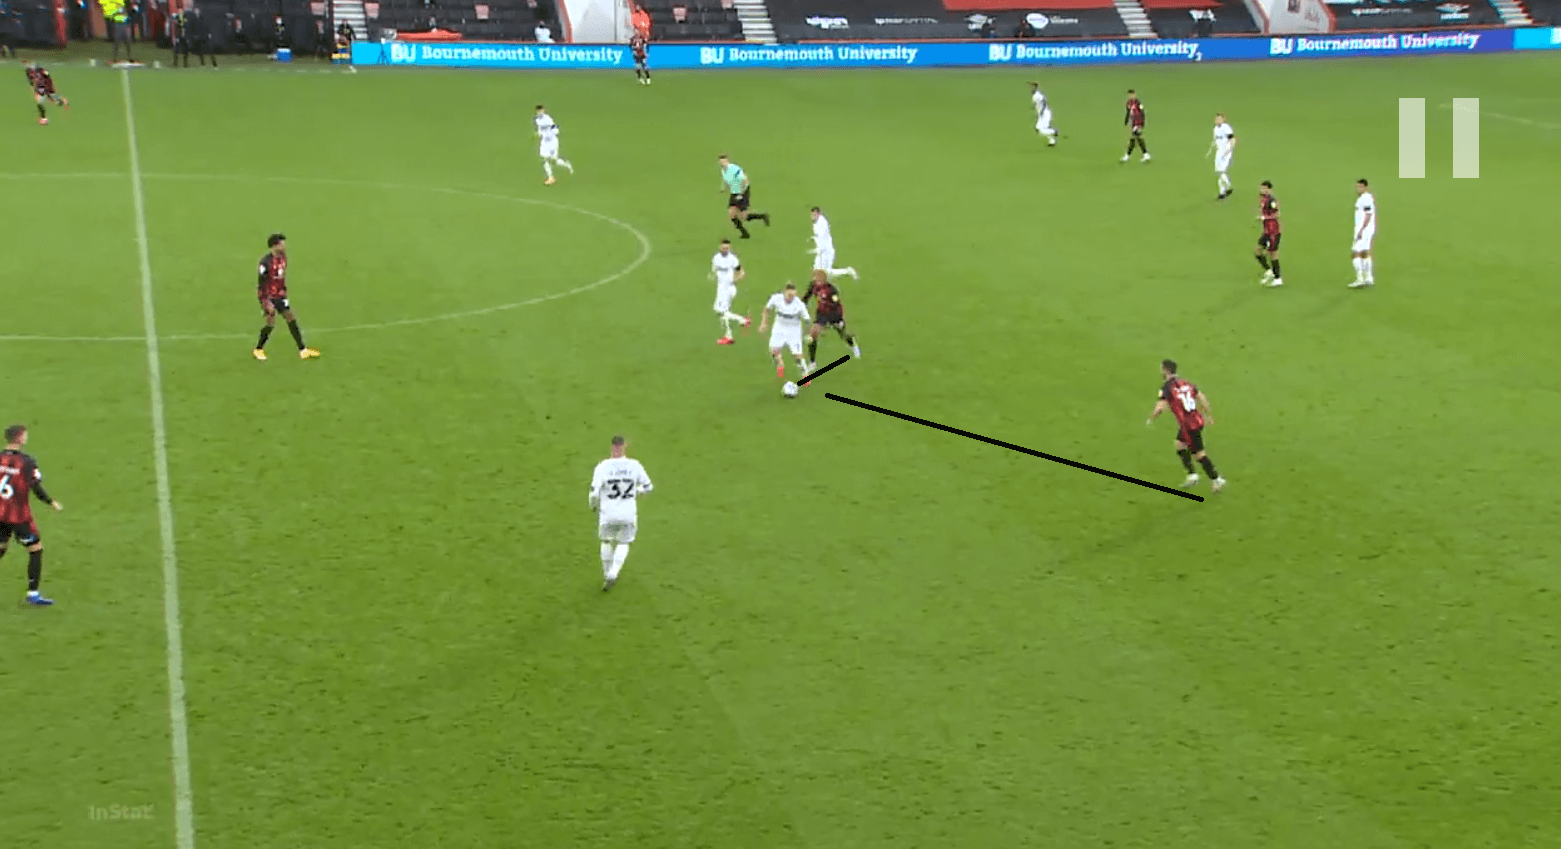
After losing the ball they also tried to counter-press but at times their structure to counter-press was poor as they committed very less man and closed very less passing angles to make sure that their counter-press succeeded. This allowed Derby to easily recycle the ball. The example of that is given below where after losing the ball two Bournemouth players looked to press immediately and win the ball back but counter-pressing with 2 players especially at the centre of the park is impossible as passing lanes are not closed properly.
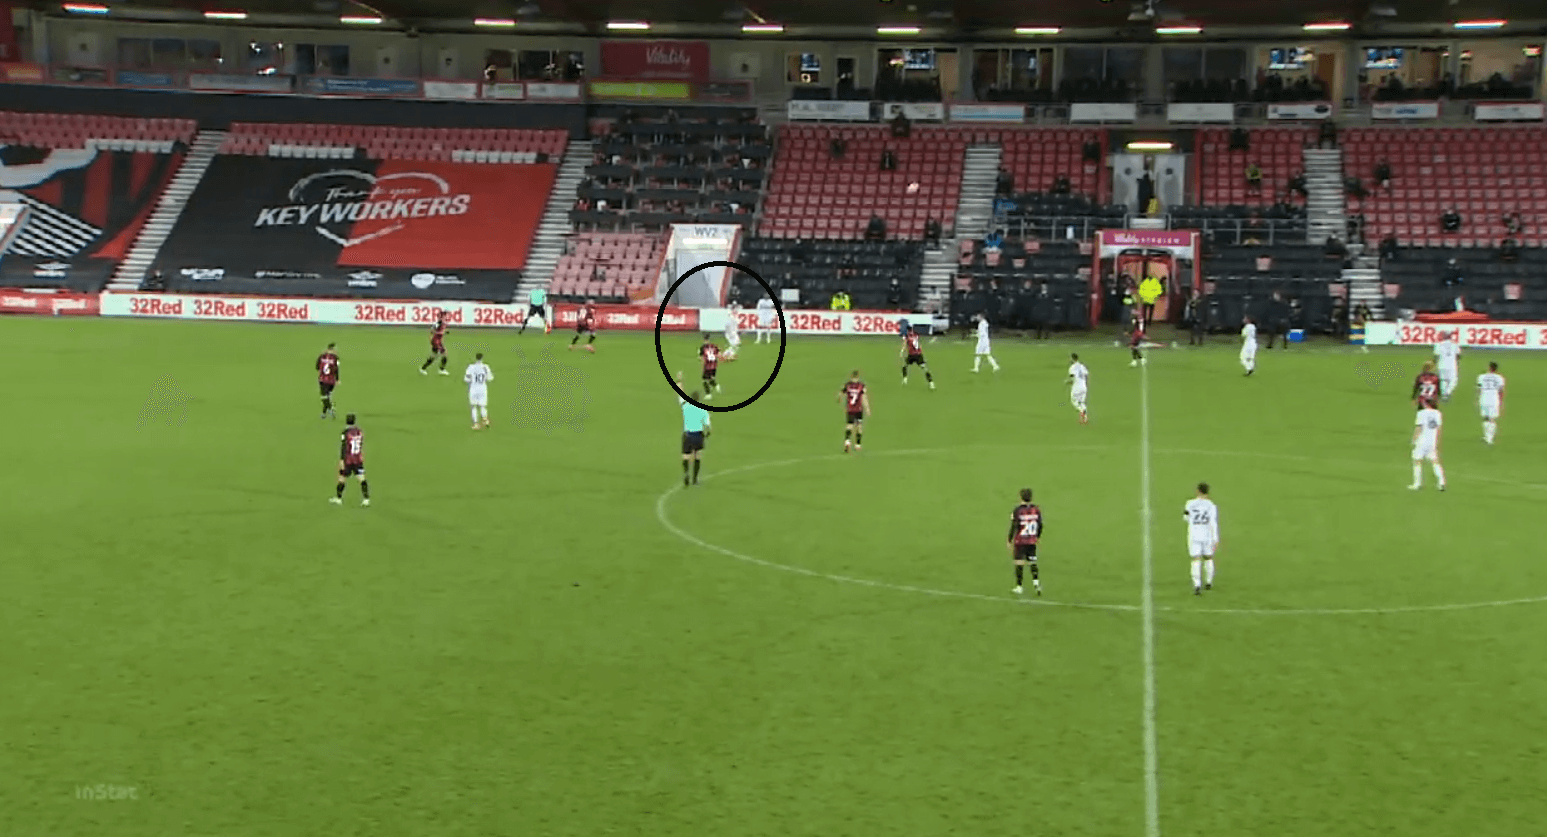
They also failed to contest the aerial duels and incoming long balls and at times left it open for the Derby players to receive it. Despite the Derby players not being so tall, for the very reason that the Bournemouth players failed to contest allowed them to win long balls or even the second balls. In the image below, Waghorn was able to win the ball as we can see no one closer to him contesting the ball and leaving him free to receive.
Bournemouth with possession
Bournemouth with a lot of possession tried to stretch Derby’s defence and looked to use constant rotations and interchanges between the players in the match. With their midfield pivots taken out due to the man-man approach by Derby’s midfielders on them, they had to resort to using the wings to build the attack. Mostly during the match when Derby players were invited forward to press, Bournemouth would look to play a ball in behind the defence with one of their forwards making a run into the space vacated by the wing-backs.
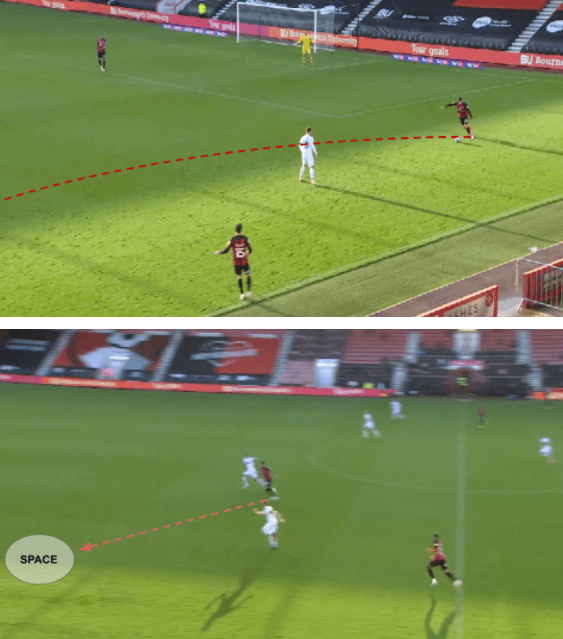
After finding such spaces they would look to create overloads in the wings and would work their way into the Derby penalty area. Small one-touch passes between the players would be used to move the ball. Billing would also join the team in the wide regions and would try to get himself involved in the play.
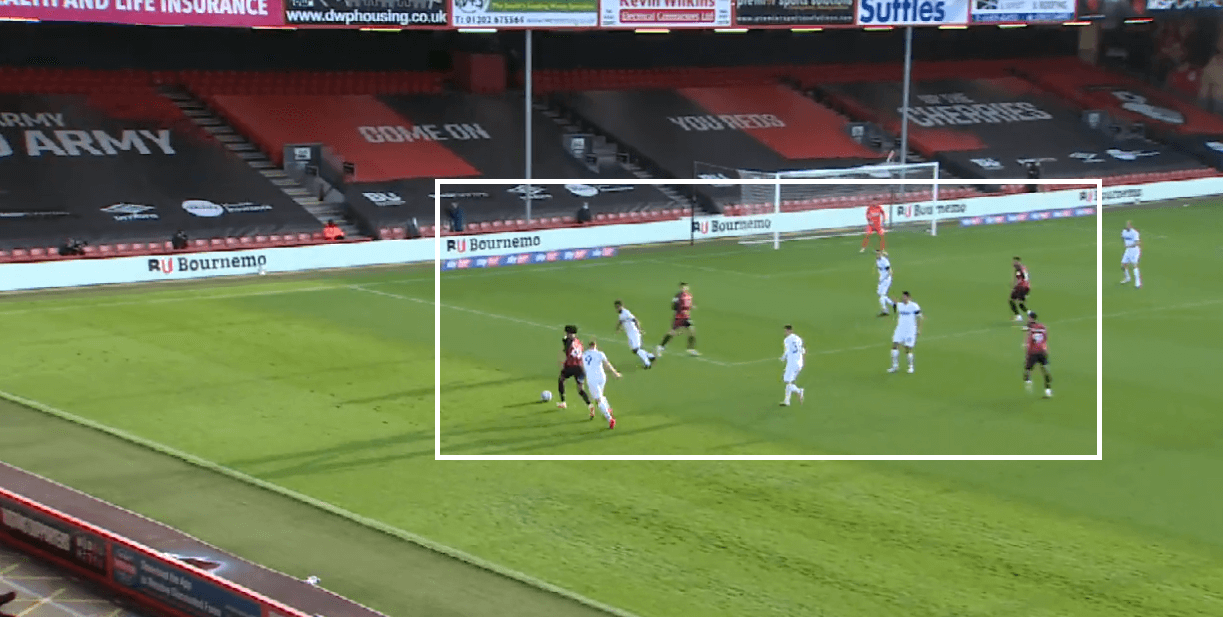
Billing struggled to get himself going in the match. This was largely due to Shinnie’s tremendous work in limiting Billing’s influence in the pitch. His total number of touches (44) in the match was less than the wing-backs, centre-backs as well as his midfield partner Lewis Cook. He would often look to drop back into the defence to involve himself in the first phase of buildup.
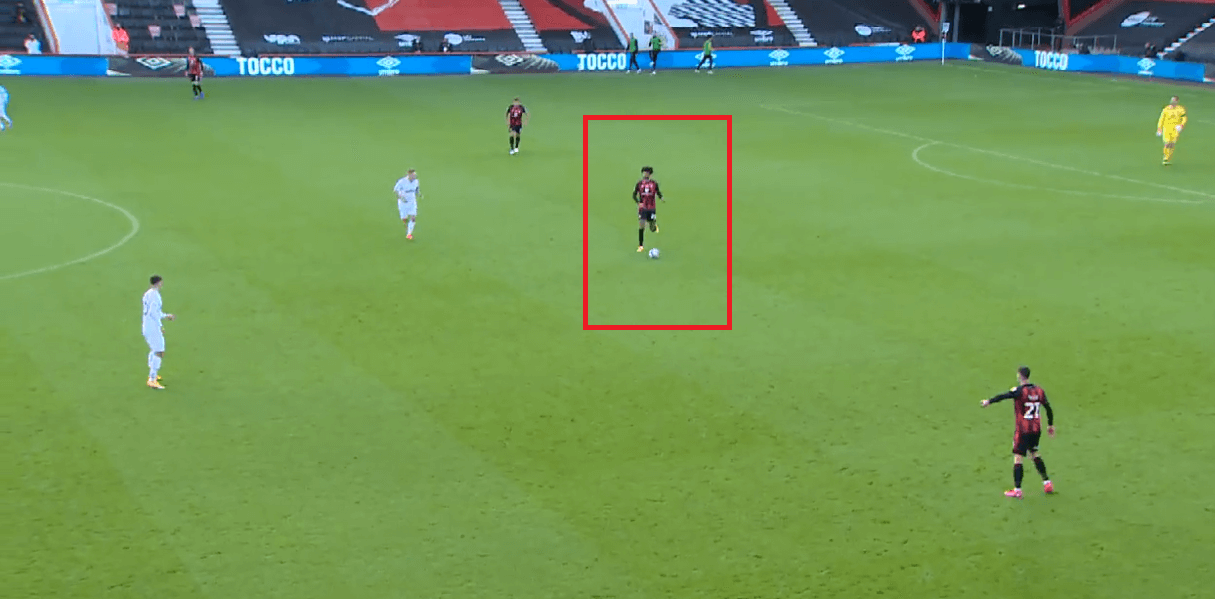
With possession, their shape looked like a 3-2-5 with the wing-backs joining the attack and providing the width. The shape is given in the image below.
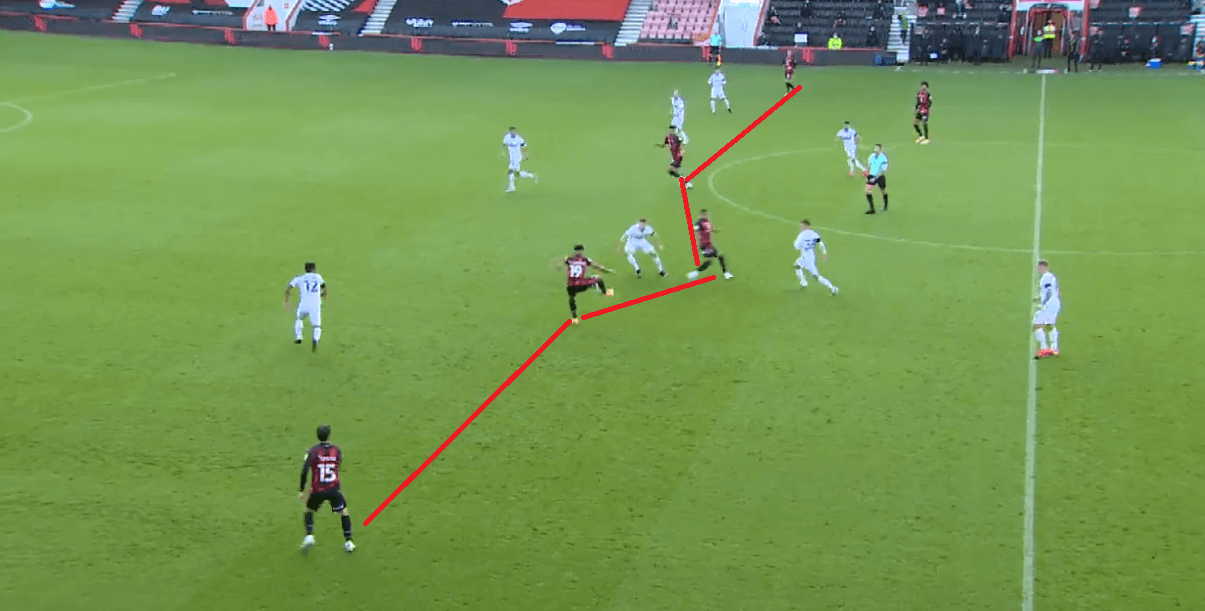
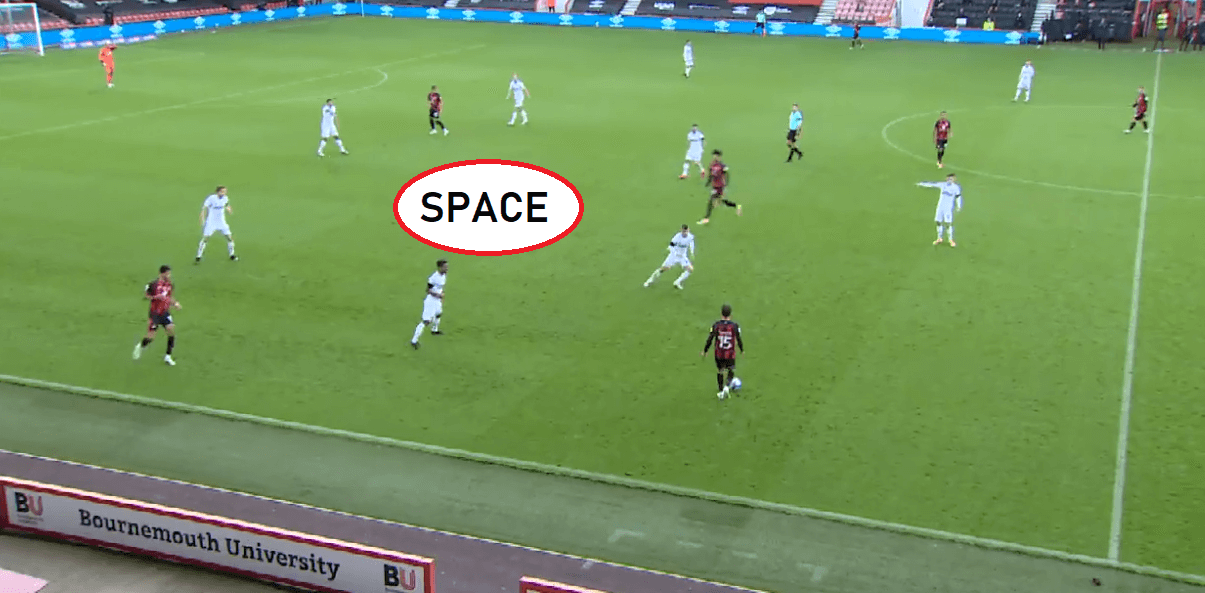
The likes of Stanislas and Danjuma would drop into the half-space and try to drag the defenders out of position. This would create a 2v2 situation for them in the wings when the centre-back steps out to defend. But the centre-back would also prefer not to step out as that would leave space centrally and Bournemouth could exploit that vacated space. So the Derby centre-backs would face a dilemma here whether to step out or not. But as the game progressed, the midfielders tracked and added that extra body to ensure the defence is protected in numerically inferior situations. In the example below, we can see Solanke dropping to the wings and this creates a space in the centre. Billing recognizes the space and moves there while also asking for the ball to Adam Smith.
In the later part of the second half, Bournemouth made a slight adjustment to their system. Diego Rico, who started as a left centre-back was told to play now as a left-back as Bournemouth shifted to a 4-3-3/4-3-1-2 with possession. Now Adam Smith who started as a wing-back on the left side moved to the midfield. The advantage of this change was that Bournemouth had 3v2 advantage in midfield and the progression got better soon after. The average positions (right image below) and the position of Diego Rico show this change.
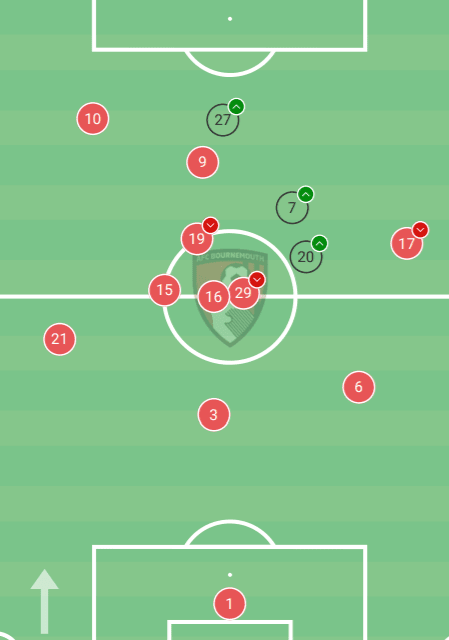
This was also a symmetrical change at times with Rico playing as a centre-back and Mepham moving wider. This created problems for Derby later in the second half and with the introduction of Joshua King, Bournemouth’s attack became a little stronger as they crowded the box with forwards.
Derby without possession
Derby without the ball maintained a mid-block and were happy not to press high. They gave time and space to the Bournemouth centre-backs but tried to squeeze the space in between the lines for the forward players. An example of that is given in the image below.
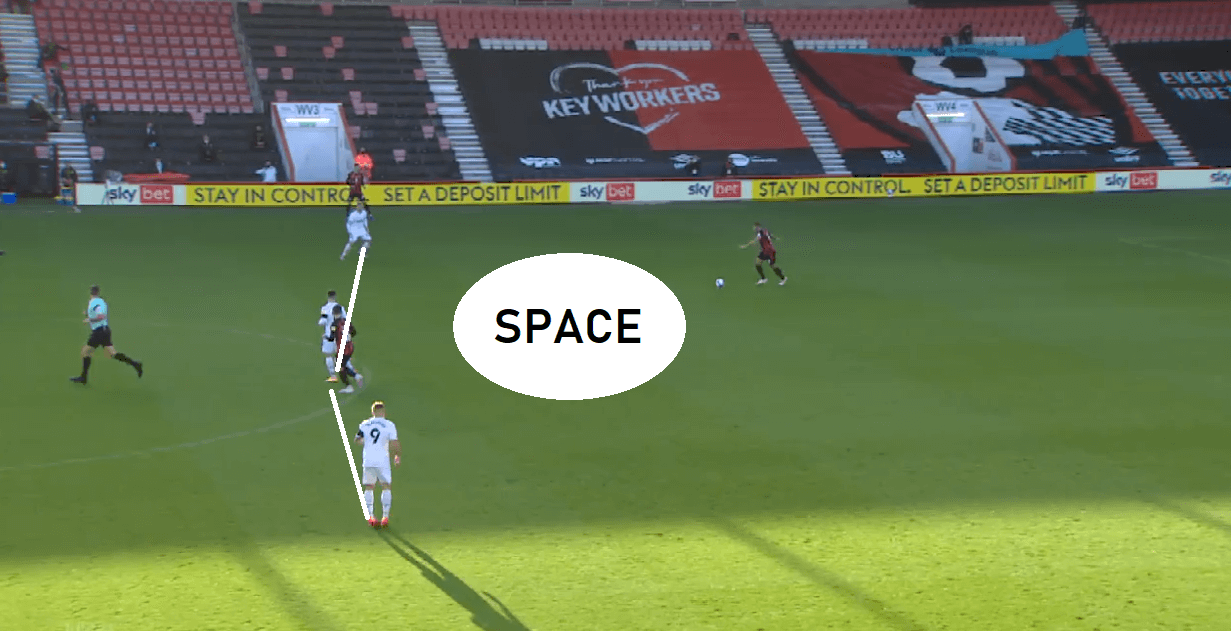
In the mid-block, their formation resembled a 3-4-3 with the forward 3 forming a line and trying to cut the passing lane. In the image above we can see Rooney trying to cover the passing lane to Chris Mepham. This forced Cook to go long and eventually lose the ball. Deeper in their half, the shape would eventually become a 5-4-1 with Rooney and Martyn Waghorn joining the midfield while the wing-backs forming a 5-man defensive line with the centre-backs.
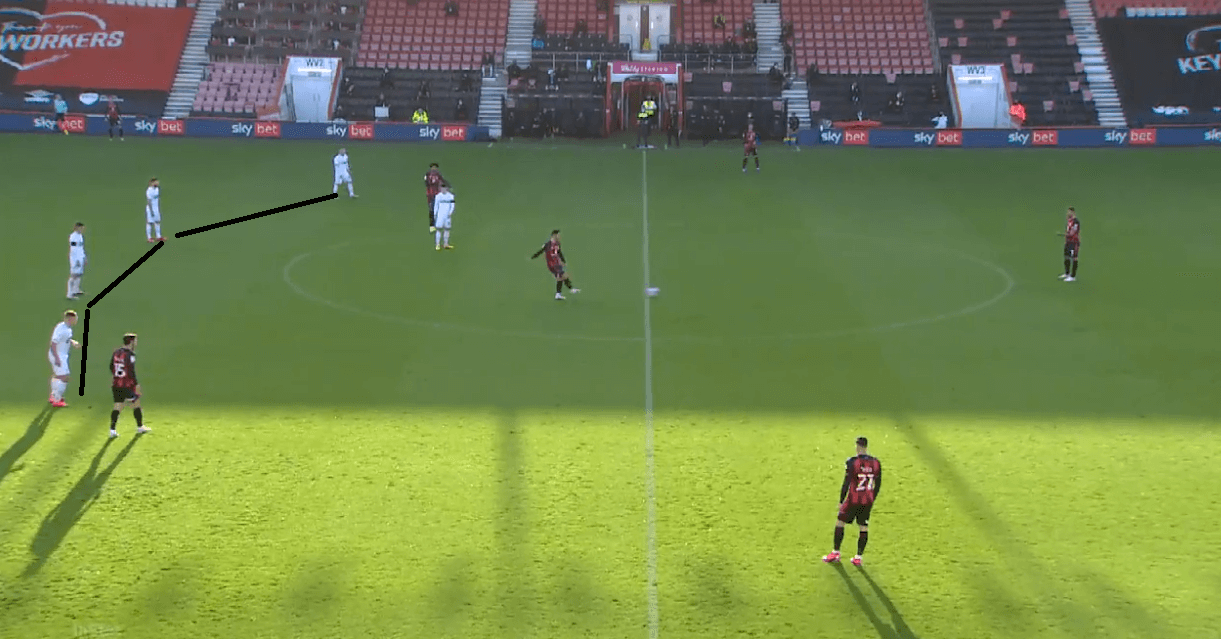
Their plan was to block the central area progression for the Bournemouth players and force them to the wings. In these areas, they would press them intensely in a man-man fashion and would force a turnover. Since both their systems were the same and they mirrored each other, it was more of who was the better team in winning their man-man duel.
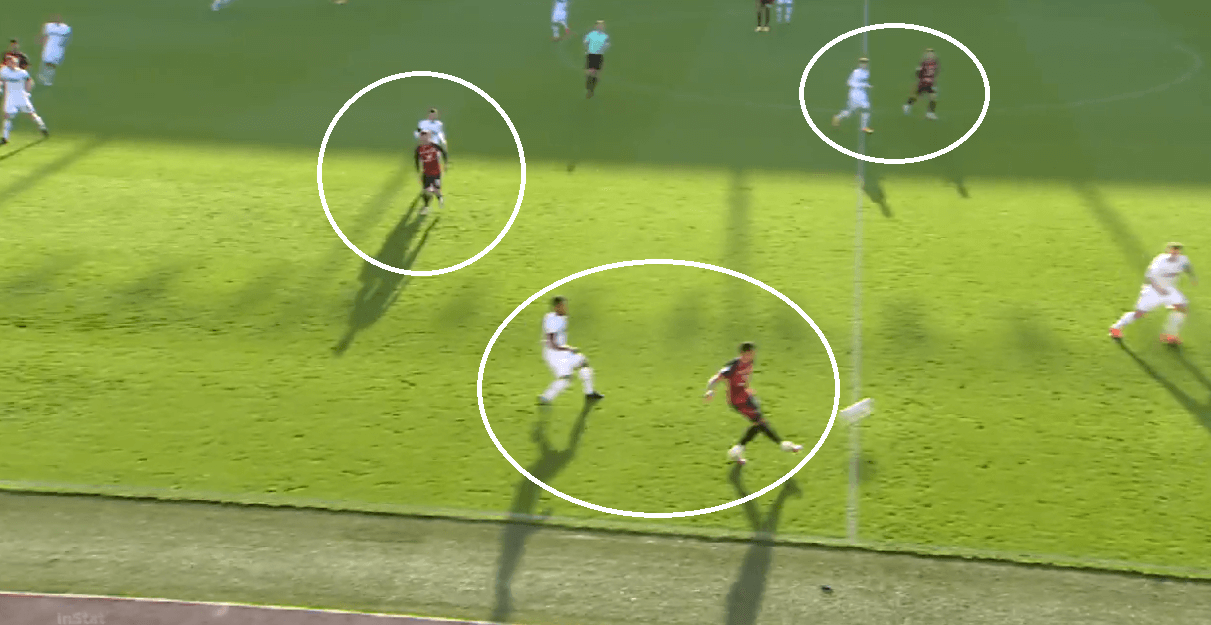
In the image below, we can see Matt Clarke breaking the play by intercepting the ball and immediately feeding it to Tom Lawrence and Derby now have a 3v3 situation on the break and looked dangerous.
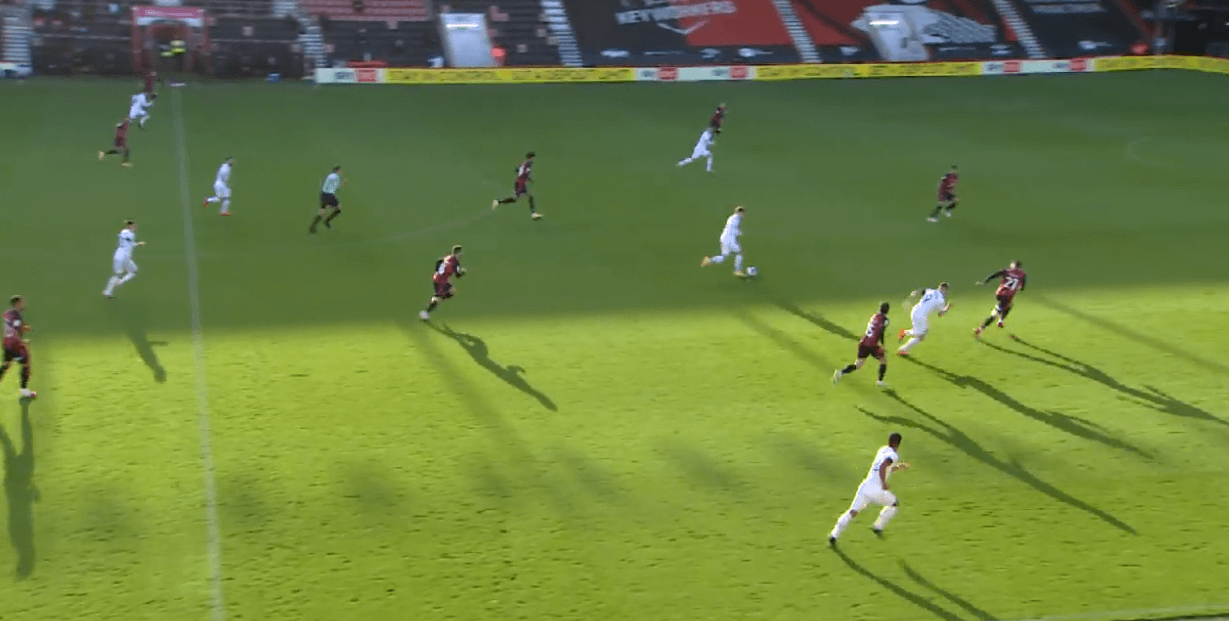
The Bournemouth midfielders, Lewis Cook and Philip Billing were marked man-man and were closely followed by the Derby pivot of Jason Knight and Graeme Shinnie respectively. Whenever the ball fell at the feet of Cook and Billing, the latter duo would intensely press the former duo to again force a turnover.
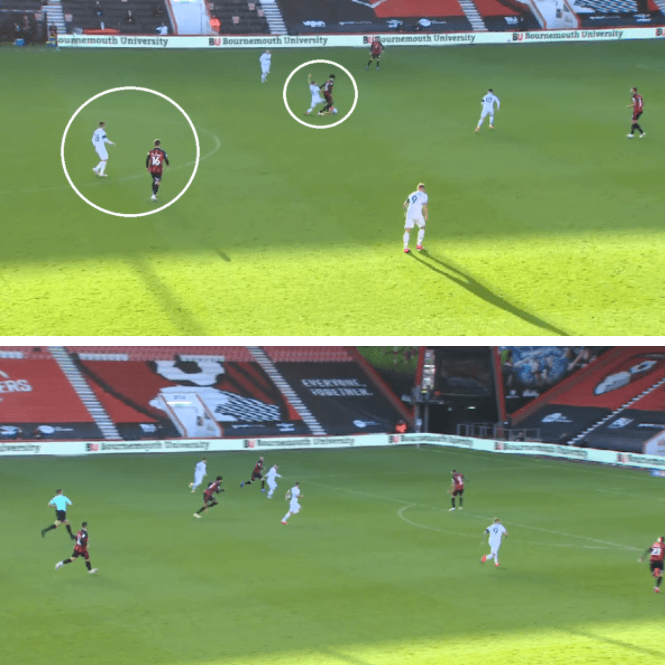
The example above shows them man-man marking the defenders and once the ball comes to Billing, Shinnie would tackle the ball and push it forward to Wayne Rooney as the former Manchester United and Everton man would carry the ball to begin their counter-attack.
Conclusion
Overall, it was an equal contest with both teams not looking convincing in their performance and often lacked a cutting edge to create chances to win matches. They eventually settled for a 1-1 draw and the result meant that Bournemouth dropped a place into 3rd position with 5 points behind leaders Reading and Derby still languishing at 22nd place and winless in their last 5 matches.


Comments