Over the last weekend in the Premier League, we saw two Premier League games be decided from a goal from the second phase of a set-piece, with both Chelsea and Tottenham dropping points in separate 3-3 draws.
Both sides conceded following an outswinging delivery and a second phase shot, and West Ham’s goal particularly had an air of “well what can we do about that?”. The purpose of this mini set-piece analysis then is to look at how teams combat against second balls from free-kicks.
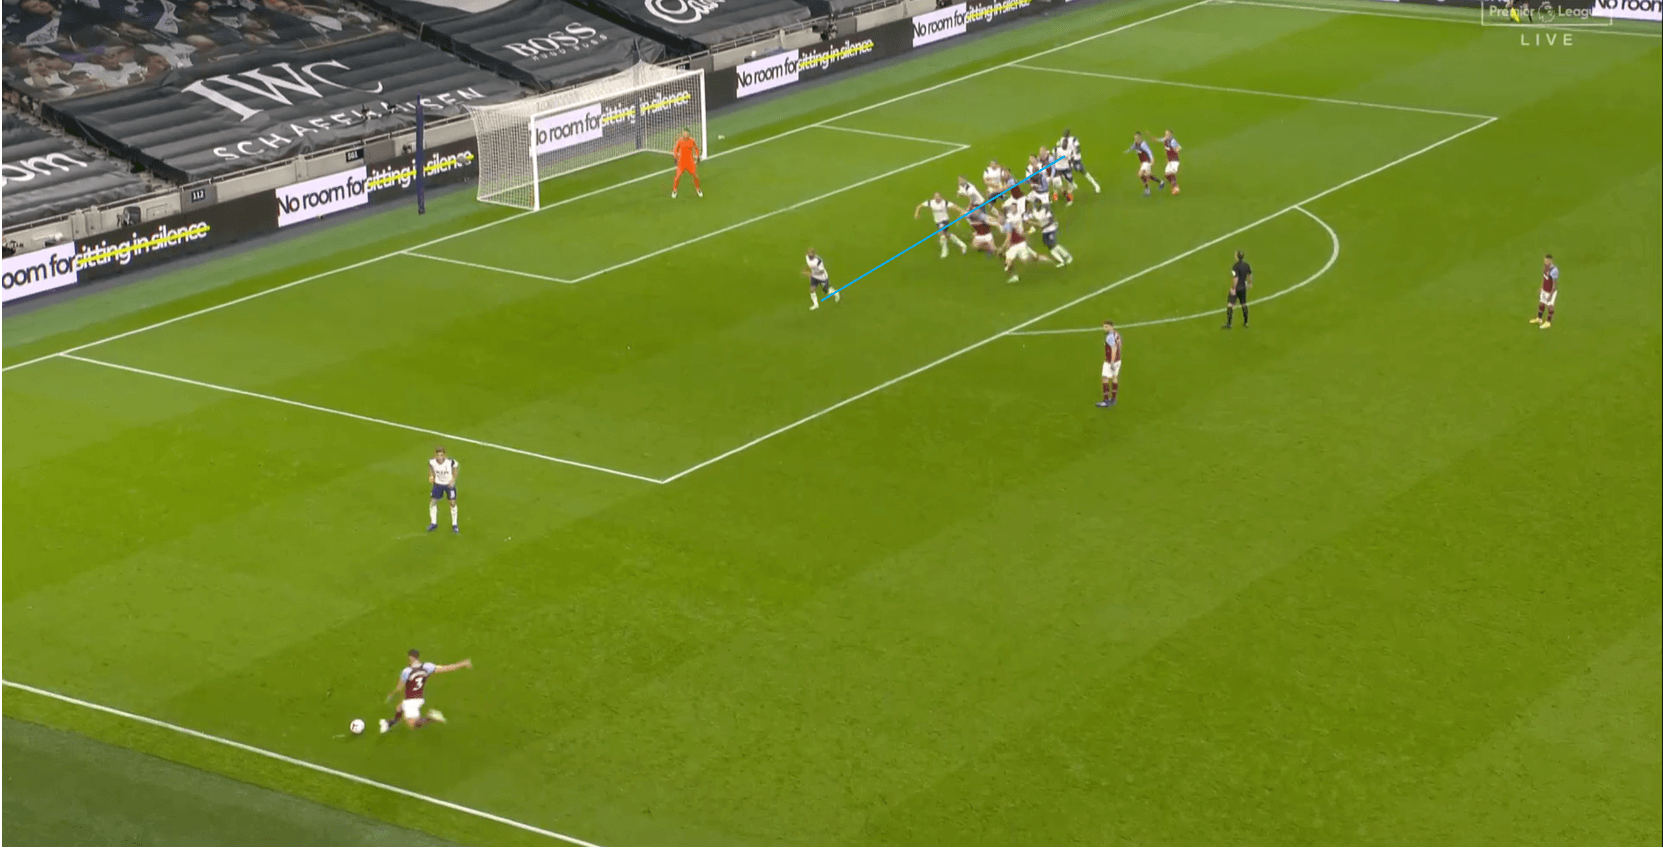
We can see in both examples below that the teams start in moderately high positions in relation to the ball to try and keep the opposition as far away from the goal as possible. Both structures are also relatively flat in shape, as both teams want as many players as possible within this zonal chain in order to increase their coverage and win the header.
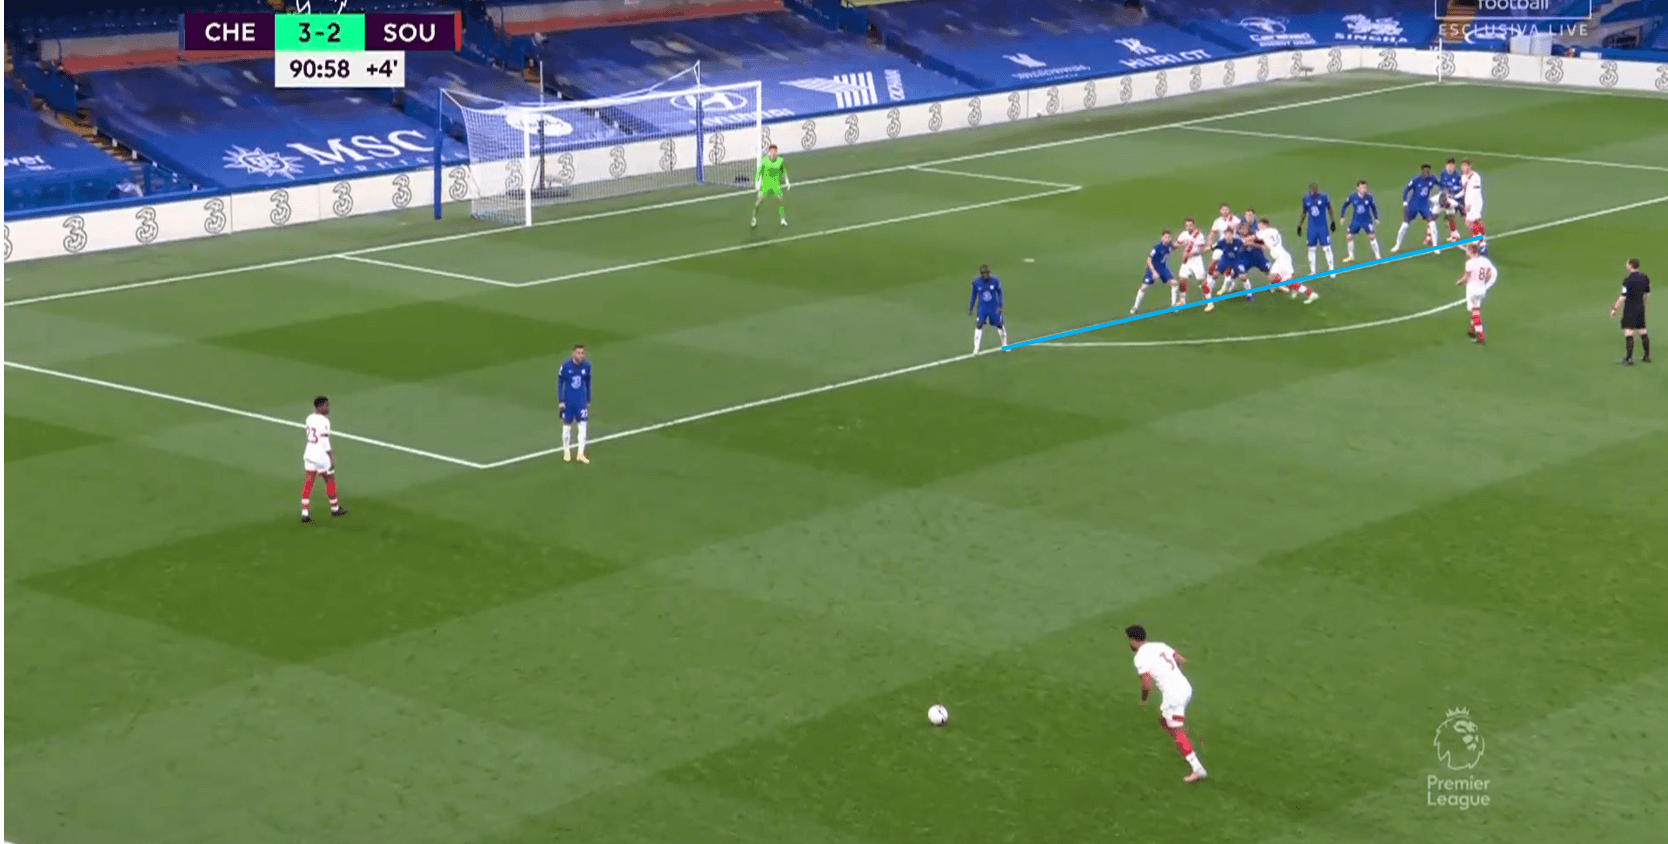
Tottenham are slightly less flat due to the positioning of West Ham’s players, but again we see the edge of the box is vacated in order to cover options in the first phase.
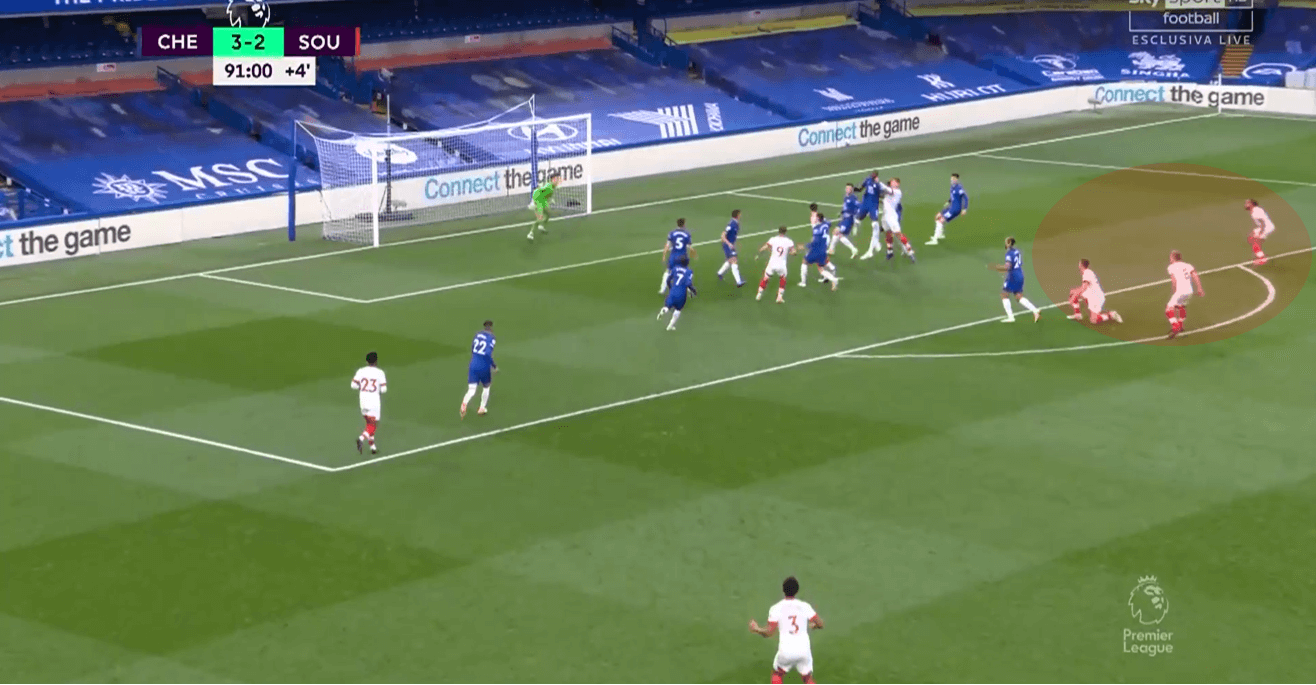
Both defending teams won the first header and cleared to the edge of the box, which was an area that was less covered. Hakim Ziyech stays highest due to his player losing his footing, but the danger at the back post cannot be covered due to Chelsea’s lack of staggering. This initial flat structure and the eagerness to clear the ball results in virtually all of Chelsea’s markers retreating deeper, and so when the ball is dropped there is no pressure on the ball, and because of that flat structure again, it becomes harder to make a block as a defensive unit.
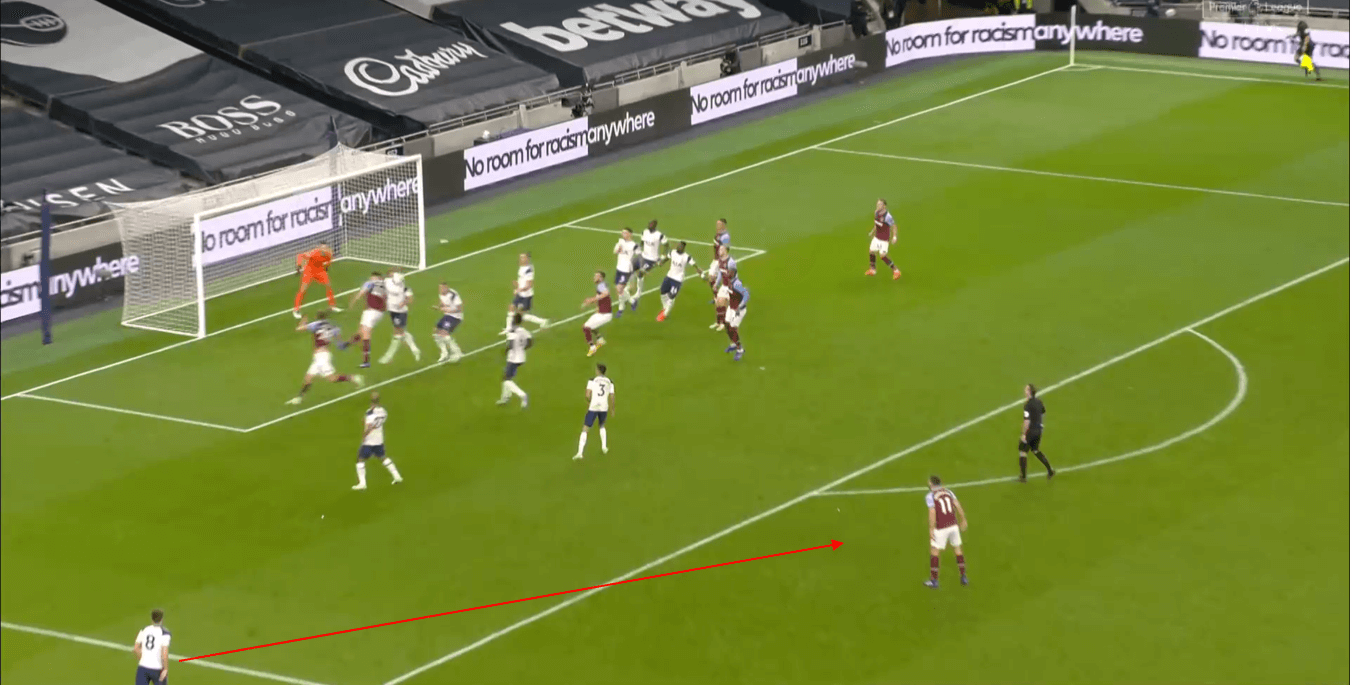
In the Tottenham example, they rely on the previous wall player to push across quickly to try and clear the ball away from Robert Snodgrass. He is able to poke the ball clear but only to Lanzini who has this large space in front of the box. Blocking structure isn’t relevant in this example due to the type of shot, but again we see Tottenham’s eagerness to clear the ball leads to a very deep and quite flat structure. The two highest players stay at this height due to having no markers to follow, but they don’t push out with the ball particularly well.
All of this begs the question of how do you stop/reduce these kinds of situations?
We can see in both examples that at least one player in the chain usually doesn’t have a player to mark, and so it becomes a question of can you cover the maximum space in your zonal line horizontally while still being able to cover some vertical space. The common compromise seen for teams is the use of staggering of players at different heights, as we can see below with an example from Liverpool last season. They will often commit one player to the edge of the box as well as having a marker positioned higher who doesn’t drop with players. As a result, they are positioned well for the second phase, and they are also able to maintain good spacing between players to deal with the first phase.
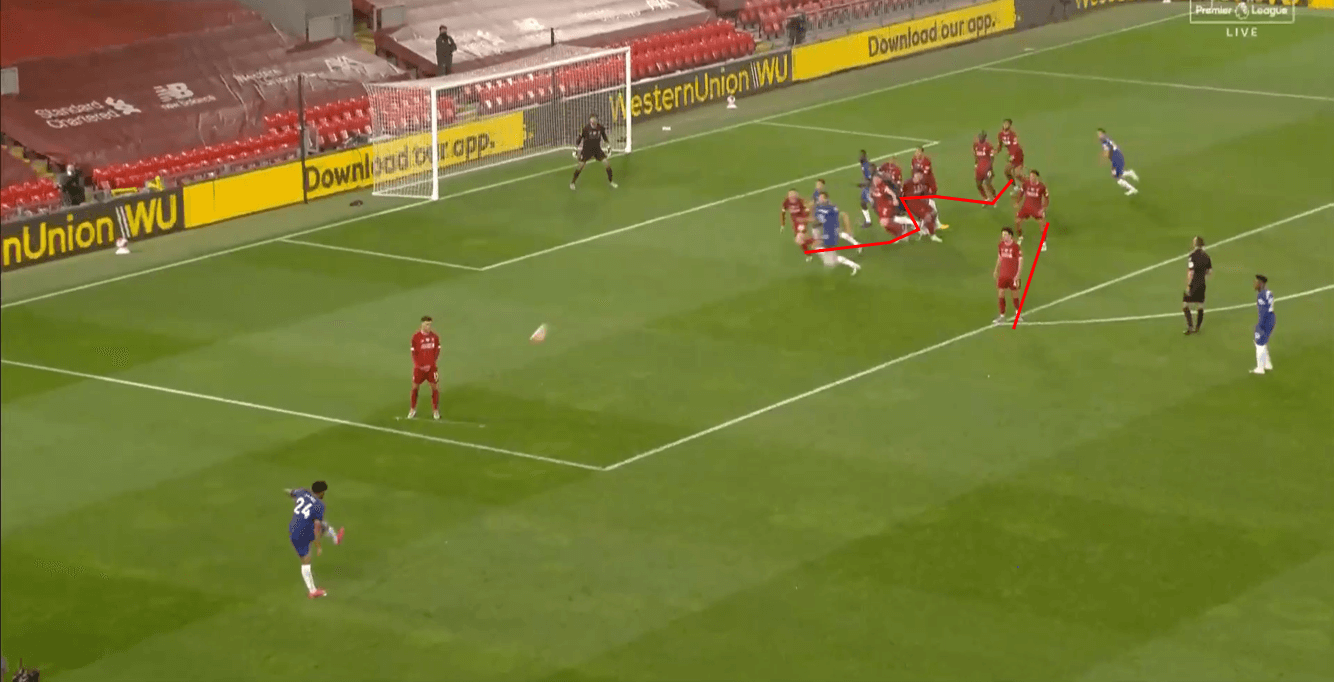
We can see in this example here Alexander Arnold initial marks a player, but he just passes him on to Origi once he goes past, as he is more concerned with being well positioned for the second ball. Again, Liverpool’s spacing is optimal to win the first header, and they are able to remain tight and compact with fewer players in the chain.
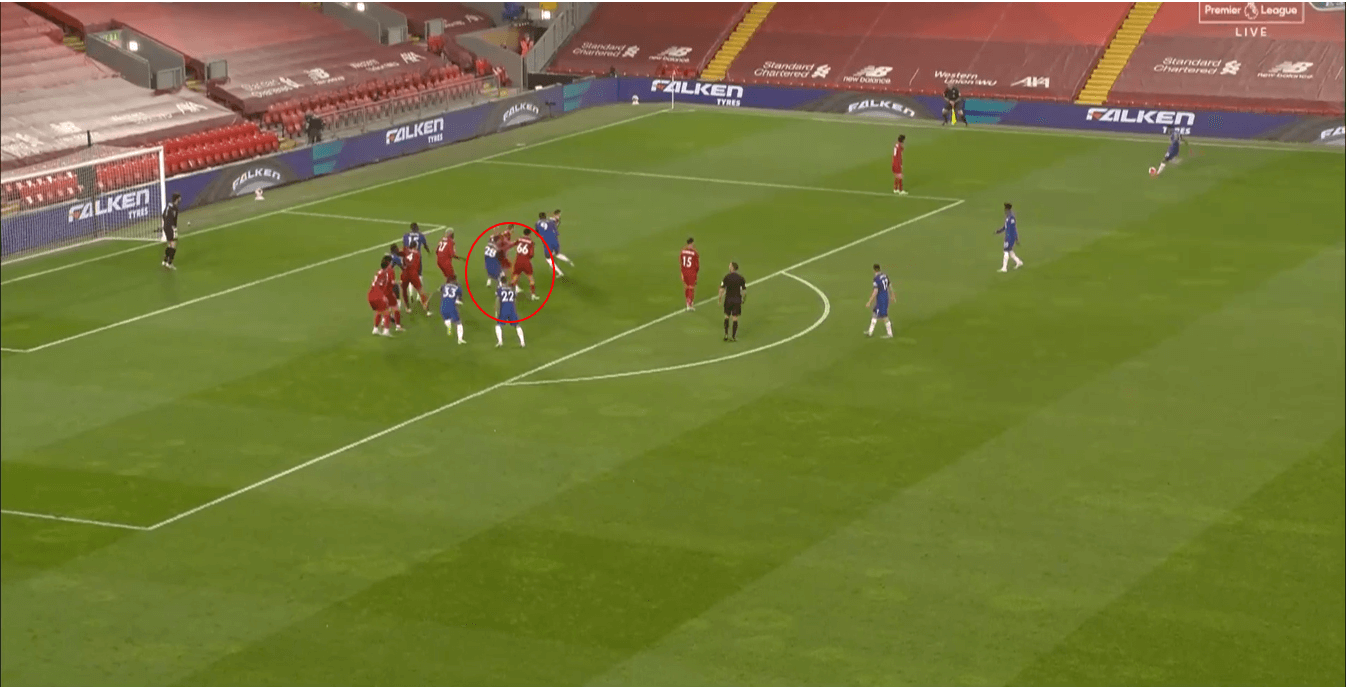
Teams have to cover an optimal space both horizontally and vertically in order to defend free-kicks well, and striking a balance between the two can be difficult. For teams defending set-pieces, there is often an urge to drop everyone back and just win the header, but as in open play, teams have to be smarter than this and structure themselves in a way that allows them to be proactive to the second ball. Again this can be difficult, particularly when defending a one goal lead late on, but this urge not to just panic and drop everyone back is one which needs to be managed and coached effectively. The Chelsea example is a much worse defensive example just due to the nature of the goal, but the Tottenham example is also avoidable given the correct structure.


Comments