Teams defend against indirect free-kicks using many strategies, which are zonal marking in a high line with a late drop, zonal marking in a high line with an early drop, zonal marking in a deep line and a man-marking system.
The use of initial offside players is most common against teams who defend with a high line, especially with a late drop depending more on the offside trap.
In this tactical analysis, we will show that many teams give instructions to a player or more to stand, initially, in offside positions for many reasons, using different tactics. Those players are asked to block defenders from their backs, preventing them from stepping back, which causes gaps in the defending line.
Other teams use those players to receive the second pass or to be targeted by using deceptive runs by other players to break the offside or be the bait to break the offside trap for other players.
Different roles
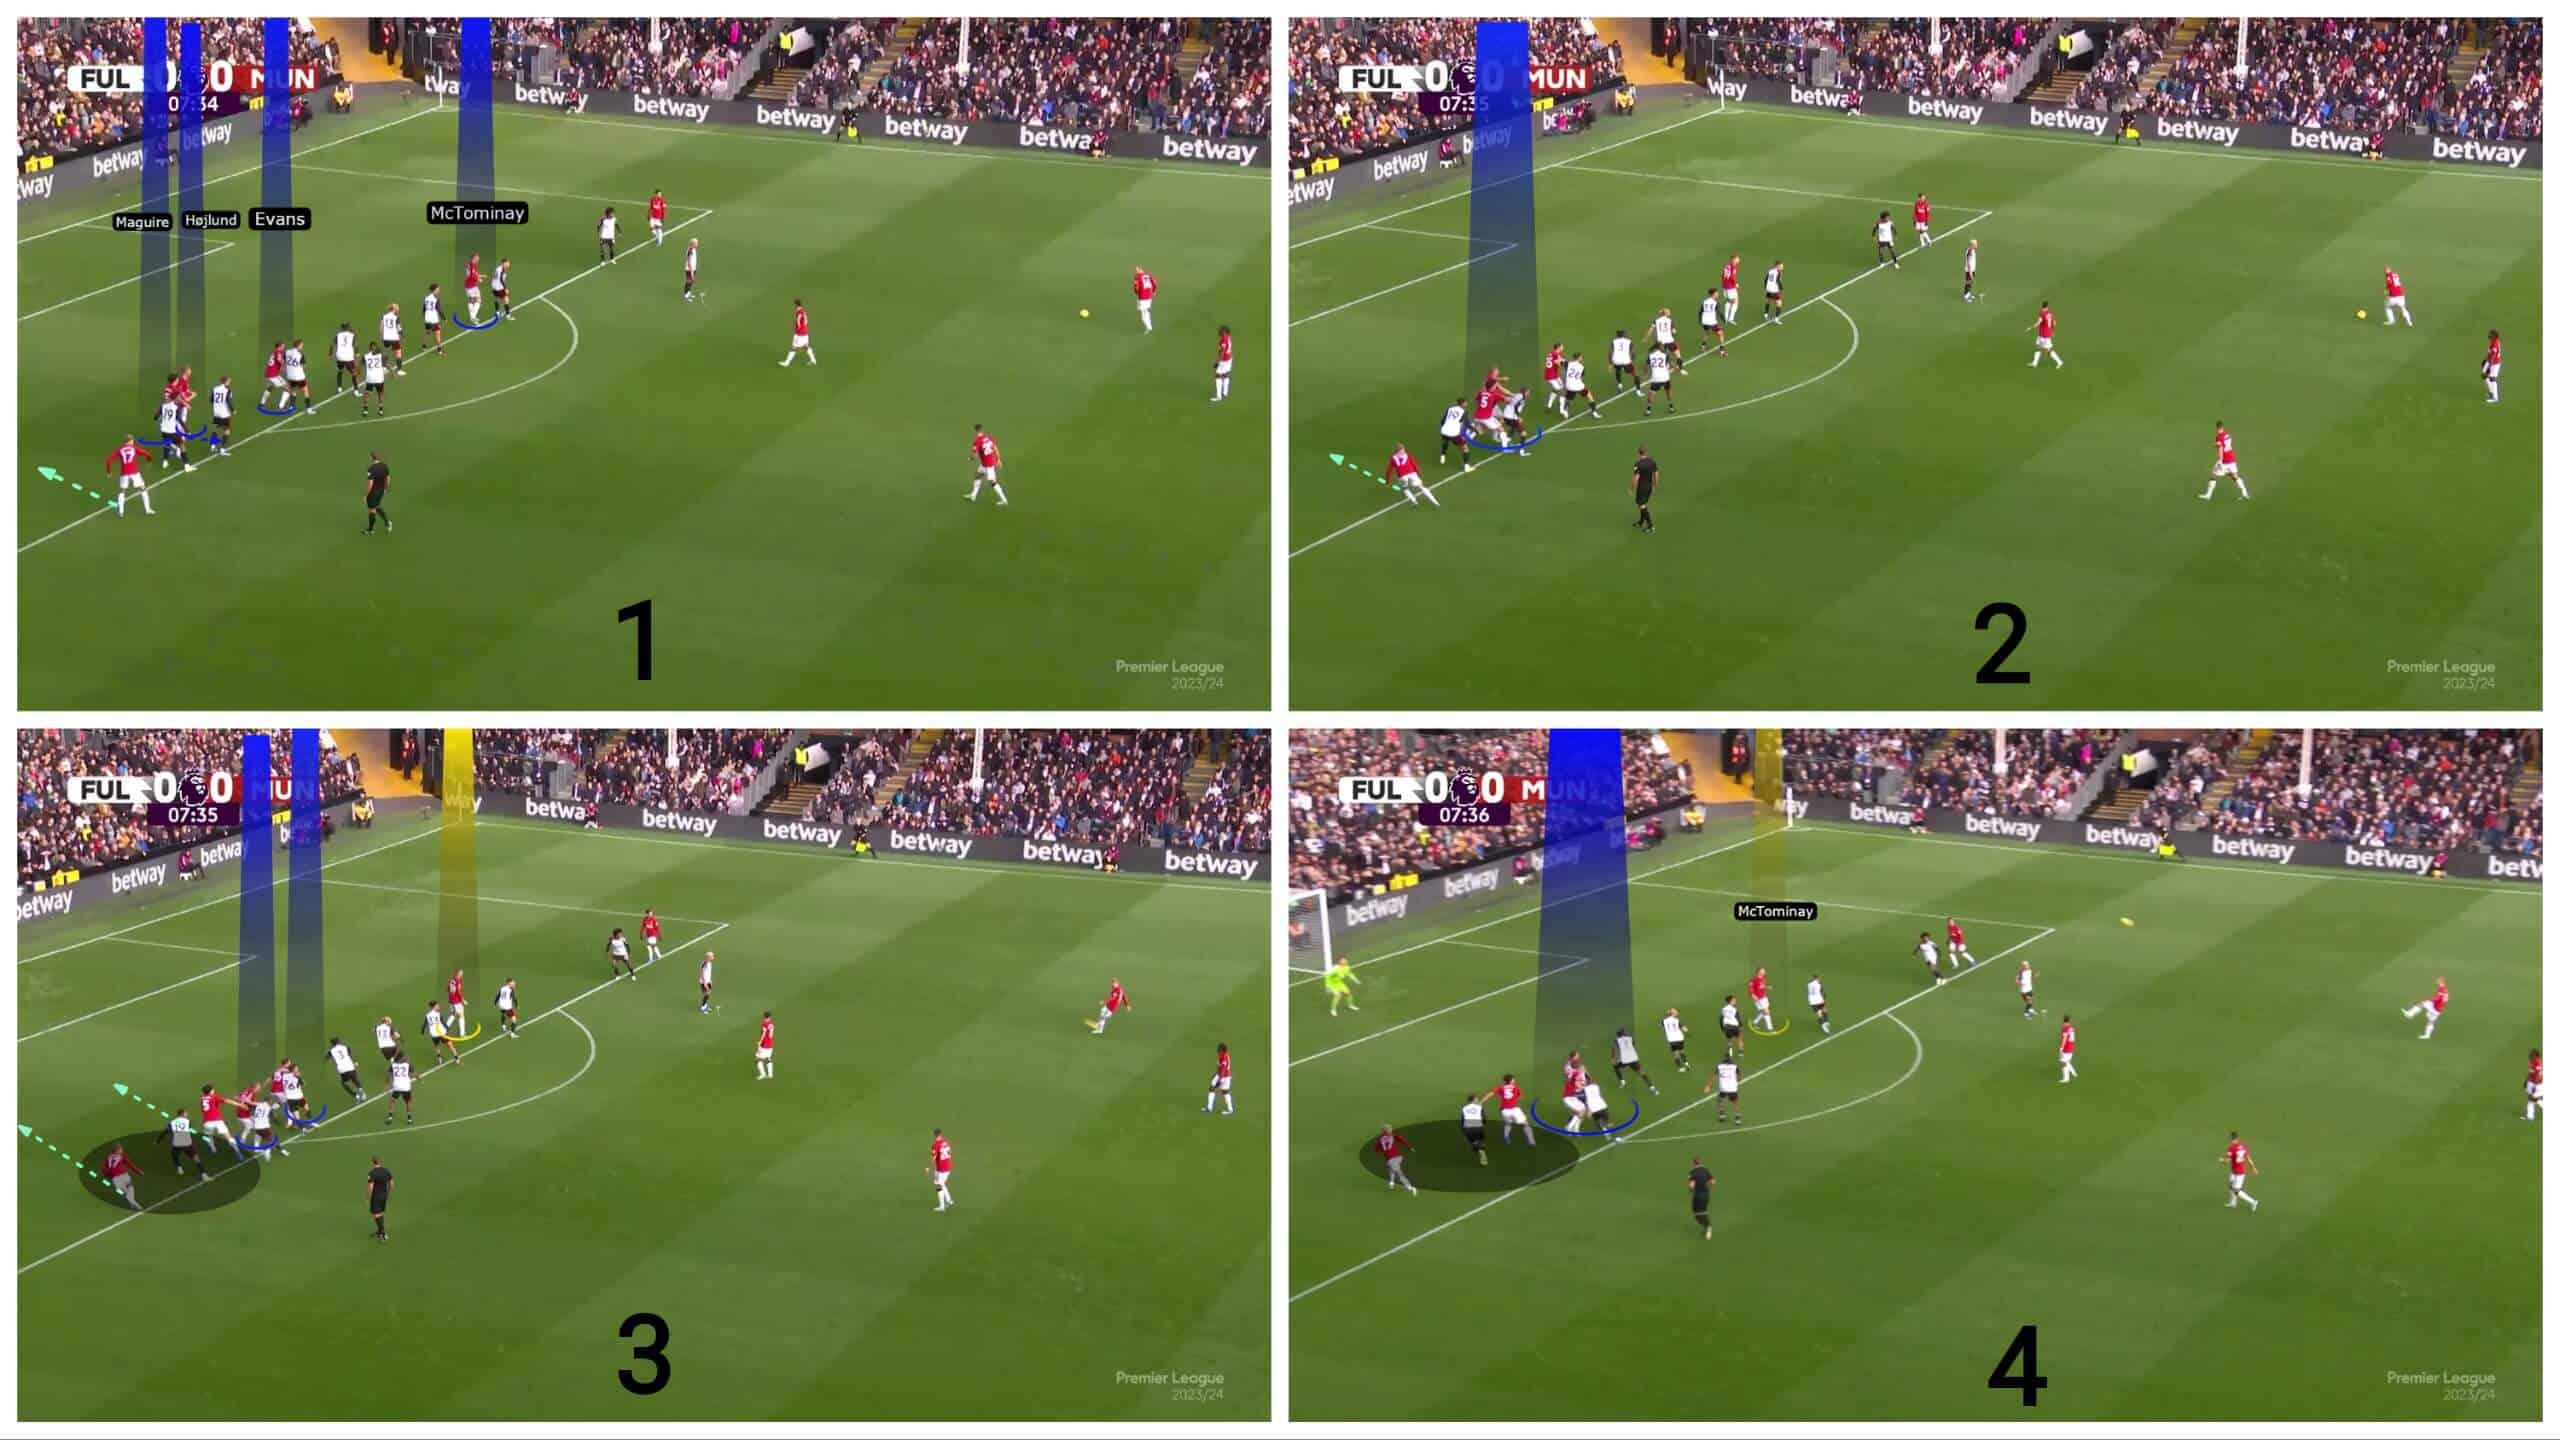
In the first photo below, Man United use four players in initial-off-side positions: Scott McTominay, Jonny Evans, Rasmus Højlund and Harry Maguire, who stands narrow more inside to force the last defender to get more narrow, leaving more space for Alejandro Garnacho, who comes with his pace from a farther distance.
In the second photo, as the taker moves, Maguire pushes the second last defender, getting more back with the line to be onside, and then he moves forward again as the taker touches the ball, as in the third photo.
In the third photo, Evans and Højlund block the second and third last defenders, preventing them from stepping back, which provides a 2v1 situation against the last defender. At the same time, McTominay stands in an offside position, but for another reason to be onside later receiving the second pass, having a positional superiority against defenders to get first to the ball because of his offside initial position, as shown in the fourth photo.
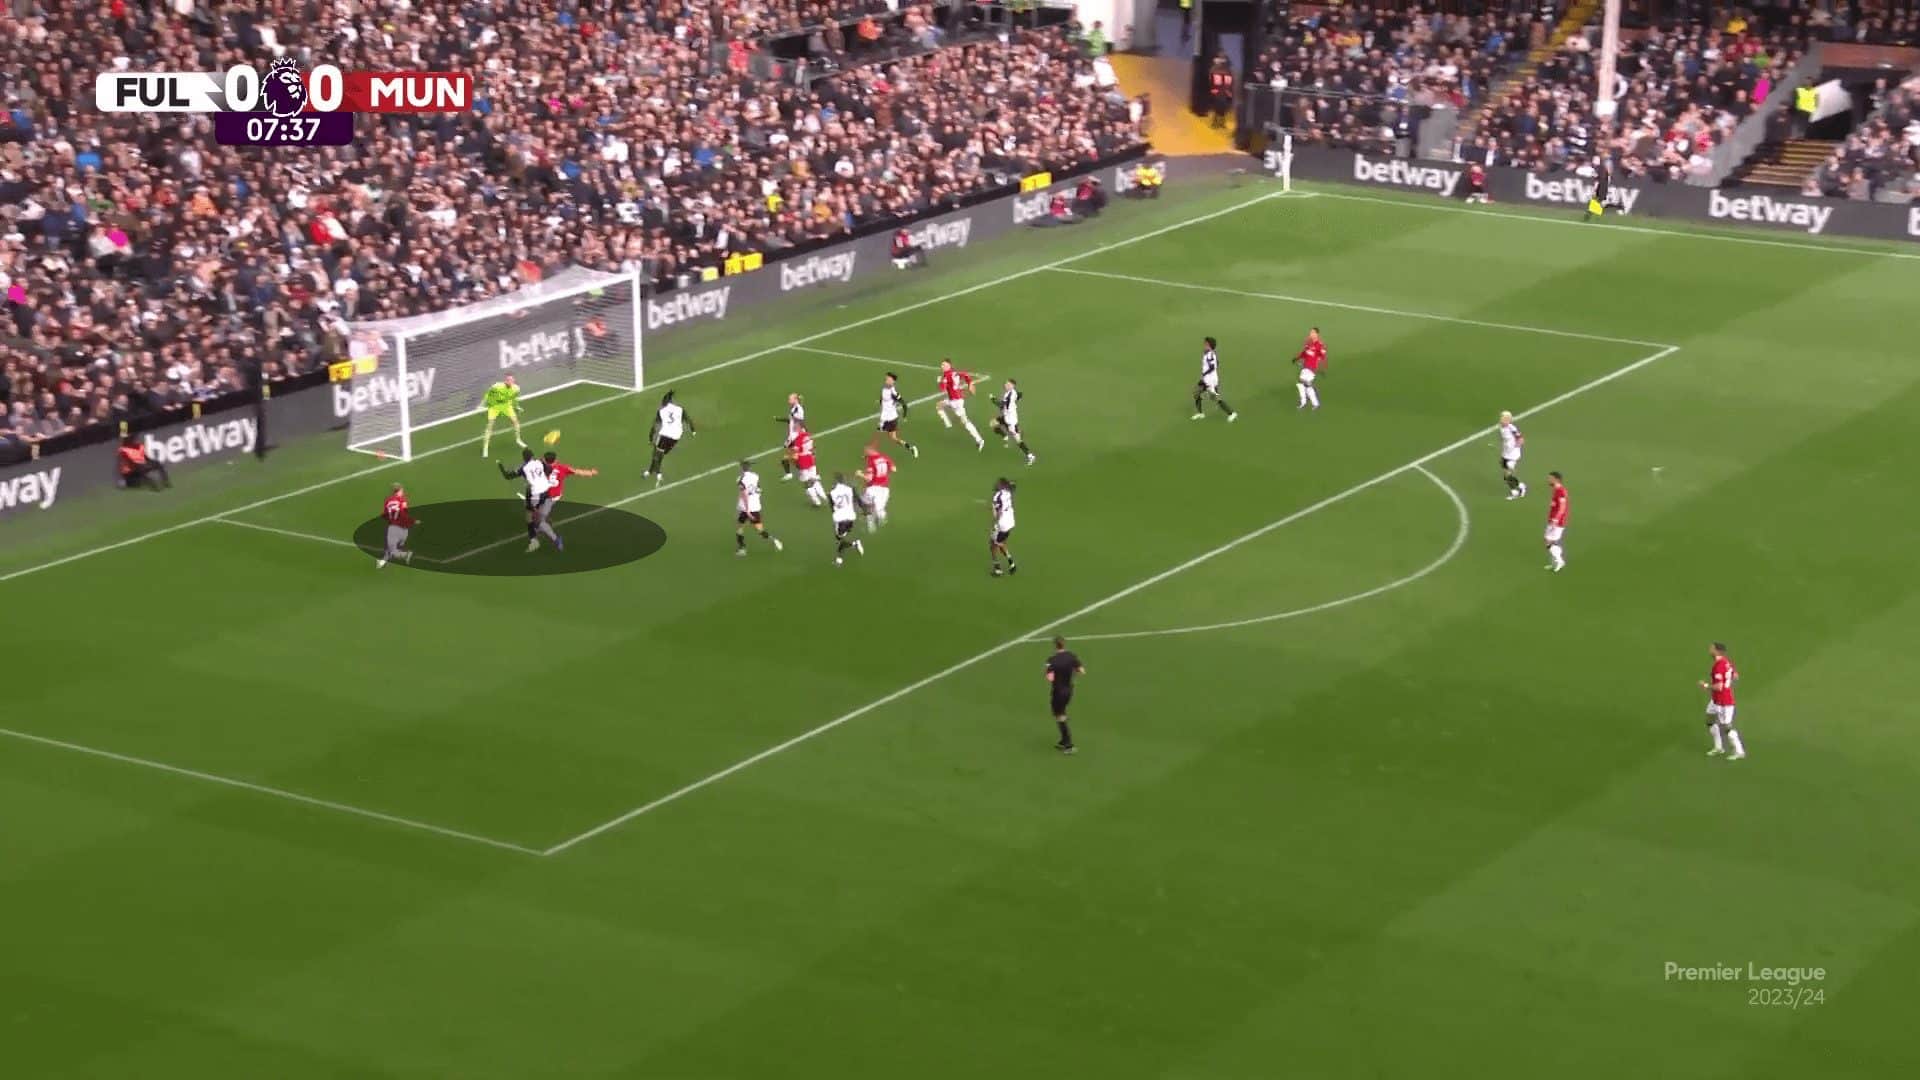
The last defender is in a 2v1 situation, so he decides to chase Maguire, which makes Højlund free when the ball gets over them, as shown below. Here, we need to note that if the cross was more toward Maguire, it would also be a direct threat because of Maguire’s initial offside position, which makes him free to go and jump, having a positional superiority against the last defender who comes from Maguire’s back, so this cross target this area exploiting the 2v1 situation either Maguire or Højlund.
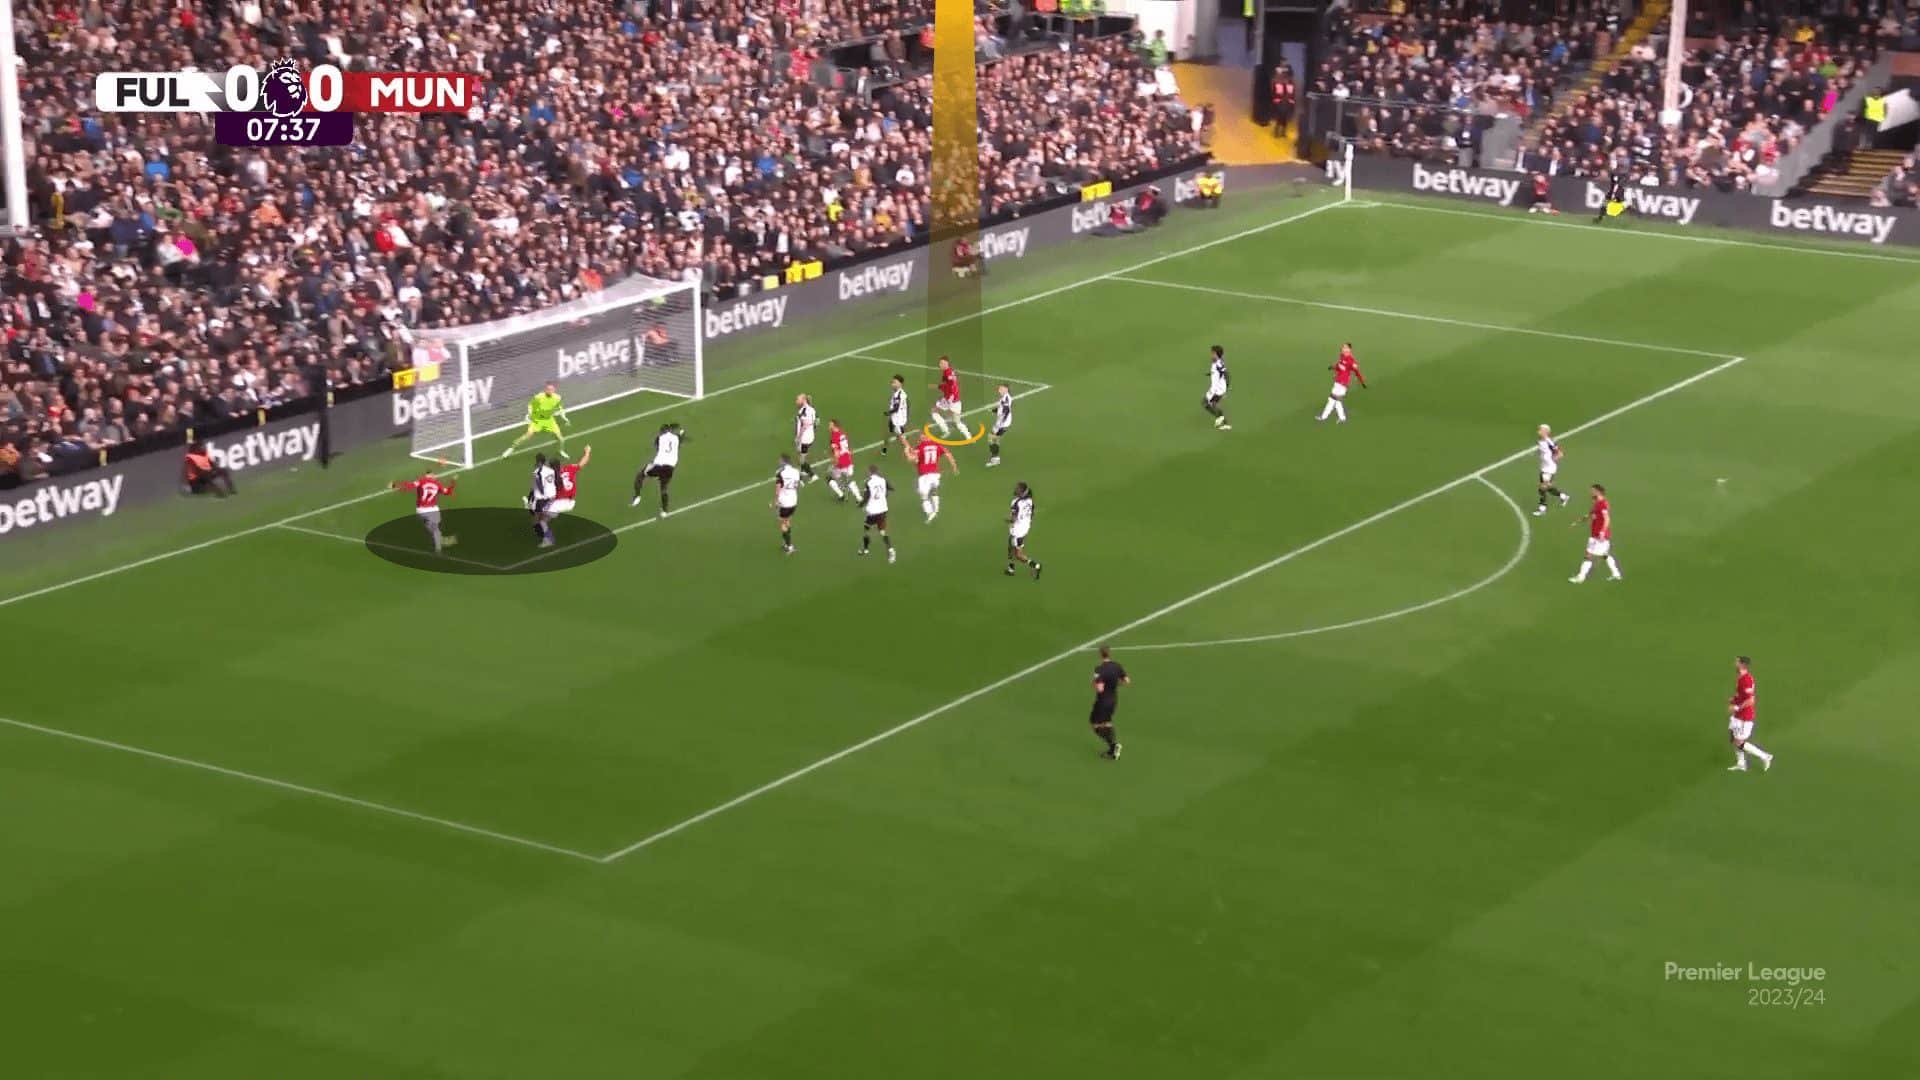
Here, McTominay was in an excellent position to receive the second pass, scoring a goal. Still, the referee cancelled this goal because Maguire was offside, so this trick to push the defender to get down and then move forward wasn’t enough to ensure he would be onside. All the ideas come from that, so we need to manipulate the line to make sure that our targeted player who has an initial offside position will be onside. Let’s know how!
Deceptive runs
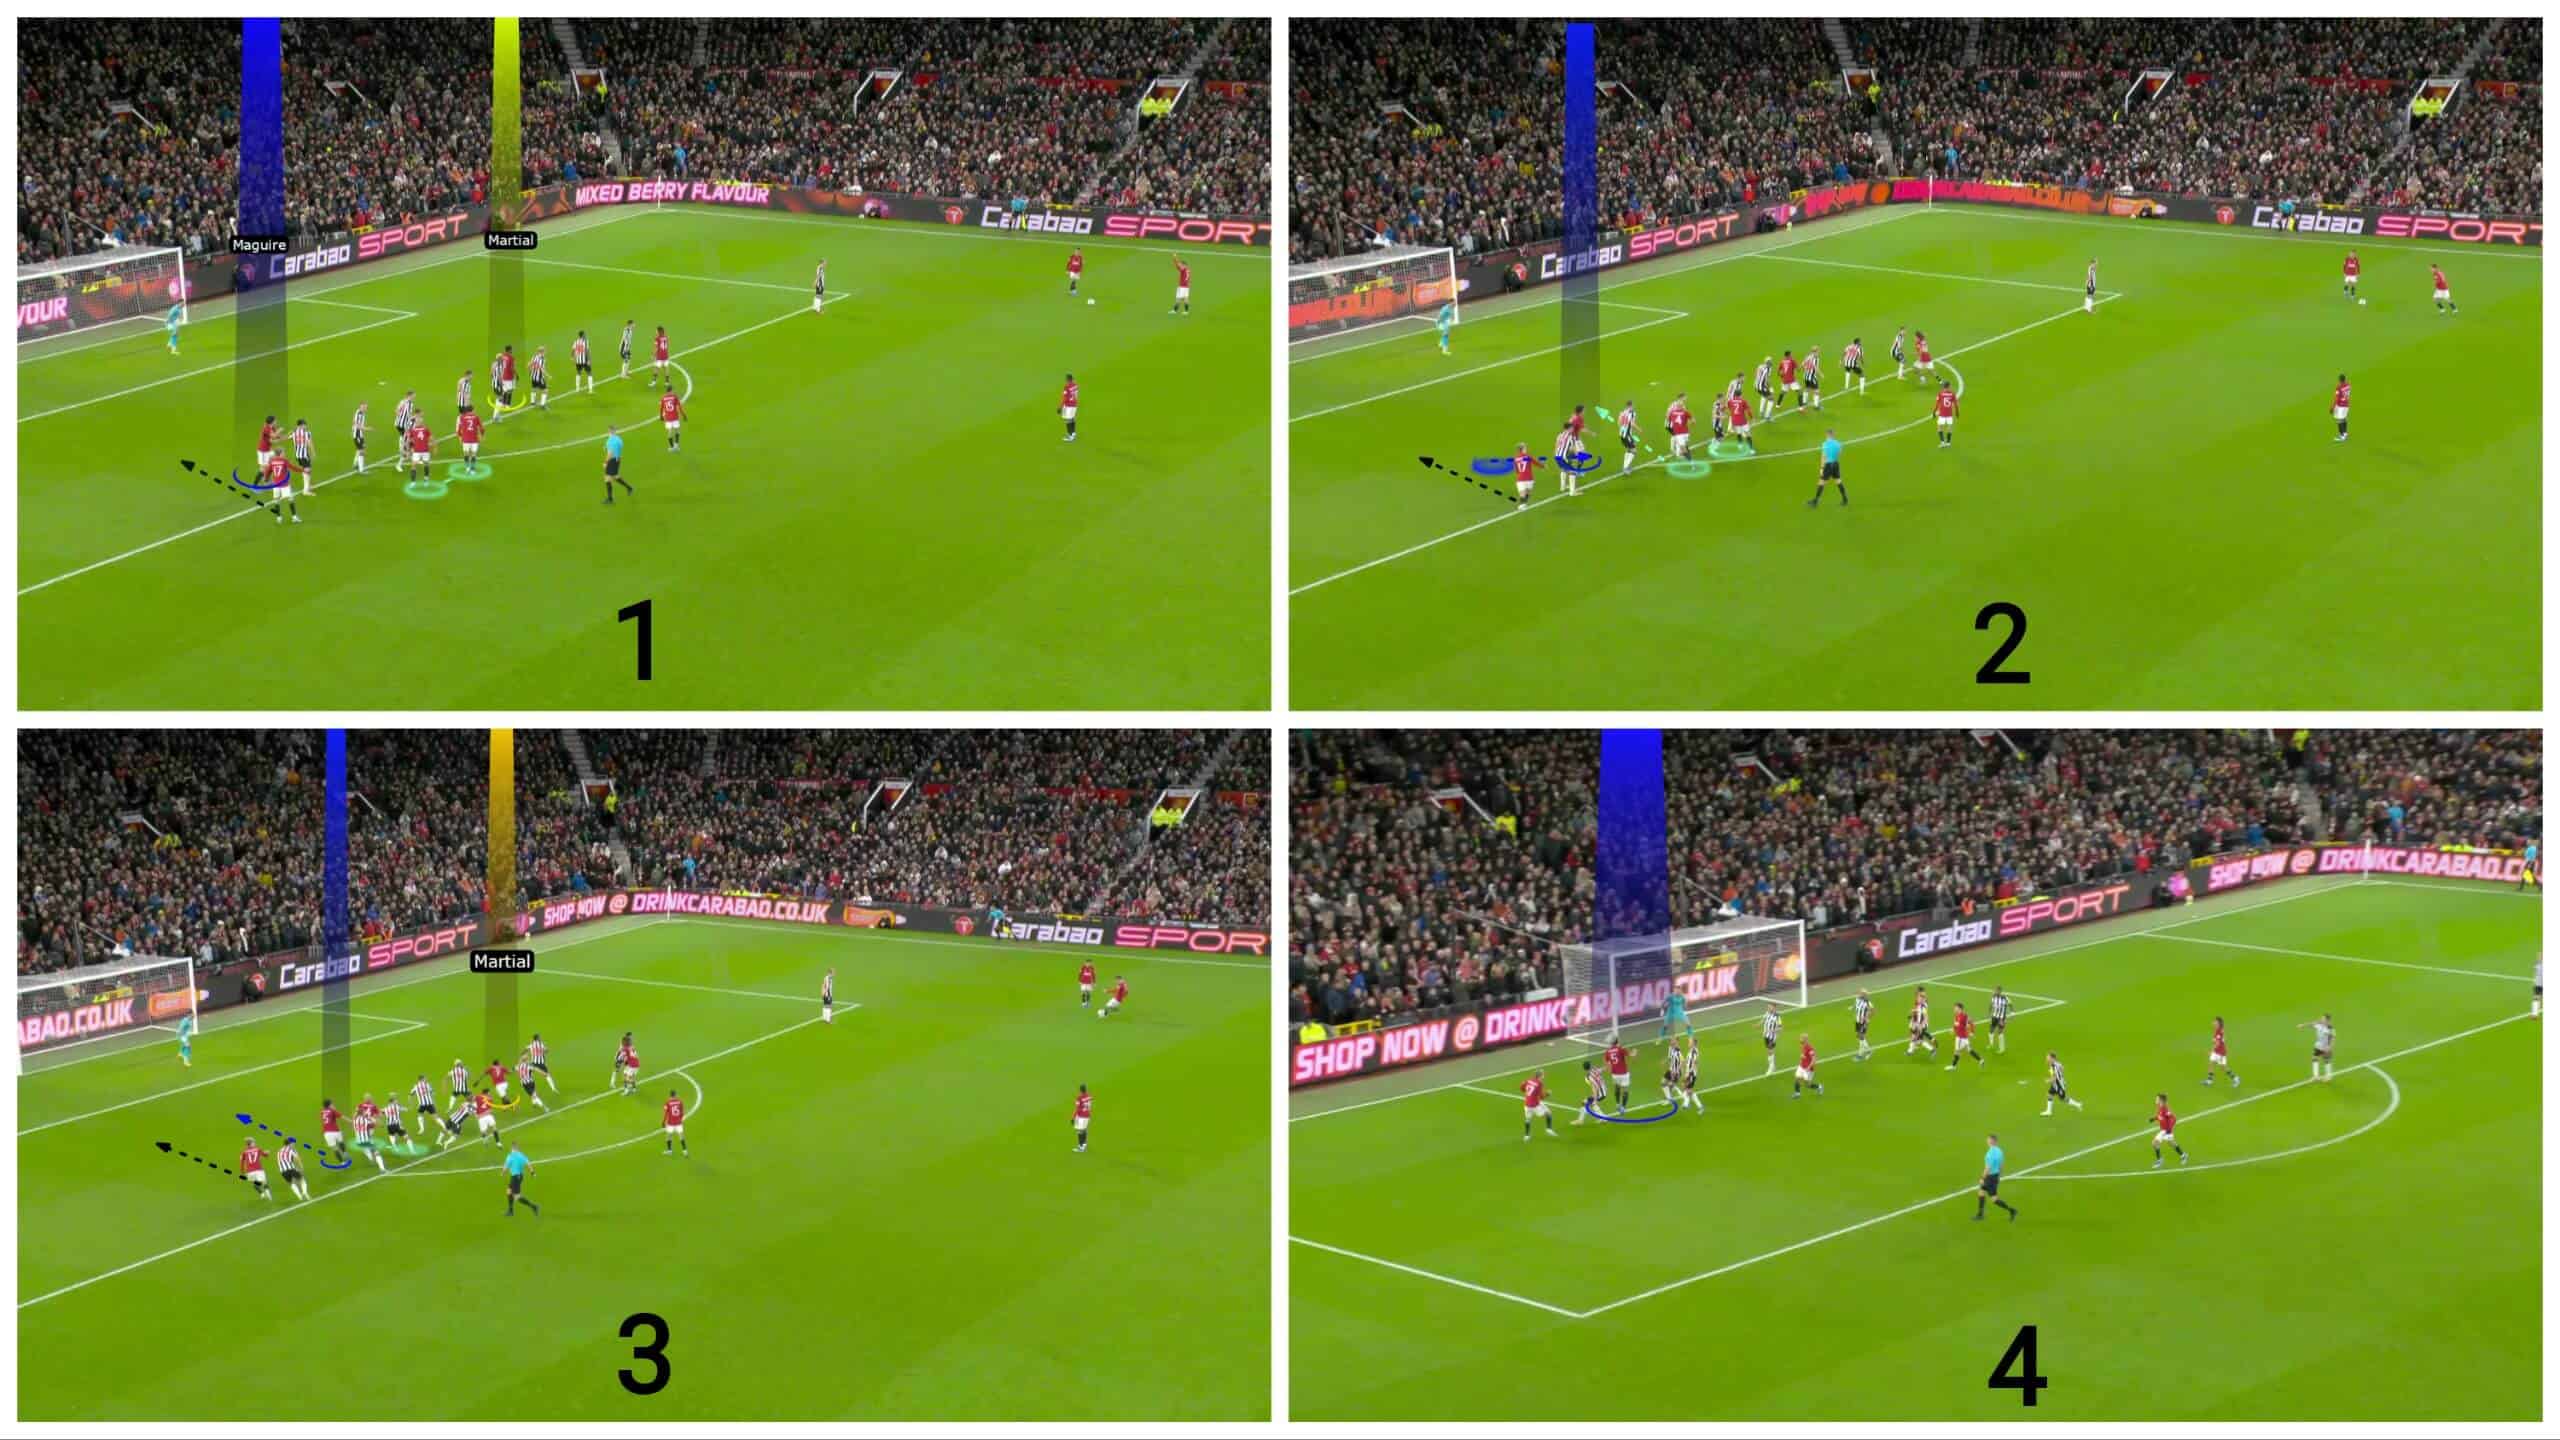
In the first photo below, the two green players are in a 2v1 situation against the defending rebound player, so as the taker moves, in the second photo, one of them drags this defender away. At the same time, the other, Sofyan Amrabat, gets through the line to drag a defender to make Maguire onside, who gets more back as the taker touches the ball to be onside without any annoyances from any defender, as in the third photo, in which Anthony Martial uses his offside position to move early as a bait dragging the first defenders, so you can see clearly that Maguire is onside.
But the cross was inaccurate, so it passed him, as shown in the fourth photo.
Why far post?
You may ask yourself why this problem happens on the far post, and the answer is in the case below.
The far-post cross takes a long time in the air, which allows the late player in blue, who comes from a faraway distance with his full momentum, to go easily to this large highlighted area while a player in yellow is fixing the last two defenders, as shown below.
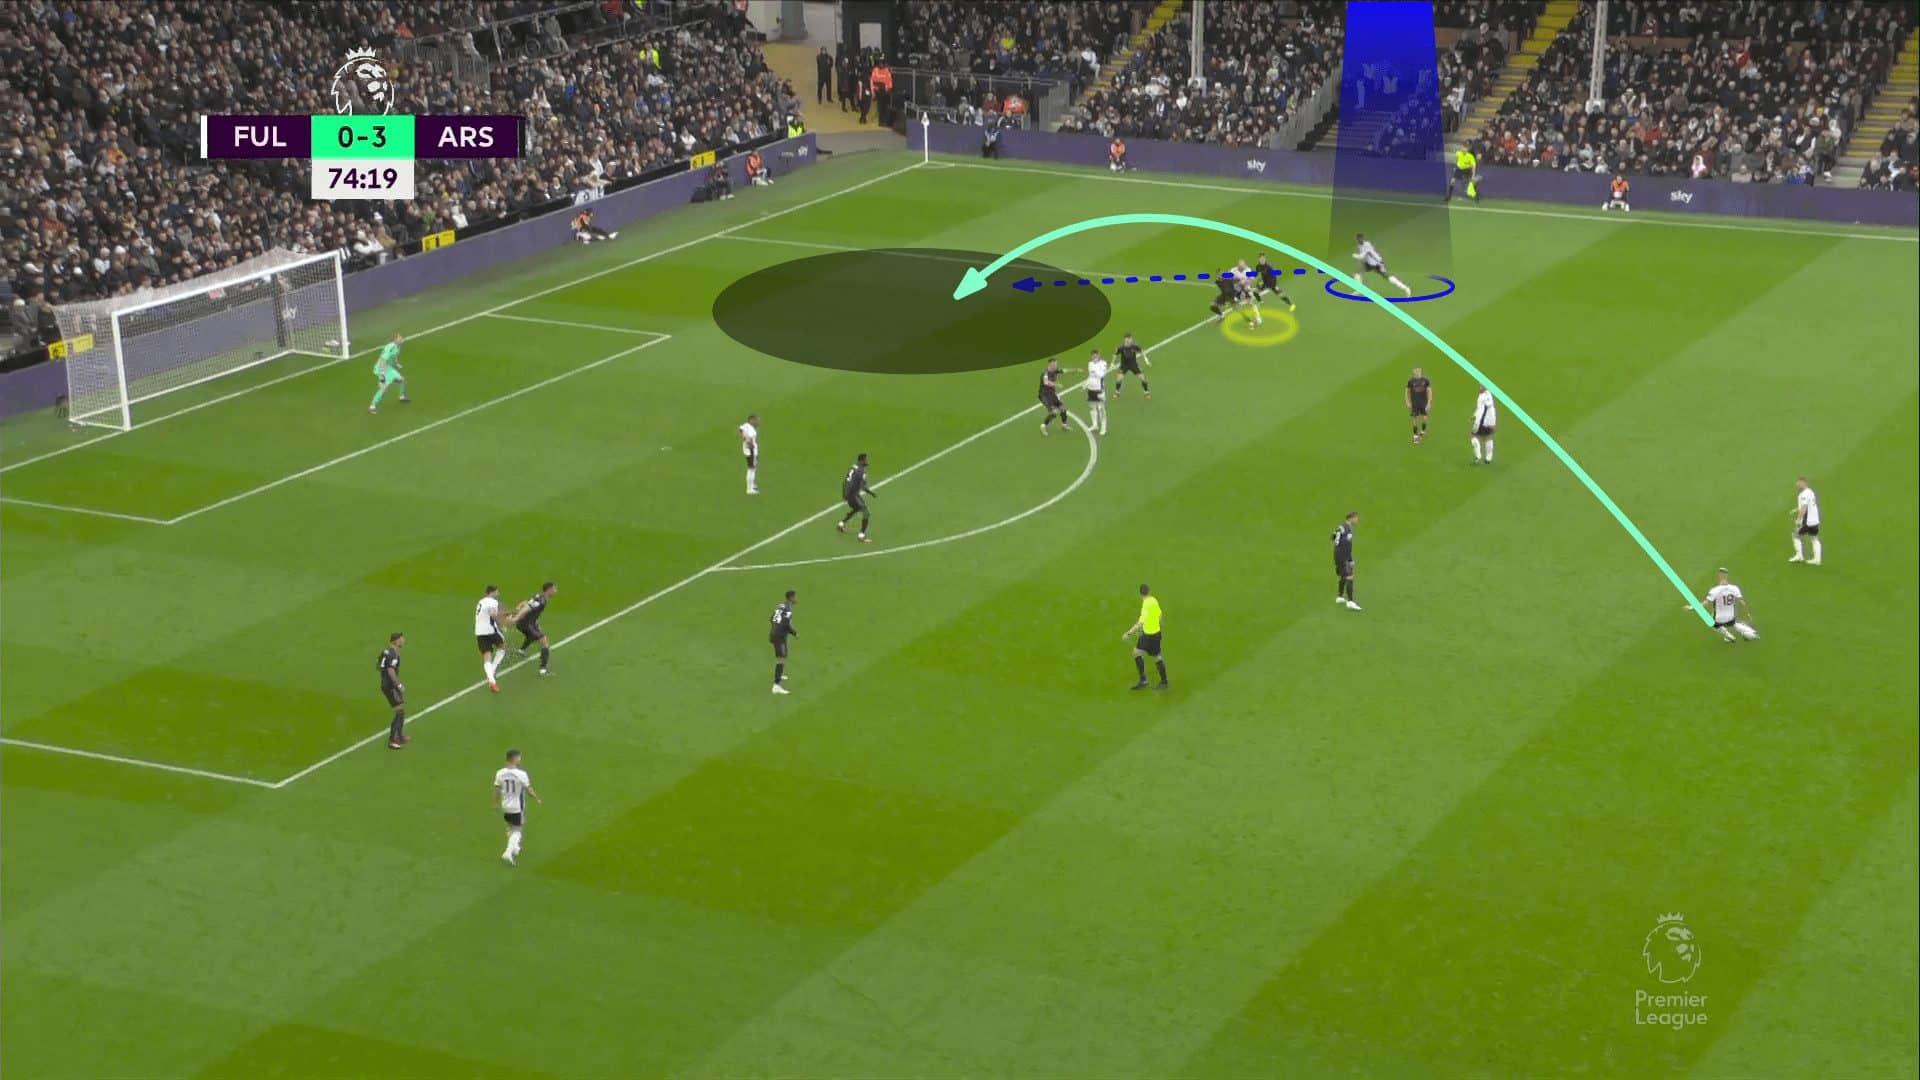
This player is in a dangerous area, having two dangerous choices.
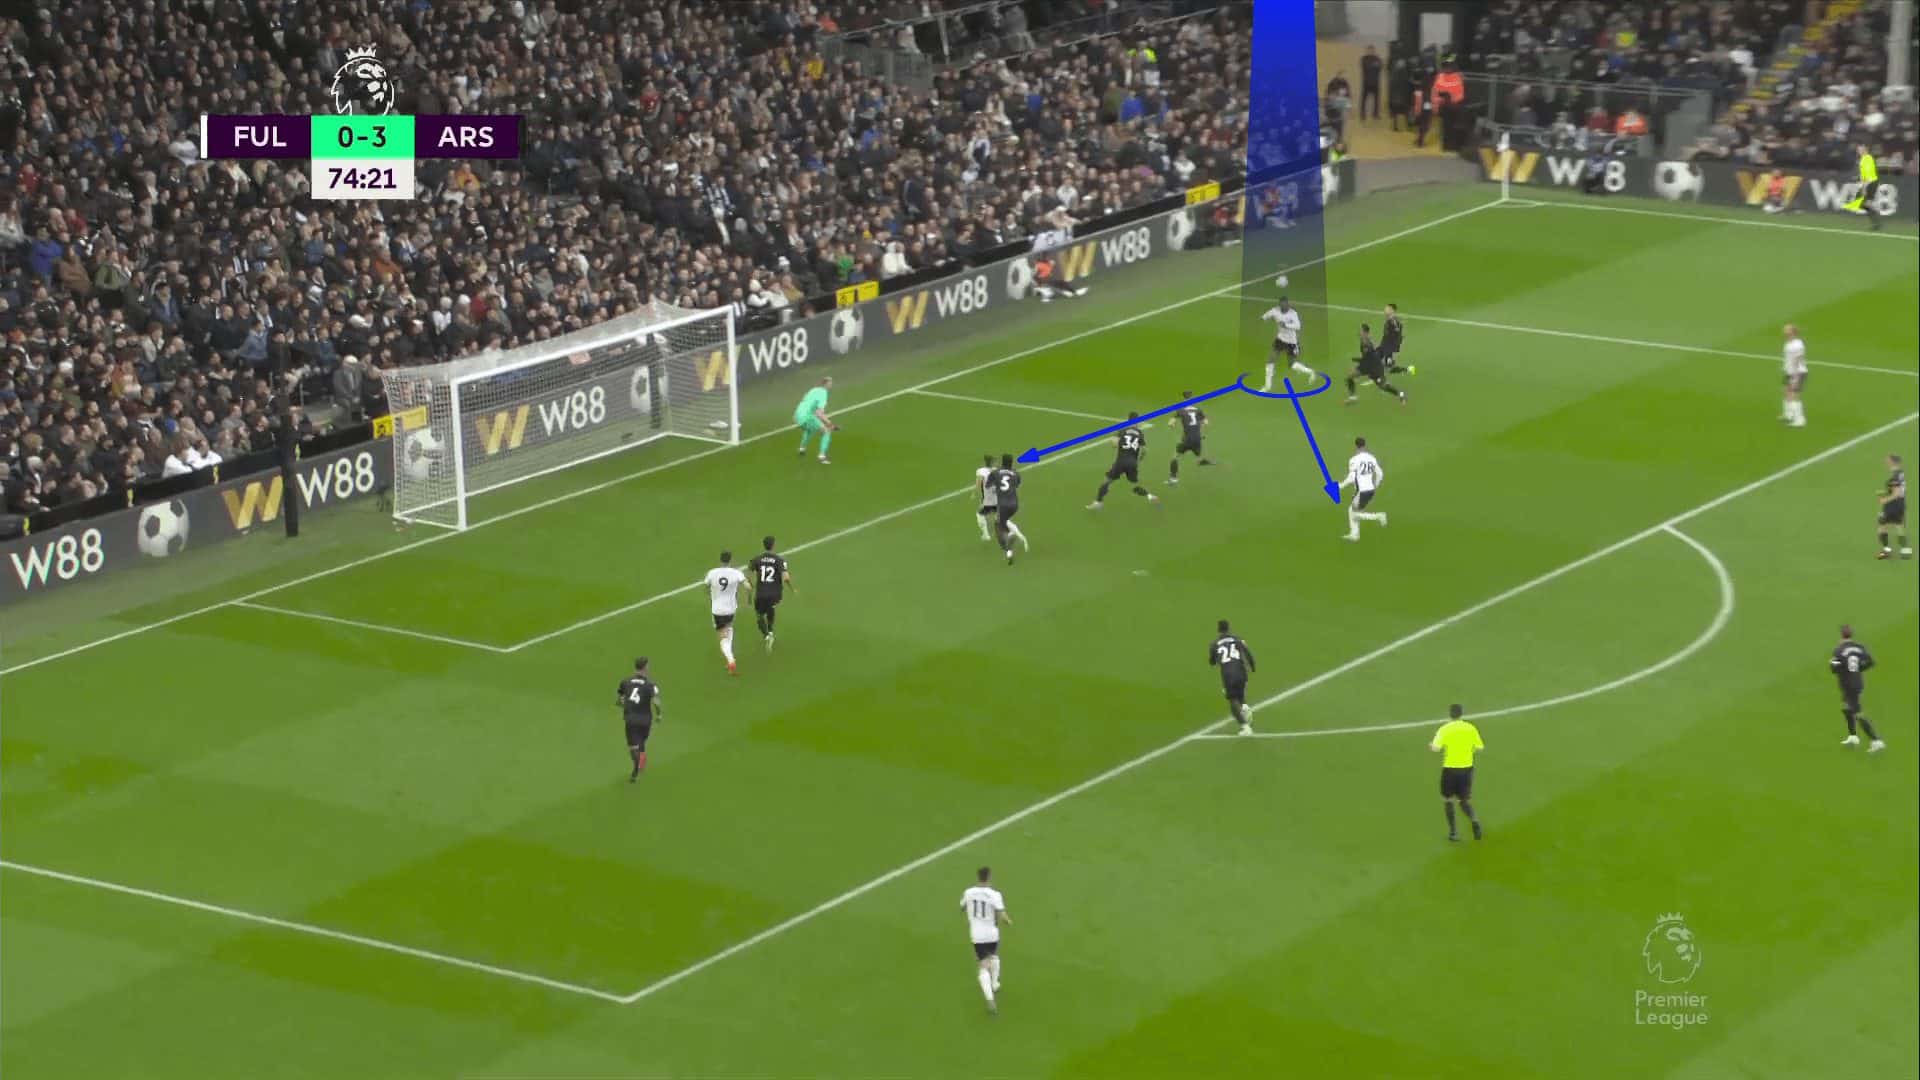
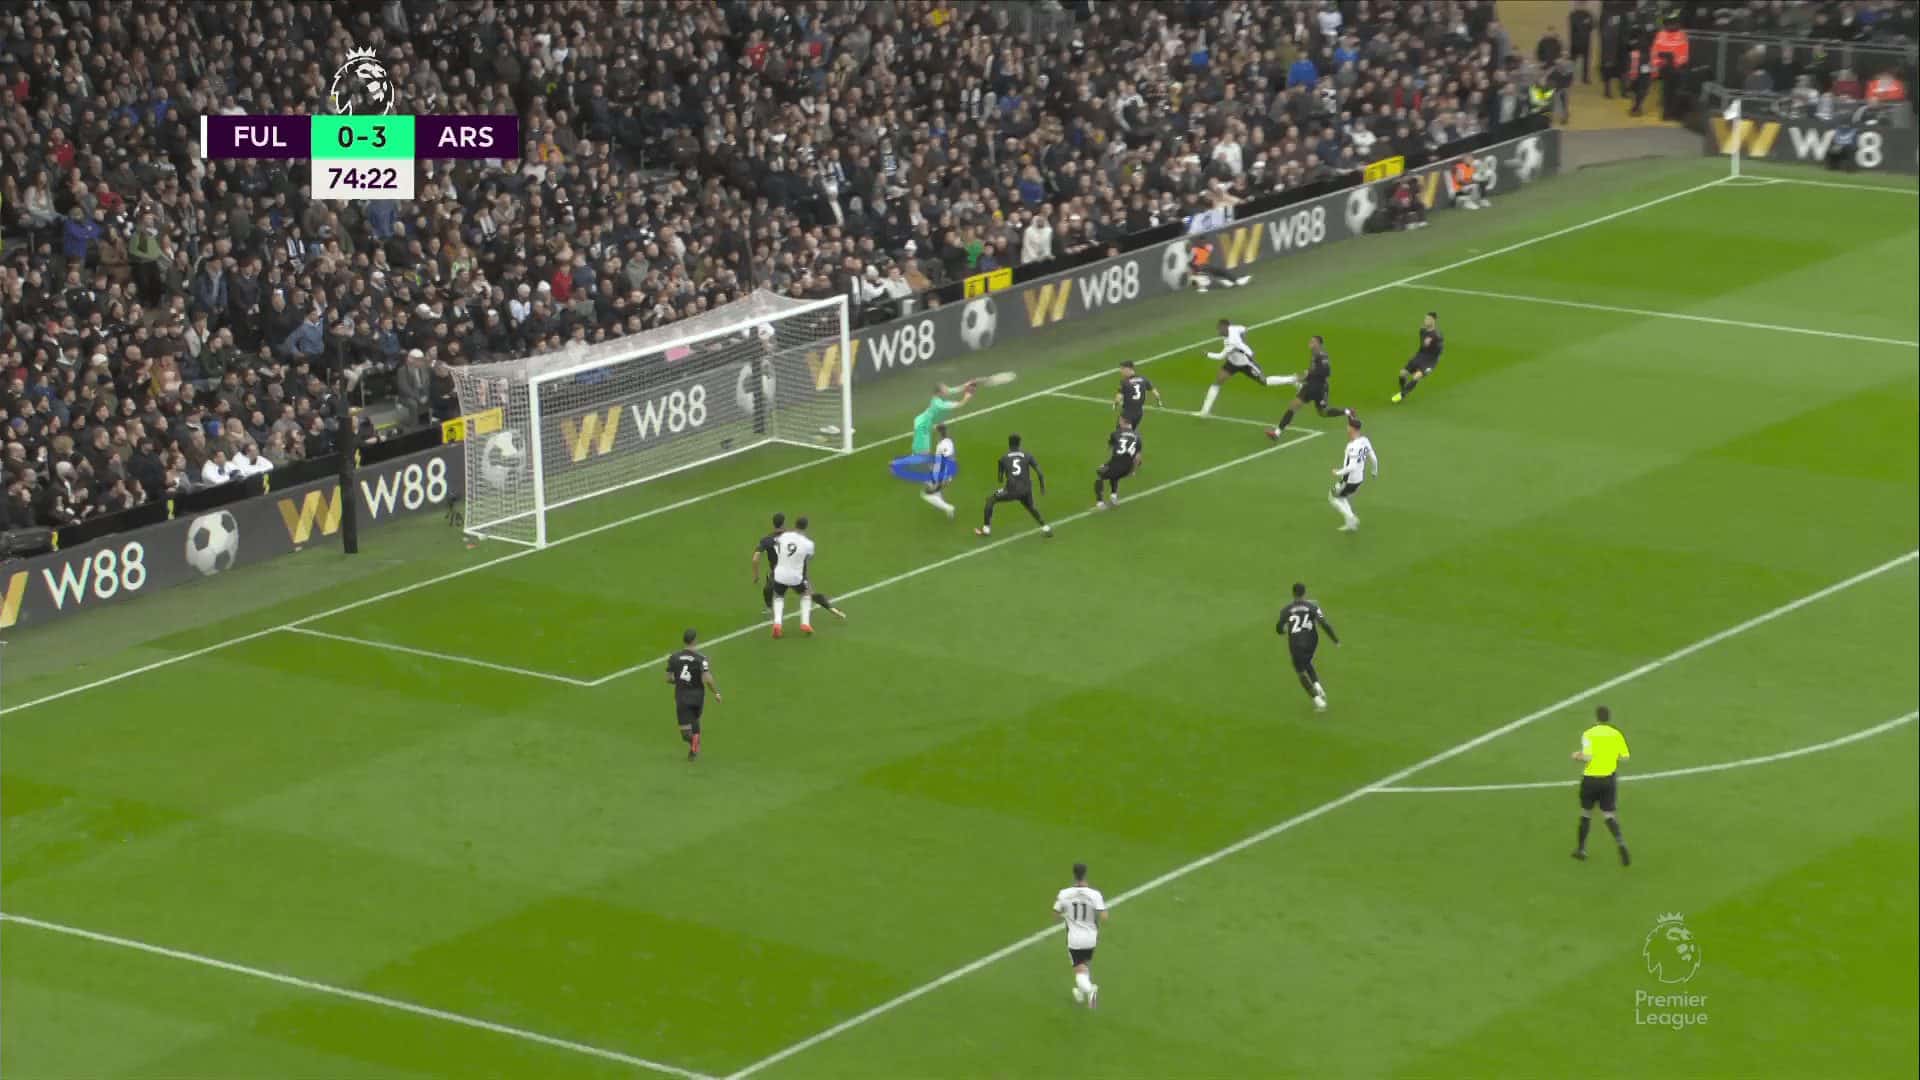
But he decides to shoot directly, as shown below.
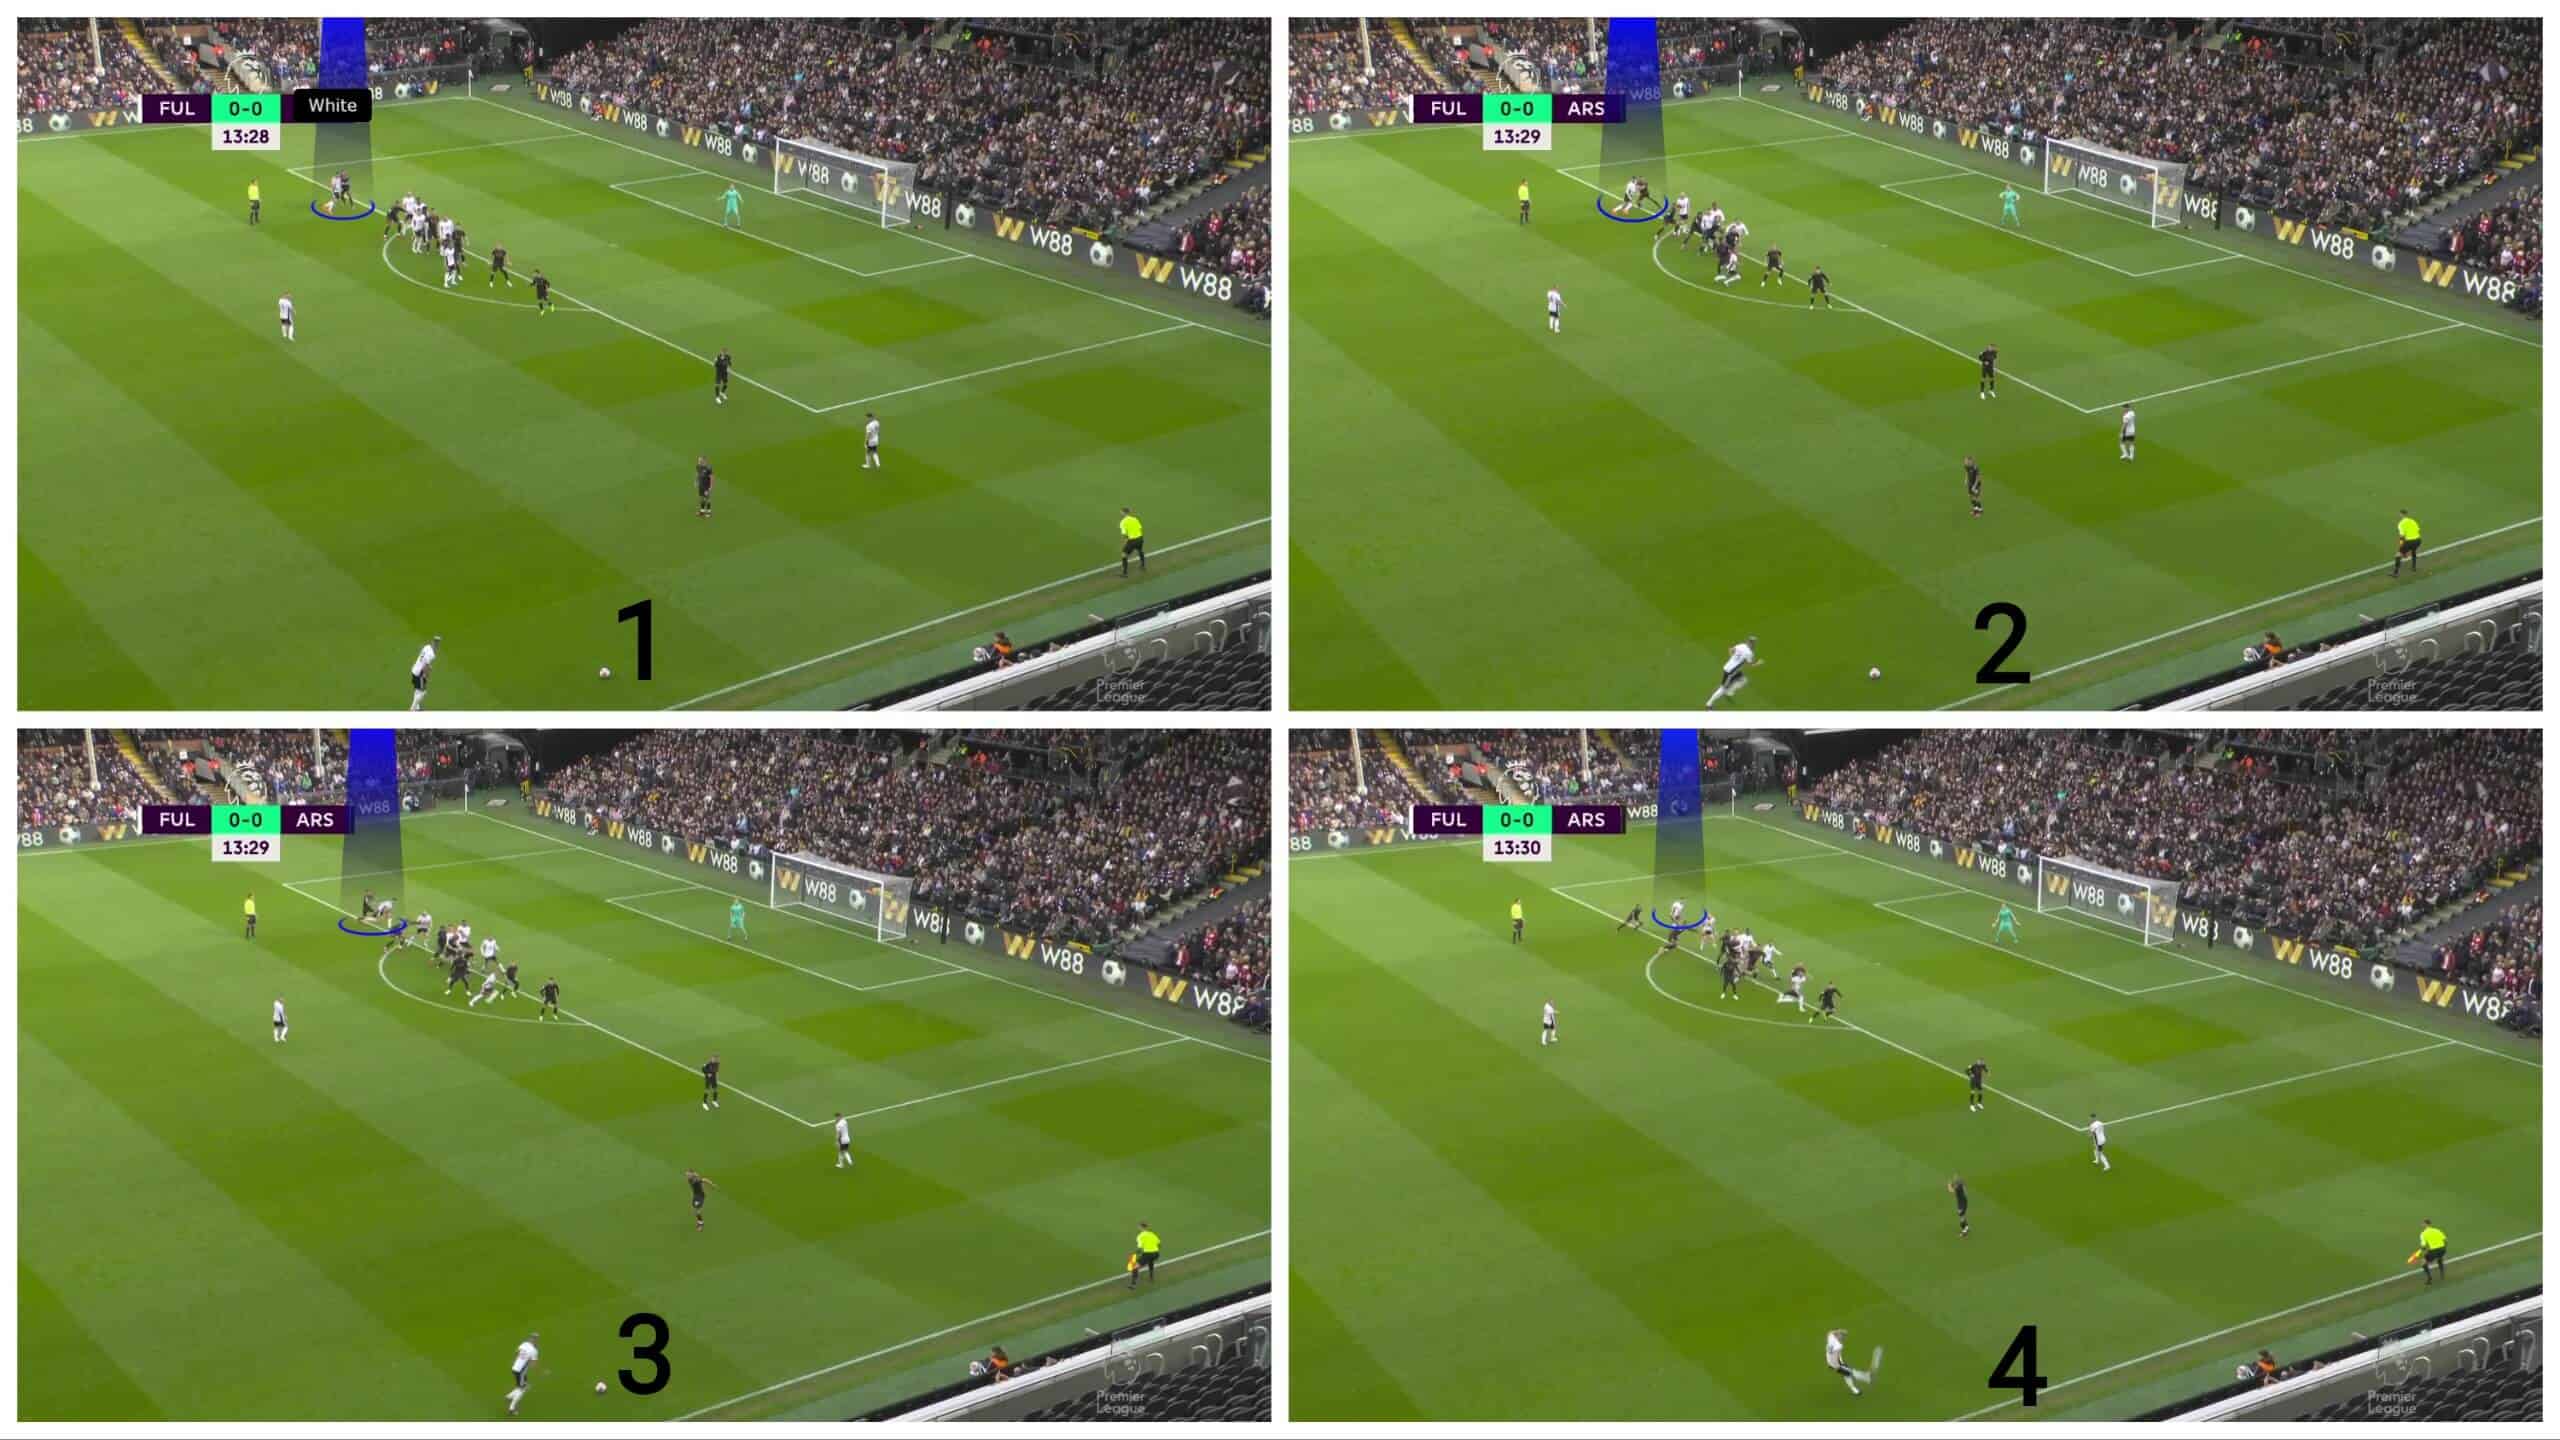
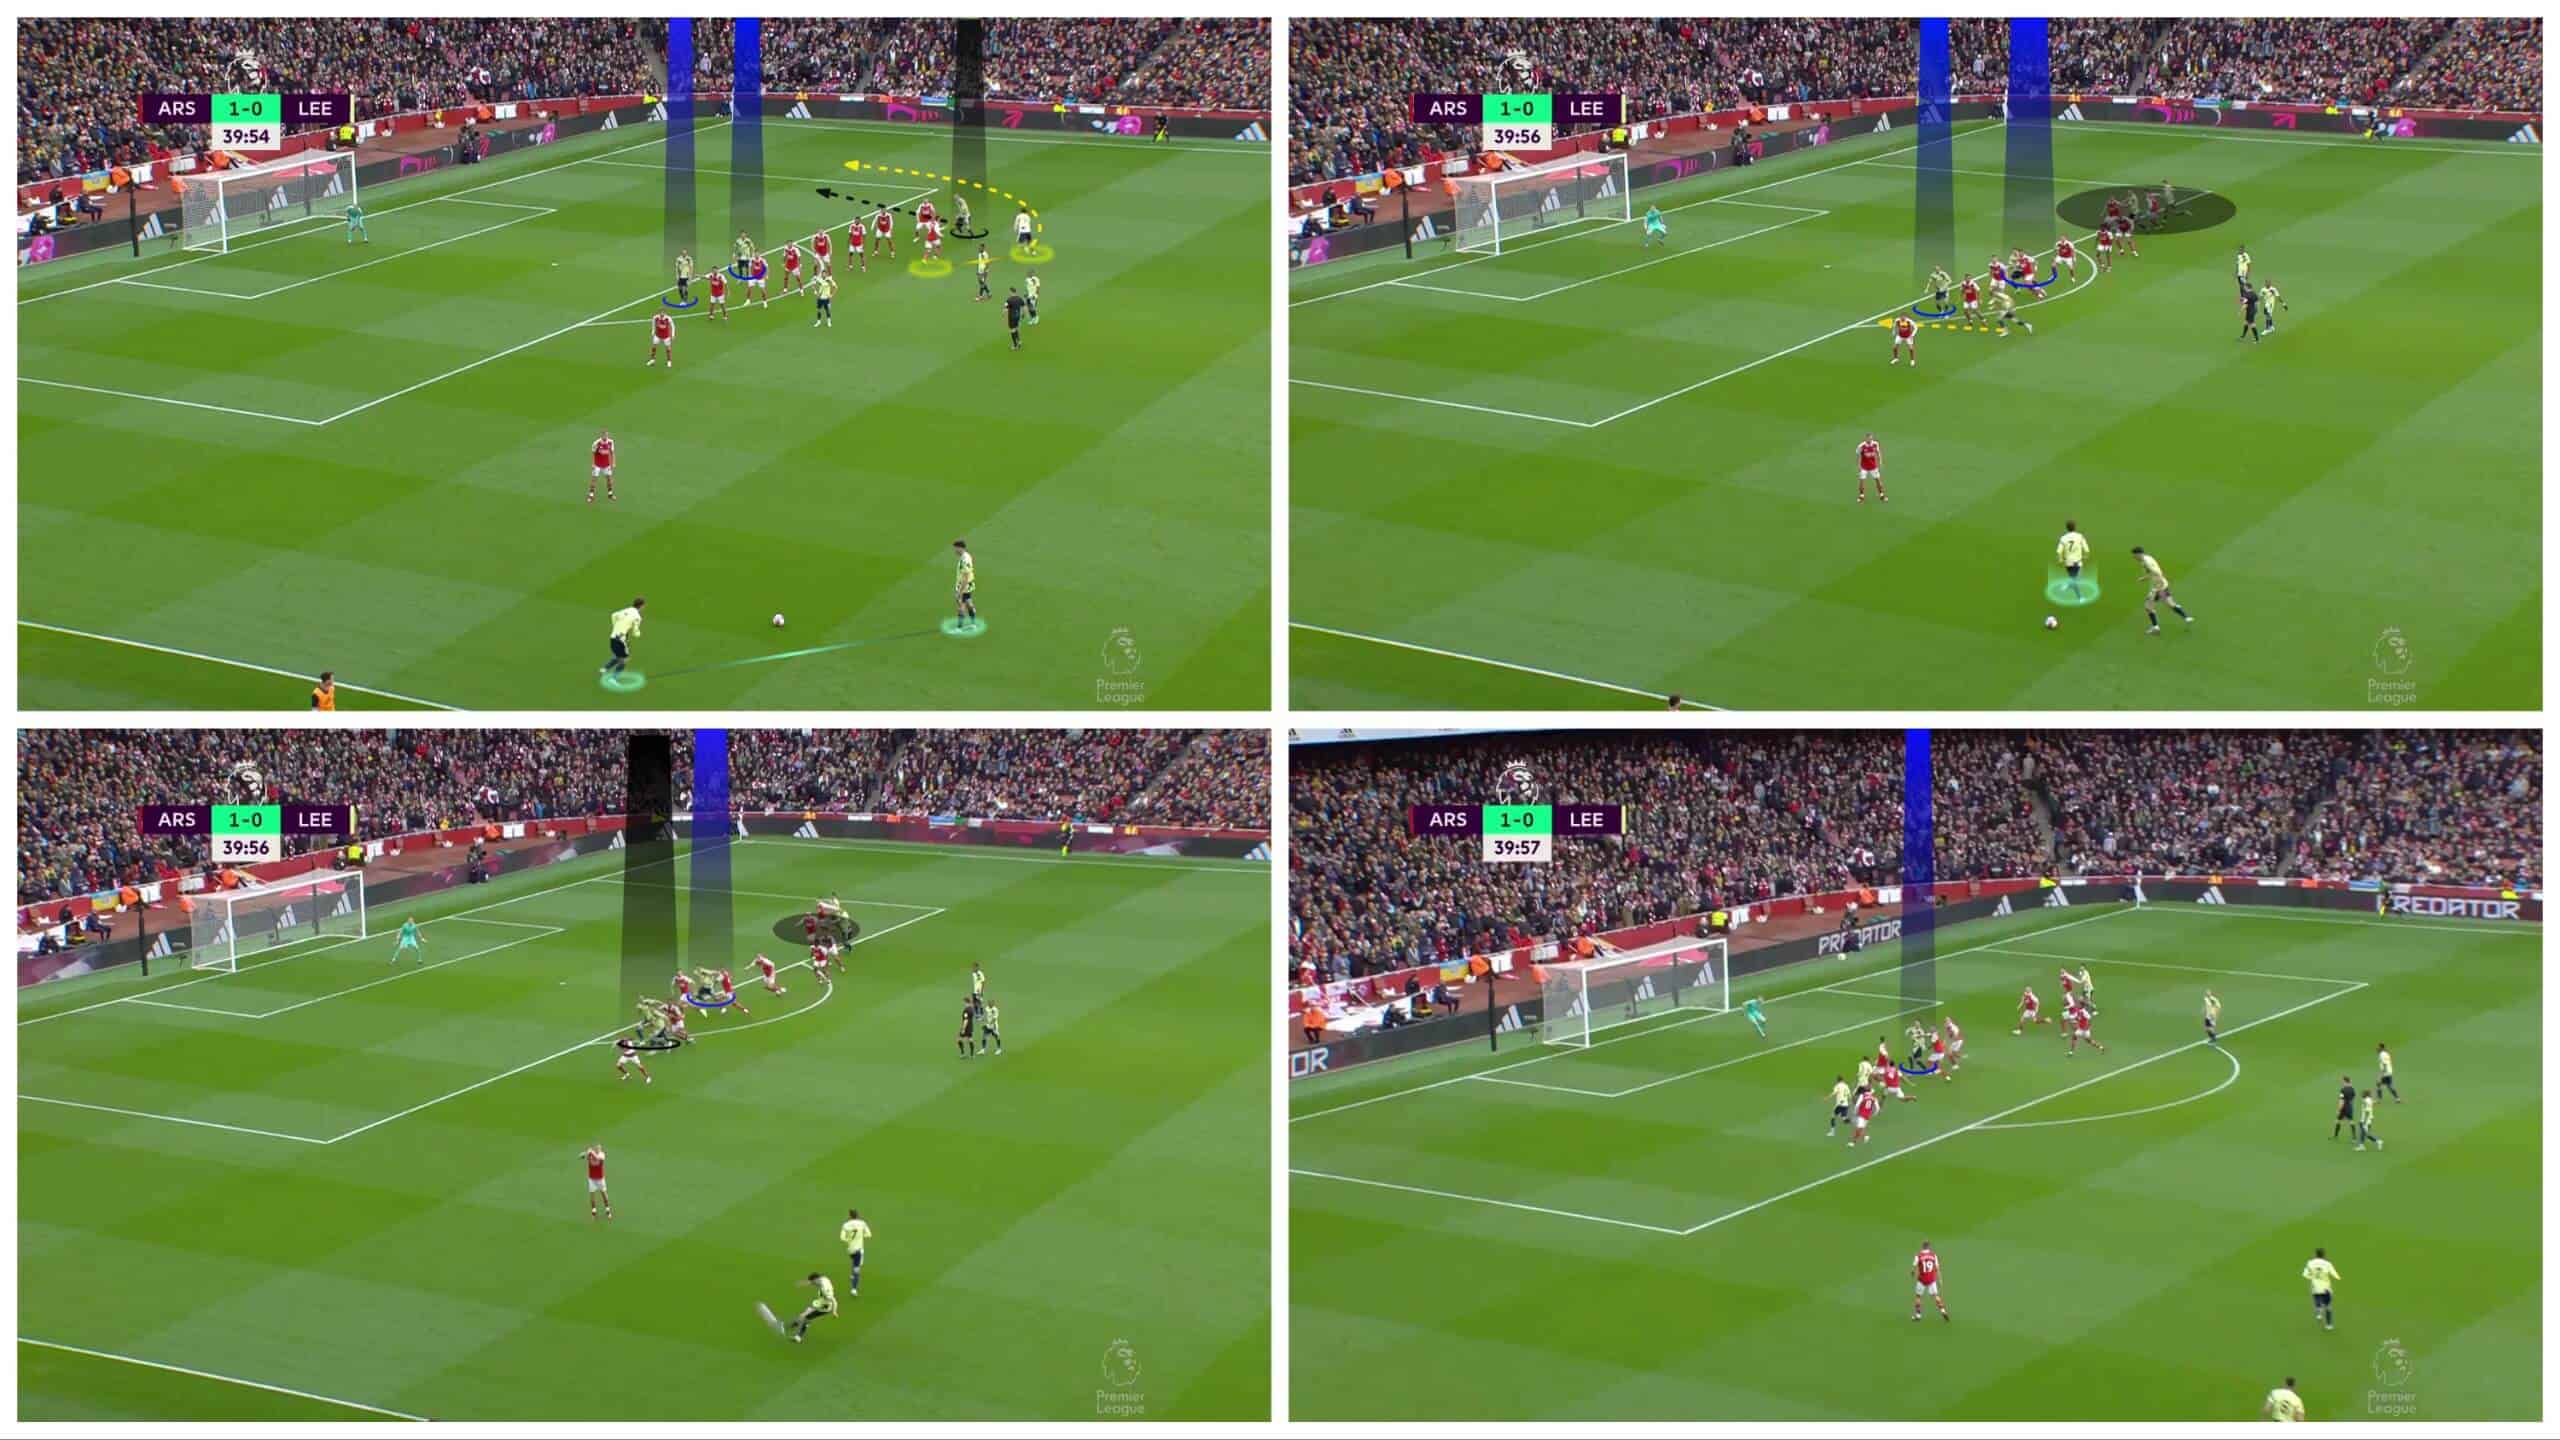
To face this problem on the far post, teams have many ideas. Some put a player to act as a man marker against the last attacker. Still, Arsenal had another idea to use the last zonal defender, usually Ben White, differently, making him act more like a man marker against the last attacker pushing him and preventing him from breaking the line with his pace, as shown in the first and second photos.
When this attacker pushes him inside, this may make him break the offside line, so when the takers is about to touch the ball, White leaves him in an offside position, as in the third and fourth photos.
Two takers
The attacking teams had counter ideas against this defending system; they used their last attackers as bait to make someone else onside; let’s discover how!
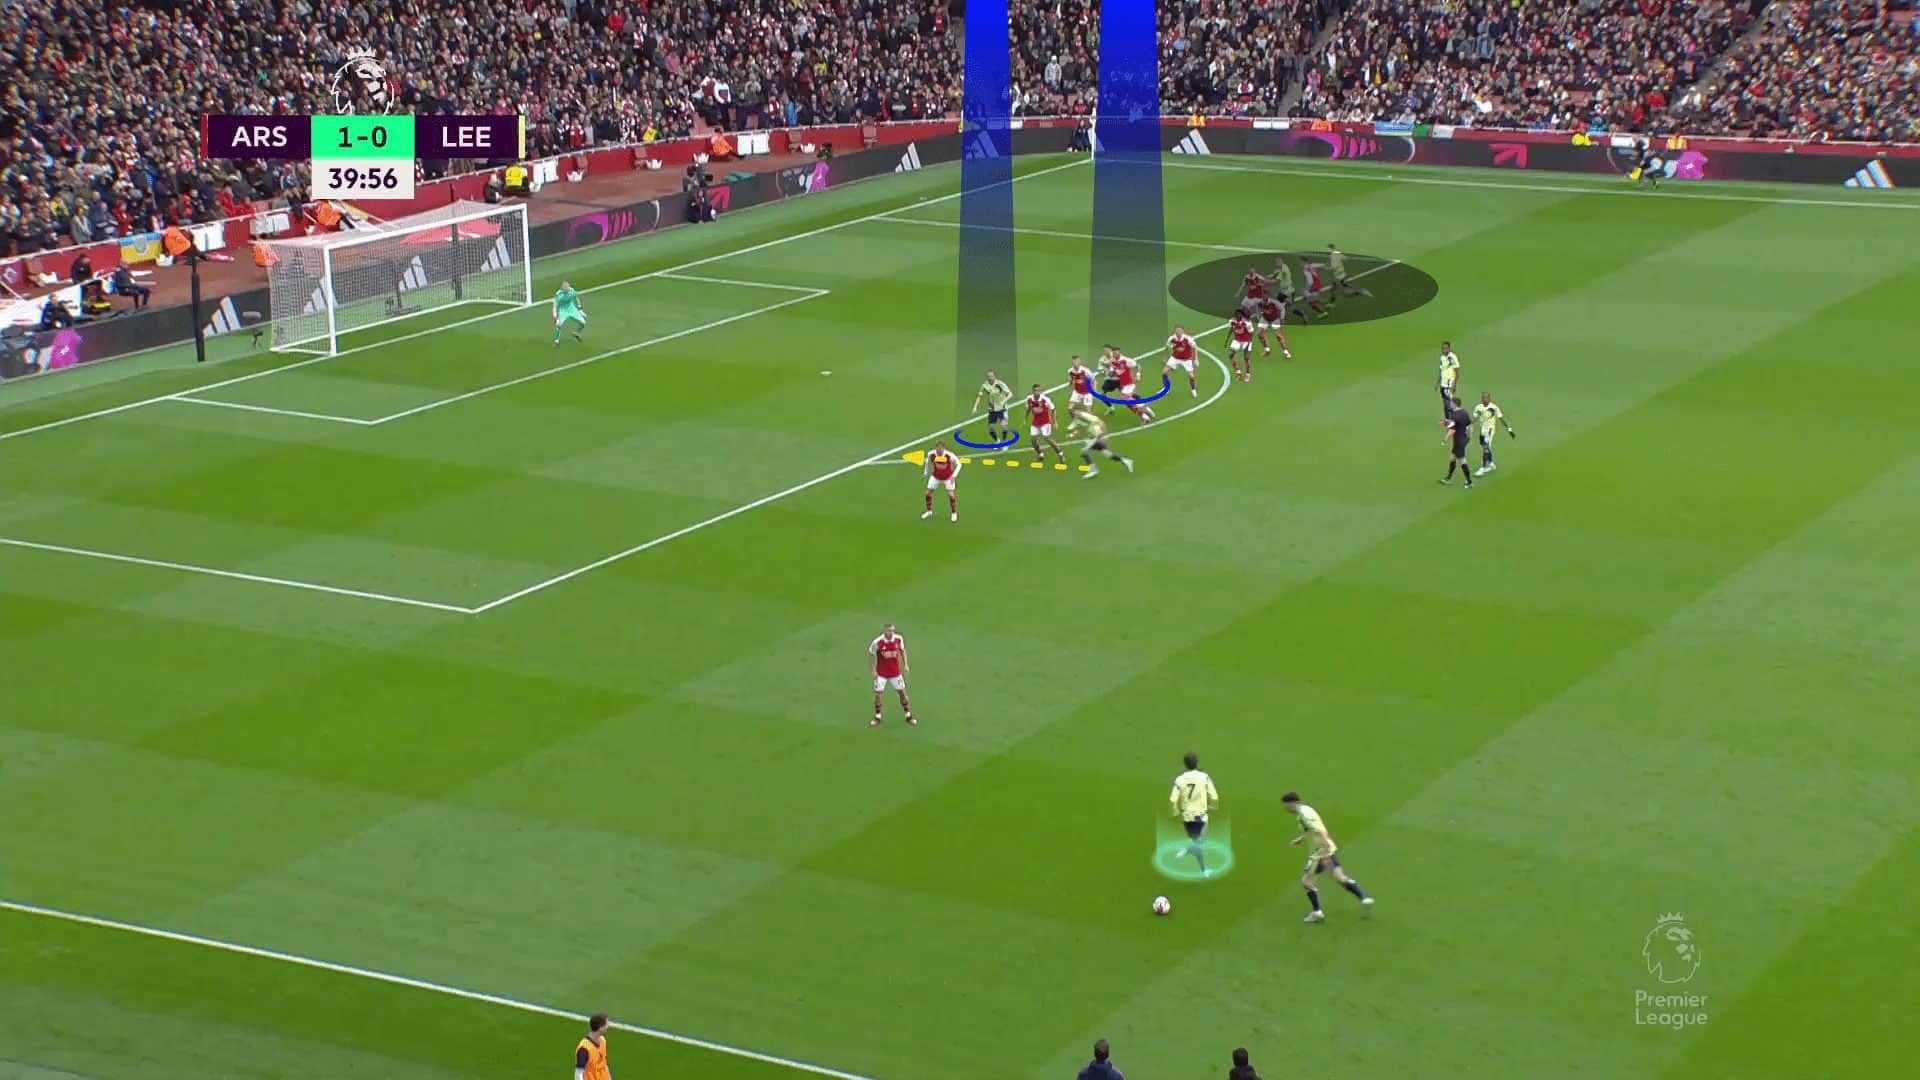
In the first photo, Arsenal asks a player to follow the coming attacker from on the far post as a man maker, in yellow, while giving the last zonal defender the same instructions we have just said above, in black.
In the second photo, as the first taker steps over the ball, the last two attackers act as if they are the targeted players pushing the last zonal defender dragging the man marker, so you can see now that the two blue initial offside players are no longer offside now.
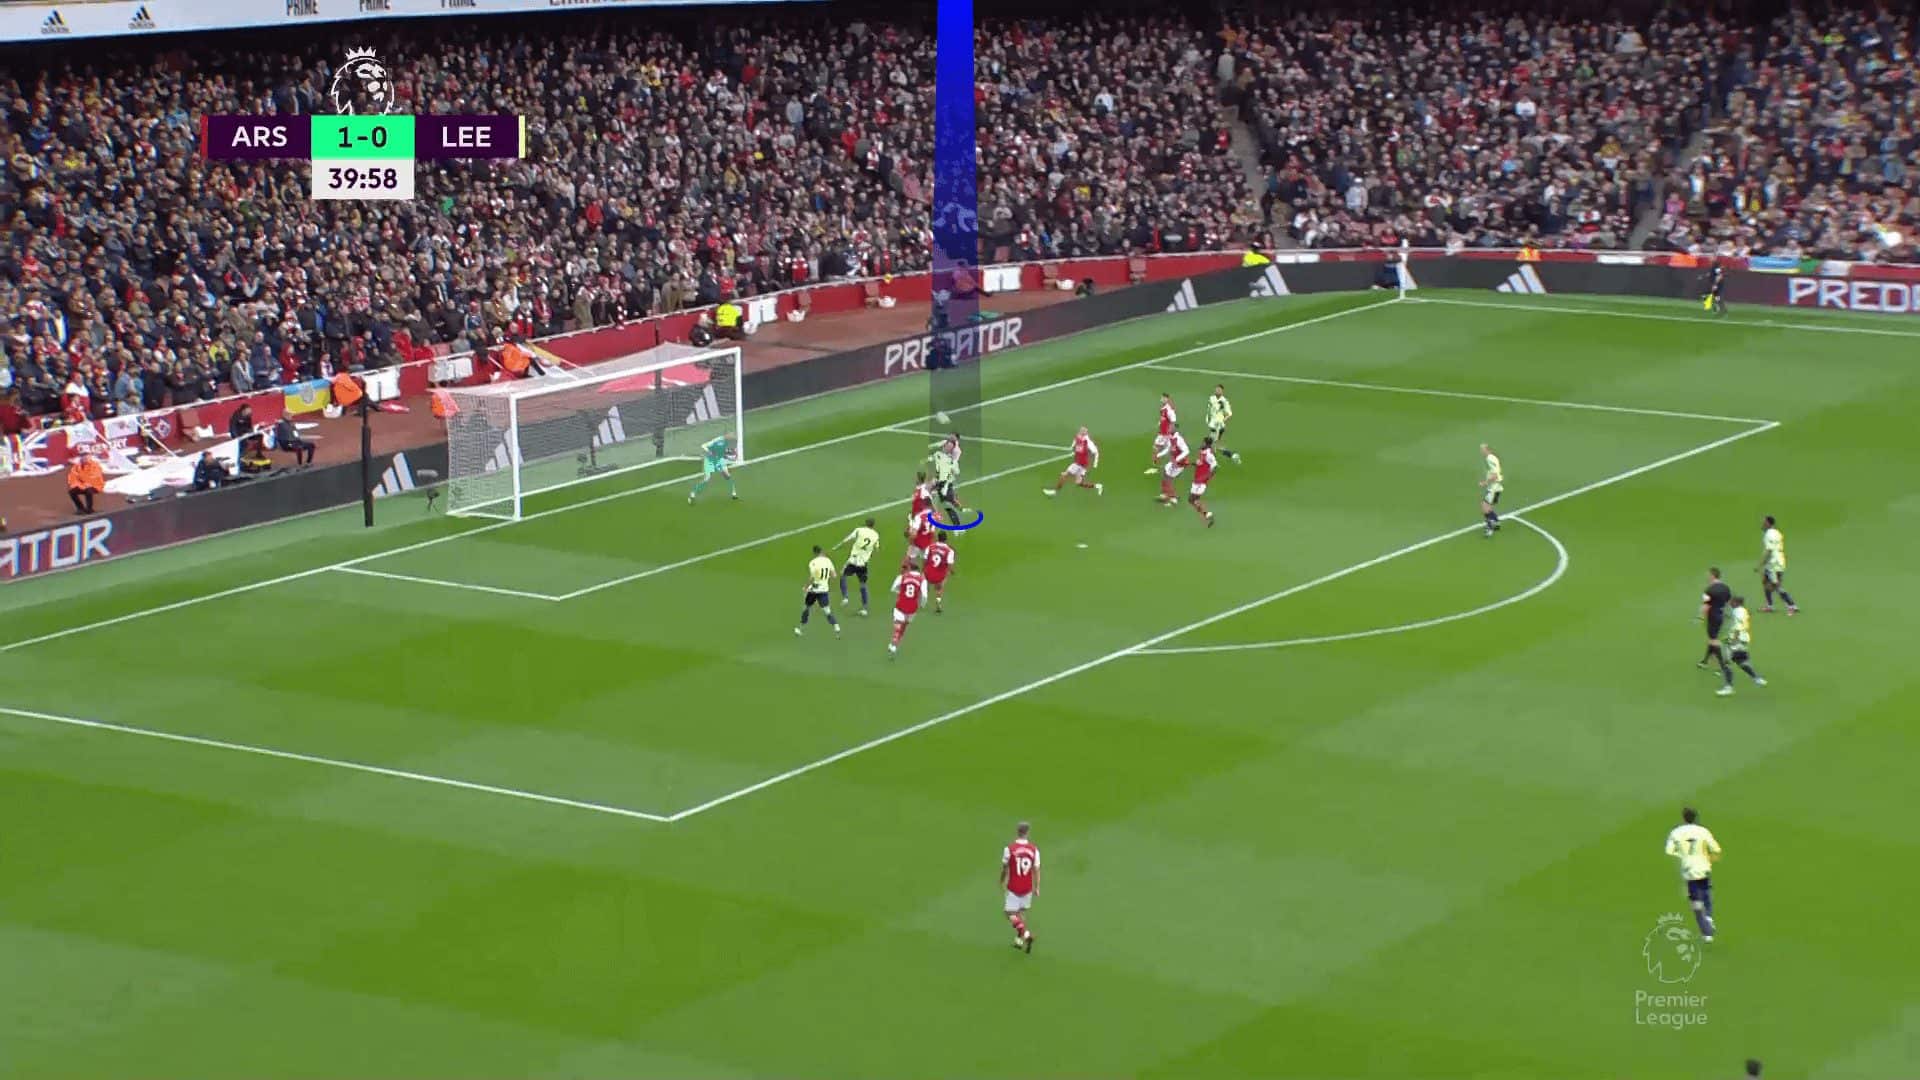
In the third photo, as the real taker touches the ball, the blue targeted player is onside while the second one, in black, moves to block the first zonal defender, preventing him from getting the first touch. In the fourth photo, the targeted player is in an excellent position to get the cross.
But the defender brilliantly gets back and then jumps to get the ball, as shown below.
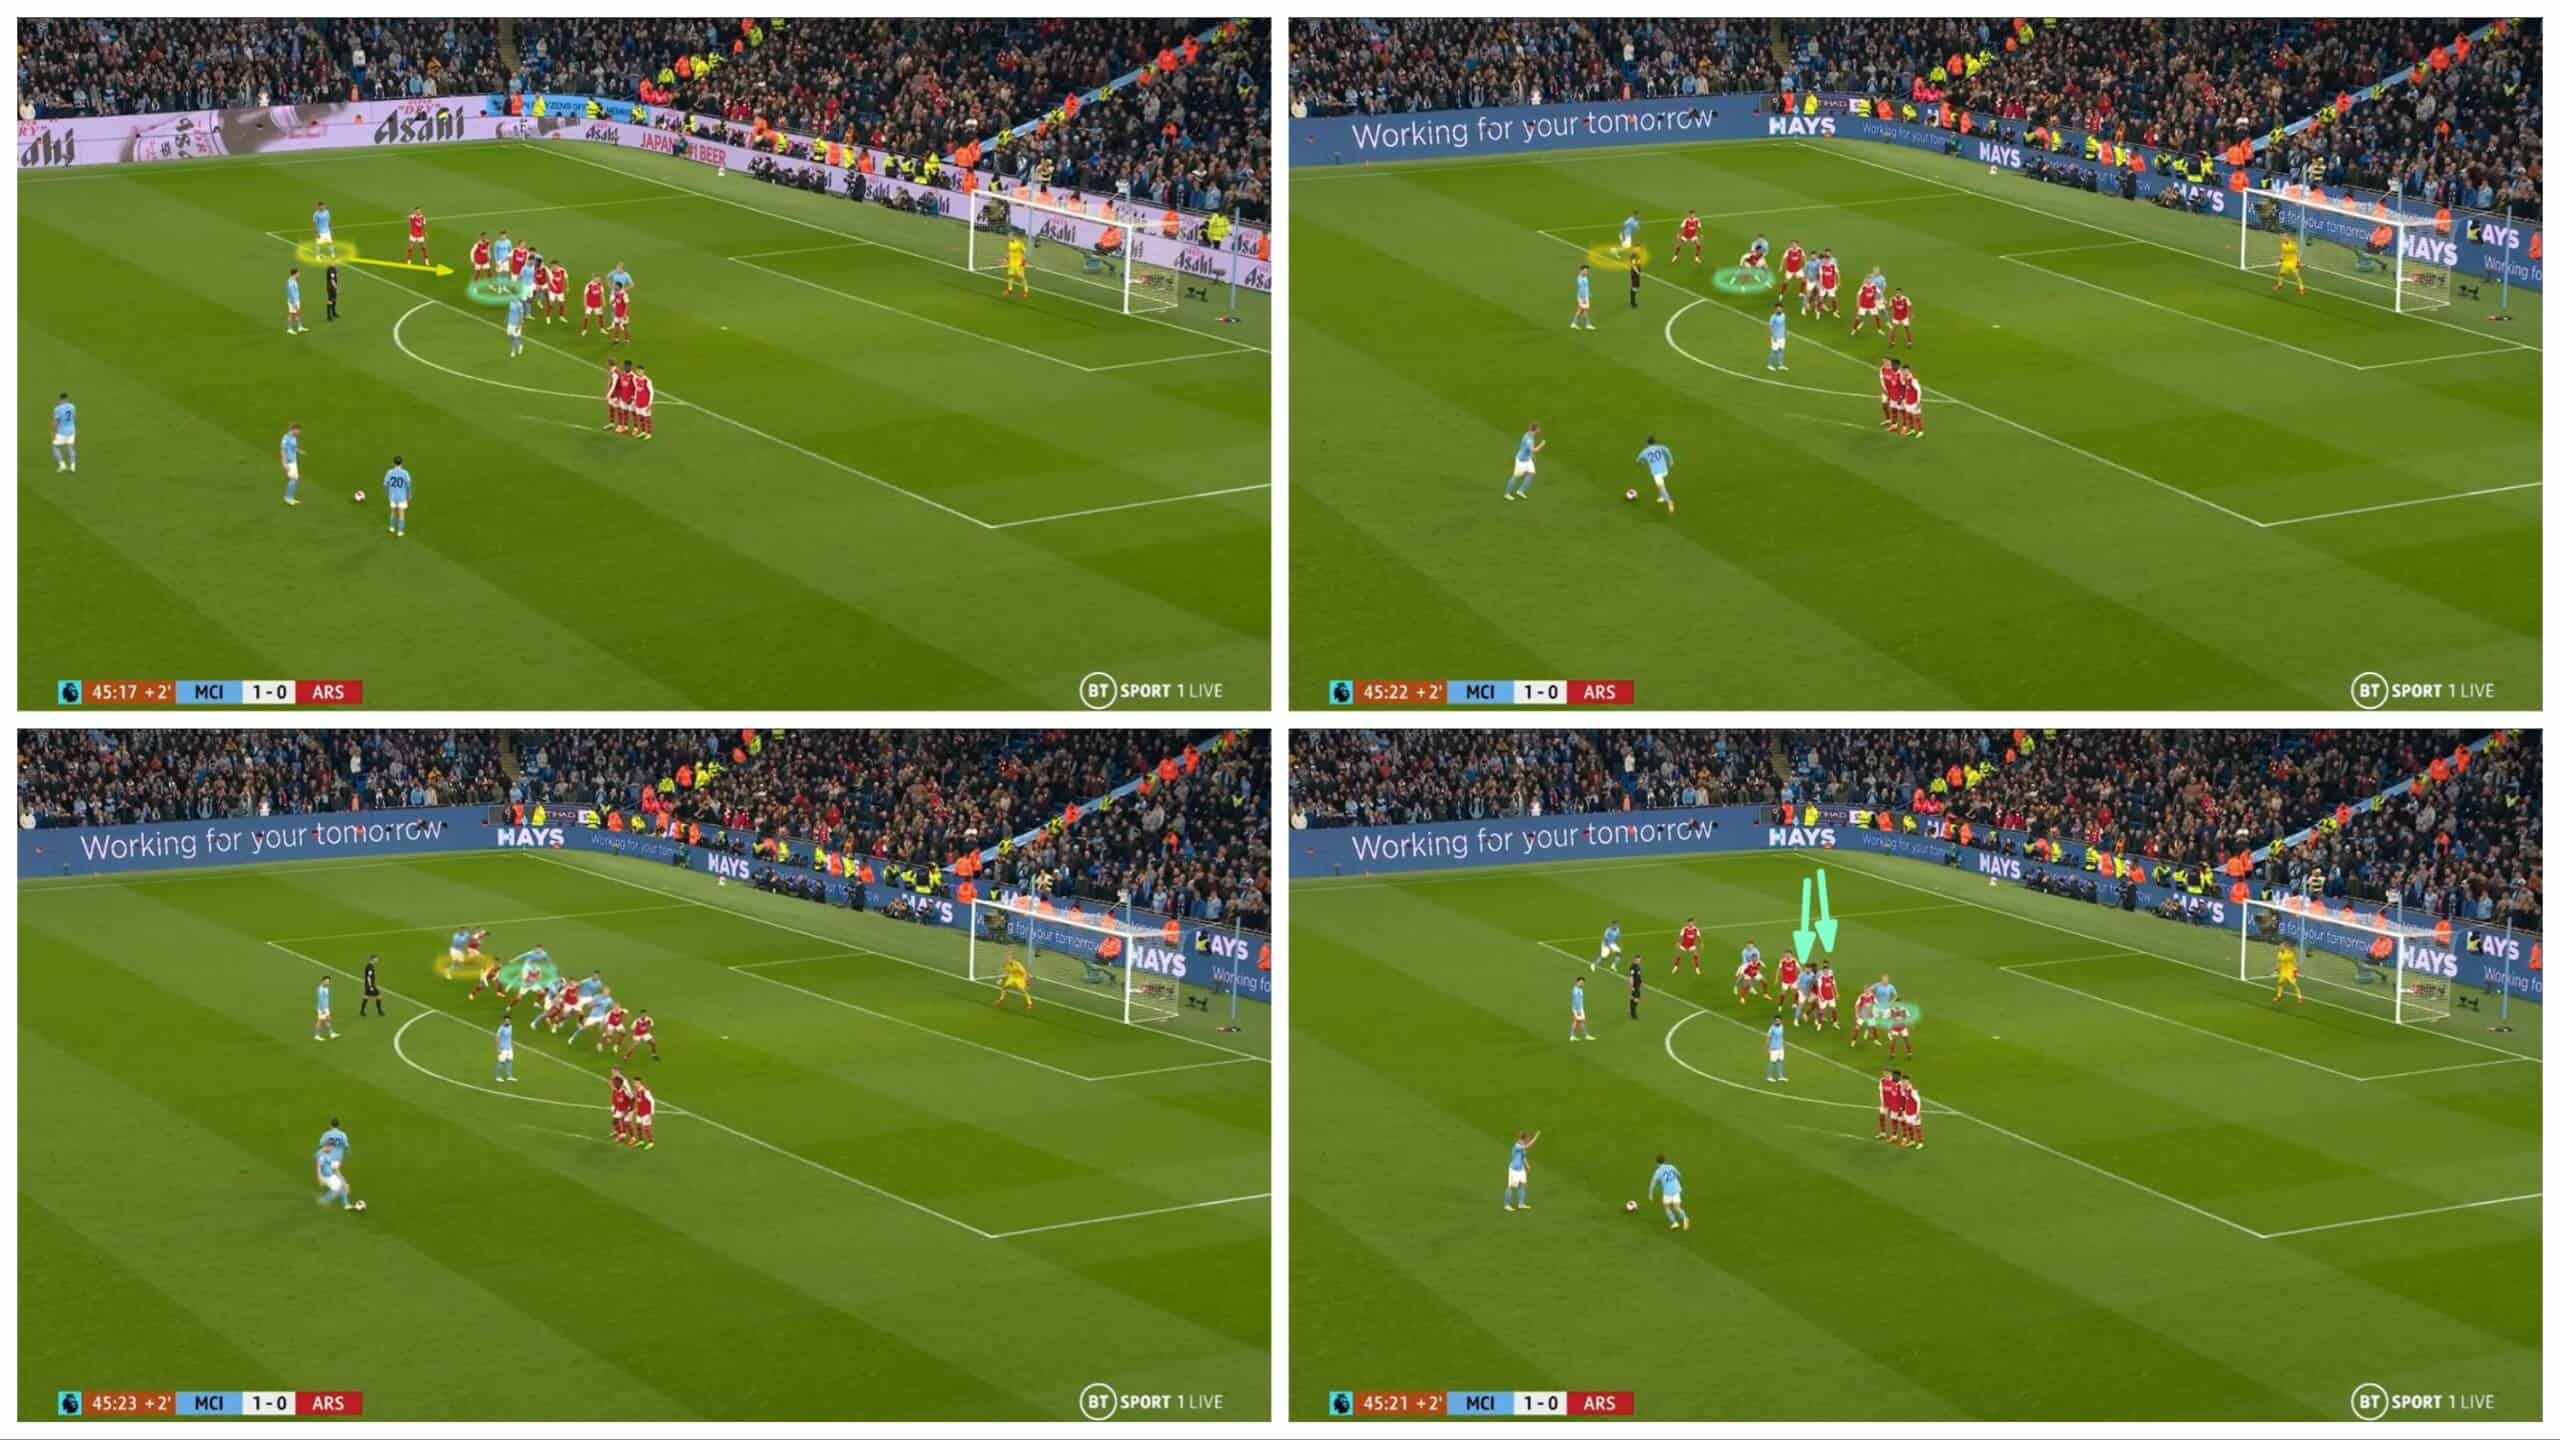
Here, against Man City, the situation is closer to the goal, which leads to three players in the wall with some different roles, but we focus on the two points that City used based on studying Arsenal.
In the first photo, Manuel Akanji, yellow, stands far away from Arsenal’s line to drag White with him while John Stones, green, starts in front of Gabriel, not behind him, to get Gabriel’s attention.
In the second photo, With Bernardo Silva’s movement to deceive, Stones, green, moves behind Gabriel, making sure that Gabriel sees him, making him reassured that Stones is offside. Akanji’s role, yellow, is to continue running with White with the help of Stones’ position, pretending that he holds Gabriel to free Akanji behind him, and this is very motivating for White to continue running with Akanji.
In the third photo, the line is not affected by Bernardo’s deception, but White’s position, in yellow, makes Stones onside, so when Kevin De Bruyne touches the ball, Stones, green, moves towards the goal without Gabriel’s bothering who is reassured that Stones is offside.
White understands the trap late, then decides to stop before De Bruyne’s execution, pushing Akanji with his back. It would have been offside, but his luck is so bad that he reveals the offside with his foot comb. But Akanji, yellow, knows his role well and keeps rubbing him and squeezing him as much as possible so that Stones would not be offside.
In the fourth photo, an important detail appears. Rúben Dias and Rodri stand in front of Thomas Partey, which attracts Granit Xhaka to help him, making it easier for Haaland to go to the near post, who stands in an offside position, to get the second ball after being onside later.
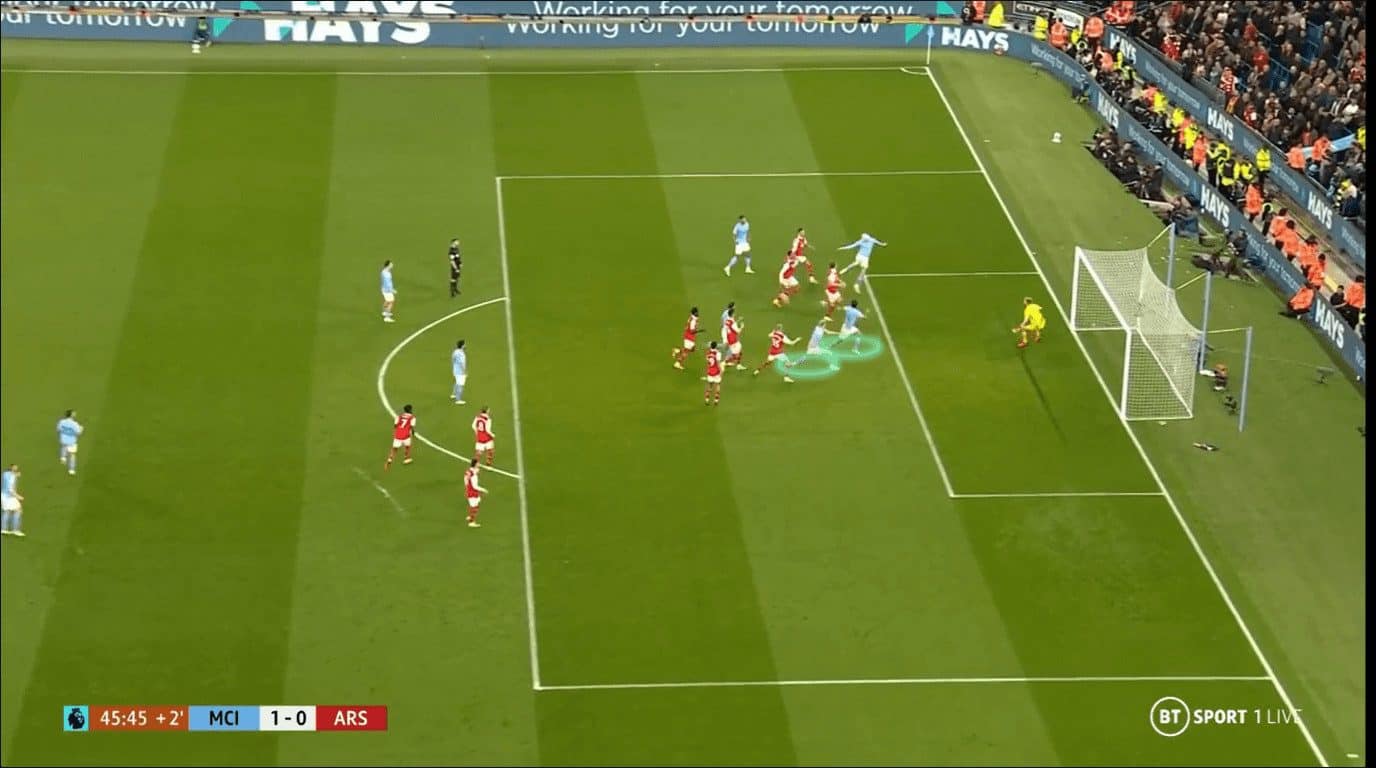
The headed shot from this distance by this body position is difficult, so John Stones may miss the goal or be saved by Aaron Ramsdale. Rodri and Erling Haalandare are ready by the near post, but Stones scores a goal directly.
Egypt have a similar idea against Algeria by switching the roles, making the middle player the bait and the far-post player the targeted player.
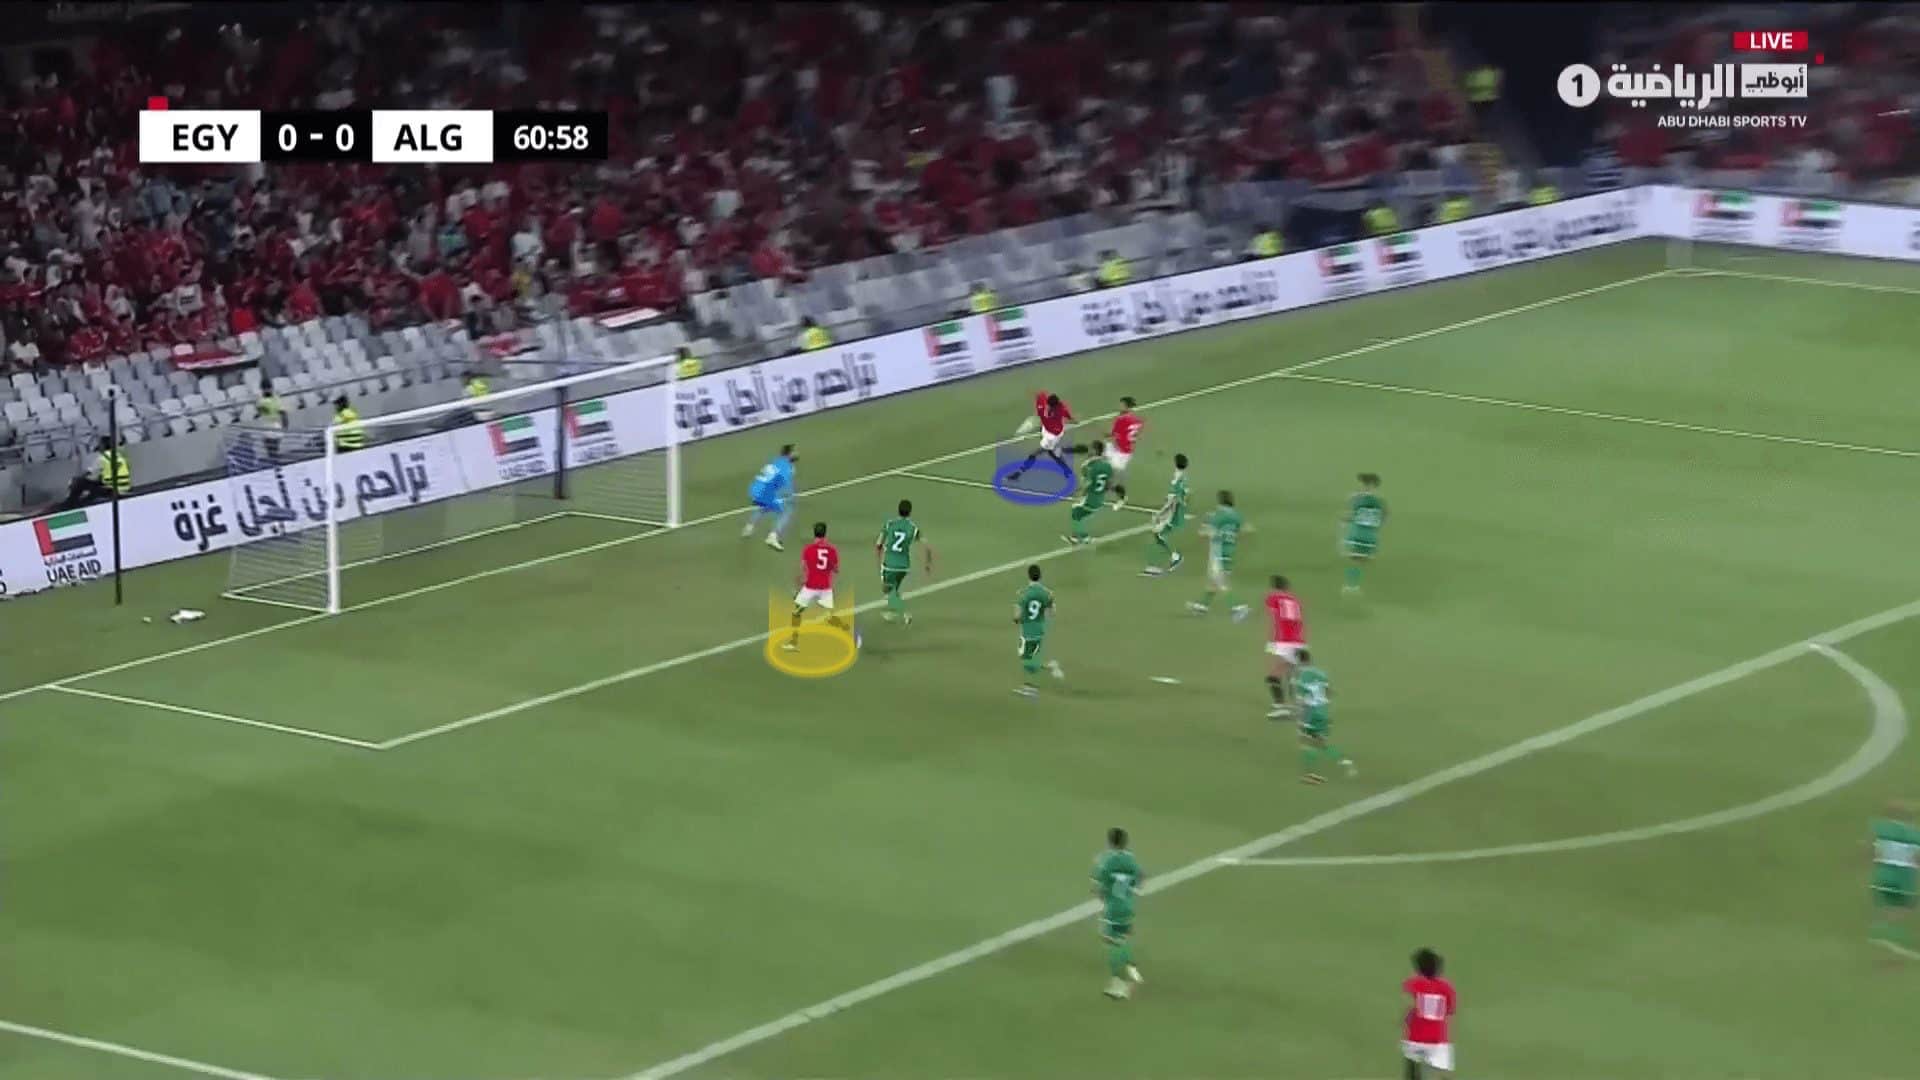
In the first photo, the yellow player is the bait, while the blue one is the targeted player. In the second photo, as the first taker steps over the ball, the yellow player moves forward, pretending to be the targeted player. This makes a defender follow him, breaking the offside trap and making the blue player onside, as shown in the third photo.
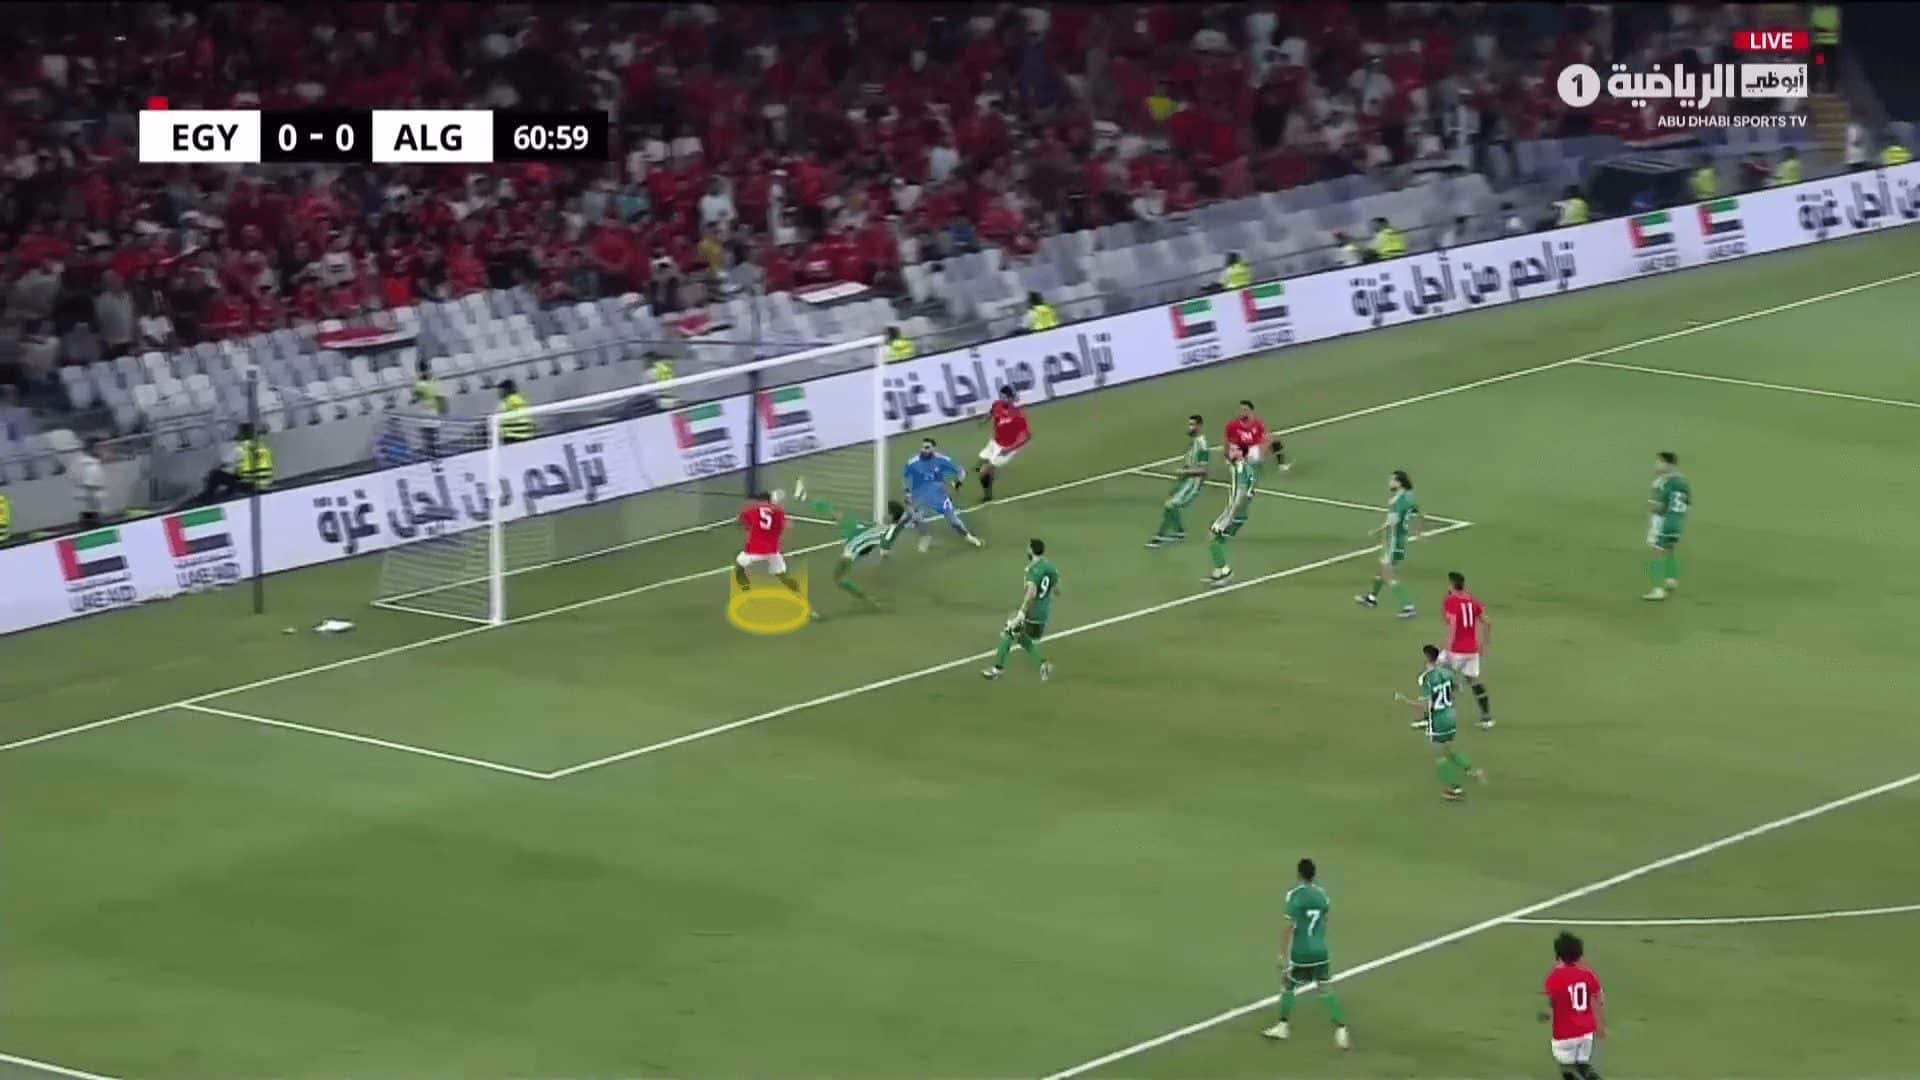
The yellow offside player also has an extra role in receiving the headed pass from the first targeted player moving to the far post, as shown in the fourth photo.
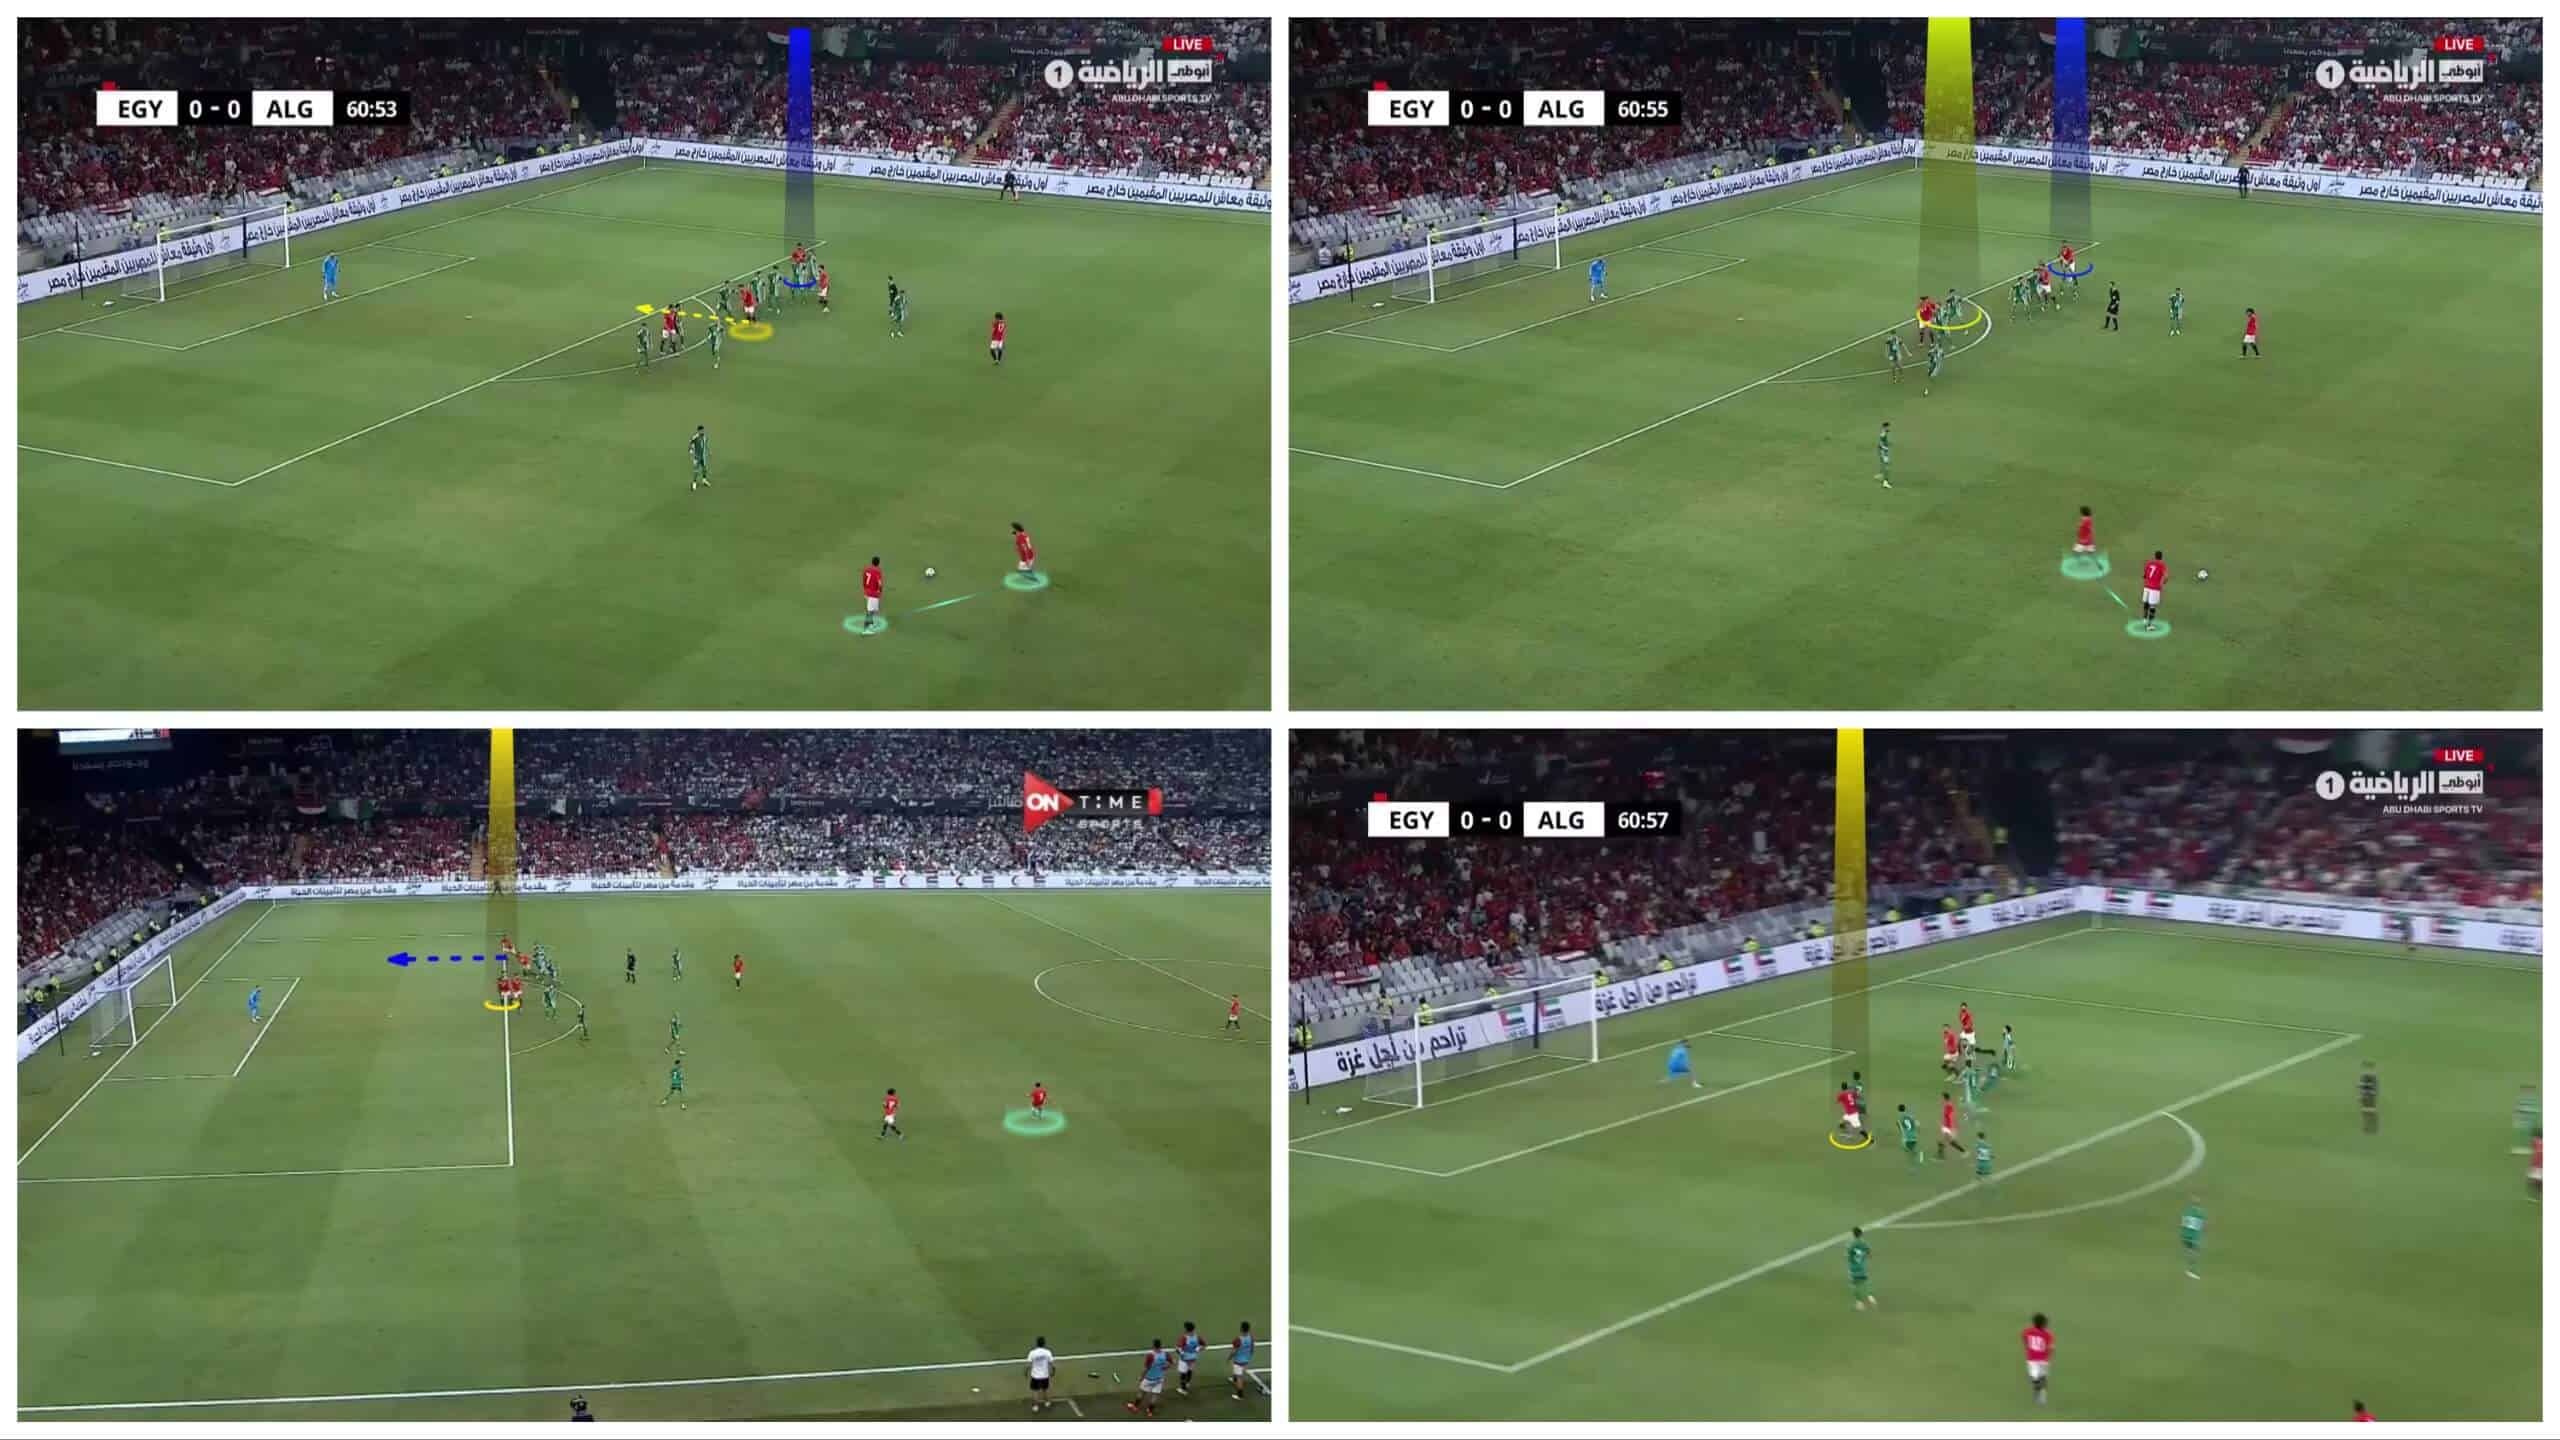
The plan works, so the result is a goal, as shown in the following two photos.
Conclusion
In this analysis, we have demonstrated the different roles of the players who stand in initial offside positions in attacking indirect free-kicks, showing how it can break the offside trap against teams who defend with a zonal marking high line defending system, especially teams whose line drops late depending more on the offside trap.
In this set-piece analysis, we have shown the use of offside players to block, receive the second pass, be the target by using deceptive runs by other players or be the bait to break the offside trap for other players.



Comments