So far during the 2020 J1 League season, supporters of both Shonan Bellmare and Shimizu S-Pulse have had little to shout about in terms of results on the pitch, as both are enduring difficult campaigns.
Heading into the latest round of matches, the Hiratsuka and Shimizu-ku clubs sat at the foot of the table, on nine points, only separated by Shonan Bellmare’s superior goal difference.
While S-Pa had been defeated in all of their six previous matches prior to the encounter at the Shonan BMW Stadium Hiratsuka, the hosts had picked up five points in their previous three matches and beaten Gamba Osaka in their last outing.
However, the resulting 3-0 victory for the visitors put paid to any hopes of Shonan Bellmare putting together a string of impressive results.
This tactical analysis will highlight the key tactics which were on show in the clash between the two Japanese clubs and use analysis to explain how they had an impact on the match’s outcome.
Lineups
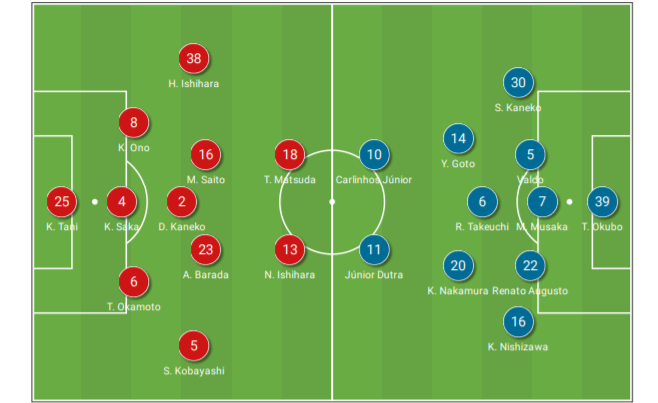
For the clash, the two sides opted for fairly similar-looking lineups, with Bin Ukishima deploying the hosts in a slightly more attacking 3-5-2 starting system. The Japanese gaffer deployed the same system in that 1-0 victory over Gamba Osaka the weekend prior to S-Pa’s visit.
Meanwhile, in the away dugout, Australian manager Peter Cklamovski lined his side up in a slightly more defensive version on the same theme with a 5-3-2 starting formation. Cklamovski perhaps opted for this system to match up with Shonan Bellmare as in their previous match – a 3-0 defeat to Yokohama F. Marinos – Shimizu S-Pulse lined up in a 4-2-3-1 formation.
The key structural difference
As mentioned, both Shonan Bellmare and Shimizu S-Pulse lined up fairly similar in their starting formations. Both lineups had three central defenders, three central midfielders with a central pivot and two strikers. However, the key difference was in the two wide players and this was pivotal in the outcome of the match.
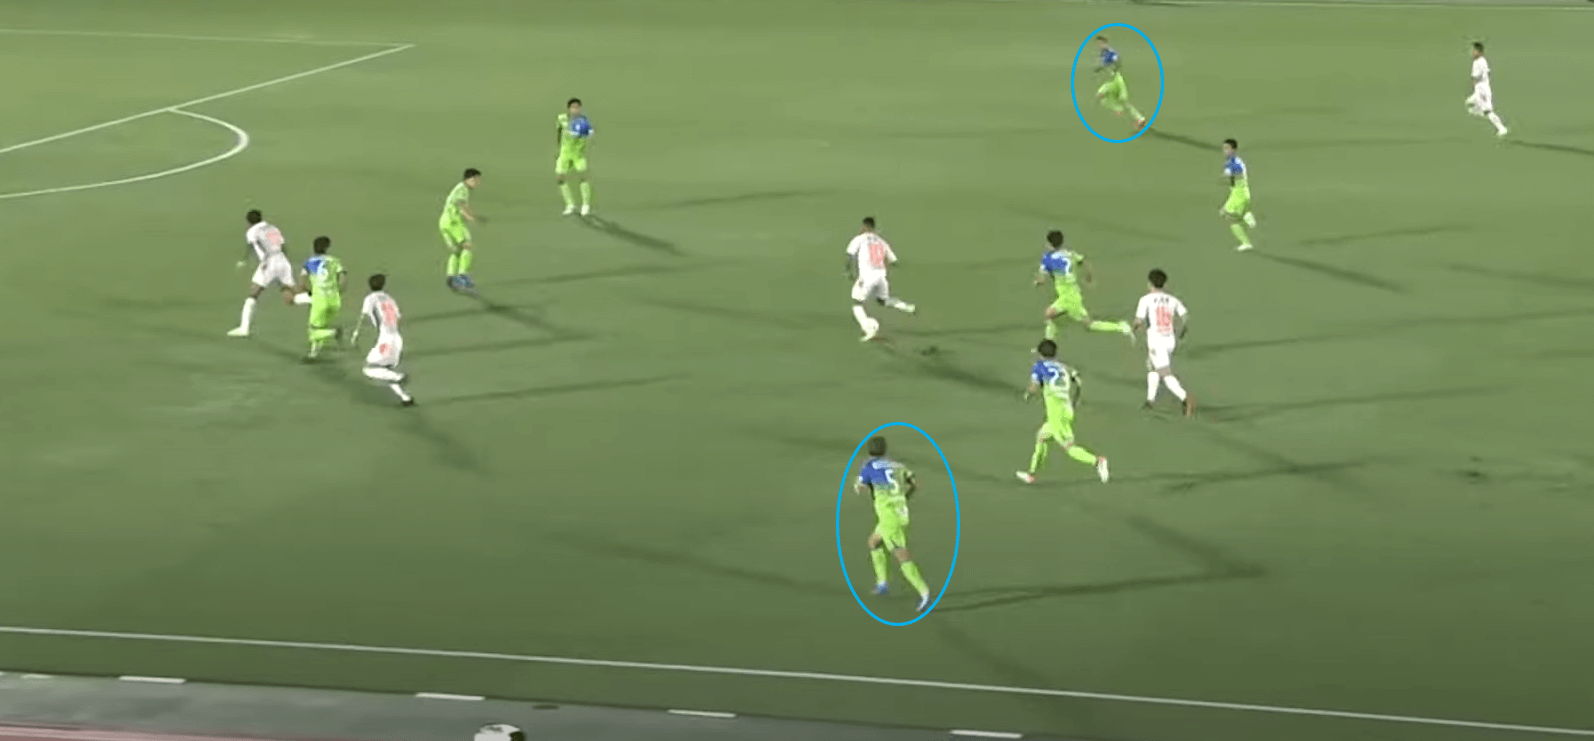
In their 3-5-2 formation, the two wide players – Shota Kobayashi and Hirokazu Ishihara – were listed as part of the midfield line, however, were still played as wing-backs. The two players were often stationed high and wide to provide the home side with some width. This, though, meant that Kobayashi and Ishihara were slow in transitioning into their defensive shape which was a 5-3-2 and often left the three central defenders exposed.
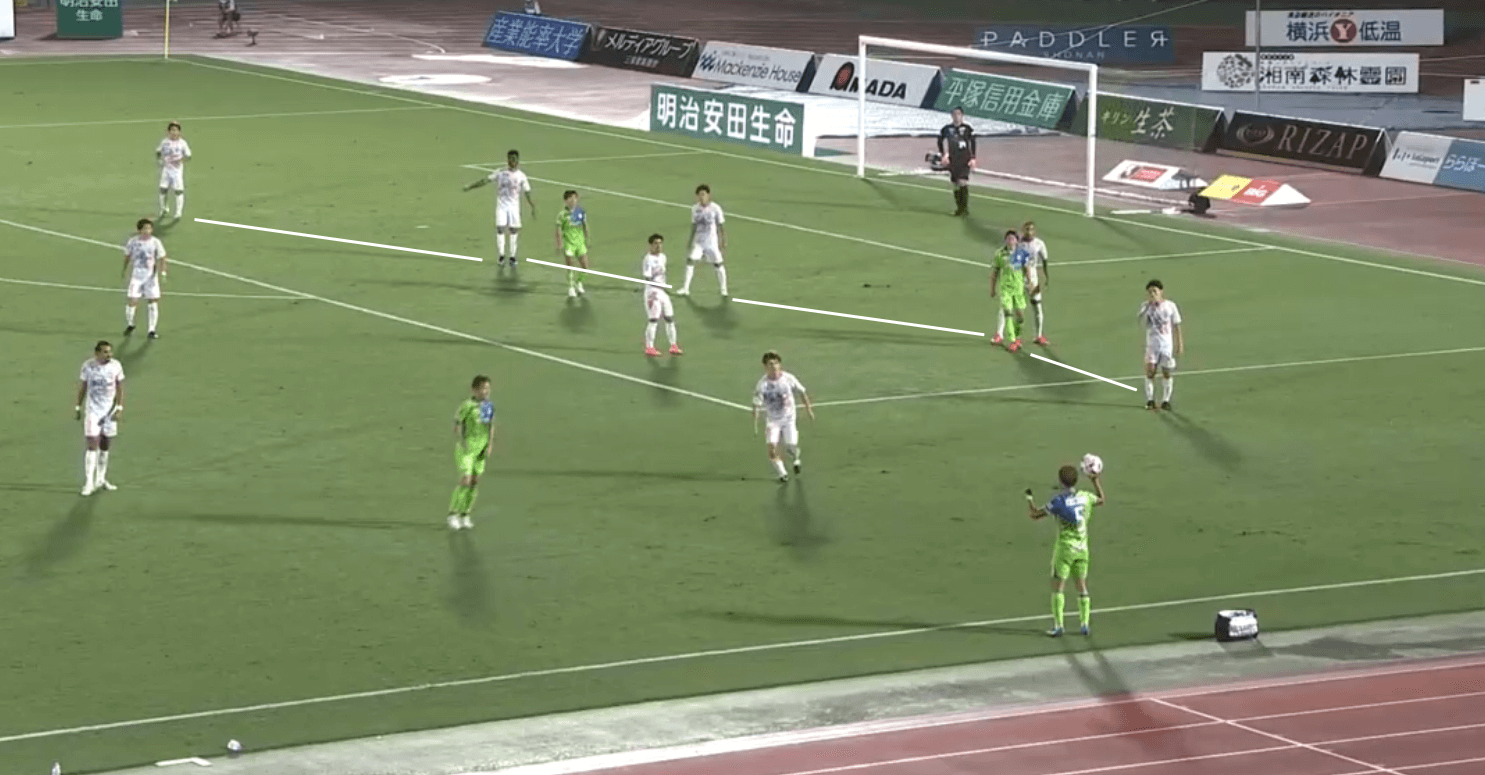
As can be seen in this annotation, in S-Pa’s 5-3-2 formation, the two wing-backs – Shota Kaneko and Kenta Nishizawa – were stationed much deeper. This allowed the away side to remain compact in a flat back five and enabled them to be quick in their transition into a defensive shape. While the two wing-backs did have offensive duties, they did not throw caution to the wind defensively.
S-Pa forcing crosses from deep
One area where this flat back five gave the visitors an advantage was in not allowing the hosts to get in behind in the wide areas. This saw Shonan Bellmare forced into crossing from deep on multiple occasions, which Shimizu S-Pulse’s three central defenders were able to deal with, and meant that they ended the game with more clearances than the hosts. S-Pa made 26 clearances during the clash while Shonan Bellmare made 19.
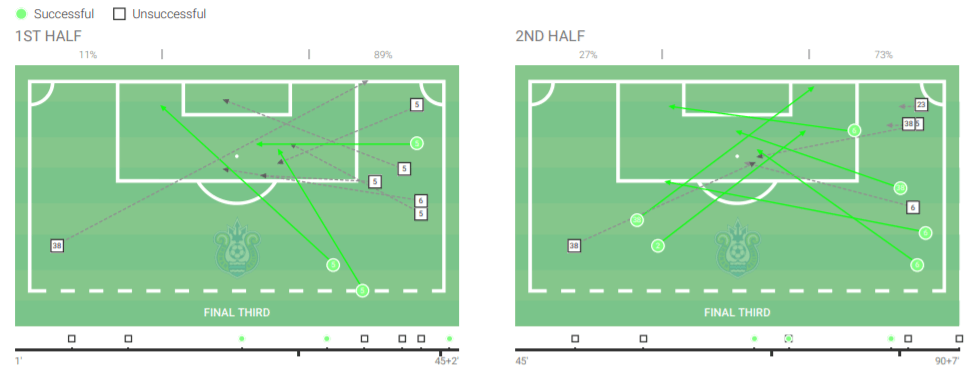
As can be seen in Shonan Bellmare’s crossing map from the match, the majority of Ukishima’s side’s crosses were made from deeper than the 18-yard box and predominantly on the right-hand side.
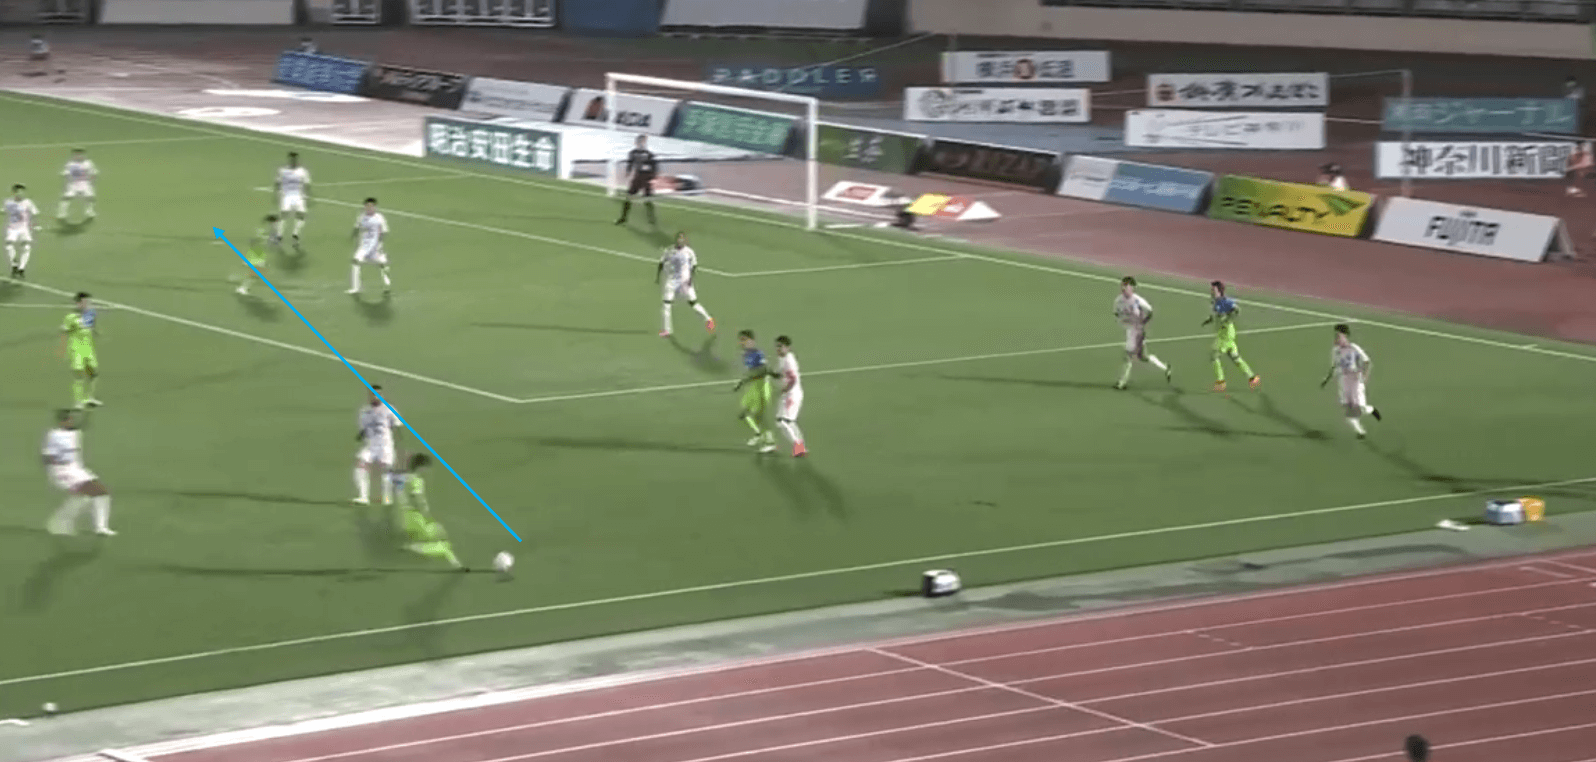
In this instance, Shonan Bellmare have been unable to get around Shimizu S-Pulse’s rigid defensive line and the ball has been played back to the crosser who hits a first-time ball into the box. The cross is then easily cleared by a defending player. This pattern of play was a result of S-Pa’s deeper positioned wing-backs.
Shonan Bellmare’s exposed central defenders
While S-Pa’s deeper wing-backs allowed them to remain defensively sound, the more advanced wide players of Shonan Bellmare left their central three defenders exposed. The visitors looked to take advantage of this throughout the match by getting around the outside of the back three in the spaces left by the wing-backs.
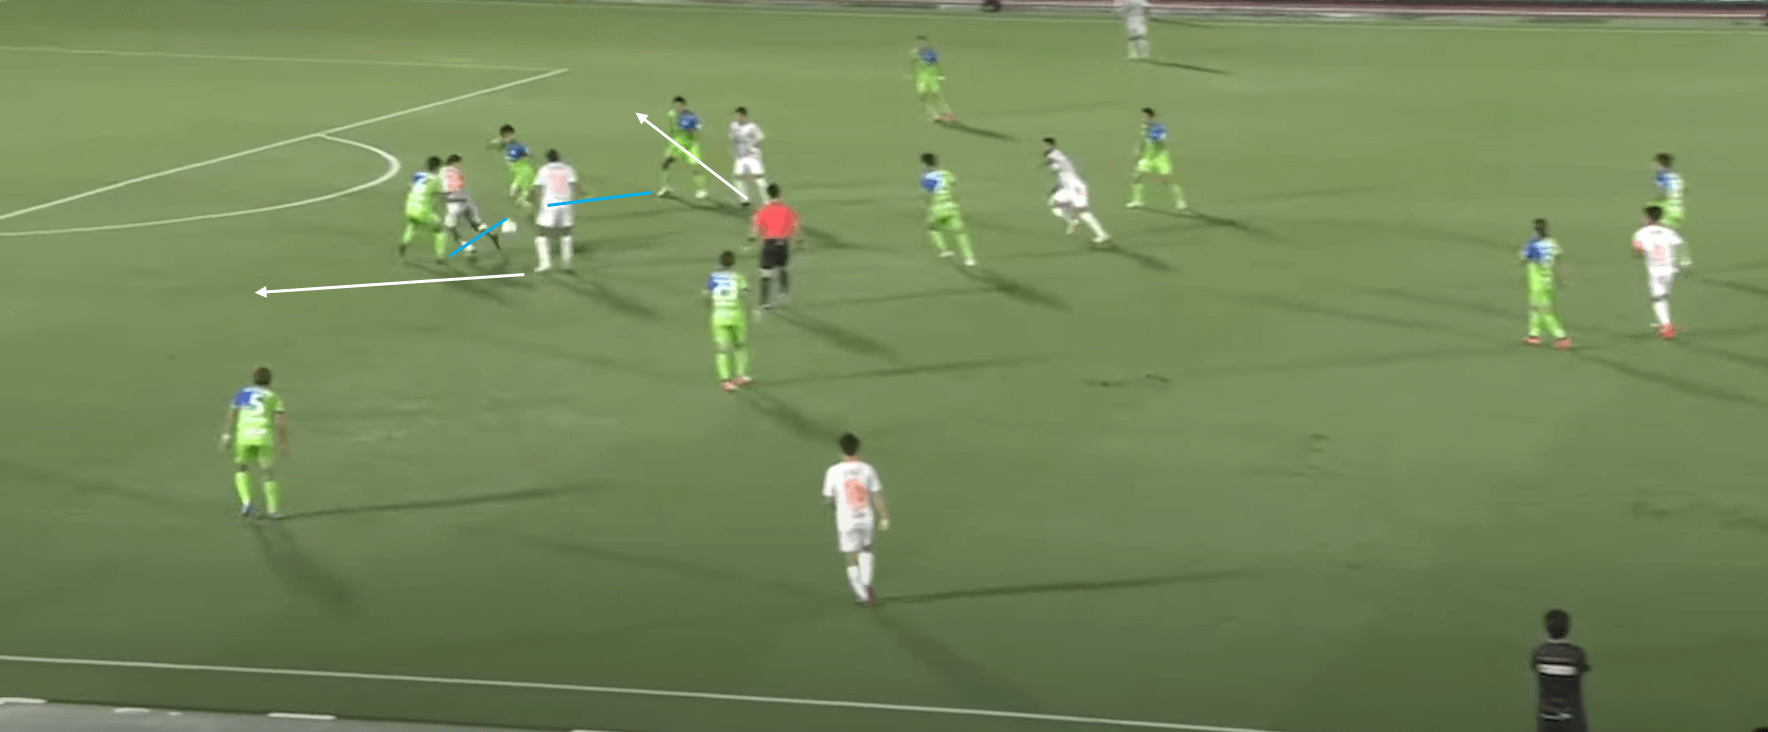
Shonan Bellmare’s three central defenders often found themselves compact in the centre of the pitch, which allowed Shimizu S-Pulse’s attacking players to get around the outside of them. In this annotation, the narrow three defenders can be seen with the two attacking players moving on the outside of them into the gaps which were left by the wide wing-backs.
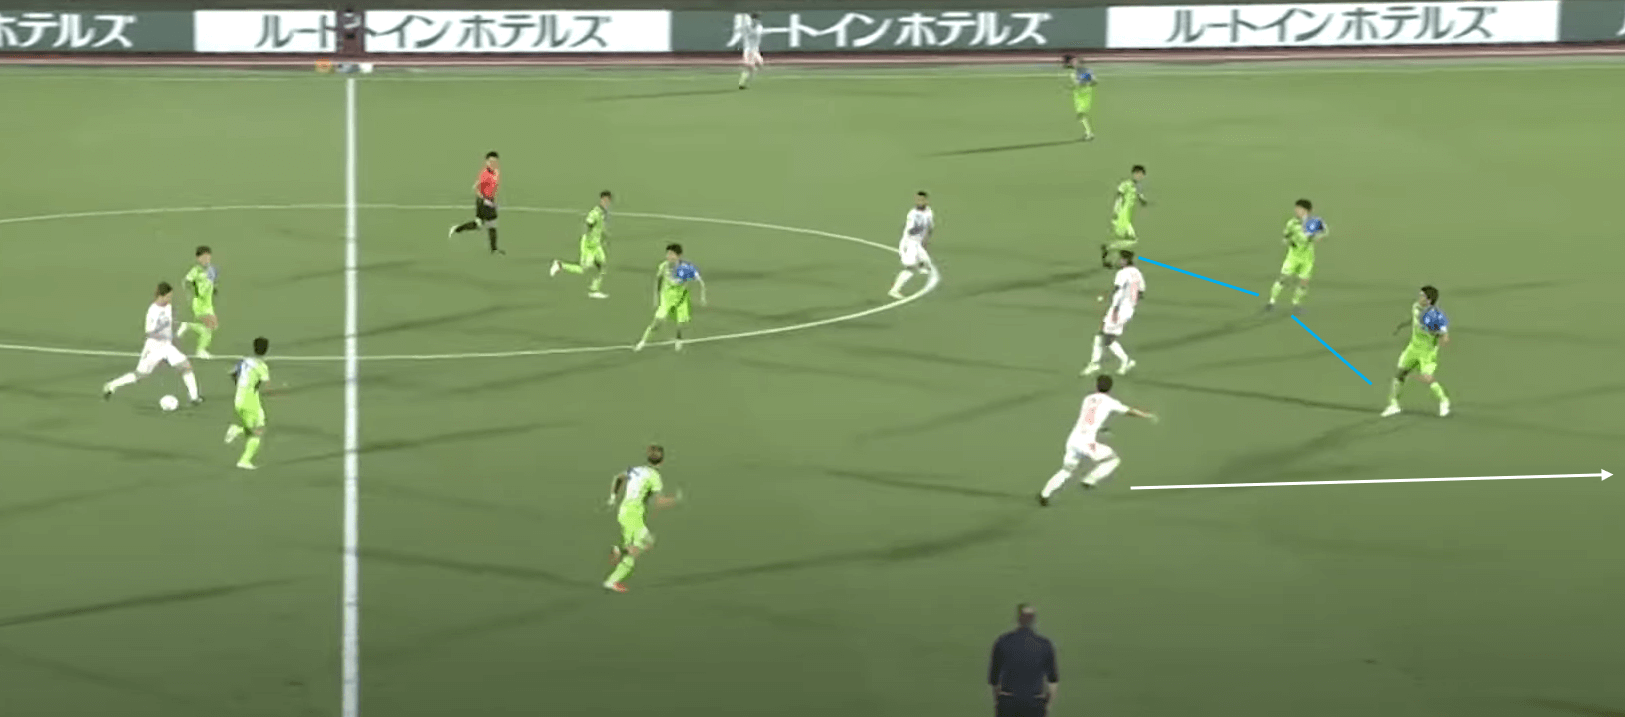
This issue went unfixed by Ukishima going into the second half, and this was where S-Pa were able to put themselves in front. As can be seen here, Shonan Bellmare’s narrow three central defenders have left space to get around them in the wide areas. Spotting the open area of the pitch to run into, Yusuke Goto points for the through ball as he has sensed the opportunity.
S-Pa exploiting the defensive frailties
As mentioned in the above section, Shonan Bellmare had the tendency to leave themselves defensively exposed and in the second half, S-Pa exploited that to seal the three points. The previous annotation was in the build up to their first goal of the match, with Goto moving into the open space down the right flank.

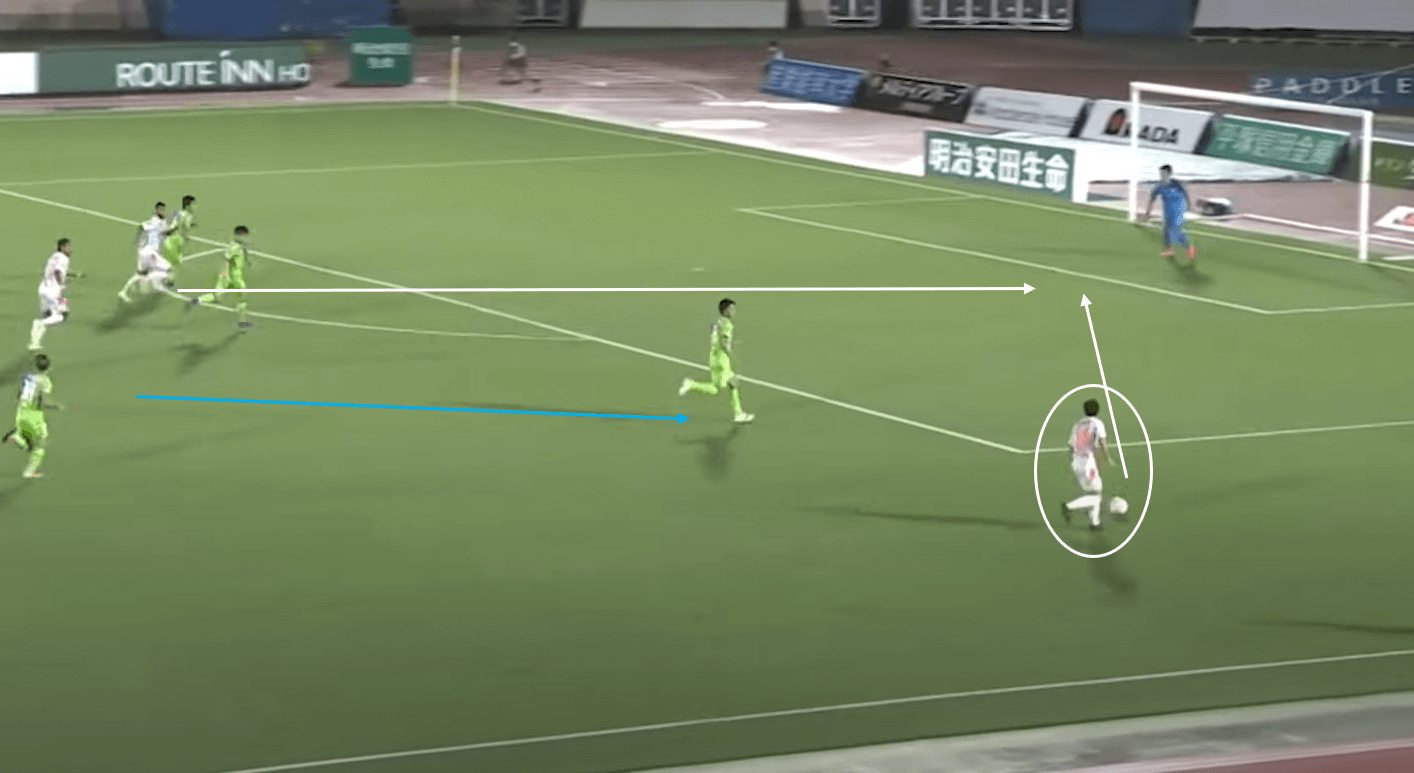
Seconds on from the previous annotation, Goto is in plenty of space down the right flank due to Ishihara being high up the pitch. Kazunari Ono is then dragged out wide to apply pressure Goto and the two central defenders become stretched by the two attacking players. Having turned, the two central defenders in the centre of the pitch do not spot the run made by Carlinhos Junior and he is able to turn home a pinpoint cross unmarked.
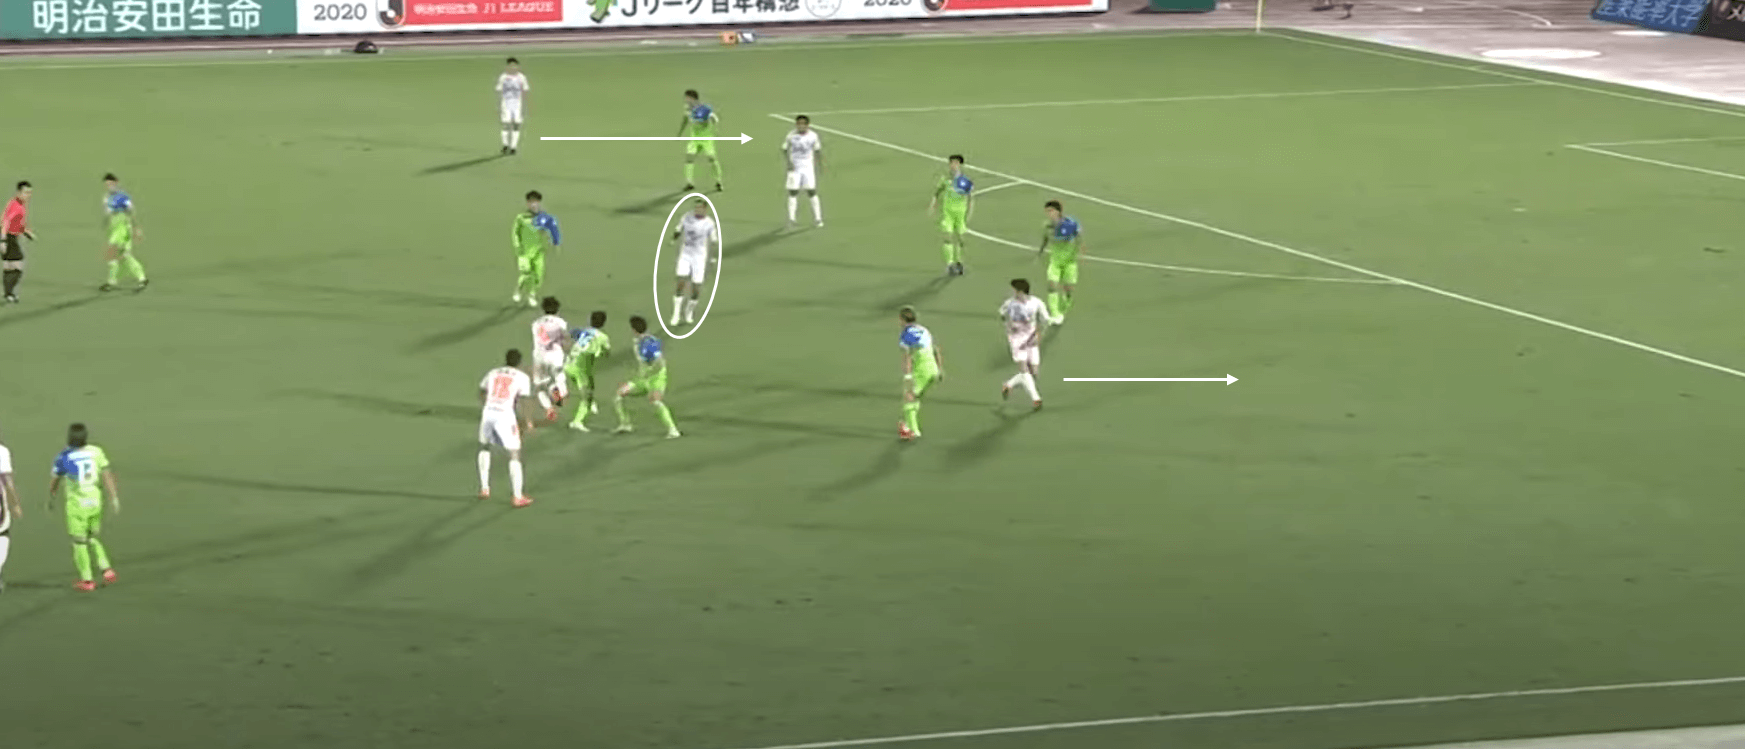
Deep into stoppage time at the end of the second half, the same pattern of play was again seen when Shimizu S-Pulse added their third of the match. Goto again got in down the right-hand side of the pitch, that then opened up space for the ball to be played back to Junior Dutra in the centre of the pitch. His shot then had some element of fortune as it rebounded off the post but again the run of an S-Pa player – Nishizawa – is not spotted and he applied the finish unimpeded to put the three points beyond any doubt.
Conclusion
Both managers will have come into the clash between the two sides hoping to have picked up three points which may spark a run to see them turn their form around.
While S-Pa have been able to move themselves to third-bottom in the table, Vegalta Sendai are only a point behind them and have two games in hand.
So, it will be interesting to see if Cklamovski can use the confidence from convincing victory against the fellow J1 League strugglers to kick-start a run which will see them move away from the foot of the table.
The Aussie manager’s decision to match the home side’s formation but have his wing-backs drop deeper was seemingly an inspired move as it paved the way to three points. It seems likely that S-Pa supporters will be hoping for more tactical nous over the remainder of the season.



Comments