Michael Duff’s Cheltenham Town were ever so close to winning the play-offs last season. After winning the first leg away to eventual winners Northampton Town, a surprise 3-0 loss at home meant that Cheltenham Town would have to play their 2020/21 football in League Two. This season, they have started the season well having won three of their first five League Two matches.
The season is early; however, I was very impressed by the style implemented by Michael Duff in Cheltenham Town’s first-leg win against Northampton, and after they lost the second leg, I felt that they would be in an even better position this season to fight for promotion to League One.
This tactical analysis will use video analysis and data analysis to analyse Michael Duff’s tactics, mainly at the set up of his side and how his players’ position in an effective way in possession.
The Duff defensive blocks – Part One: In the opposition half
The next two sections will take a look at the overall defensive side of Michael Duff’s Cheltenham Town tactics. This section will take a look at the press in the opposition half where video analysis highlights a broken block which has been effective in forcing the opposition into longer, riskier passes.
Michael Duff sets his team in a 3-5-2 formation(used 84% of times last season), though, it is likely that in some matches he will use a variation of this, in a 5-3-2/5-2-1-2/5-1-2-2 at the back formation or in a 3-1-4-2/3-4-1-2 formation where the wings backs would drop deeper to form a back five. Depending on the match situation.
It is becoming more popular for football managers to apply the phrase ‘defend from the front’ to their team tactics, such as at Bayern Munich. The attacking players are more active in making defensive actions compared to five years ago. It appears that when the opposition has possession in their defensive third, and the Cheltenham attacking players feel it is necessary, they will aggressively press and this will form a block in parts.
What I mean by this is, the two Cheltenham strikers will look to apply pressure on the ball, and they will be joined by one of the Cheltenham Town midfielders, likely to be Premier League West Brom loanee Finn Azaz. This forms a 3-4-1-2 block. The front three are shown to be in a much higher position compared to the rest of the team.
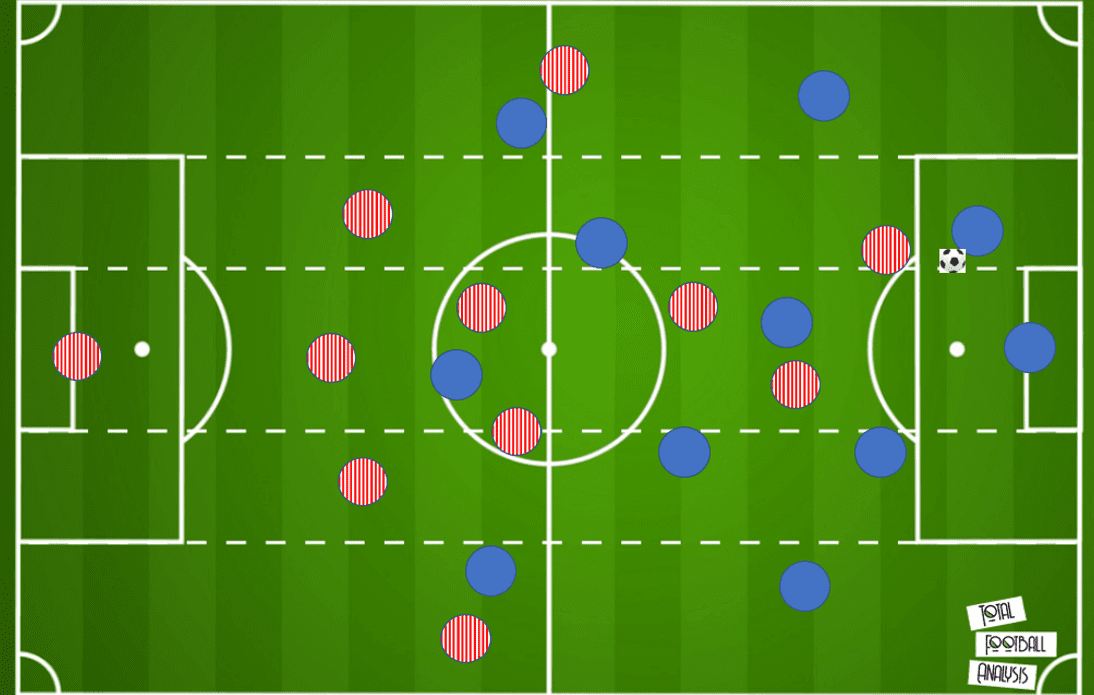
The striker closest to the ball will look to apply pressure on the ball holder and will do this aggressively and quickly to rush the opponent on the ball. The supporting striker and midfielder(Azaz) will support the block by occupying central passing lane potentials.
If the ball holder passes wide, the striker that just pressed the ball holder will be able to press again, in support of the wing-back who is in a high enough position to press the new ball holder, it this happens. This type of press has been effective as they only allowed 9.76 passes per defensive action per 90 last season. Below shows Azaz, George Lloyd and Andy Williams pressing high up the pitch.
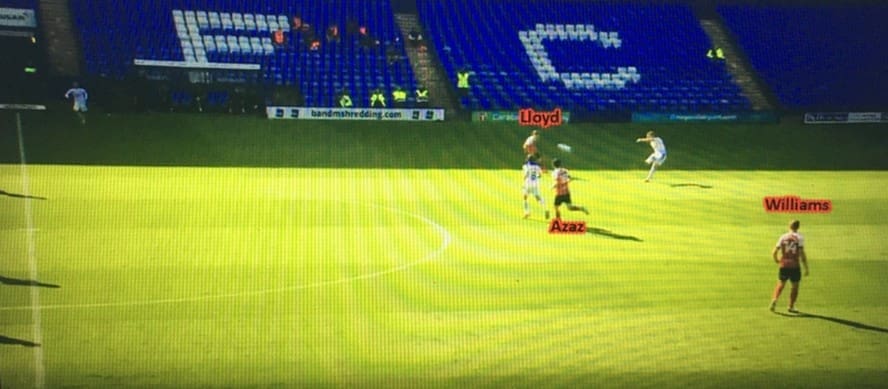
As mentioned earlier, the high press from particularly the three furthest forward can force the opposition into longer passes. This led to a turnover in possession for Cheltenham on a number of occasions, 19.64% of the opposition passes last season were long.
The deeper players are in a mid to high position in the Cheltenham half. This allows the Cheltenham players to be in a position to act on the longer passes. They did well in aerial duels as they won 47% of their duels per 90, not bad considering they competed in 64.45 aerial duels per 90. Fans will see the centre-backs pushing forward from their defensive line if they deem it necessary to compete in the aerial duels that are in the mid-third.
This positioning of defensive lines also means that if the opposition do wish to press then the second block are not in too deep a position to not be able to press. However, are deep enough so that if the opposition does play a very long pass, they are not at risk of conceding a dangerous attack from a deep runner behind the defence; hence they can meet act on the ball before it hits the ground making it a loose ball.
Alternatively, the opposition could pass wide, and the wing-backs and forwards will press these wide players, though, this is not so aggressive as Cheltenham look to press the opposition to force them wide and outside rather than inside.
The Duff defensive blocks – Part two: In the Cheltenham half
The Cheltenham defensive line maintains its mid-distance defensive line when the opposition travel with the ball into the Cheltenham half. The aim of this is to squeeze the opposition play, this congests play and allows Cheltenham Town to have a higher probability of winning the ball as they reduce the length of the pitch. This can be shown below.
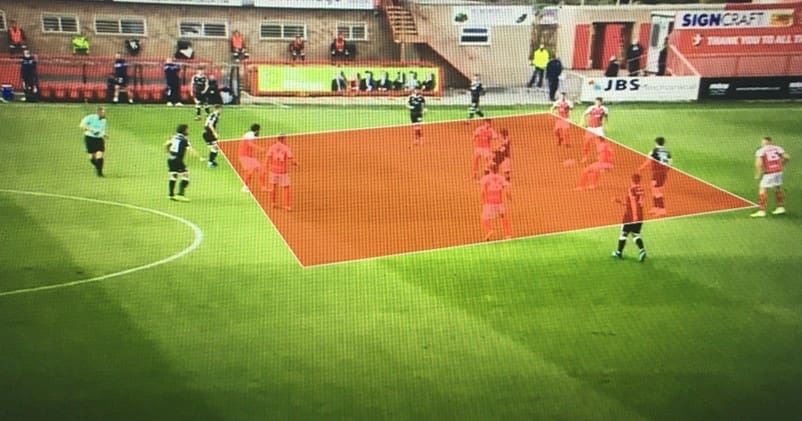
This shows the compactness of the Cheltenham side against Crawley. Eight players are in the highlighted region. It is worth noticing the mid defensive line applied by Cheltenham and the number of Cheltenham players in the highlighted region to congest the amount of space that Crawley can play in. In the end, Crawley were forced to play a pass behind the Cheltenham defence, which was unsuccessful.
The mid-block by Cheltenham in the opposition half has worked well as it has forced sides into playing quick passes and due to the style of many sides in League Two, it has led to Cheltenham regaining possession.
In this situation, Azaz will drop deeper and help to form a three-man midfield. The Cheltenham forwards will position behind the ball to press any backwards passes that the opposition make. This can lead to a swift counter-attack for Cheltenham, the bonus of having two strikers.
Transitioning from back to front
Cheltenham Town’s style of play in their own half is short passing build-up from the defence, if possible. They will look to focus their attacks wide where 76% of attacks came from. This season they have favoured the right-hand side of the pitch
All three Cheltenham Town first-choice centre-backs Charlie Raglan, Ben Tozer and William Boyle, are strong technically, and this is key to Cheltenham Town’s style of play, especially against mid and high blocks that will look to force the players under pressure. Shorter passes reduce the likelihood of losing the ball as longer passes make it more likely for a duel and therefore a reduction in possession and control of the match. Below shows the likely passing lanes for a centre-back.
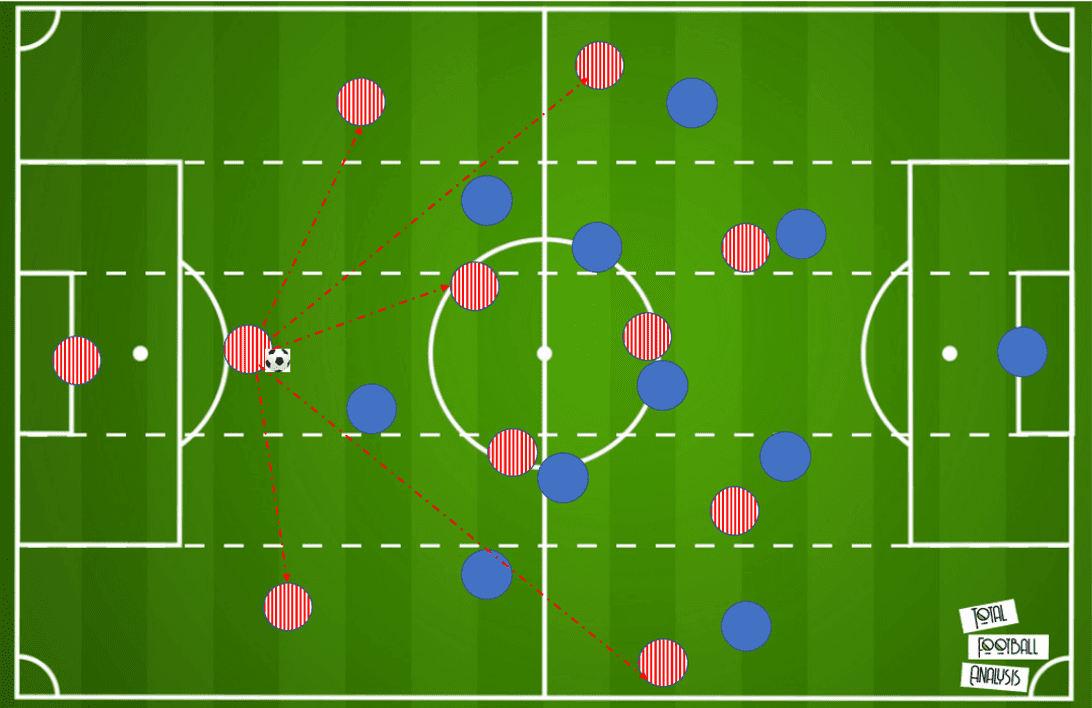
Left and right centre-backs, Boyle and Raglan will look to position in a narrow full-back position, below.
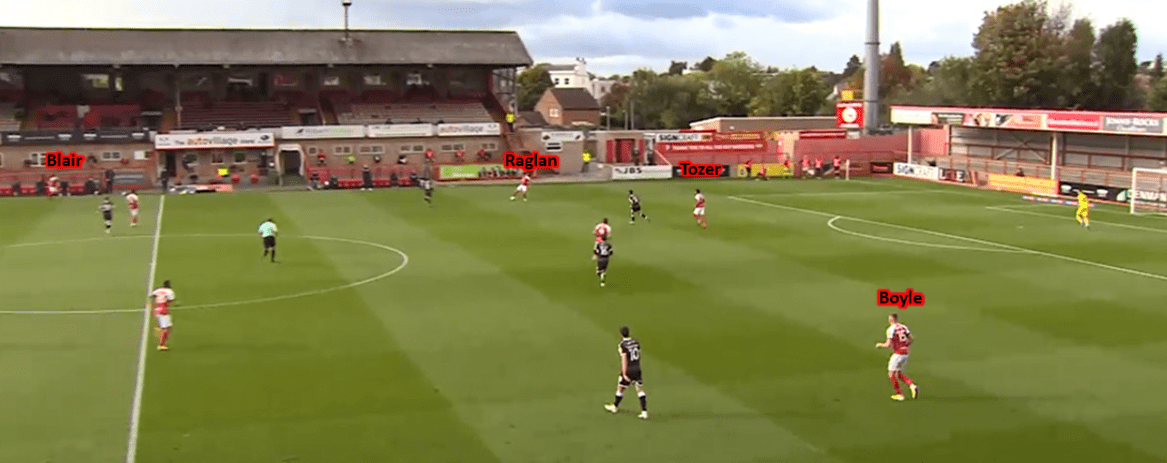
Raglan is in possession and occupied a wide position for a centre back, Boyle also takes control of the narrow full-back role. This type of positioning allows Cheltenham to utilise the width of the pitch; therefore, the wing-backs Matty Blair and Chris Hussey can play in a wide winger position when the team attack. In this situation, Blair received the ball. The positioning of the deeper central midfielders is analysed below.
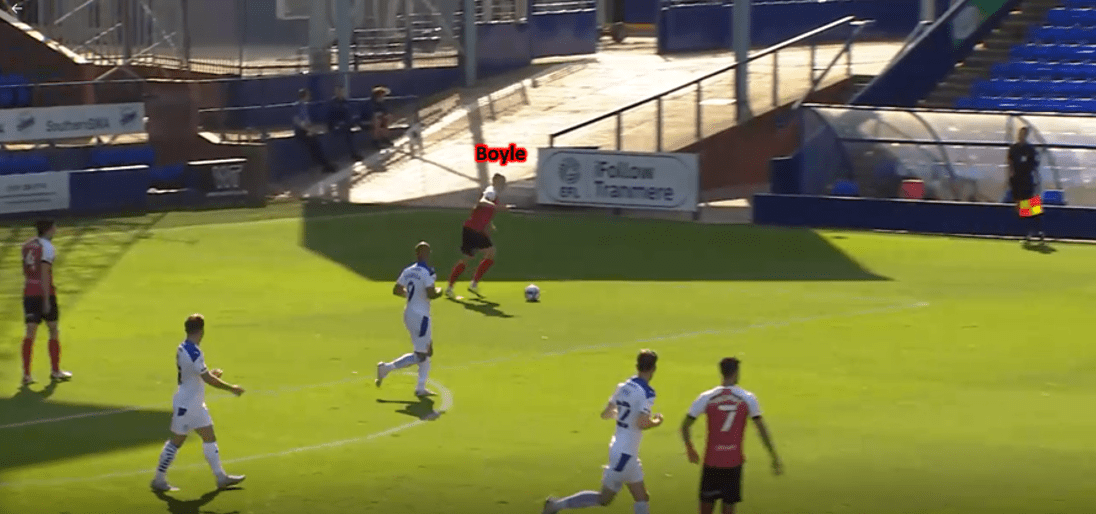
Boyle is in possession.
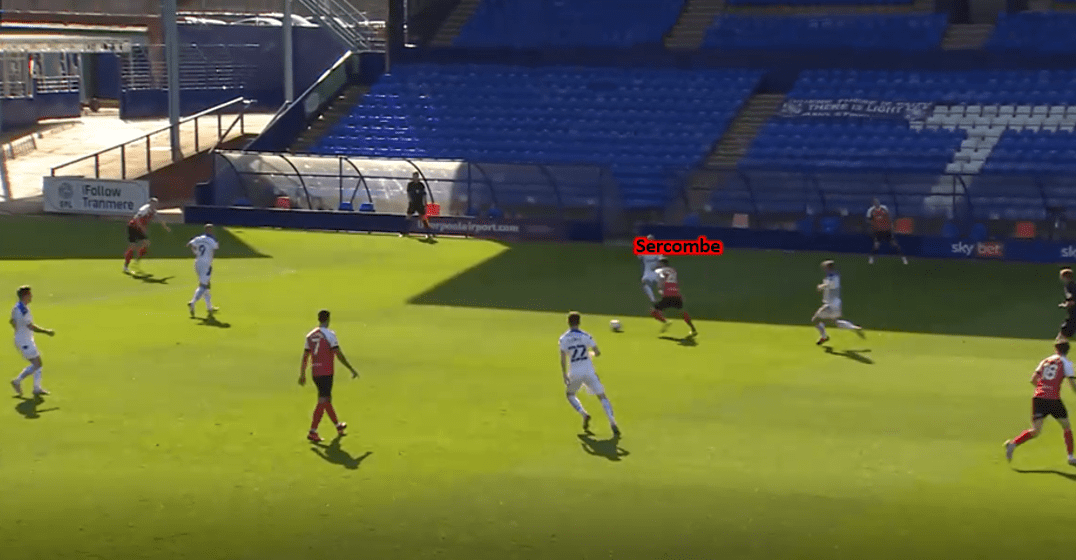
Liam Sercombe is shown to have received the ball in the deep half-space, Sercombe and Conor Thomas(who has been playing alongside Sercombe as the slightly deeper central midfielders), will position in the half-space as it is a clear passing line to break the lines between the midfielders and forwards.
Why is this so effective? It is so effective because it can allow for several opportunities of passing triangles as the central midfielders produce the top of the triangle, which can allow the transitions. This helped them to hold 52% ball possession per 90, holding possession, on average, more than the opposition.
Final third threat
Cheltenham will look to play wide whenever possible. They use the width of the pitch and play longer switch passes to unsettle the opposition block. This creates space for the Cheltenham attackers to drop into positions in the half-space to allow for transitions into the wide areas. This means that the crosser can cross from a position where the opposition are not able to easily block the cross before it enters the box.
Cheltenham enjoy crossing the ball as they made 16.82 crosses per 90 last season. First choice strikers Andy Williams and George Lloyd will run freely across the width of the pitch to create these overloads which will be shown below.
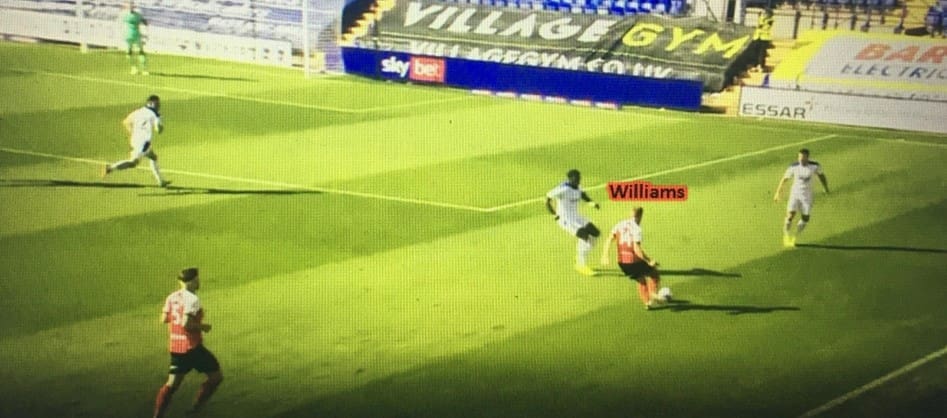
Williams is in possession of the ball on the right-hand side of the pitch. This resulted in a throw-in for Cheltenham, they are dangerous in these positions due to Ben Tozer’s long-throw ability. The next visual shows the next passage of play.
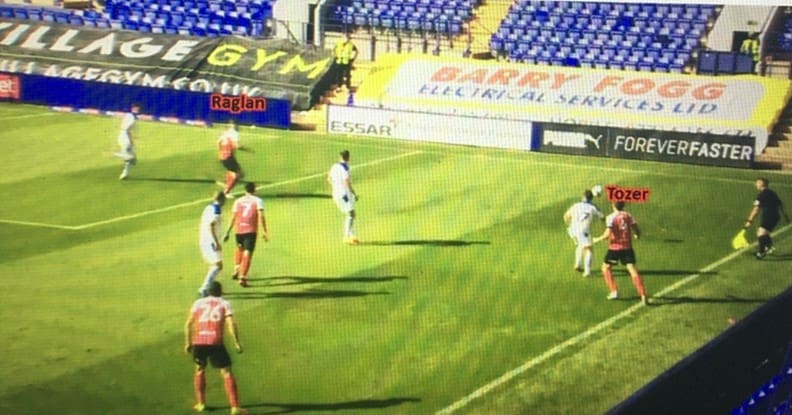
Centre-backs Tozer and Raglan are high up the pitch, which shows their mindset of trying to control the game in the opposition half. There are four players who are able to help the transition on the right-hand side of the pitch, Tozer plays a forward pass to Raglan.
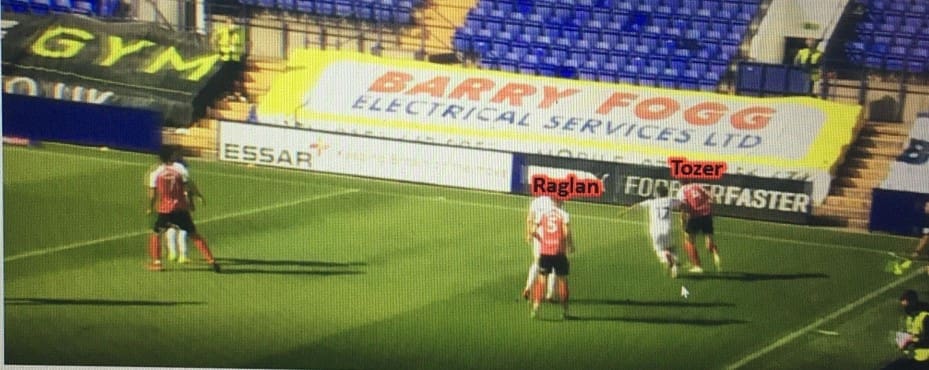
Raglan is able to retain possession and play Tozer into a possession where he can clearly cross the ball into the box, the cross from the byline is brilliant to allow for lofted crosses which can cause problems for the opposition.
Conclusion
This tactical analysis has highlighted Cheltenham Town’s short pass style in possession which looks to attack the opposition in wide areas. Their defensive blocks were also highlighted. Cheltenham will definitely be fighting for promotion this season; though, this could depend on them keeping manager Michael Duff as manager as he is likely to have impressed clubs by implementing his own tactics on the side.
It is worth watching Cheltenham this season as Duff has set up an attractive style of play for his side to play. If fans don’t come back into stadiums soon, watching them on TV would be recommended.


Comments