The last game of the fifth Premier League match-day between Aston Villa and West Ham United ended in a goalless draw. In a match between two sides with similar tactical concepts, spectators saw plenty of long balls, wing attacks and solid defensive departments when it came to defending the opposition crosses.
In the following tactical analysis, we will take a closer look at the tactics of either side. Moreover, we explain West Ham’s pressing issues and the consequences of Pellegrini’s side being one man down in the final stage of the game.
Lineups and formations
Aston Villa lined up in a 4-1-4-1 with the wingers supporting attacker Wesley during the press. During the attacking phase, single pivot Marvelous Nakamba acted in front of the centre-back pairing consisting of Tyrone Mings and Björn Engels. The advanced midfielders Jack Grealish and John McGinn were supposed to break the opposition midfield and support the wingers with progressive runs.
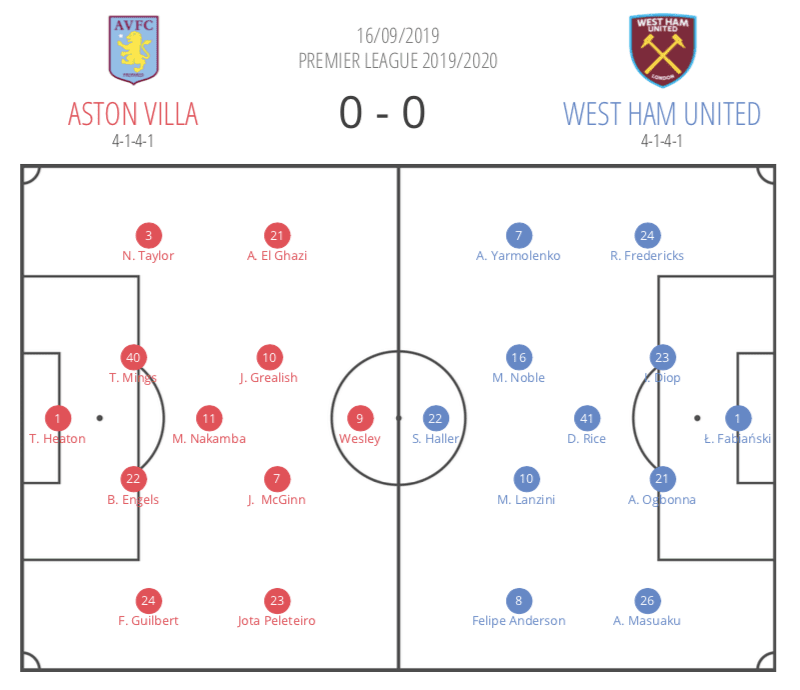
West Ham played in a 4-1-4-1 as well although their setup differed from Aston Villa’s one slightly. In pressing moments, advanced midfielder Mark Noble took over a higher role which often left defensive midfielder Declan Rice alone in front of the backline. Up front, West Ham coach Manuel Pellegrini lined up French striker Sébastien Haller being tasked to threaten Aston Villa’s goal with his heading qualities.
Pressing setups
Especially in the beginning phase of the game, Aston Villa attempted to disrupt West Ham’s build-up right from the start. Therefore, the wingers pushed forward to press the first line of build-up.
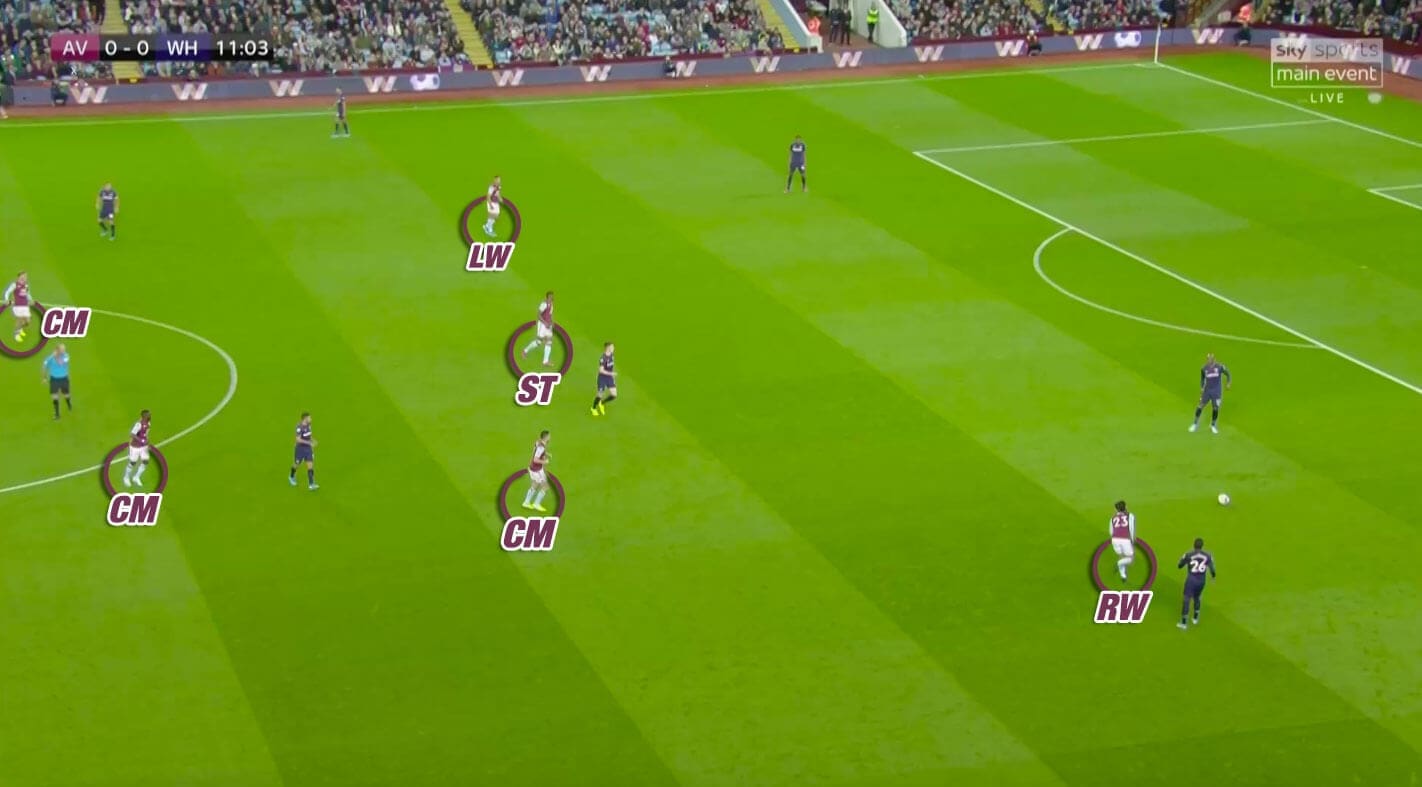
After often forcing the defenders to play back passes to their goalkeeper, Aston Villa’s pressing players continued their pressing runs. As a consequence, West Ham often had to hit the ball long causing 47 long balls throughout the match. As a comparison, Aston Villa only played 29 long balls.
The main reason for that is that Aston Villa found ways to outplay West Ham’s press. Manuel Pellegrini’s side used a forward-moving advanced midfielder to press.
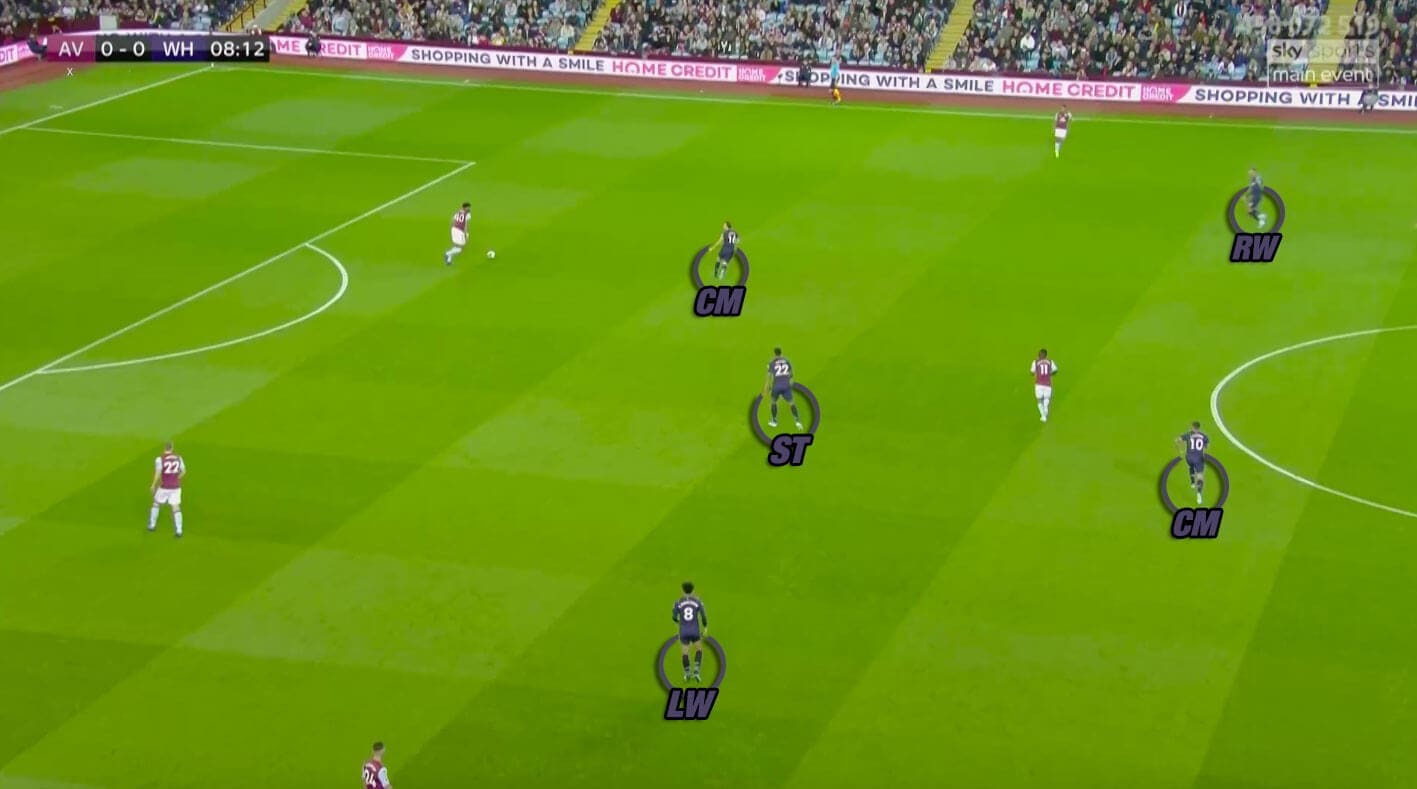
West Ham’s pressing worked out when they pressed Aston Villa on the wing. Out wide, the advanced midfielder could stay on his position while single striker Haller could shift towards the ball side. That way, Pellegrini’s team took advantage of the sideline.
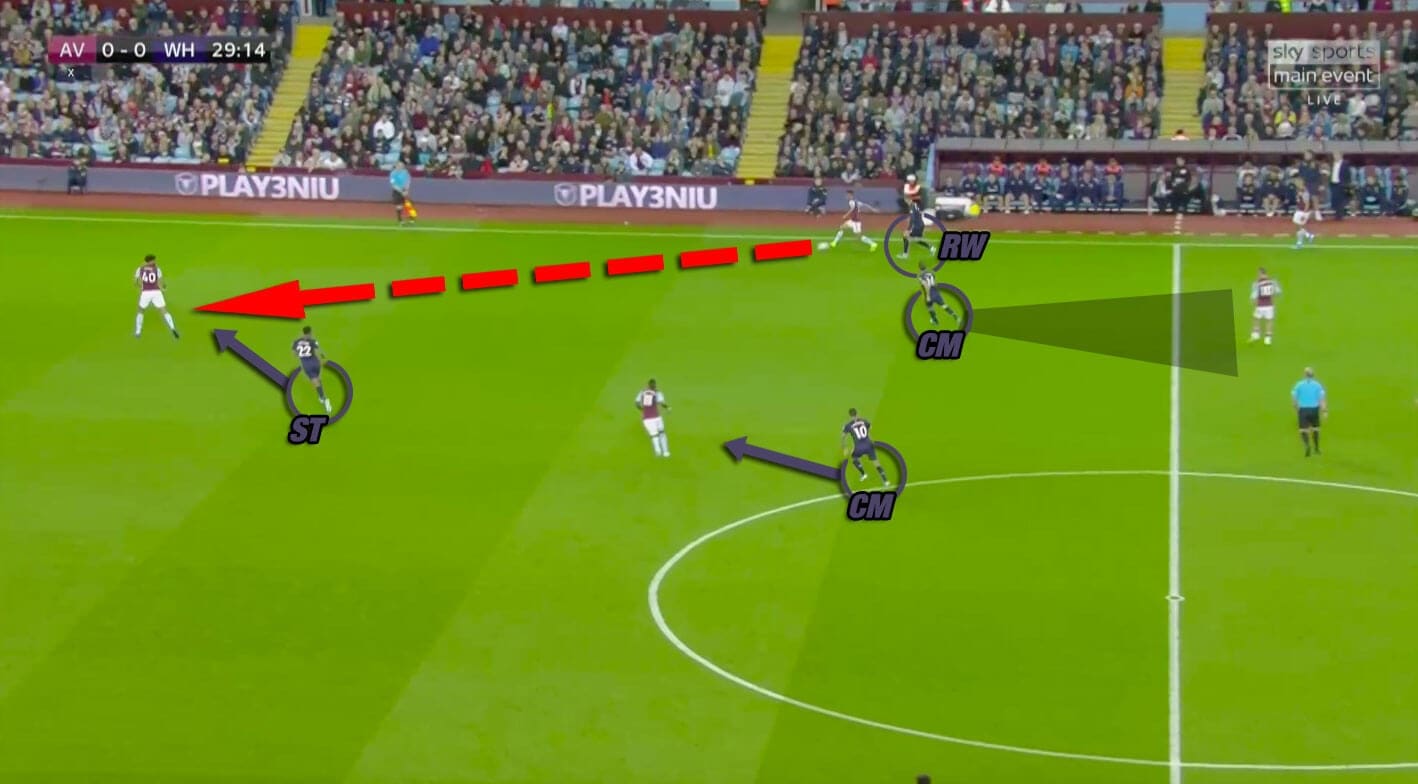
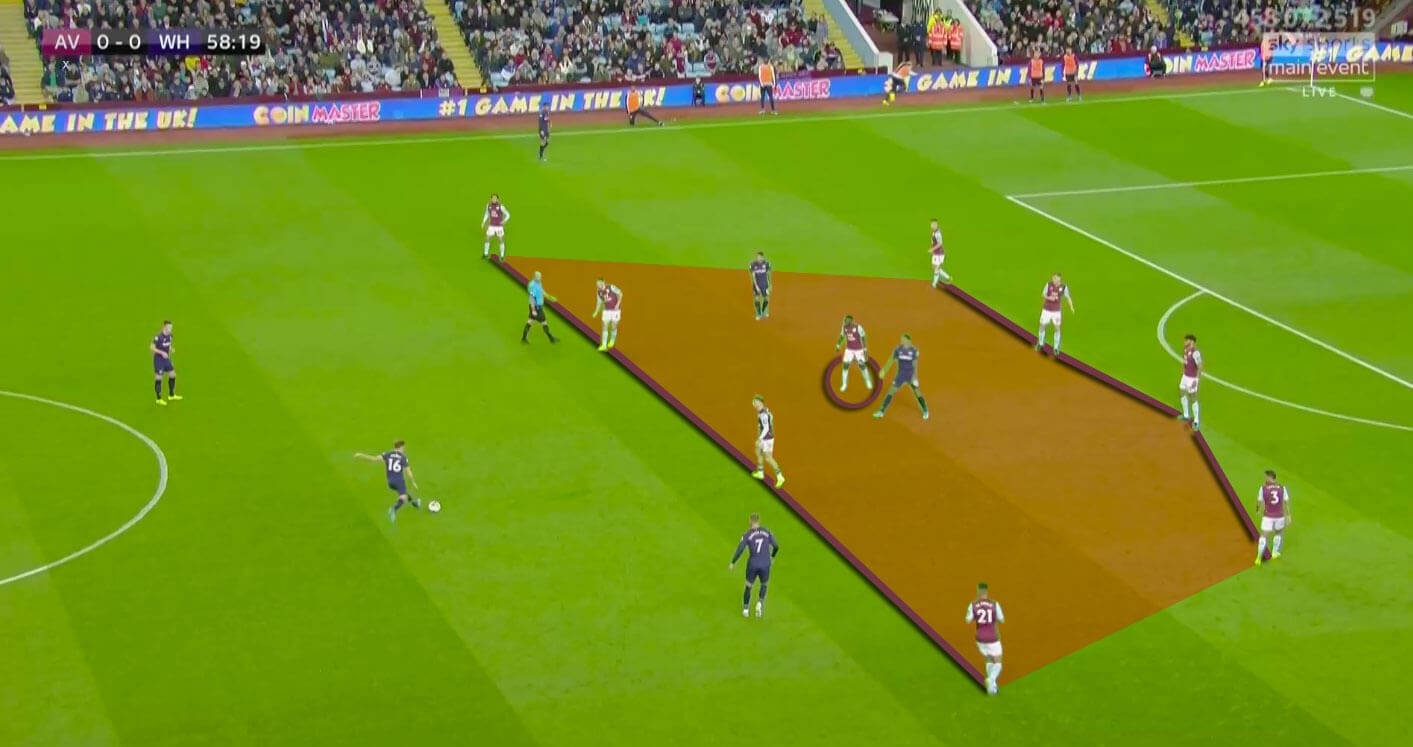
But when pressing in central areas, the space between both lines of four was simply too large to be defended solely by defensive midfielder Rice.
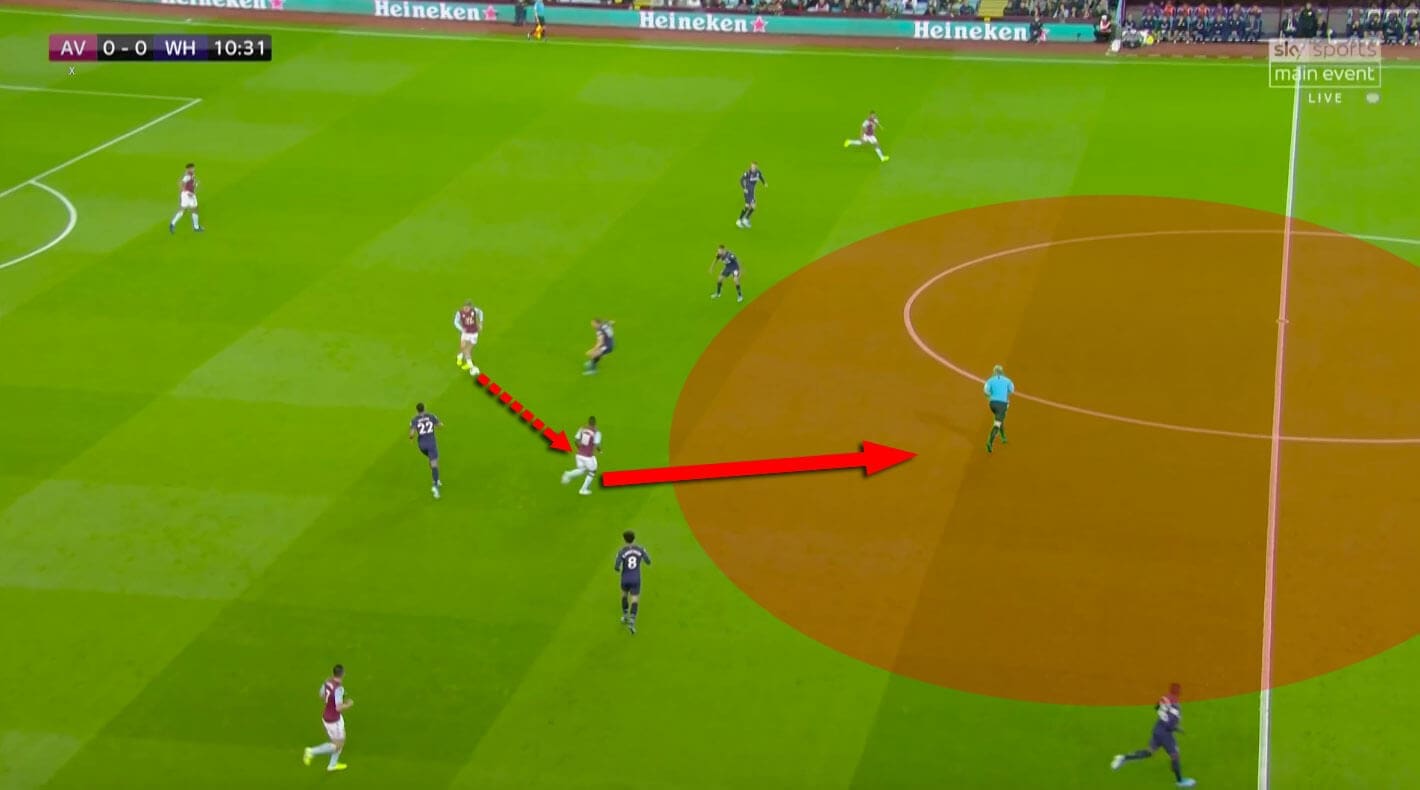
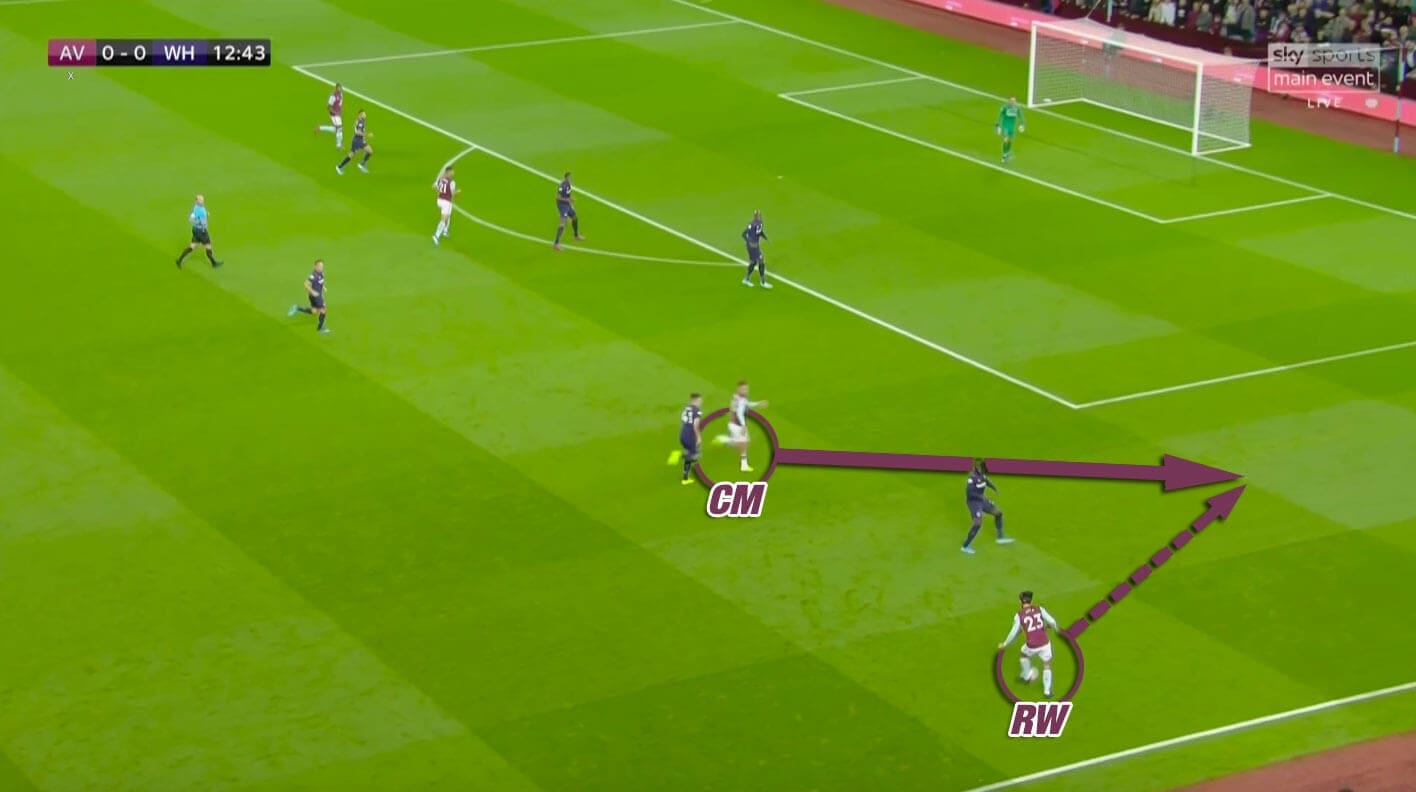
In other cases, the three central midfielders were all positioned on one side of the pitch. And due to the lack of support by the ball far winger, Aston Villa could then get behind the midfield in the half-space, as in the situation below.
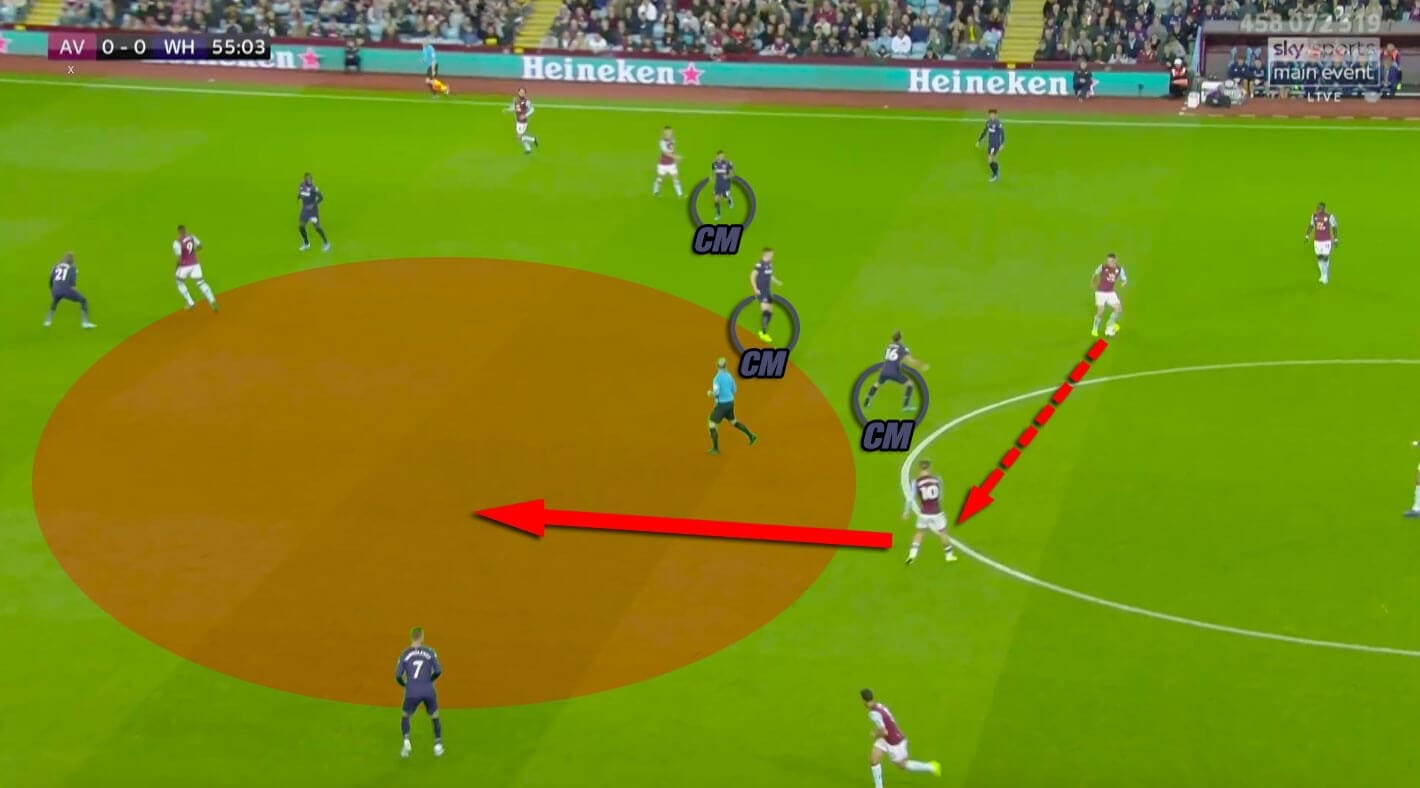
And as a result, Aston Villa regularly found ways to play into space between the lines and progress up the pitch.
To avoid any dangerous counter-attacks, Aston Villa positioned their full-backs not as high as many sides playing a 4-3-3 in possession do.
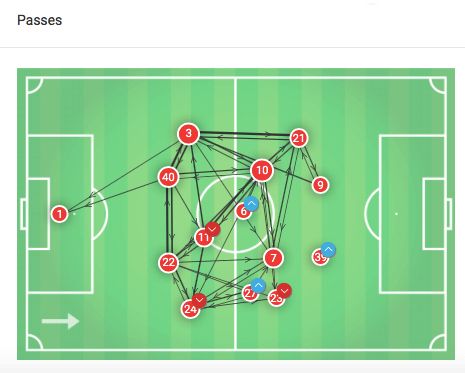
That way, Dean Smith‘s side could immediately defend any West Ham counter with five players. The full-backs quickly moved inside to defend the half-spaces. Meanwhile, the central defenders defended the opposition striker together with defensive midfielder Marvelous Nakamba.
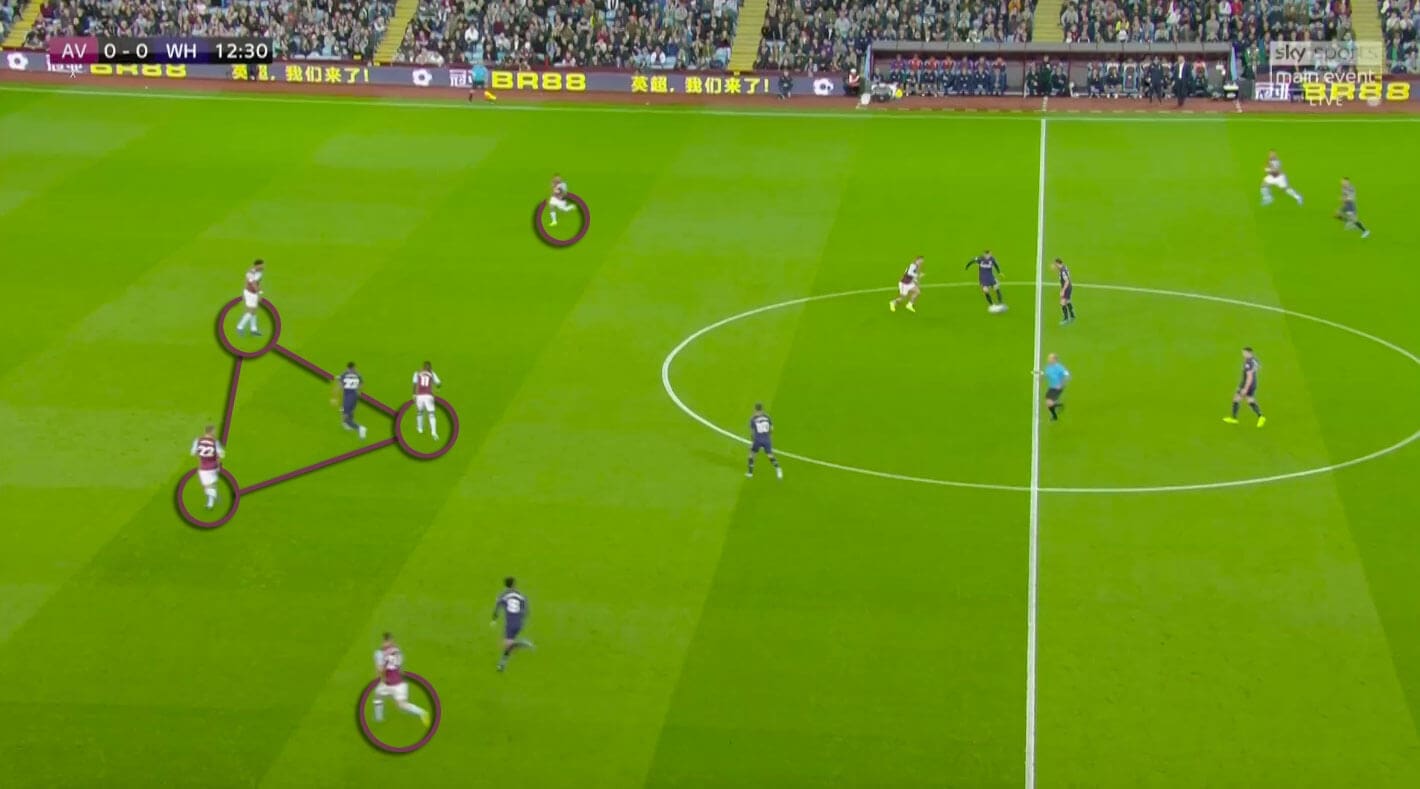
As a consequence, the game offered only a few chances during transitions. This led to the circumstance that the defensive side was well organised during every promising attack. That allowed the defensive departments of either side to set up a good structure to defend the opposition attacks which will be depicted further in detail in the following paragraph.
Wing-focused attacking approaches fail
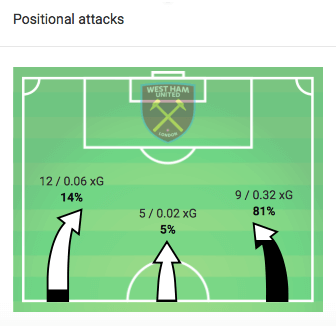
As one can see on both attacking graphs, Aston Villa and West Ham attacked a lot down the flanks.
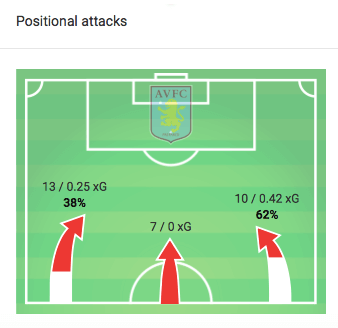
While the defending team often successfully shut down central areas, the attacking side utilised the open flanks to get into the final third.

The best chances of the game were created with balls played from the end line. After having reached the final third, the wingers were offered the option to play towards a central advanced midfielder running into space behind the opposition defence. Both sides used this concept to threaten the opposition goal after crosses from the end line.
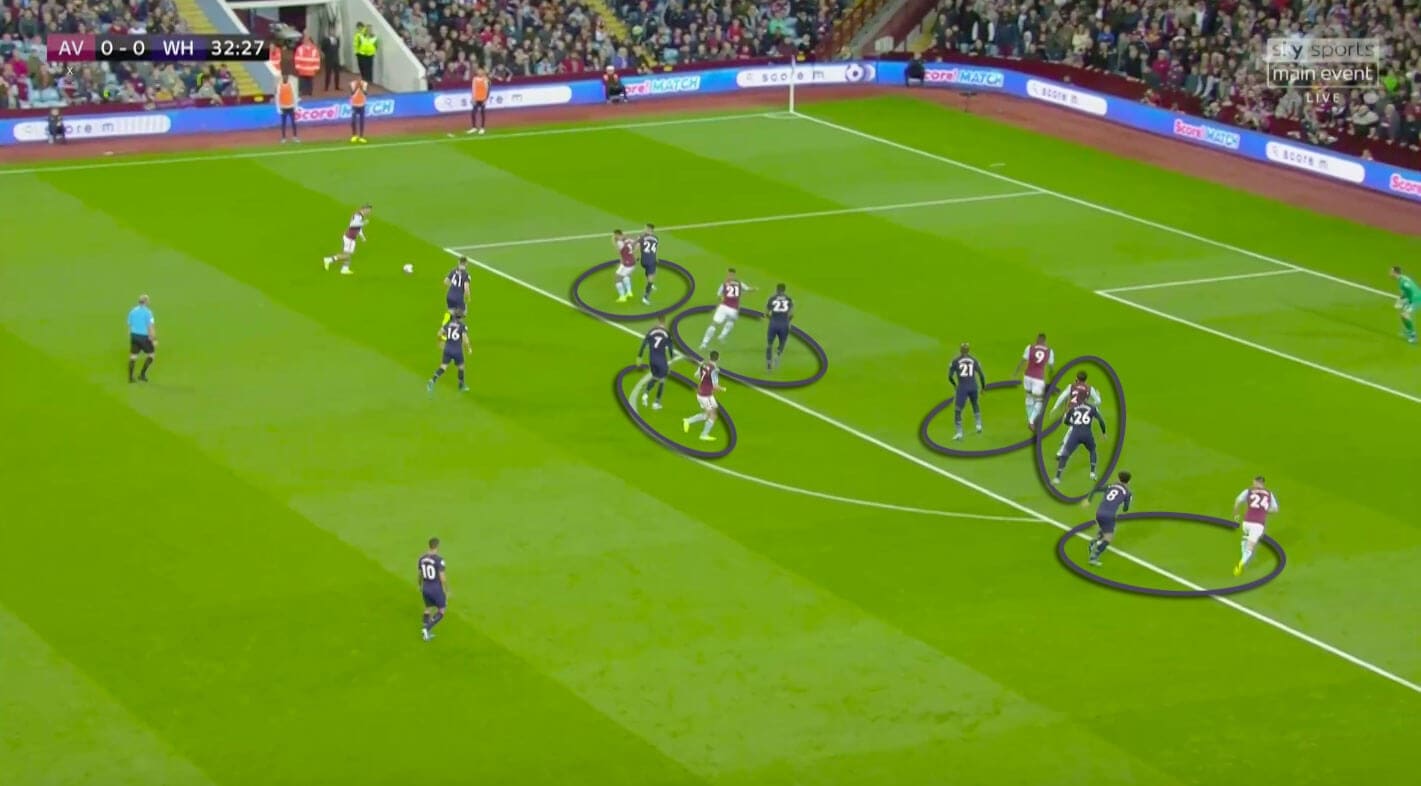
But there were also some differences in the attacking approaches of either team. Apart from the similar focus on wide areas, Aston Villa attempted to overload the penalty area with plenty of attackers. Nevertheless, West Ham successfully defended these situations with a man-marking approach within the box.
West Ham, on the other hand, depended on their single striker Haller who was often left alone within the opposition box.
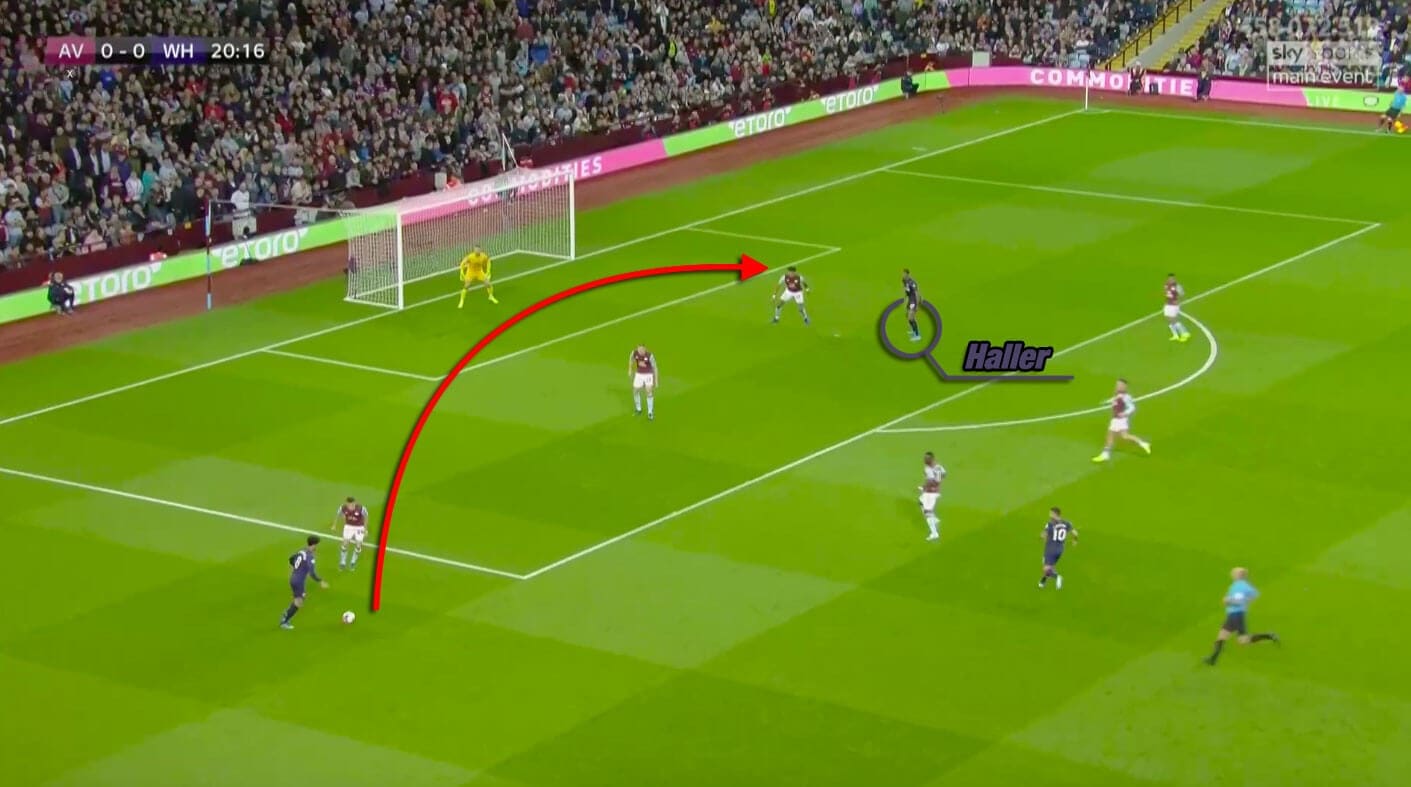
Whereas the French attacker was capable of winning the duels against a single opponent in counter-attacking situations as above, he was incapable of receiving a cross within Aston Villa’s organised defence during positional attacks.
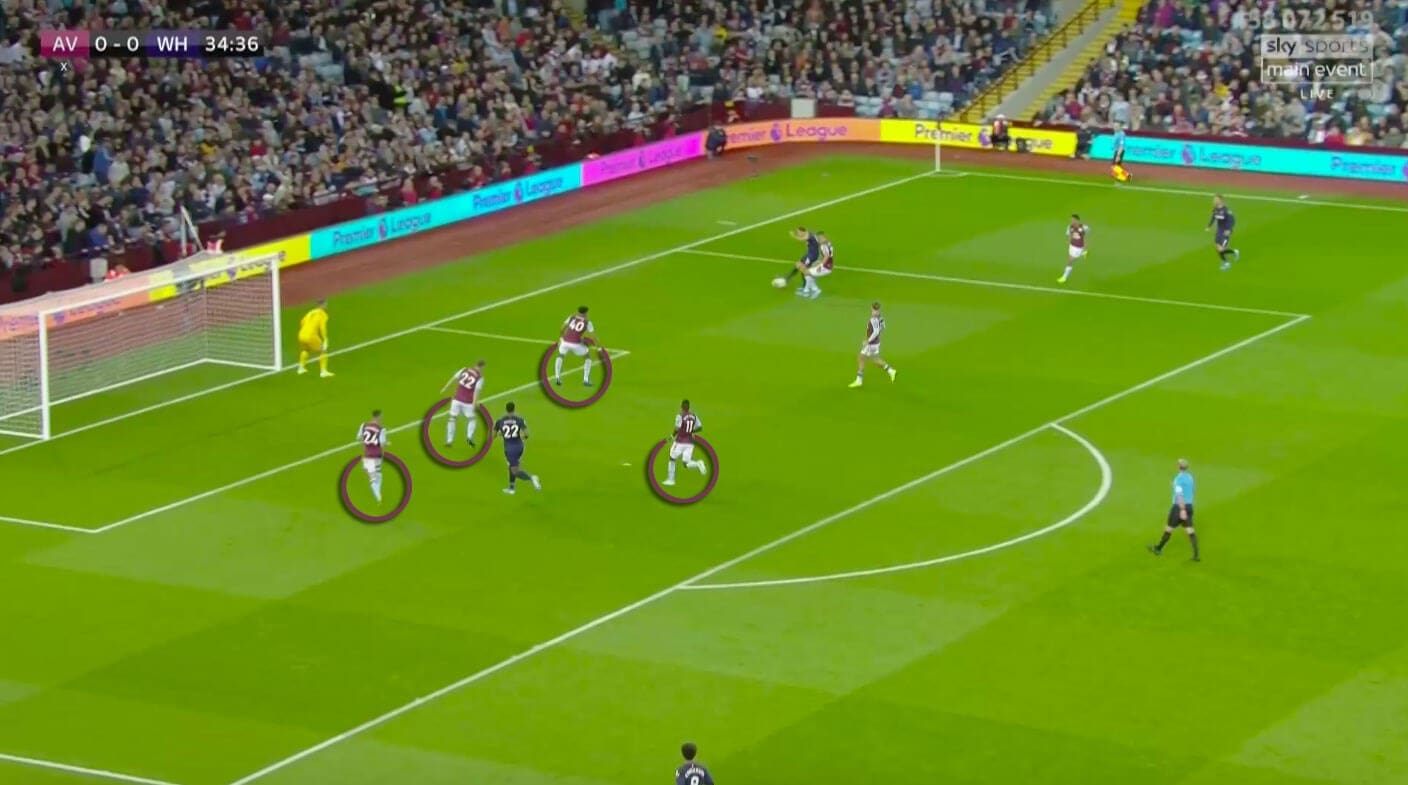
All in all, Aston Villa sent in 17 crosses, while West Ham even exceeded this number with 20 crosses. But neither Aston Villa nor West Ham were capable of scoring, partly because of missing attacking personnel and partly because of solid defensive departments.
West Ham’s numerical inferiority during the final stage
Since West Ham left-back Arthur Masuaku was sent off with a second yellow card, they defended in a 4-4-1 low-block during the final stage of the game.
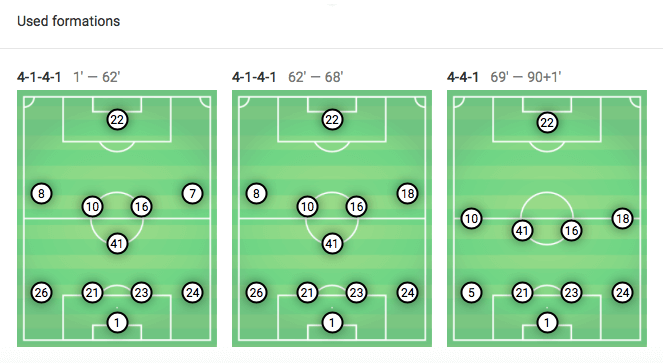
With this setup, they were at least capable of avoiding their full-backs to be outnumbered on the wing as the midfield was positioned close to the defence. Therefore, the ball near midfielder could support the full-back and therewith even create numerical equality or even superiority.
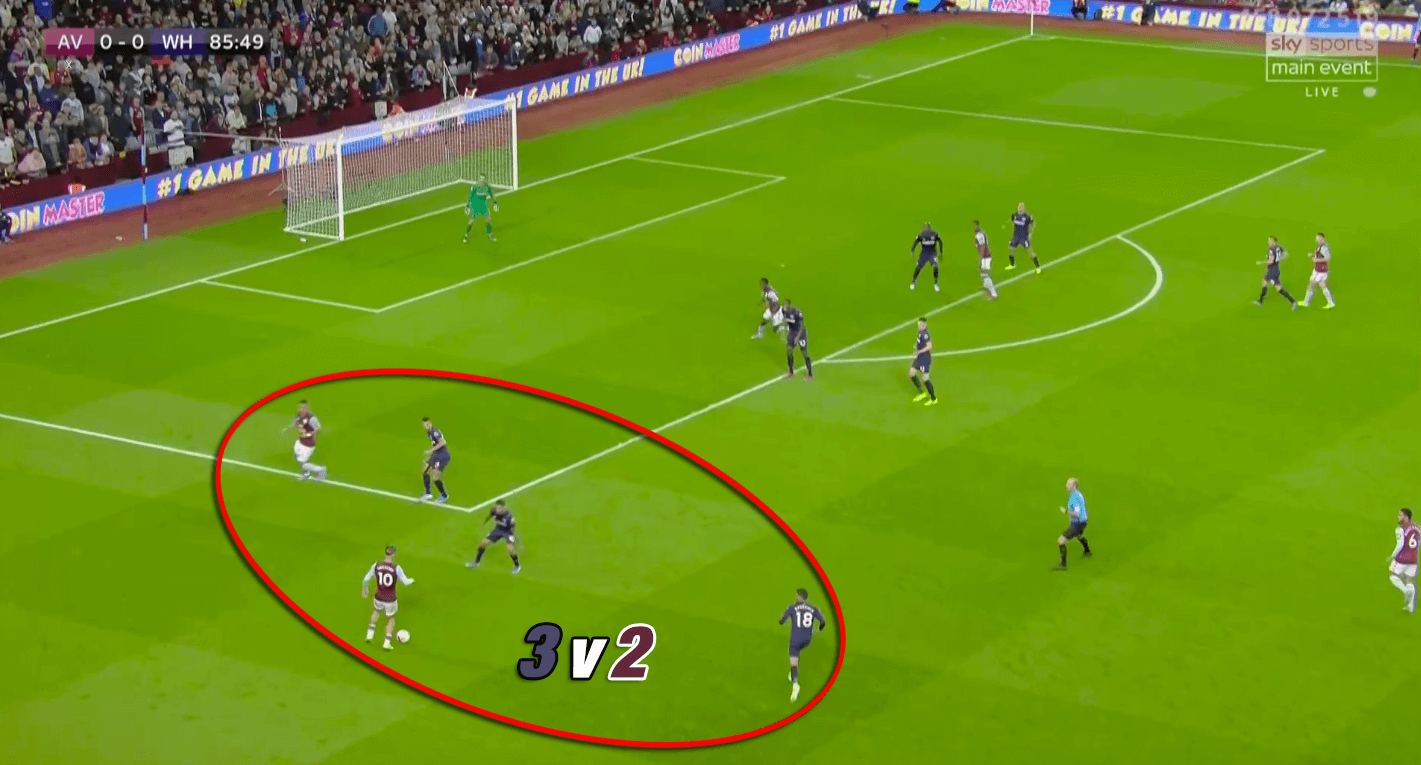
Therewith, West Ham prevented Aston Villa to get to the end line. Smith’s side, as a consequence played around the block waiting for an opportunity to arise. However, as their attacking concept only offered crosses from wide areas, Aston Villa attempted to send in crosses which resulted in one last scoring opportunity which will be described in the following.
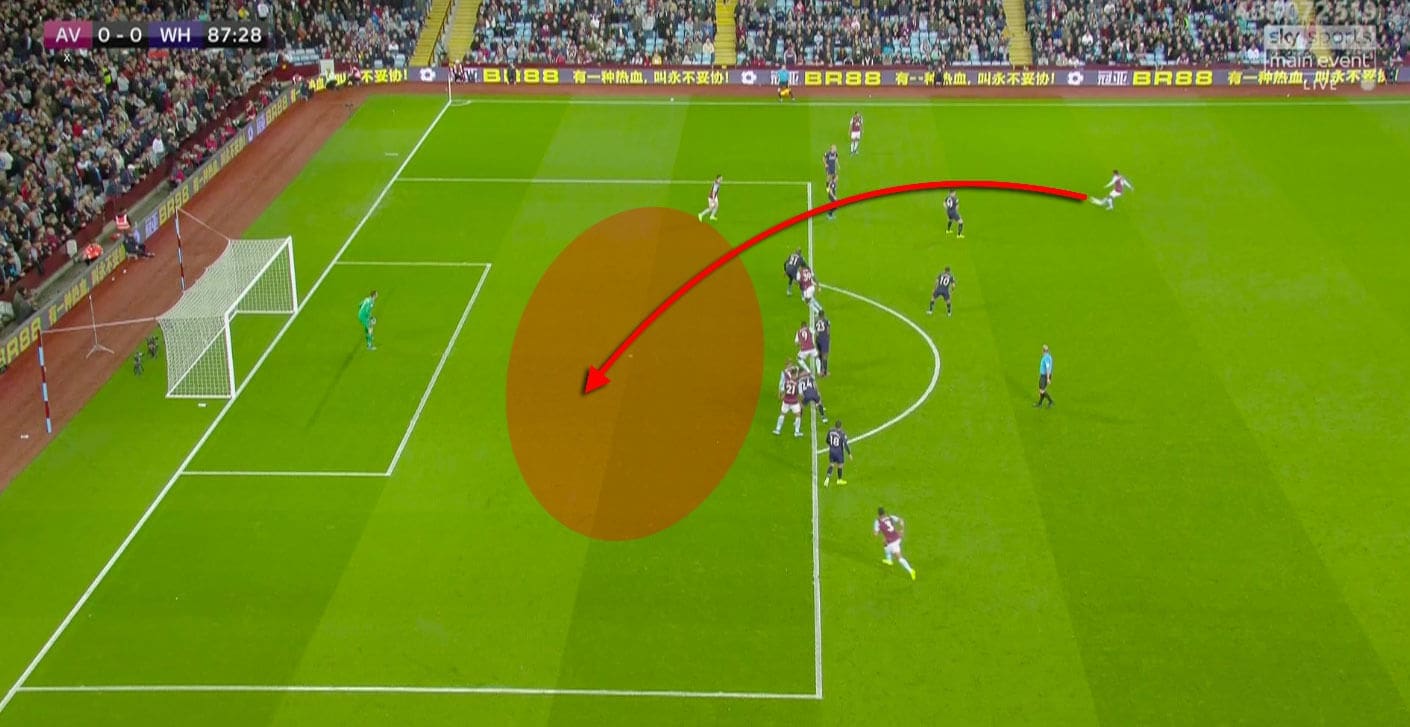
West Ham’s defenders often wait at the edge of the penalty area in order to force the opposition attackers into offside positions. However, that also comes along with the risk of admitting the opposition chances in case a defender misses to move forward. As a result, Aston Villa could create their biggest chance with a cross from a lower platform as one can see below.
And also Aston Villa allowed the opposition a chance before. Despite being one more player, their counter-pressing failed.
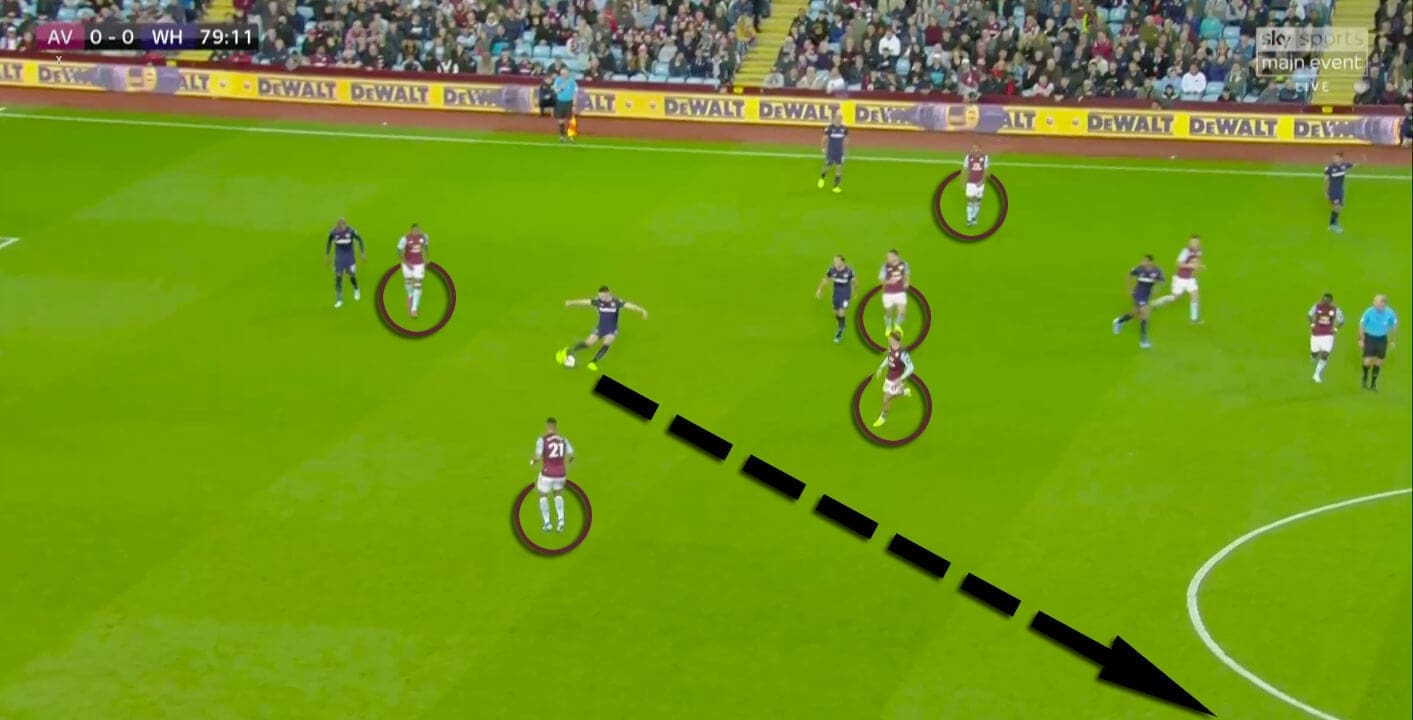
This enabled West Ham to switch sides and introduce a promising counter-attack with a 1v1 situation on the wing as displayed below.
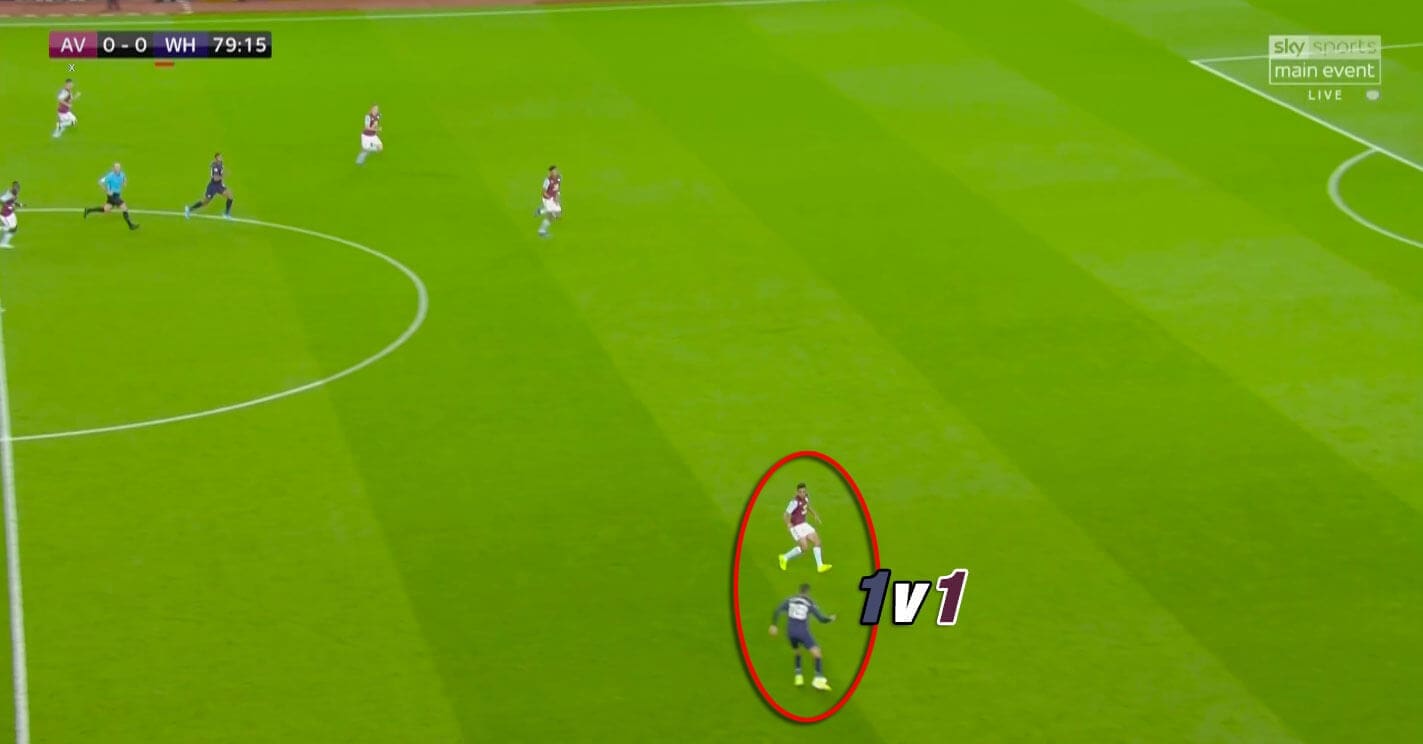
However, since West Ham’s attacker delays the counter, they miss the opportunity of creating a big chance. In the end, West Ham’s shot got blocked.
Conclusion
All in all, Aston Villa were the superior side in this game as our analysis proved. With the help of their wing attacks, the home-side created bigger scoring opportunities throughout the game as the better xG value shows.
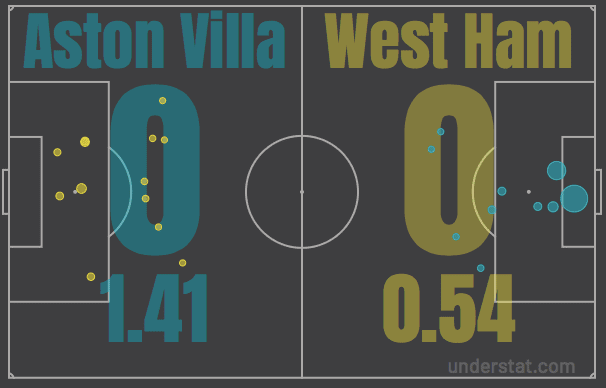
Nevertheless, the draw could also be described as deserved since the match lacked of clear cut chances on either side. Moreover, both side’s defensive concepts to defend attacks from wide areas worked out well.
With regards to their future games, Aston Villa and West Ham will need to improve their offensive versatility in order to increase their attacking threat.

If you love tactical analysis, then you’ll love the digital magazines from totalfootballanalysis.com – a guaranteed 100+ pages of pure tactical analysis covering topics from the Premier League, Serie A, La Liga, Bundesliga and many, many more. Buy your copy of the August issue for just ₤4.99 here.



Comments