An in-form Chelsea side recently visited West Ham at London Stadium in a London derby between two clubs at opposite ends of the Premier League table. The Hammers had lost five of their last six matches and are in serious threat of relegation. The Blues meanwhile had won all three matches in all competitions since the return of football, including victories against Manchester City in the Premier League and Leicester City in the FA Cup quarterfinals. This tactical analysis will examine the stratagems of both sides and dissect how the hosts outplayed the opposition in various aspects of the game.
Lineups
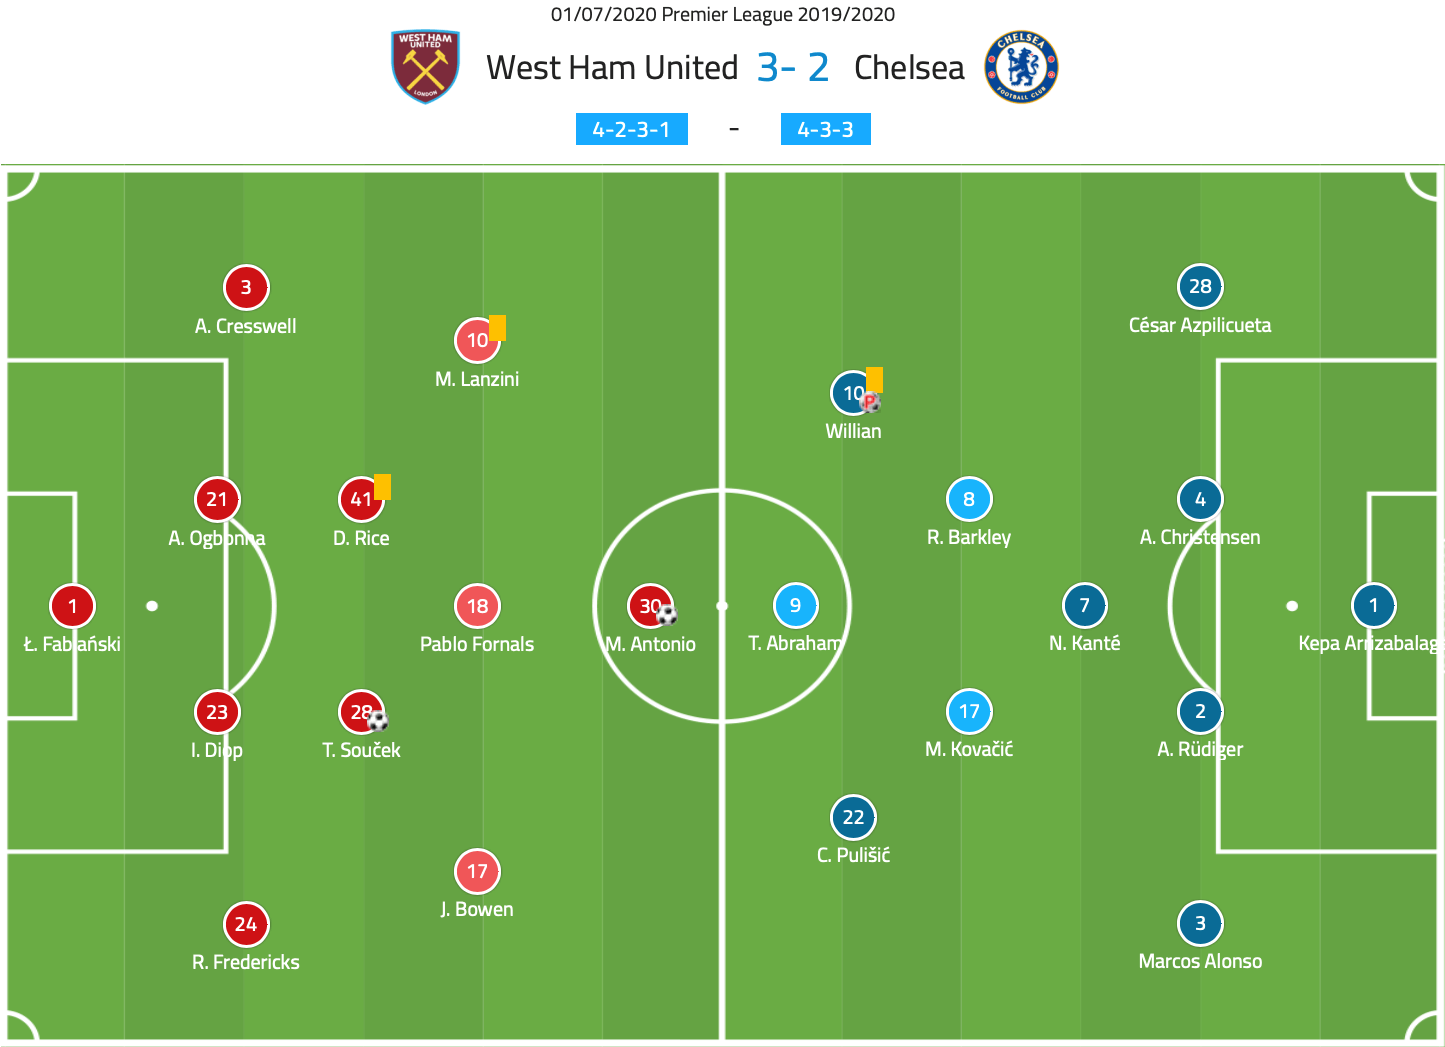
West Ham manager David Moyes set up his team in their common 4-2-3-1/4-5-1 formation. The backline of Ryan Fredericks, Issa Diop, Angelo Ogbonna, and Aaron Cresswell has been the side’s most common back four personnel. With Mark Noble out on a precautionary measure due to injury, the midfield five consisted of Declan Rice and Tomáš Souček behind Jarrod Bowen, Pablo Fornals, and Manuel Lanzini. Michail Antonio started at striker.
Chelsea came out in a strong starting eleven. César Azpilicueta, Andreas Christensen, Antonio Rüdiger, and Marcos Alonso formed the back four behind a midfield three of Ross Barkley, N’Golo Kanté, and Mateo Kovačić. The club’s top three goalscorers- Tammy Abraham, Willian, and Christian Pulišić- filled out the attack.
West Ham’s initial front press
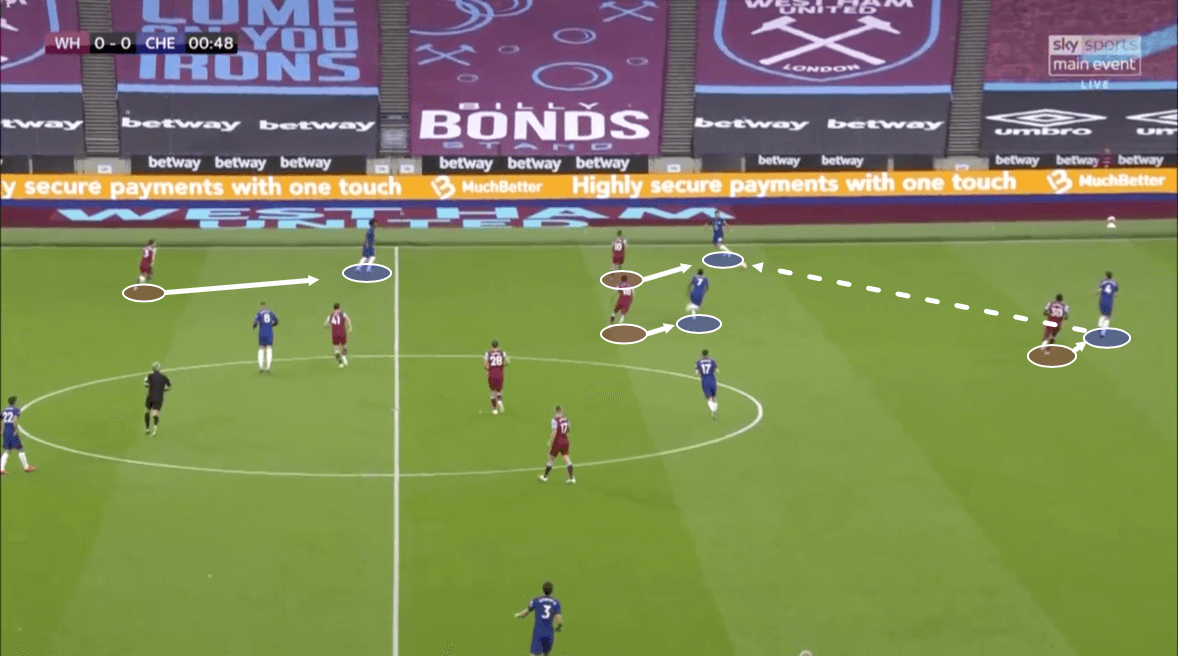
Right off the first whistle, West Ham initiated a rather aggressive front press. With Chelsea playing the ball out from the back as one of the more possessive sides in the Premier League, Moyes looked for his side to disrupt their buildup early to gain a potentially quick lead. Below, this press results in an interception by Fornals. As Antonio’s pressure on Christensen forces the pass wide to the right-back, West Ham’s ball-side and central midfielder press the right-back and opposing deeper midfielder, Kanté, respectively. Cresswell’s additional pressure of the ball-side winger ultimately forces a poor pass.
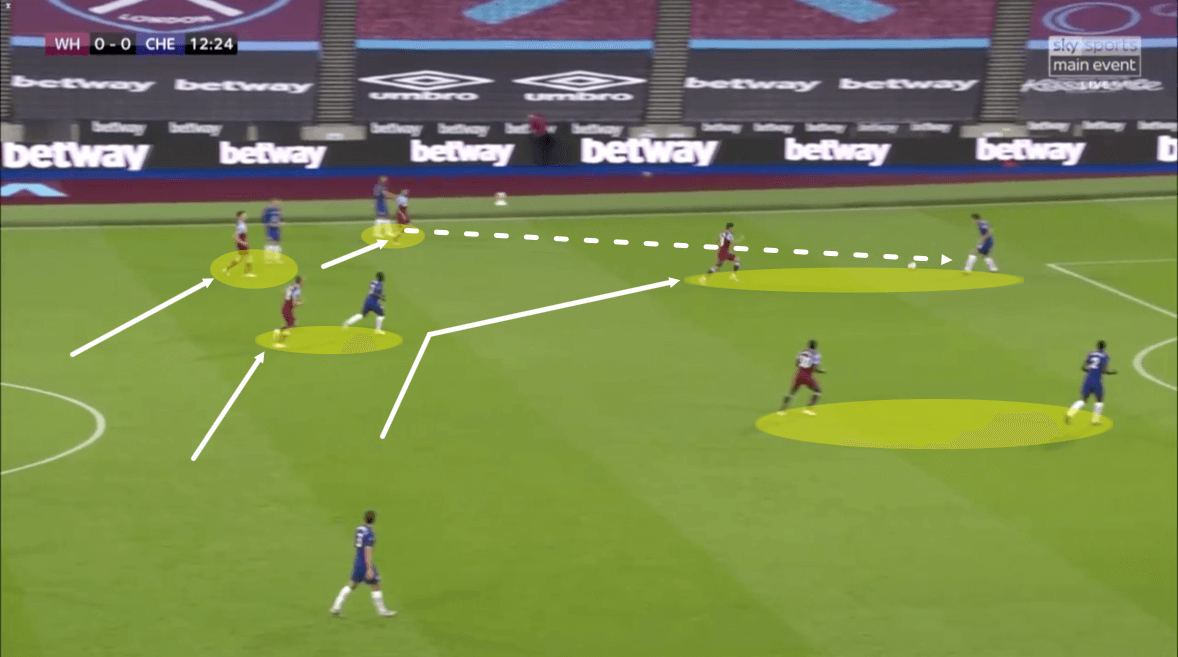
Below is another example of an early successful West Ham press with advanced pressing movements. After Kovačić had completed a pass back to Christensen due to pressure from Souček, the Czechian midfielder continued his pressing movement forward onto the deeper opposing midfielder Kanté. This was preceded by a similar pressing action by Fornals. After pressure from the West Ham left-back and the left midfielder forced the ball back to Christensen, Fornals could shift off covering Kanté with a cover shadow to pressing Christensen directly, with Souček marking Kanté. Finally, with Antonio pressing the other centre-back, Christensen had extremely limited choices. A long ball was thus intercepted by West Ham, nearly developing an Antonio opening goal.
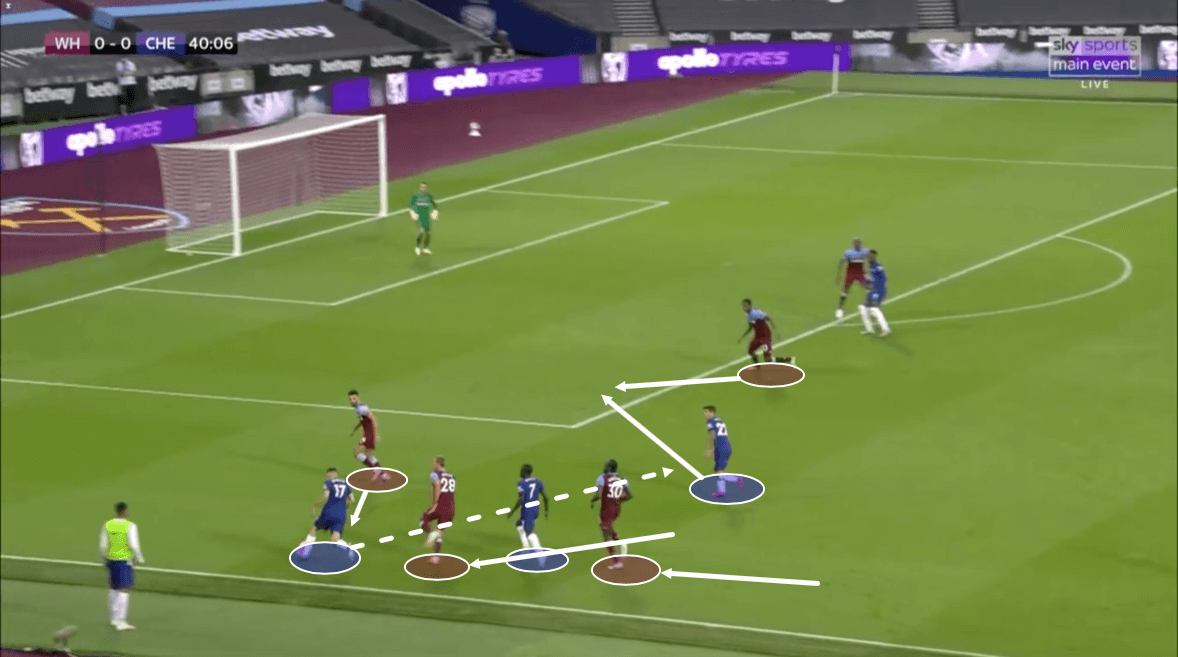
Limiting Chelsea’s ball progression out from their own half proved positive early on. Eventually however, Chelsea were able to possess through the press using wide progressions and long balls. The instance below is a quality example. Kanté and Kovačić were able to carry the ball through the wide area, pulling Antonio (acting as the right-winger in this case) and Souček wide with them. This opened up space for Pulišić in the ball-side half-space Souček would have been occupying. The American attacker, who has been one of the better players in the Premier League since its return, faced the lone centre-back Diop and earned a penalty, resulting in the opening goal of the match.
Low block organisation
After multiple nearly prosperous pressing attempts, the hosts fell back and resorted to low block defending. They were similarly successful in these tactics, as Chelsea’s attacking strategies often failed to penetrate the compact block.
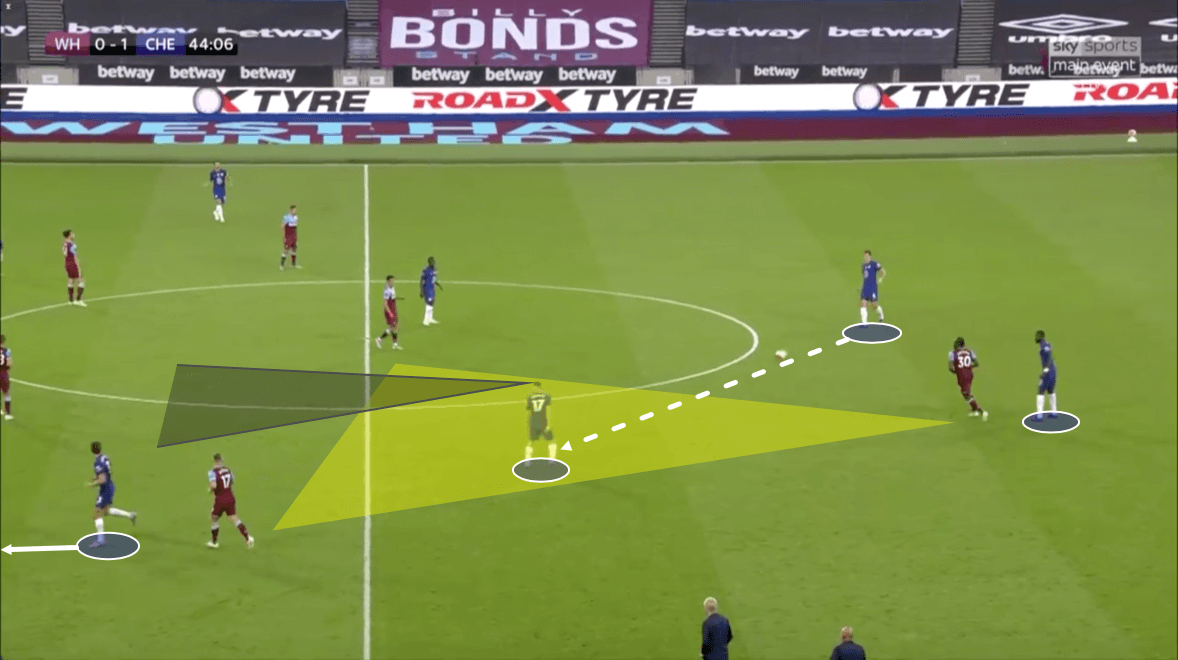
As stated, the visitors attempted attacks via progression from the back through the half-spaces and into the wide areas. The scenario below is one instance of this. The centre-back Christensen was able to find the opposite side midfielder Kovačić open in space due to the opposing striker, attacking midfielder, and right midfielder all occupying the other centre-back, defensive midfielder, and left-back respectively. Even before receiving the ball, Kovačić scans the half-space in front of him and sees space to progress the ball with left-back Alonso pulling the nearest opposing player wide.
From there, the full-back or winger would receive the ball and attempt crosses or ground passes between or around the defensive block. This proved difficult, for example below, due to West Ham’s compact structure and scanning. With the entire back six defending compactly inside the box, the winger Pulišić’s cross was easily cleared.

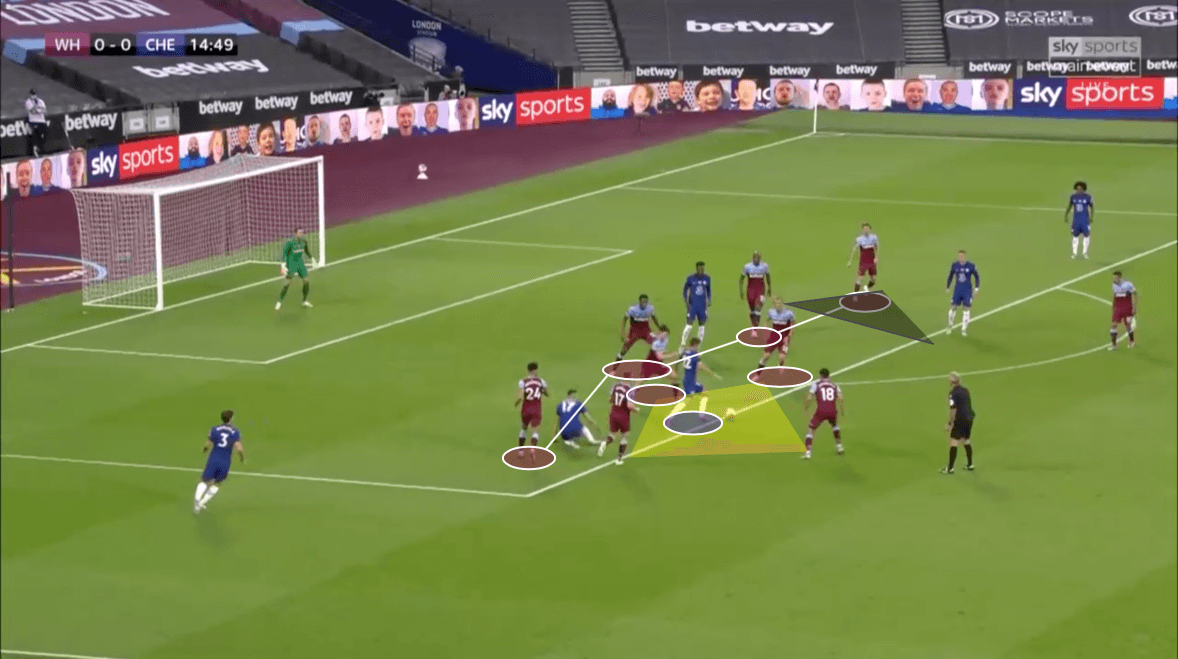
West Ham’s low block structure was well organised in swarming Chelsea attackers who moved inside the block and preventing goalscoring chances. The image below shows the compact back line paired with a swarming defensive midfield. Rice and Souček, along with the wide midfielder Bowen and attacking midfielder Fornals, block progressive passing lanes and pressure Pulišić into a backpass.
Another benefit of West Ham’s defensive block was the false sense of security it gave Chelsea’s backline. With the back six forming a defensive block, the front four could spring a counter-attack quickly and into swathes of space without worrying about a counter-press exploiting space behind them.
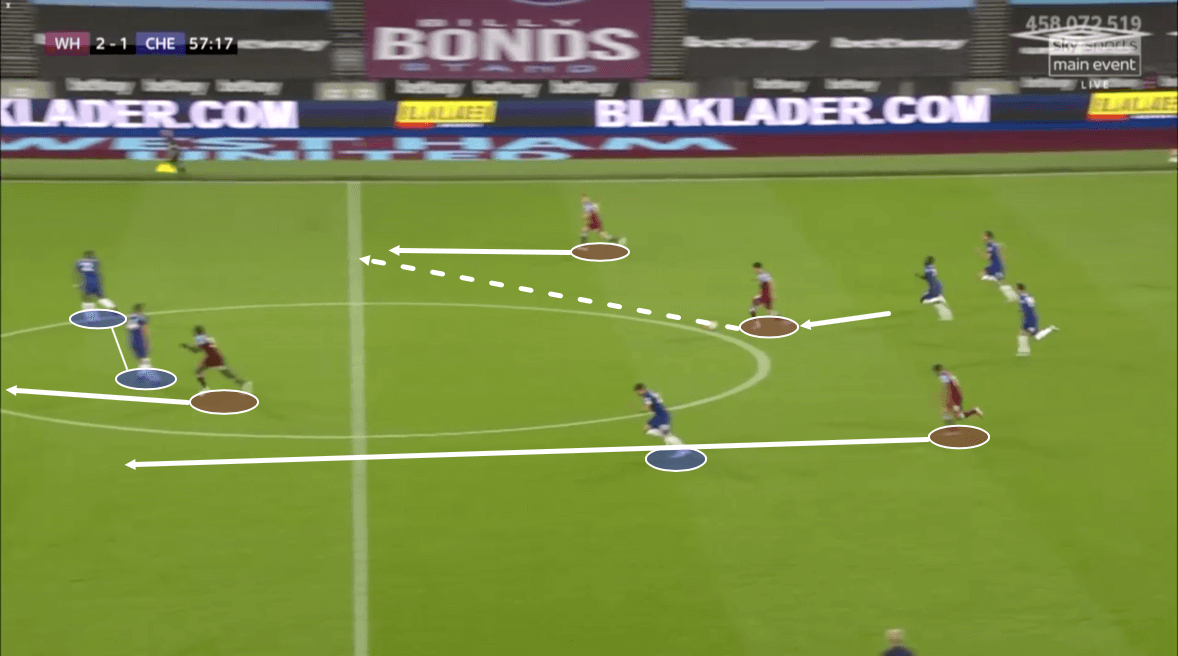
Above, West Ham’s front four do exactly that. Using the numerical advantage in front of them, two of the attackers pull two defenders down towards the right side of the pitch. This gave Bowen space to complete a pass to Lanzini, who nearly scored a brilliant curling shot.
Chelsea’s defensive errors
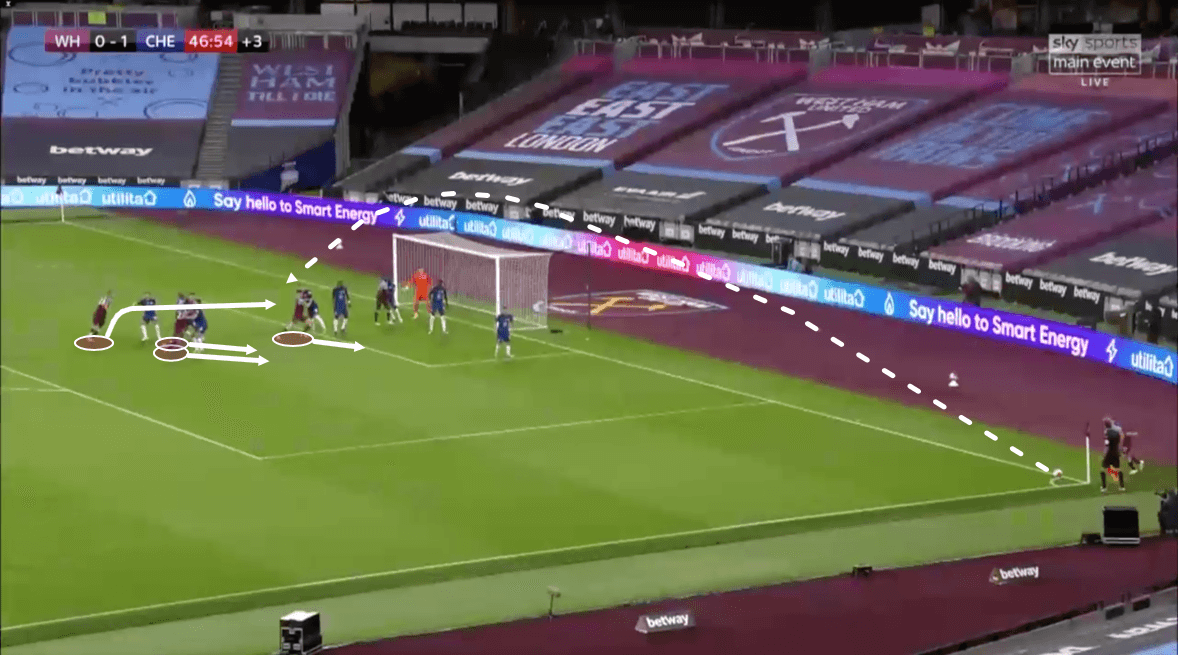
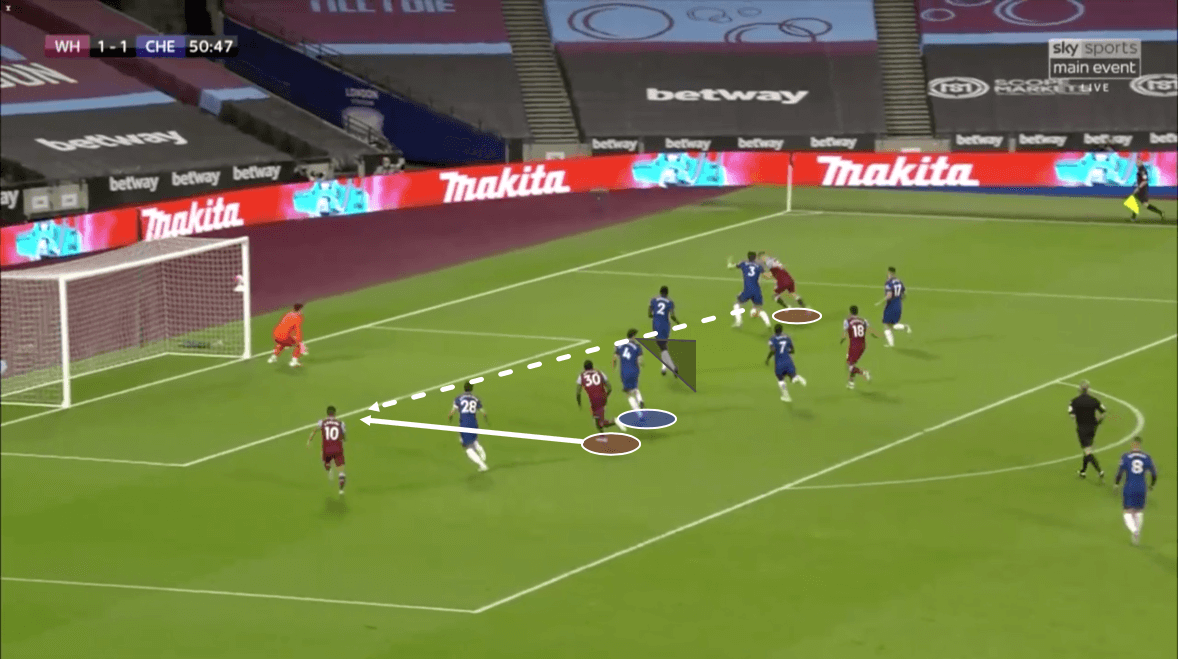
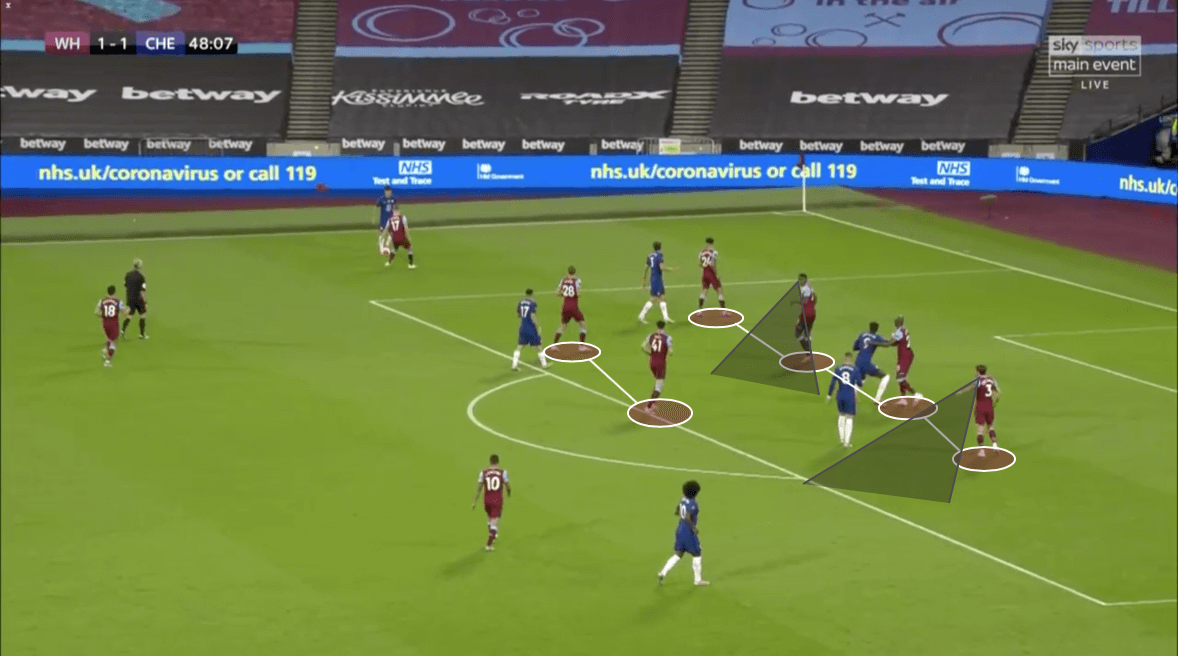
This match was another classic example of a team taking advantage of Chelsea by allowing the Blues the majority of possession. All three of West Ham’s goals were the result of a combination of defensive errors and poor defensive configuration. The first Hammers goal was rather unsurprisingly off a corner kick. After earning the corner kick because of Rüdiger’s poor clearance, Moyes’ designed set-piece routine worked well against a side that has conceded the tied-third most goals on set-pieces in the Premier League with 12. With three players pushing towards the near post, their markers followed them, freeing up space at the far post for the 6’4” Souček to head in Bowen’s delivery on the cross over his own marker, the 5’10” Azpilicueta.
Another defensive error can be seen below on West Ham’s second goal. Bowen has the ball in Chelsea’s 18-yard box. Antonio, who had just fallen down in the box, quickly gets back up and makes a run towards goal. Christensen made the mistake of losing sight of the attacker once he was on the ground. Bowen completed the short cross and Antonio tapped it past Kepa for West Ham’s first lead of the match.
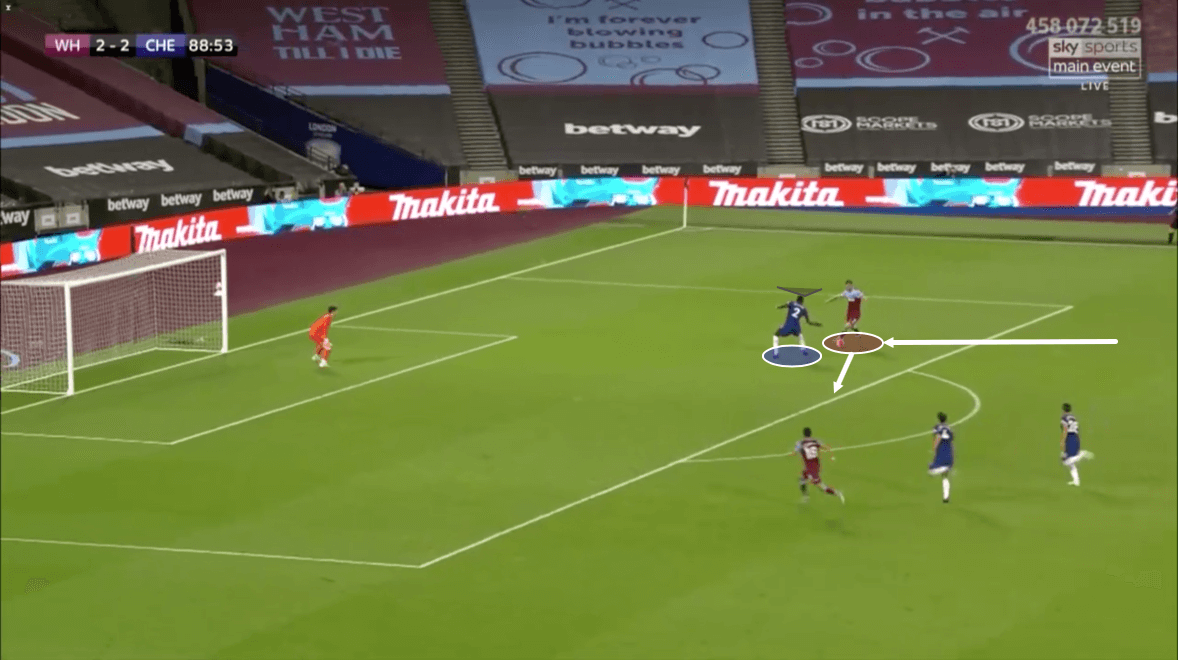
The final, match-winning goal was aided by too high of a porous defensive line along with another mental lapse, this time by Rüdiger. At the end of a West Ham counter-attack, the German defender squared his positioning too far in front of substitute Andriy Yarmolenko, facing the right wide area from West Ham’s perspective. This allowed Yarmolenko to cut onto his heavily favoured left foot (the Ukrainian has scored all four of his goals this season from his left) and hit a strong shot into the bottom left corner of the net.
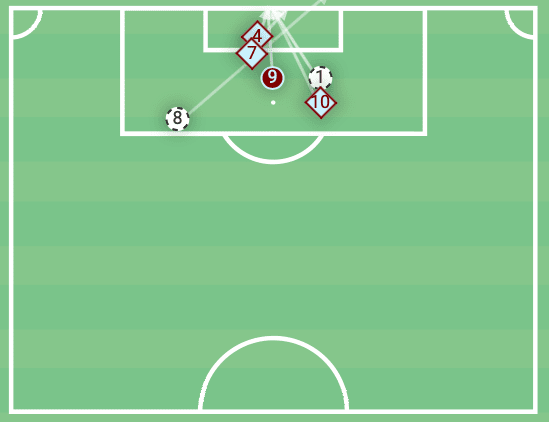
Lastly, the provided analysis is well mirrored in the expected goal tally for the match, with an xG score of 2.3 to 1.77 in favour of West Ham. The host’s shot map below also accurately reflects this, showing their ability to attempt high-quality chances through the porous Chelsea defence.
Conclusion
West Ham ultimately pulled out a hard-fought victory. Their versatile defensive tactics paired with the opposition’s defensive errors paved the way for goals through set pieces and open counter-attacks. They now sit three points and two spots out of relegation and will look to further their escape through the final six matches of the season as three of those matches are against clubs below them on the league table.
Chelsea meanwhile will be disappointed in this blow to their Champions League qualifying campaign. That said, Lampard has already made a significant imprint at the club, having established a strong youth core and adding two promising and energizing signings next season in Hakim Ziyech from Ajax and Bundesliga’s Torjägerkanone runner-up Timo Werner. As only time will tell which of the two European competitions Chelsea will compete in, the club from South West London could very well be back in the thick of a Premier League title race next season.



Comments