In the 9th game week of the 2020-21 Premier League season, Aston Villa hosted Brighton and Hove Albion. After a brilliant performance against Arsenal just before the last international break of 2020, that saw them beat the Londoners 3-0 at the Emirates Stadium. Dean Smith’s men will be hoping to continue the momentum.
Brighton, on the other hand, have had some great performances this season but were unable to translate them into wins and have registered only one win in eight appearances this season. They will be coming into the match looking for a crucial 3 points. This article focuses on the tactical analysis of the tactics deployed by both the teams. Let’s get into the analysis.
Lineups
Aston Villa lined up in a 4-2-3-1 formation with Jack Grealish in the left-wing, Chelsea Loanee Ross Barkley in the CAM role and Trezeguet in the right-flank. Dean Smith went with the same line-up that beat Arsenal 3-0 last time around.
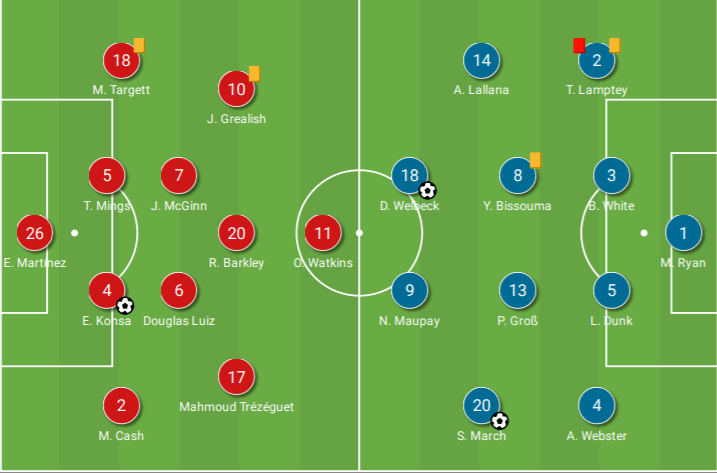
Brighton, on the other hand, lined up in a 3-5-2 / 3-4-1-2 formation on the pitch though with possession it often shifted to an asymmetrical 4-4-2 when they built out from the back. The only change from their 0-0 draw to Burnley was Solly March made his way into the starting eleven in place of Dan Burn.
Aston Villa with possession
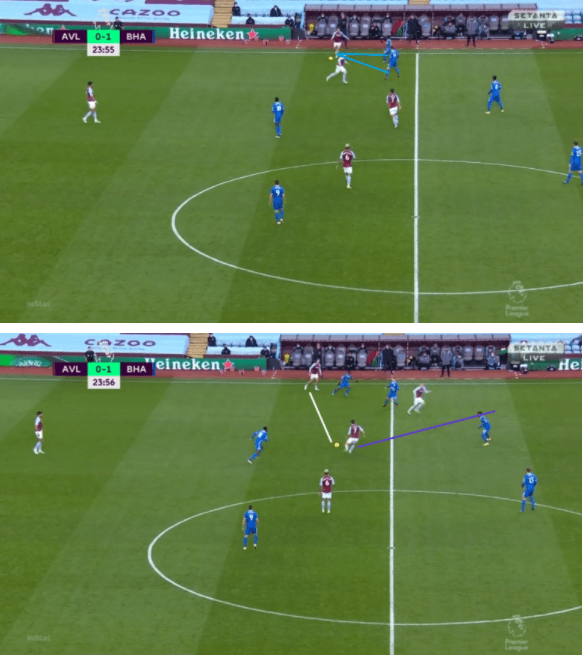
Aston Villa with possession maintained their 4-2-3-1 shape. Villa have mostly used combination play from their fleet-footed players this season. They would often drag the opponents wide and would try to combine in these regions and make way into the box. Their wide players would generally stay wide to attract opponents and a foul from there would result in set-pieces in dangerous places. Mostly, opponents would get attracted towards Grealish due to his quality and would also try to place more than one player on him. The downside to this is that Grealish can manipulate the opposition and open spaces around him. In the example we can see him staying very wide, attracting both Lallana and Lamptey towards him. Matt Targett then makes a run into the space vacated by Lamptey after a combination play between Grealish and McGinn and Targett making the third-man runs (purple line).
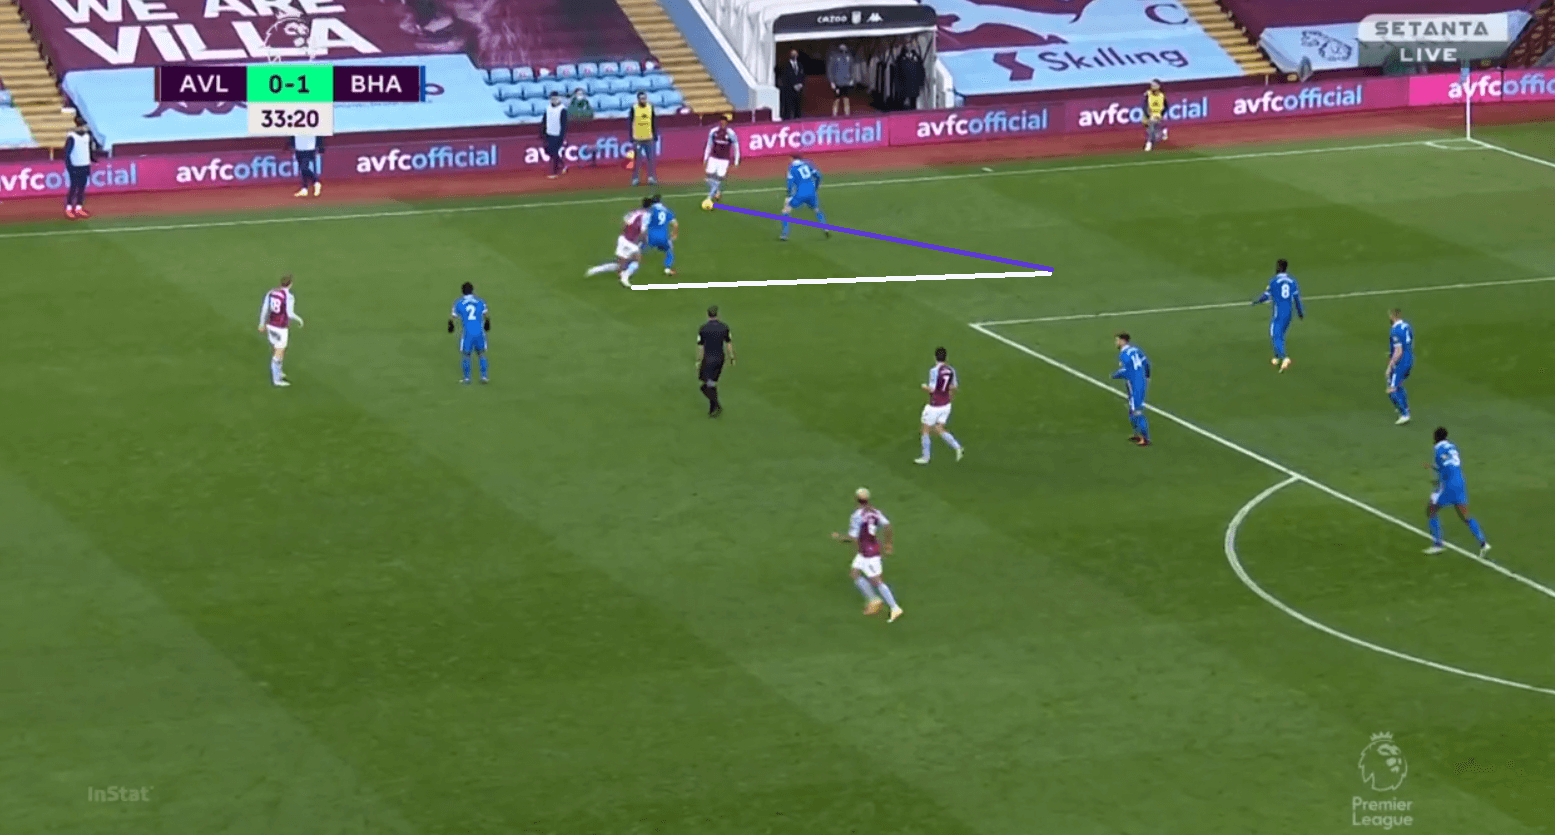
Similarly, in the other wing, it would often be Trezeguet and Traore staying wide and Cash being the right-back would make an underlapping run similar to how Targett. The full-backs then attempted cut-backs or crosses into the box. Sometimes, Watkins would also move wide into the wing and drag players opening the central lanes for making runs where the other players would run into. In the images below, we can see him in the left-flank and combine with Konsa. He makes a run into space and Konsa plays the ball into space and Watkins attempts a cut-back. Mostly these cut-backs were dealt well throughout the game by Brighton.
They looked to target Brighton’s weakness in set-pieces by regularly drawing fouls and Villa has drawn the most number of fouls in the league this season, 123. The analysis of their set-piece plays is discussed in the next section. While they certainly missed the presence of Ross Barkley after he was taken out due to an injury earlier in the game, who’s timely runs and incisive passes give an extra dimension to the Villa attack.
Brighton without possession
Brighton without possession dropped into a 3-5-2 mid-block where the 2 forwards would sit in front of the Villa midfield pivot of Douglas Luiz and McGinn to stop the passing lane to them. While covershadowing them they would initiate a trigger press and press the centre-backs often. The wing-backs would then press the Villa full-backs when the ball goes out to them thus pressing with coordination.
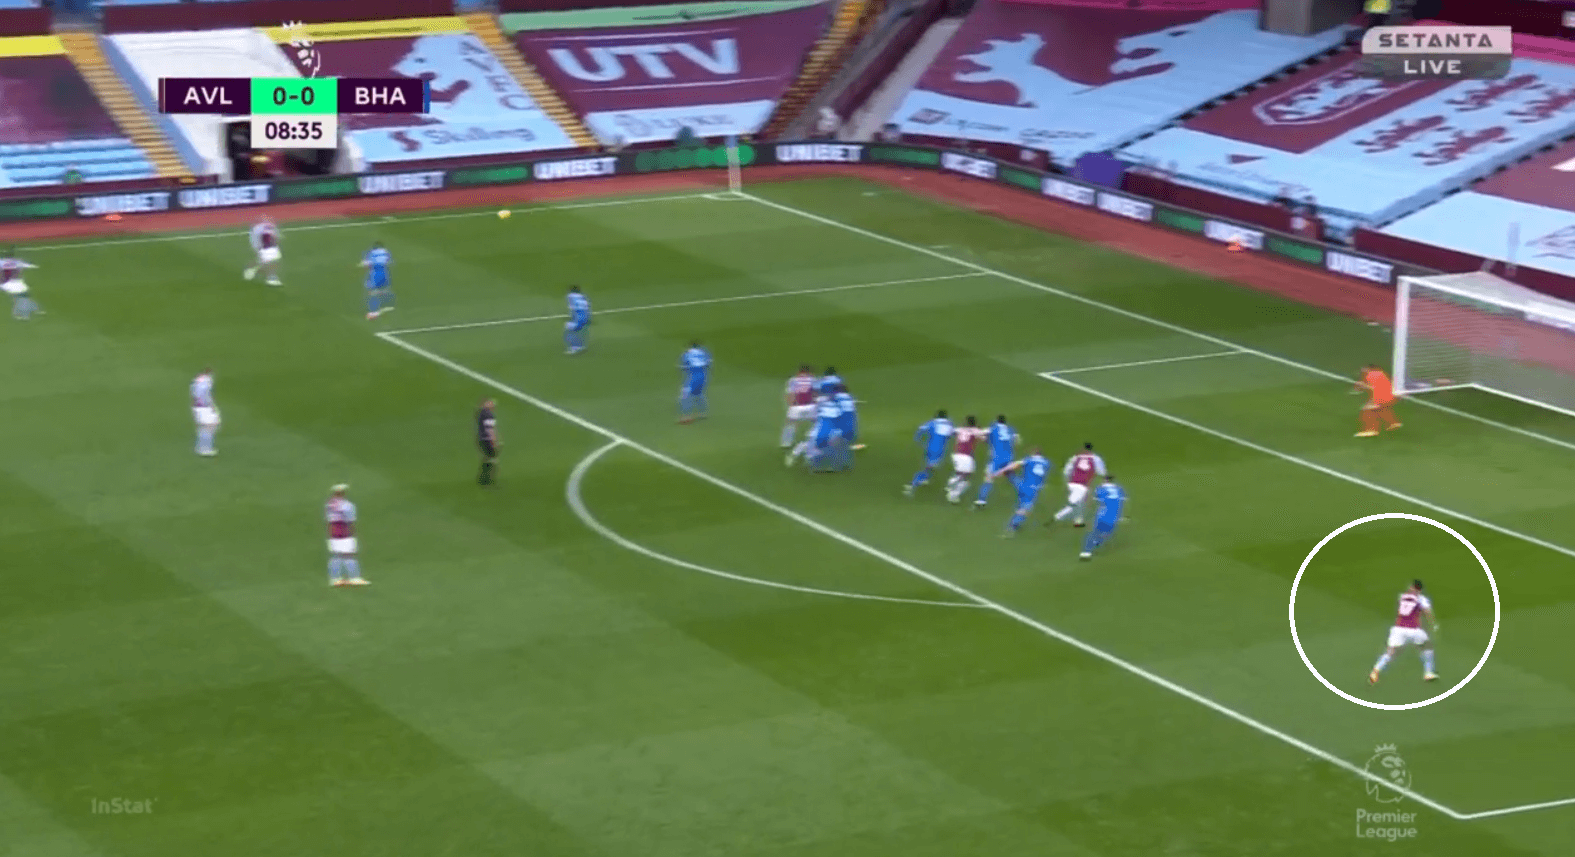
Brighton’s tense situations mostly came during set-pieces where their positional discipline and structure was not up to standards as they were regularly troubled in these situations. With Villa having skilful players across the pitch with the likes of Grealish, Watkins, Traore, etc they would look to draw fouls outside the box and use the situation to trouble the Brighton defence. The image below shows that the defensive high line of Brighton have left Trezeguet free at the far post as the farthest defender Ben White gets dragged by another player. The ball arrives at Trezeguet and he gets a shooting opportunity that gets blocked.
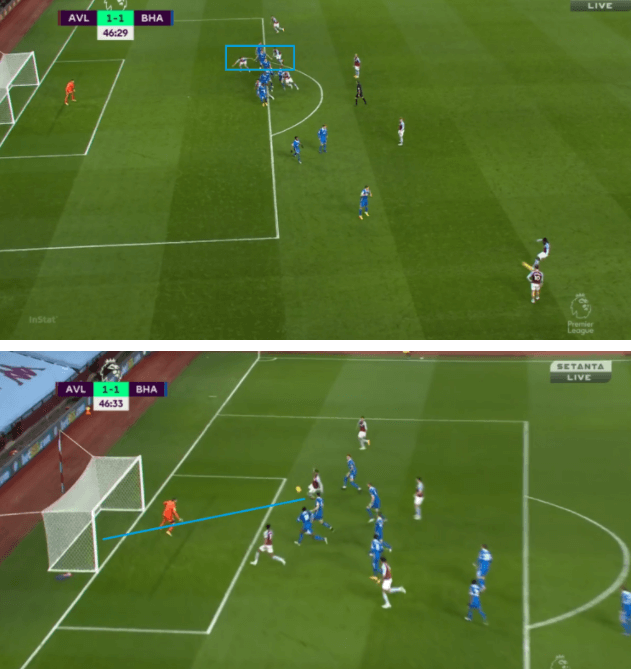
They eventually conceded early in the second half from a set-piece where Villa exploited their zonal line effectively. After getting a scare in the first half, Ben White now tries to keep an eye on him but he also has a man to care off. Now, this puts White in a 2v1 situational dilemma and when the ball gets launched very far, White looking at the Trajectory positions himself towards the farthest Villa man. This leaves Webster now in a 2v1 situation and he gets blocked by one of the players while the other goes onto score.
Brighton with Possession
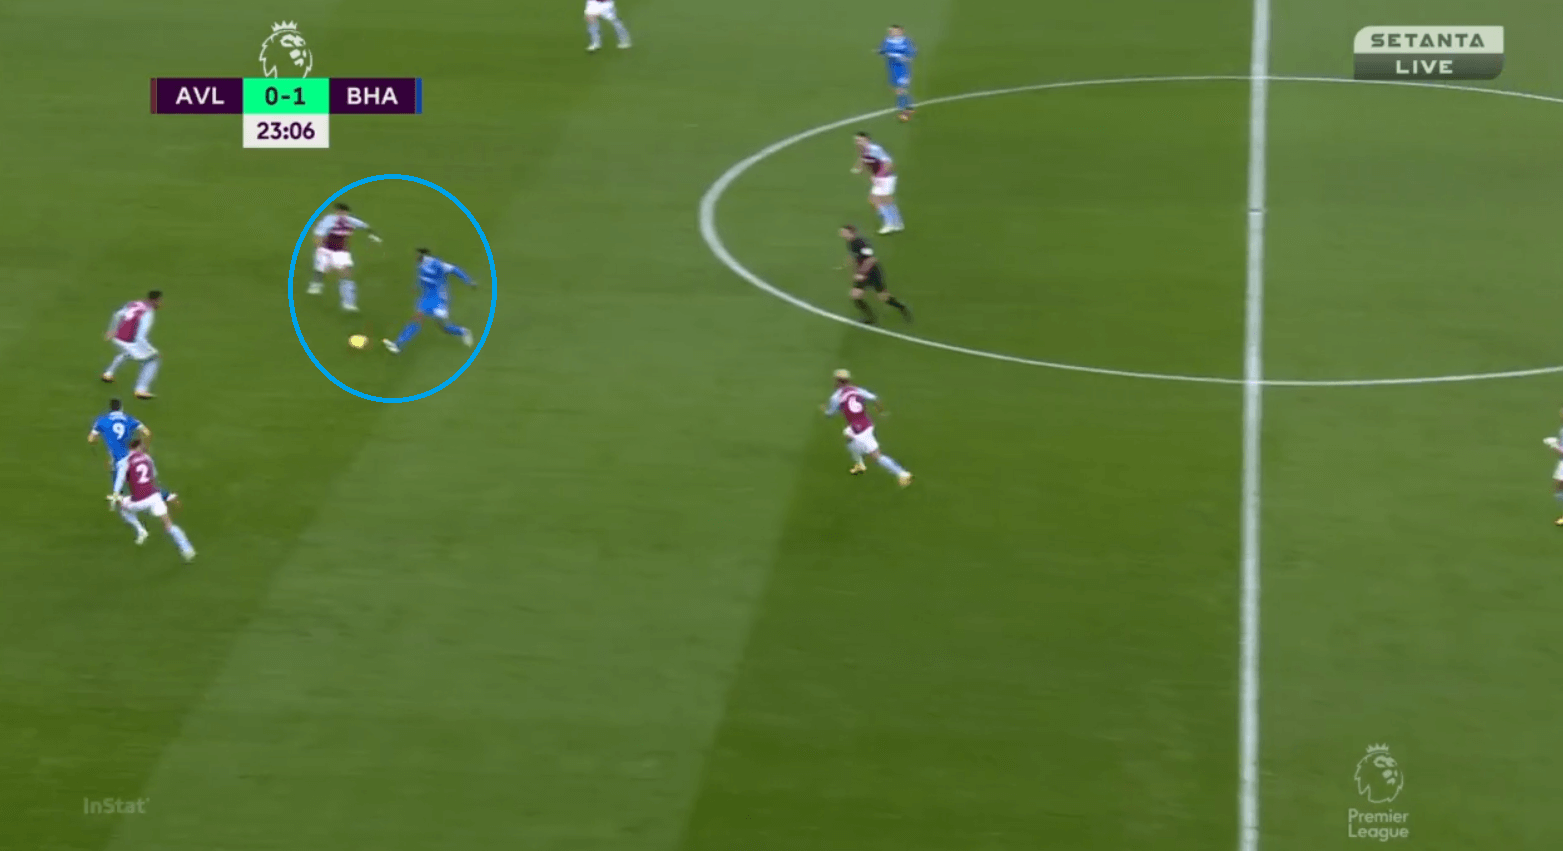
With the ball lined-up more in a 3-5-1-1 formation where either Maupay or Welbeck would drop to make the progression easier from the midfield. They would then look to use their highly energetic wing-backs to provide them with the width and from these places they would deliver crosses. The image below, shows Welbeck dropping deep and dragging Mings with him. While at the same time, Maupay makes a run in behind the defence. Welbeck threads a very good pass to him and Maupay gets a shooting chance.
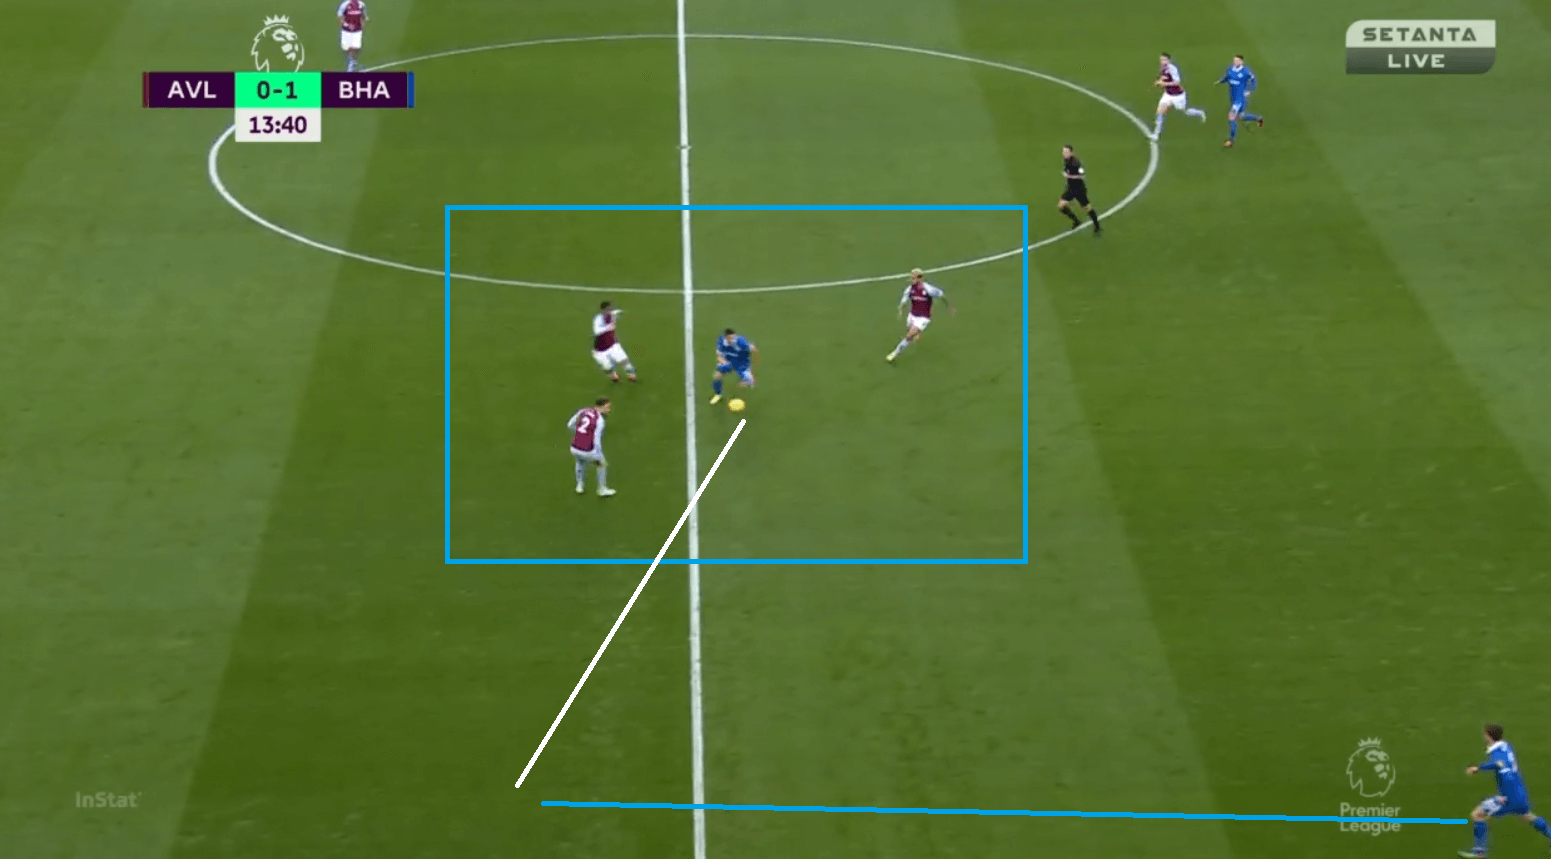
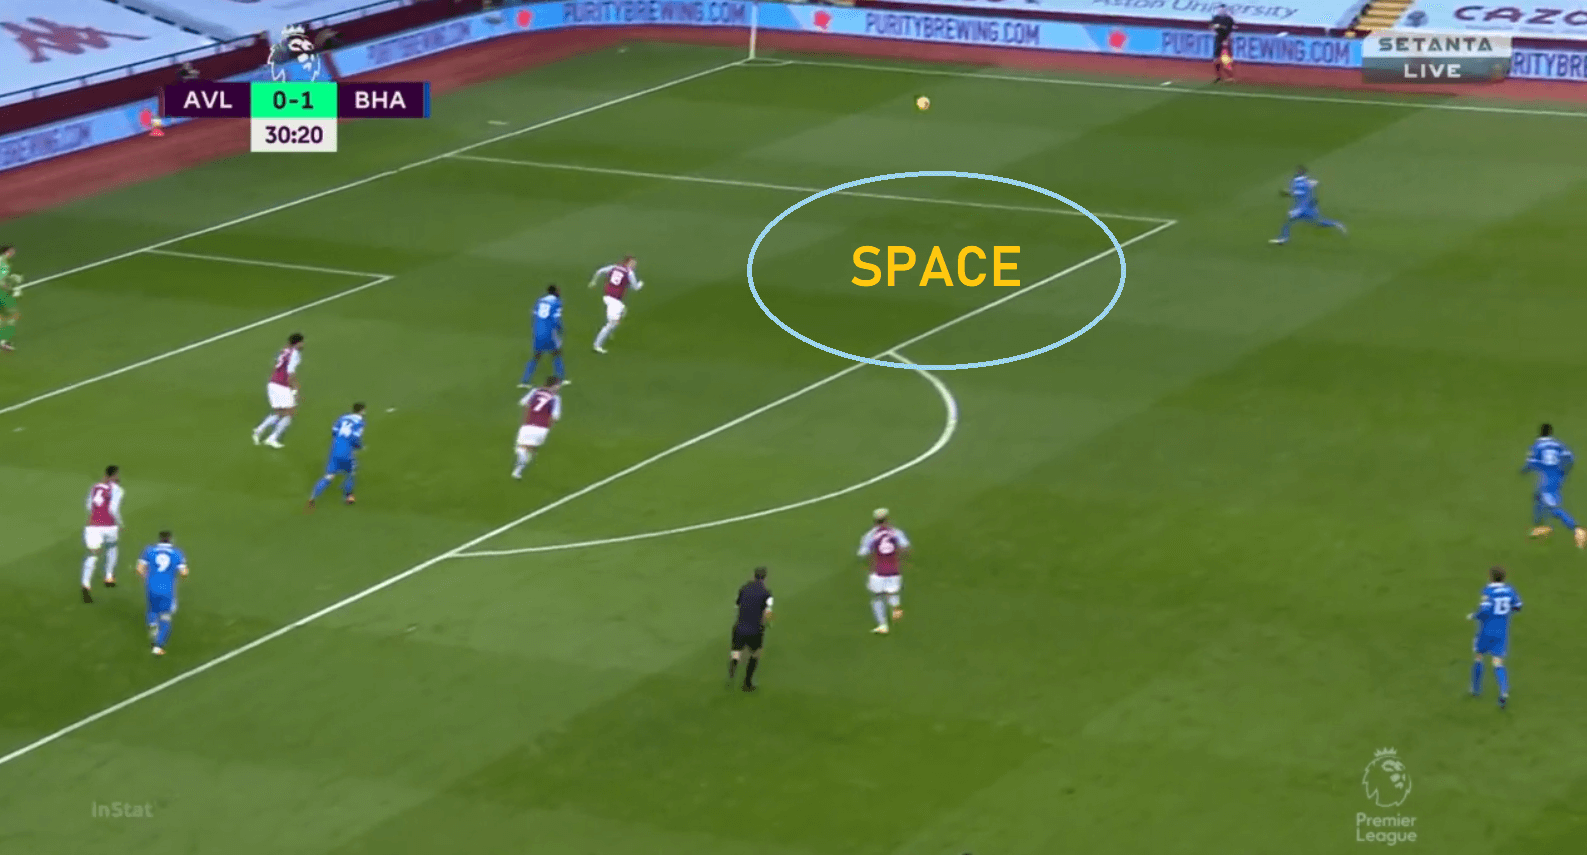
This time Maupay drops deep and collects a long ball from a centre-back. He attracts 3 players around him and none of the players are pressing him optimally as they leave a passing lane open to Solly March who now has huge space to deal with as the full-back has also gone centre to press Maupay.
In the build-up, Brighton would make Webster play wide like an auxiliary left-back while the other 2 centre-backs stay in the half-space. This gave Solly March to push forward and mostly Brighton attacked down their left-flank as they seemed to overload with March pushing higher and underloading the right side (the reason for this a later switch of play to Lamptey could cause dangers in the final-third as Villa players get dragged to this flank). Due to Villa not pressing efficiently, the 2 midfield pivots were enough to progress forward and Lallana often played as part of the forward line without having the responsibility to drop deep.
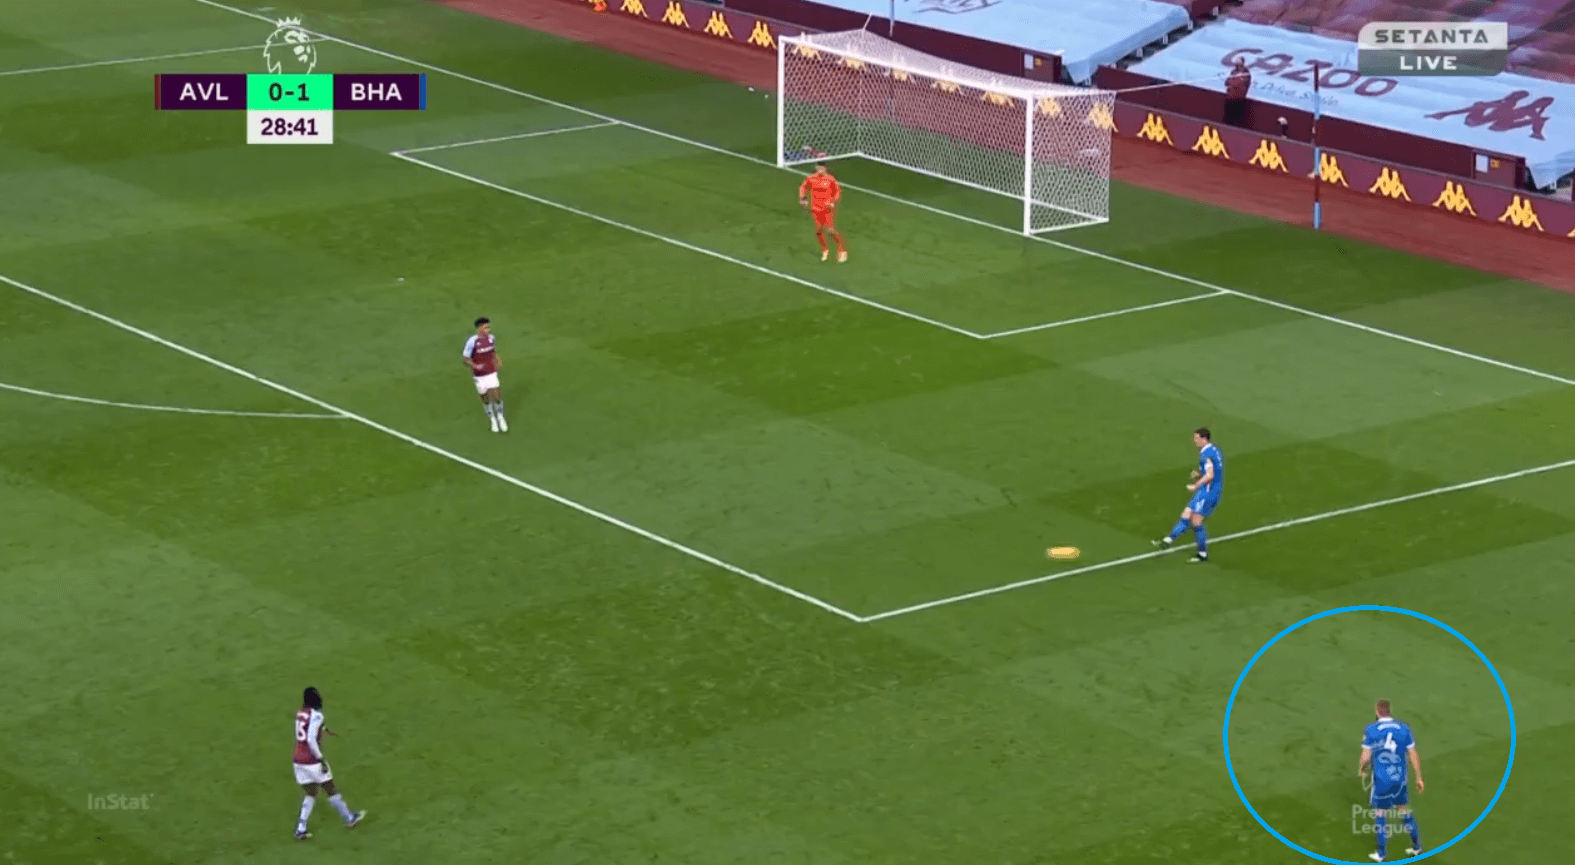
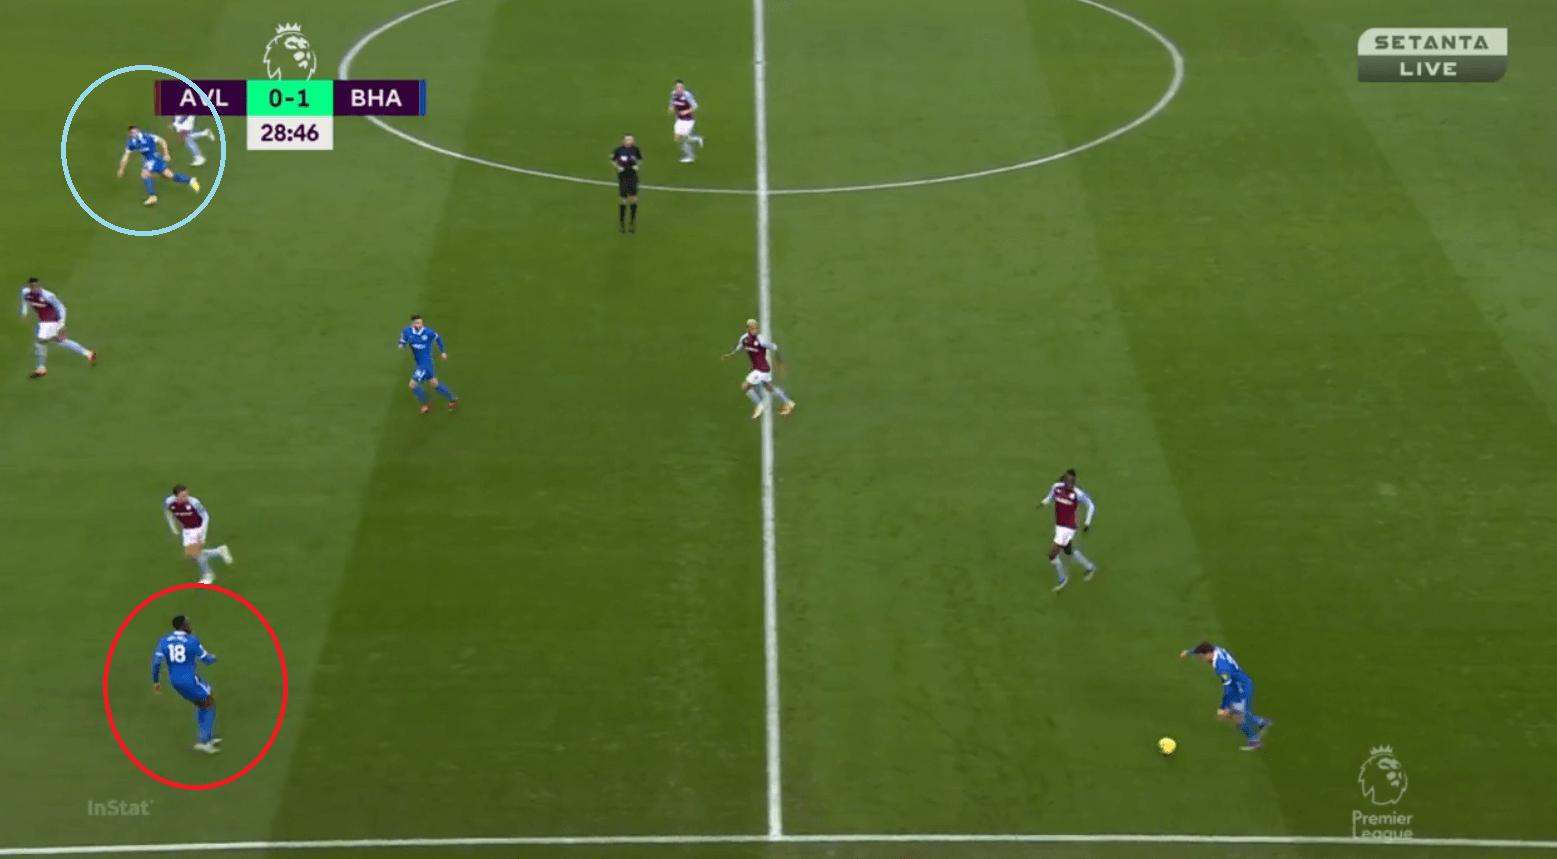
With Villa full-backs often pressing higher to go out and press the Brighton wing-backs they would leave spaces as a result and Brighton would then look to play vertical balls from their centre-backs or wing-backs into these spaces where either Maupay or Welbeck made a run into that vacated space. Or sometimes Welbeck or Maupay would make a decoy run into that space that forces the centre-backs to follow them and opens space or 1v1 opportunities for the other Brighton forward. We can see in the image below that Welbeck (red circle) has gone wide and now Maupay (blue circle) makes a run with a possible 1v1 situation with Mings as the other defenders get dragged by Welbeck.
Brighton also employed a quick switch of plays between their wings and wing-backs made runs into the box to meet the balls delivered to them. Their formation with possession, 3-2-5, allowed them to use this as the 2 forwards along with a midfielder, Lallana in the first half and Groß in the second half, pinned the entire Villa backline leaving huge wing spaces. The image below shows a similar switch of play from March (not in the picture) to Lamptey who has huge space in front of him.
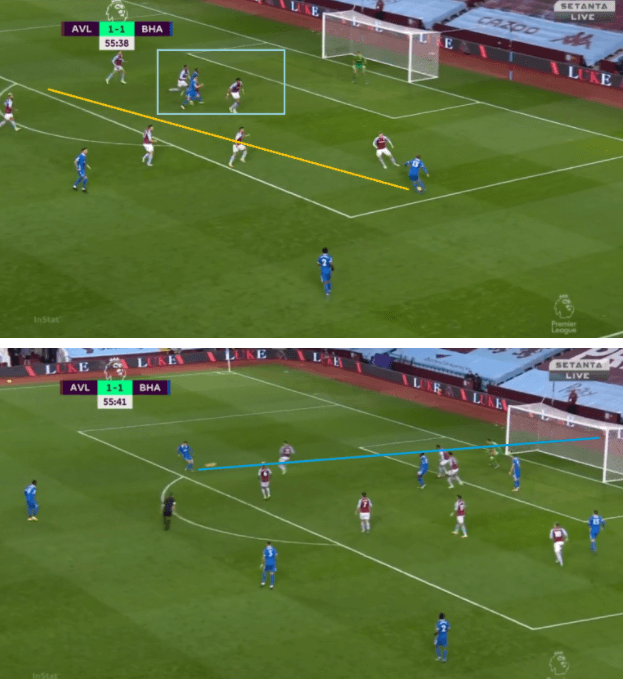
This switch to wings between the wing-backs or to the wing-back is what led to the eventual winning goal from Solly March. Groß has the ball in the right-half space, in the image below, and he cuts it back. Maupay and Welbeck making runs forward drags the backline and Groß cuts it back into the passing lane indicated by the yellow line and March meets the ball with a brilliant finish.
Aston Villa without possession
Aston Villa’s 4-2-3-1 shifted to a 4-4-2 mid-block without possession. The CAM would join Ollie Watkins as a two-man front-line. At the start, Barkley played there but after his substitution, Grealish and Bertrand Traore took a turn to play in that role. Since they used a mid-block they would not necessarily press high always and would block the passing lane to the Brighton midfielders. The image below shows both Watkins and Barkley blocking lanes to Pascal Bissouma and Groß, while also looking to press the ball carrier.
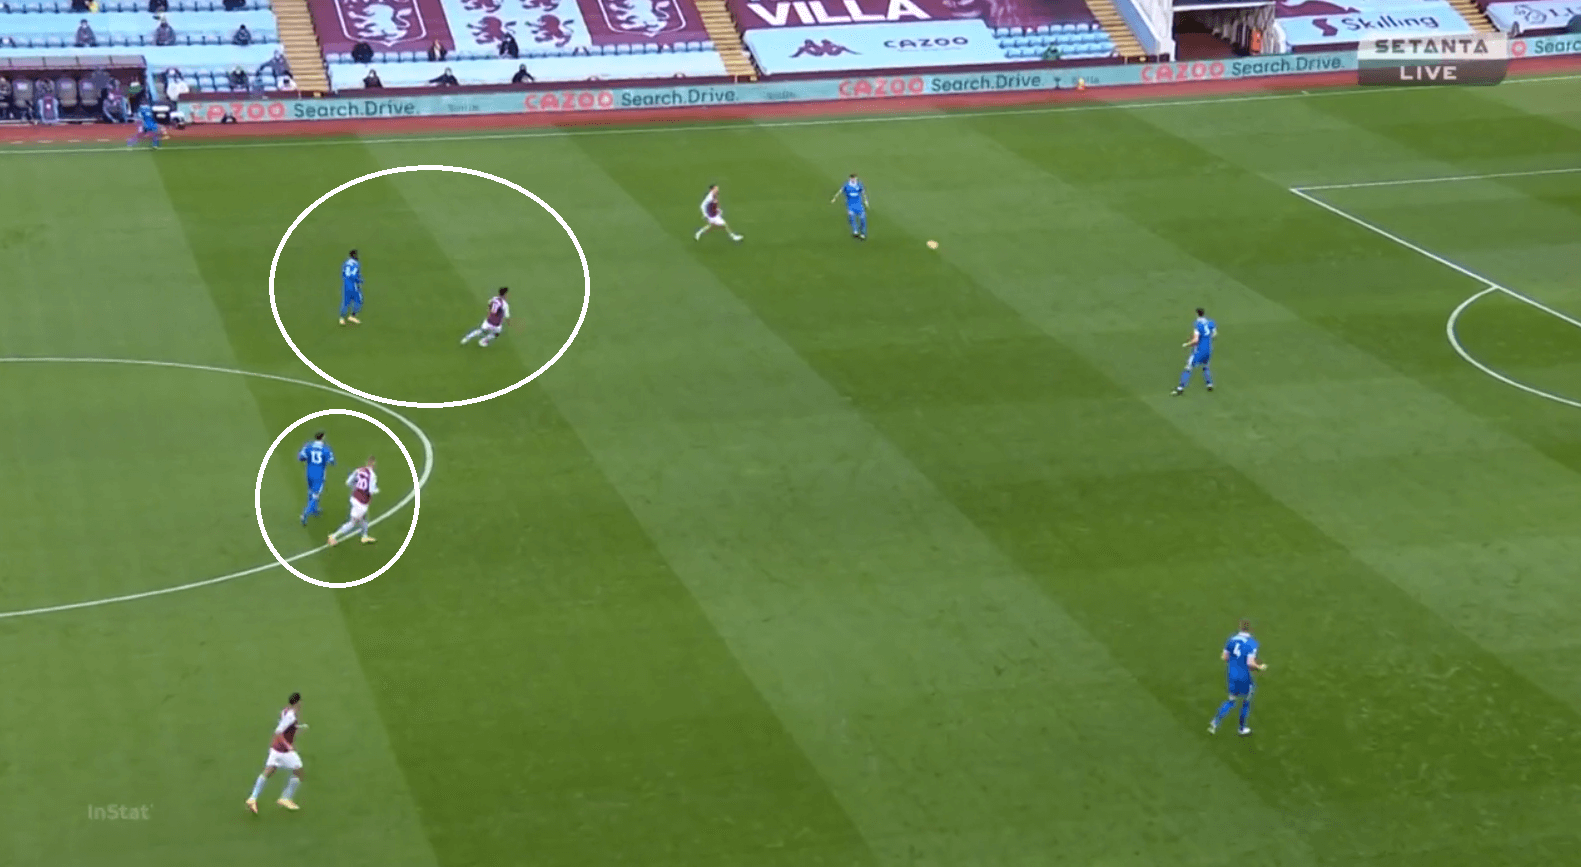
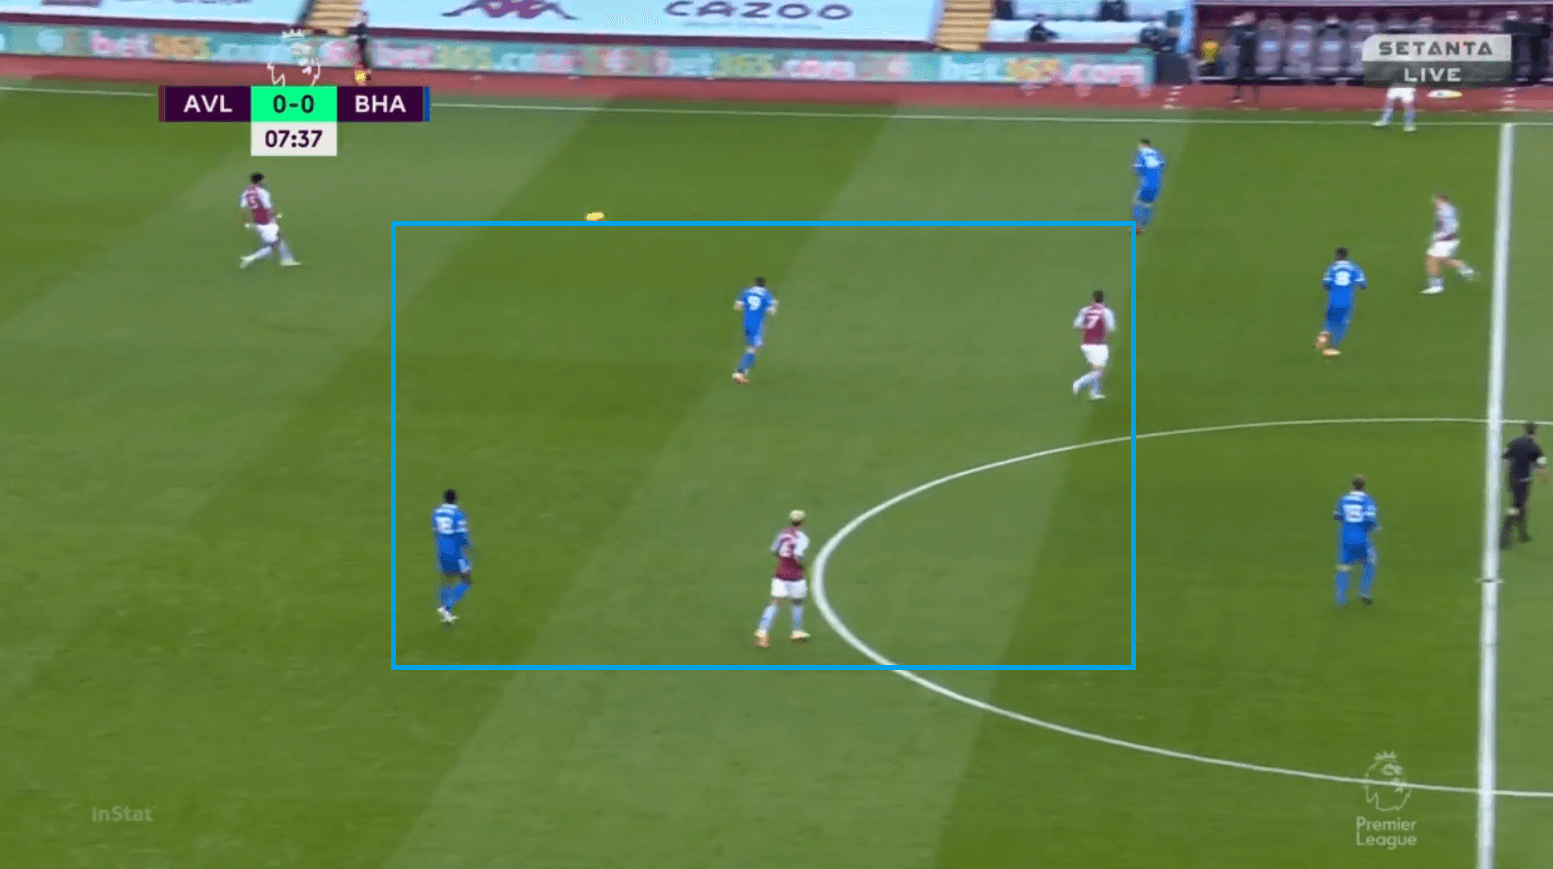
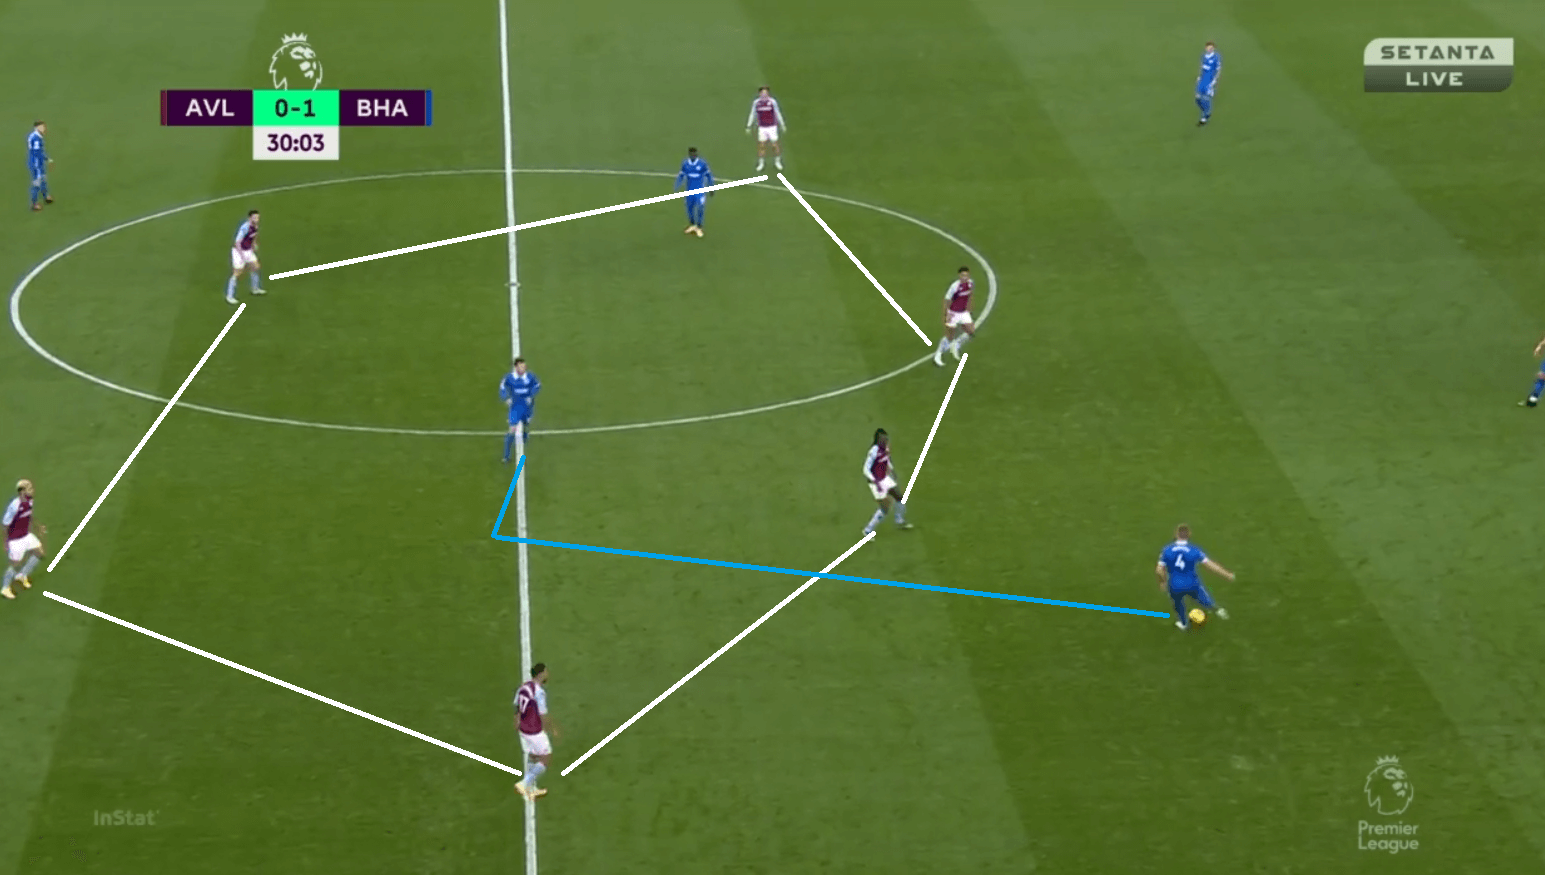
This mid-block had huge issues in many instances throughout the match, especially in the first 45 minutes. Villa tried to congest the space in the midfield and would stay very narrow to prevent penetration through the centre. But at times their cover shadowing of players let them down and that would give Brighton a lending hand in developing the play. The image shows them forming a hexagonal shape that looks to block the passing options for Webster to the midfield. But the issue here was even a slight misorientation of their body will open the passing lane and Traore’s (red circle) body positioning means that Groß moves a little wide and Traore fails to notice this movement and Webster makes an easy pass to him.

Apart from these small things, larger issues persisted where lack of communication led to some disjointed defensive shape. In the image below, Tyrone looks behind and stops without following Lamptey, who is making a run into space and is looking for the ball from Welbeck (who has again moved wide) to deliver it. What Mings thought here was staying with his defensive line and helping his team re-group in the box without making any proactive action. But in this situation, Brighton have committed very few players forward and most of the Villa players are tracking back to prevent any danger so Mings could have easily taken the opportunity to contain Lamptey and intercept the ball from him. Lamptey later delivered a cross that eventually met nobody but was dangerous enough for cut-backs.
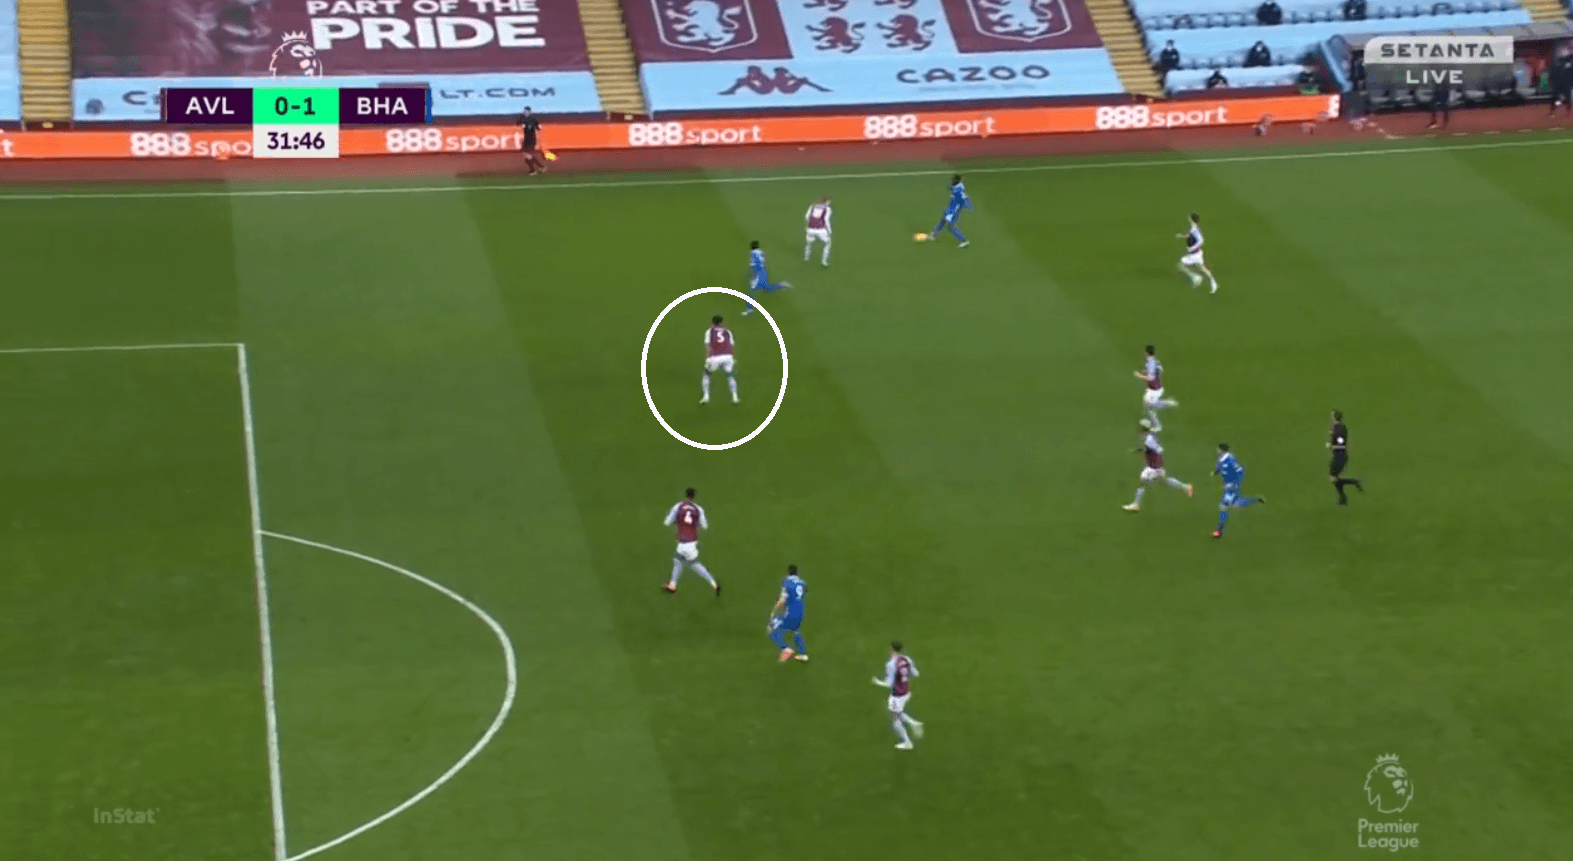
This lack of proper defensive orientation is also what led to the goal as we can see in the image below, that all the Villa players are playing high in the Brighton’s final-third and Welbeck being in his own half gets the chance to run and score the goal.
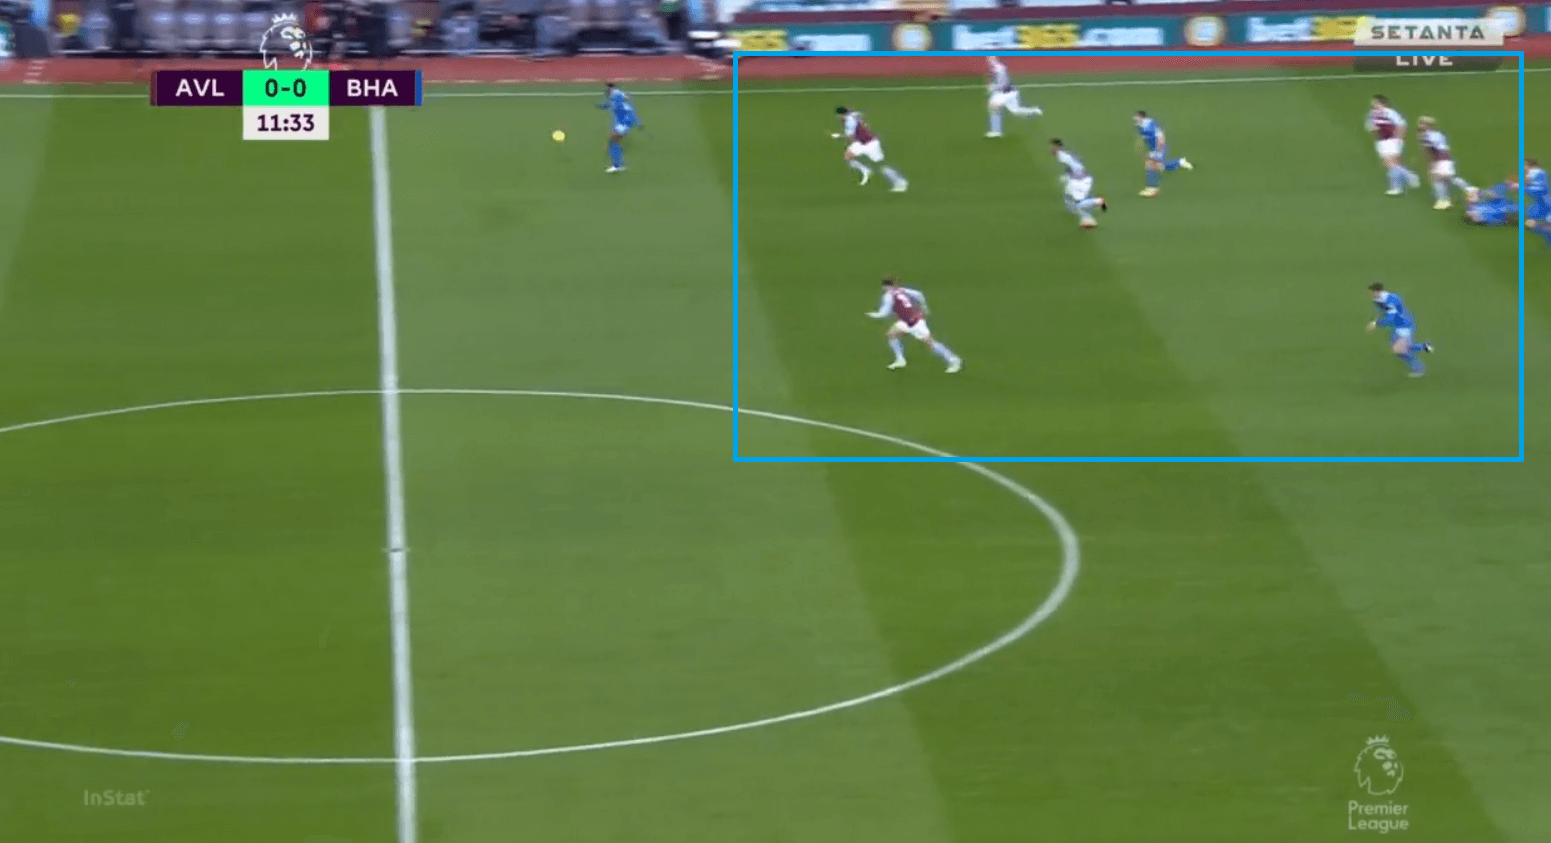
Like said before, Villa extremely struggled in containing the wing-backs of Brighton as they kept marauding down the flank providing width and also sudden switches of play found them in space that led to many dangerous situations for Brighton.
Villa also left huge spaces in between the lines as they failed to press as a team. This led to either Maupay or Welbeck dropping in between the lines and finding these spaces. This made them more prone to counter-attacks.
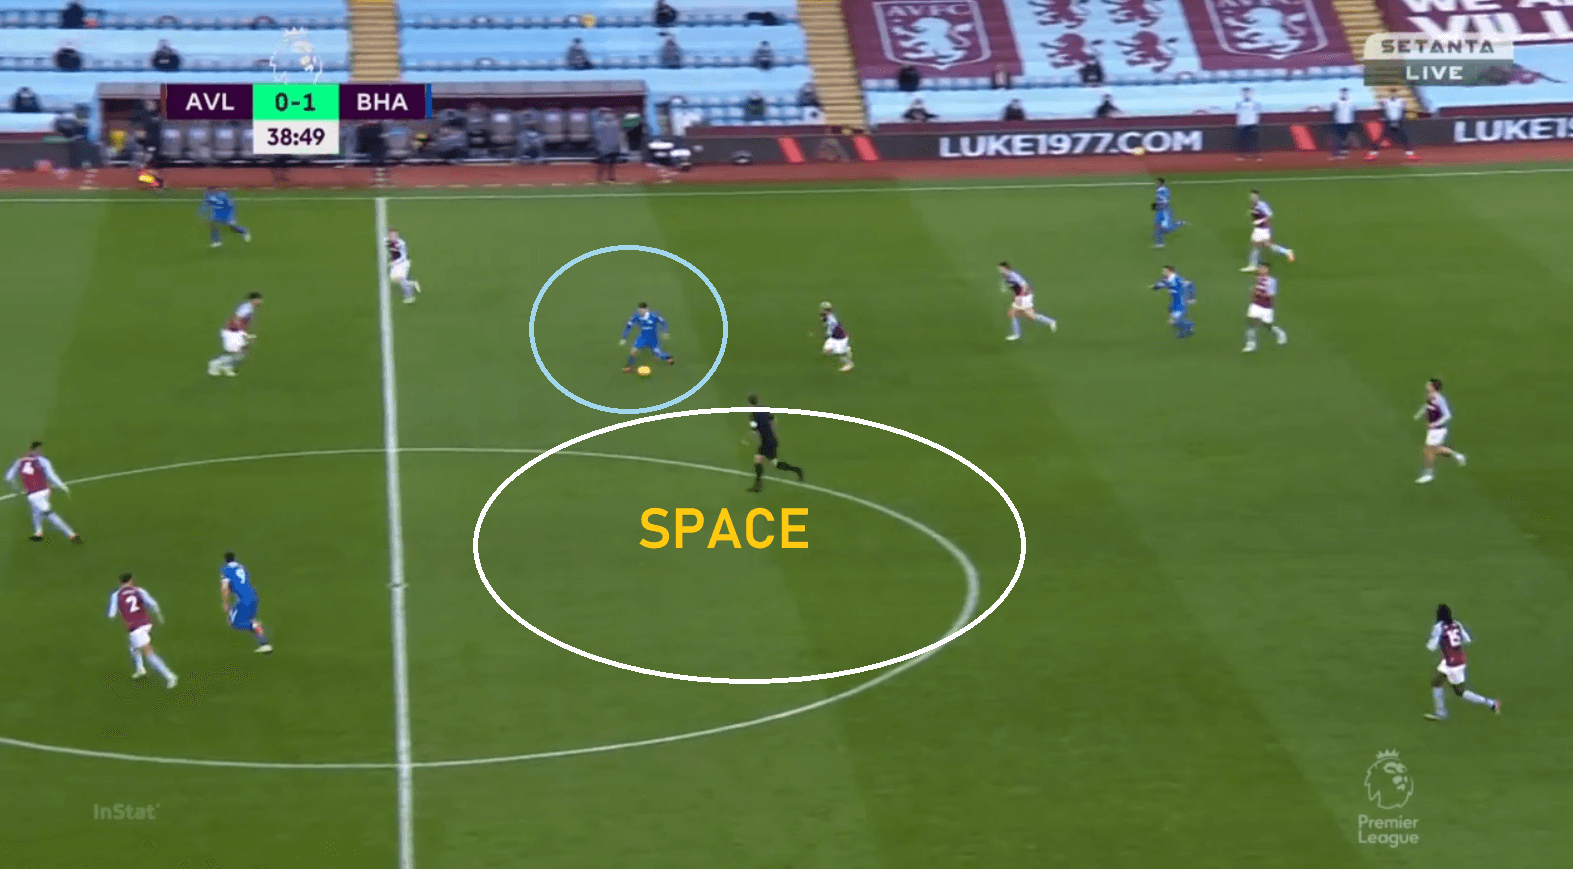
Likewise, the press also lacked coordination even from the forward players and this extended to even in the second half. We can see that Webster has the ball and Grealish presses the centre-back next to him. While Douglas Luiz marks Bissouma and Watkins (red circle) remains closer to Ben White (played as a midfielder in the second half). While all these players press, Traore (black circle) fails to press Webster who has a lot of time and space to play a pass. We can see the reaction of Watkins too, as he is frustrated that Traore has not come forward to press.
Conclusion
Brighton eventually earned a well deserved 2-1 win and crucial one on the road after a tense final 10-15 minutes that saw Lamptey getting sent off after receiving a second yellow card. Villa meanwhile, fell to a 3rd defeat in an otherwise a brilliant start to the campaign which ensures that they will stay in the top half of the table despite the defeat.


Comments