With nine games left to go, Newcastle United and Tottenham Hotspur found themselves at opposite ends of the table. While the former was caught up in a relegation battle while the latter was in a top-four race alongside the likes of Chelsea, Liverpool and West Ham after having been top of the tree early on in the season. A win for either side would massively boost their hopes of winning their respective battles but the draw would have probably affected Spurs more than it did Newcastle. In this tactical analysis, we will see the tactics behind this fixture and our analysis will show how Newcastle were arguably the better side in the game.
Lineups
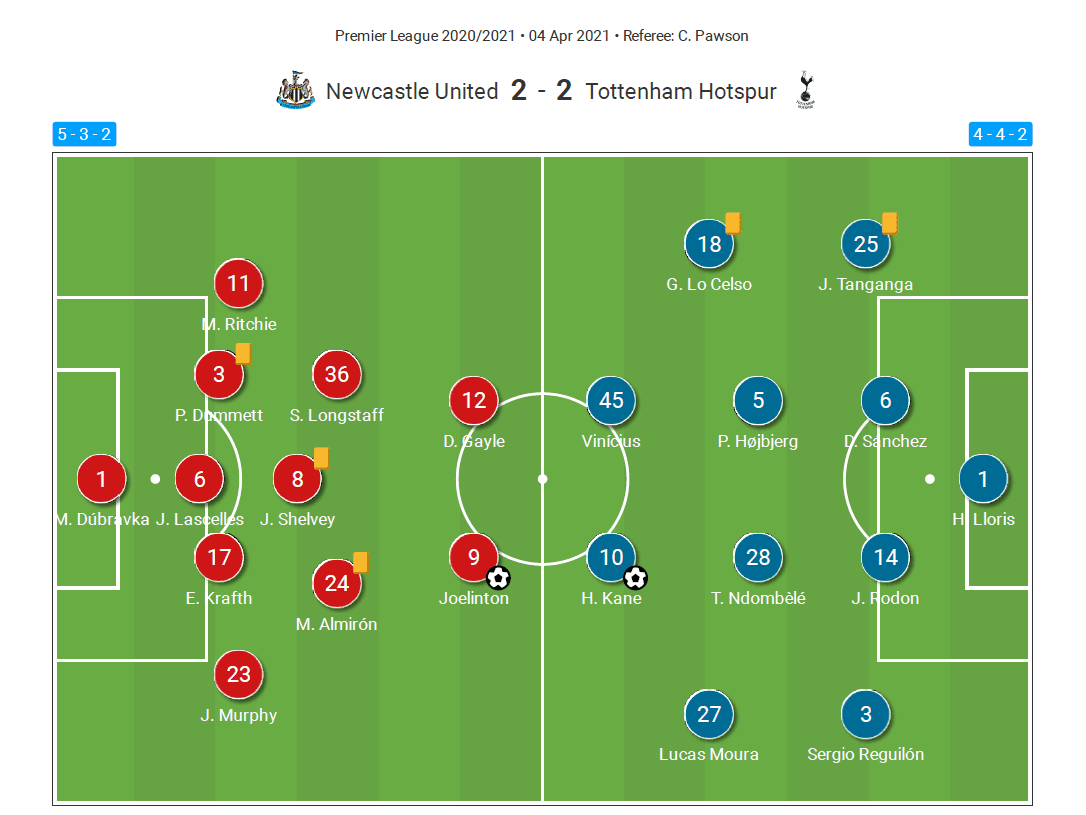
The home side started with a 5-3-2, using Matt Ritchie and Jacob Murphy as the wing-backs. Sean Longstaff, Jonjo Shelvey and Miguel Almirón started in midfield while Dwight Gayle and Joelinton started as the forwards. Newcastle were once again without the pair of Allan Saint-Maximin and Callum Wilson, both of whom have been excellent for the side, although the former returned to the bench for this fixture.
As for Spurs, it was Japhet Tanganga and Joe Rodon who started at right-back and centre-back with Giovani Lo Celso and Lucas Moura starting down the wings. Pierre-Emile Højbjerg and Tanguy Ndombele started in midfield while Carlos Vinícius partnered Harry Kane in what looked like a 4-4-2, but could also work as a 4-3-3. With the lineups covered, let us move onto the analysis.
Newcastle’s press
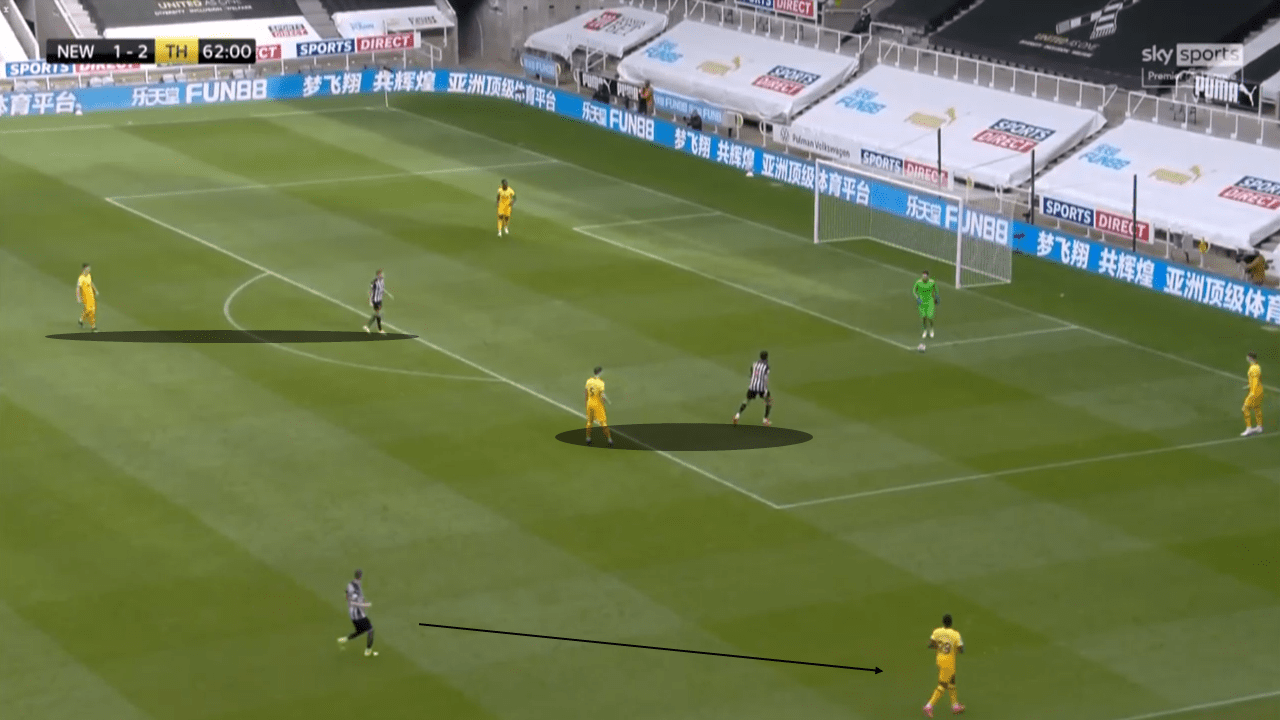
In the 5-3-2, Newcastle’s press was set up to prevent ball progression to either of Tottenham’s central midfielders. Both central midfielders, particularly Højbjerg, have been crucial to Spurs’ build-up play as they look to break the lines with their passing from midfield. Steve Bruce realised this threat and had both his forwards keep the central midfielders in their cover shadow as they pressed the centre-backs. The Newcastle midfielders would also push up in this case, as they looked to stay close to the opponent’s full-backs with one central Newcastle player ready to press his opposition counterpart should Spurs play past their first line of pressing. This naturally forced Spurs out wide towards the flanks.

Forcing the opposition towards the flanks makes for easier defending as the touchline effectively acts as another defender in such scenarios. This is precisely what Newcastle aimed to do and once they forced Spurs out wide to their full-back, they would continue their press. One forward would remain close to his centre-back on the opposite flank while the other moves to press the full-back who has had to drop much deeper to receive the ball. The Newcastle central midfielders then move towards the ball side and one stays within a pressing distance of the centre-back while the other ensures he is close to the opposition central midfielder on this side. It should be noted that Newcastle did ensure that both their central midfielders, in this case, were also close enough to Spurs’ midfielder, so they looked to completely eliminate the passing option to him.
Another Newcastle player would also follow any dropping winger in order to prevent the pass down the line and in such a scenario, the only viable option was a long ball down the channel for Tottenham. However, this is not an efficient method of building up play as it often leads to conceding possession but for Spurs on the day, an improper clearance led to Newcastle capitalising on their error and quickly scoring from it. Spurs were forced into this risky style of play and having been pressed into an error, they failed to recover in time to prevent the home side from taking the lead.
Spurs passing through the lines
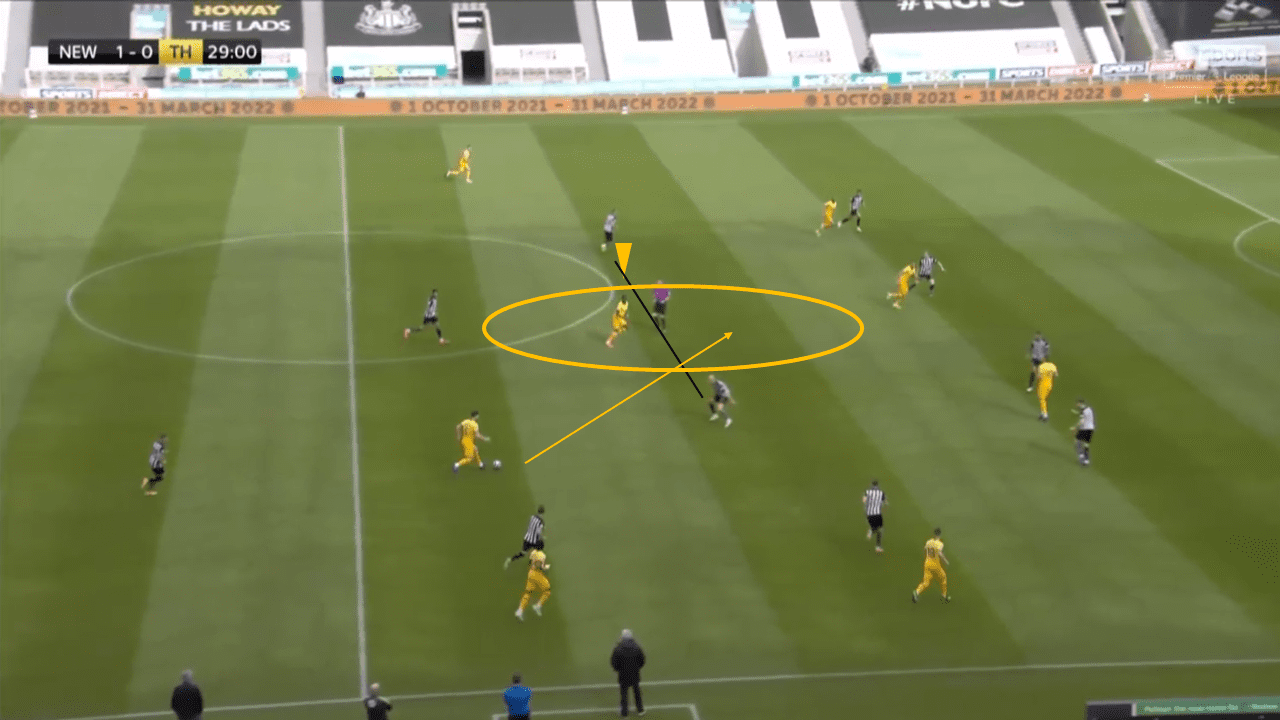
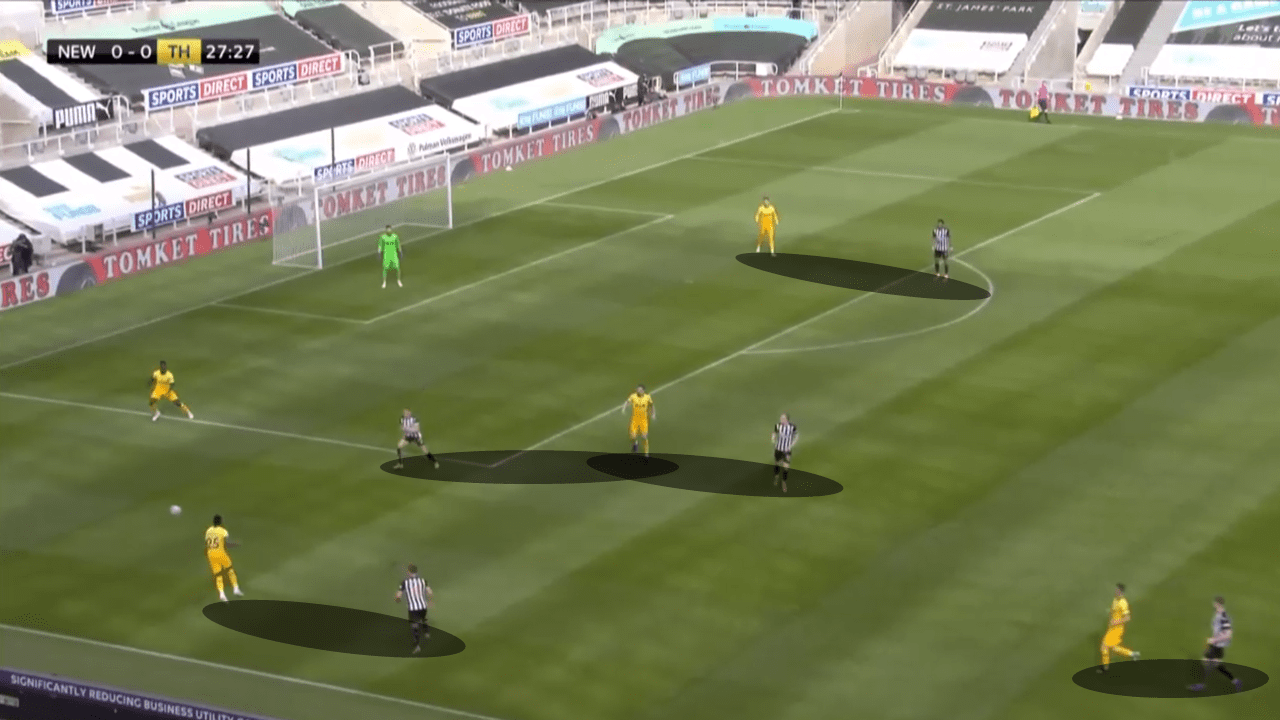
Spurs did manage to hit back nearly immediately though, and a key element of this comeback was their ability to pass through the lines. While Newcastle had been very effective with their pressing higher up the pitch, it was not nearly as good as it was further back. The front two were often spread apart, opening up spaces for Højbjerg and Ndombele to receive the ball and turn. Bruce’s side were not as willing to commit their wing-backs higher up in order to tackle Spurs’ wide players and this meant that the three central midfielders were also spaced apart in midfield. This provided easy opportunities for the Spurs players to pass through the lines as shown above. Ndombele is able to run into space between the opposition central midfielders and with Højbjerg passing just ahead of him, he has already bypassed Newcastle’s second line of defence with this simple run. This was precisely how Spurs’ first goal was scored as well after Ndombele managed to float through the lines and start a sequence that saw Kane slot into an empty net after some miscommunication from the keeper and his centre-back.
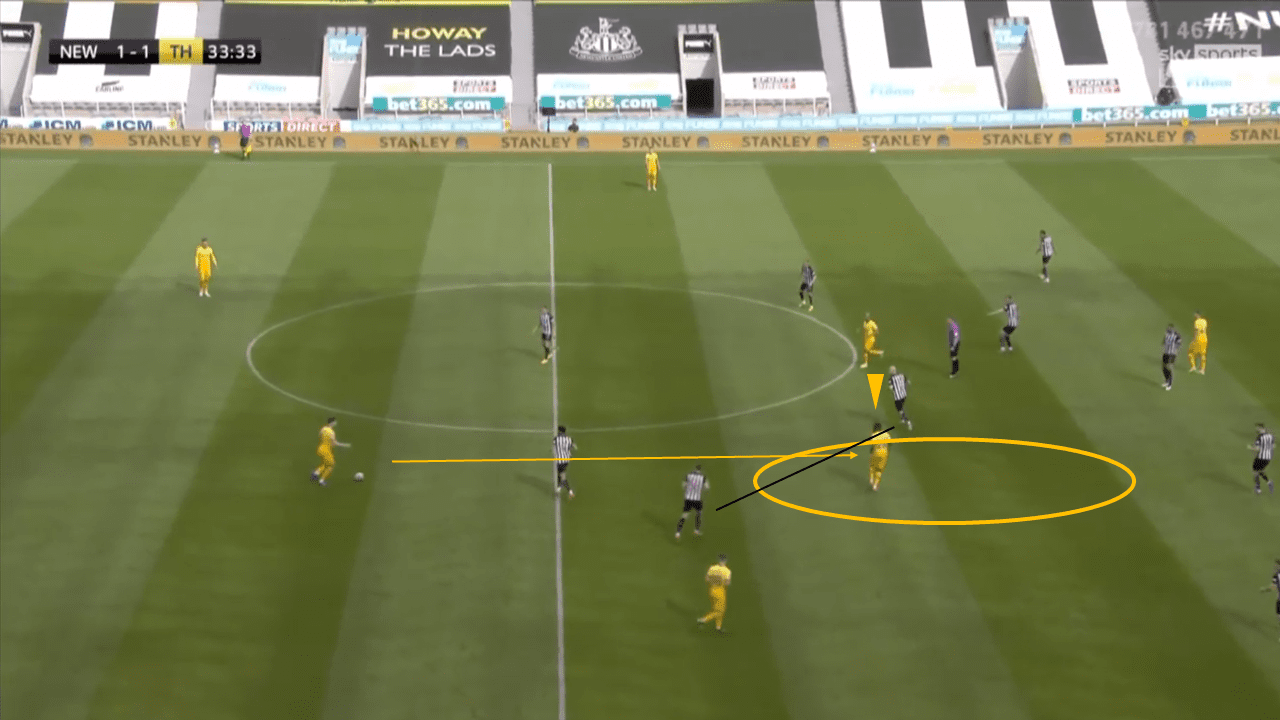
It was the same for the second Spurs goal as well, with Højbjerg and Ndombele linking up once more. This time, space was created with Moura dropping deeper, dragging Shelvey out towards him and opening up space for a pass to Ndombele, that Joelinton fails to cover with his press. Ndombele is able to receive and turn, now with just the backline ahead of him and once again he is able to start a sequence of passes that sees Kane finish excellently and give Spurs the lead. It was a very similar build-up as the first goal and although Newcastle did try to stay more compact to prevent it, some clever movement from Moura and poor positioning from Joelinton meant that the home side went behind after conceding two goals in a span of five minutes.
Early crosses trouble Spurs
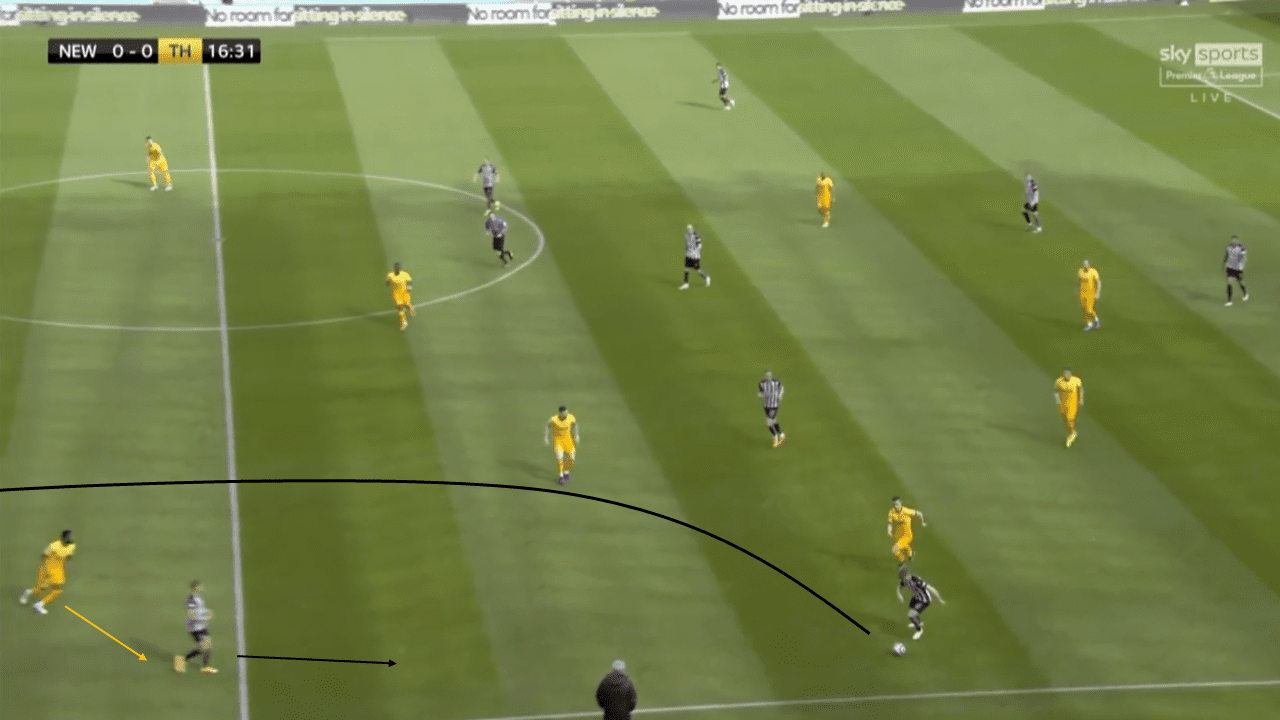
Newcastle’s attack was primarily built around long balls down the wings for the forwards to chase and allow the side to progress. They were looking to attack the spaces left behind by the full-backs as they moved forward in attack and even when this did not happen, they looked to create their own space. One forward would drop back to provide a short passing option to the ball carrier, dragging the full-back with him. The other forward would then dart into the space behind them and providing a passing option further down the line. He would then look to hold possession as his teammates move forward after which he can release the ball and move towards the penalty area.
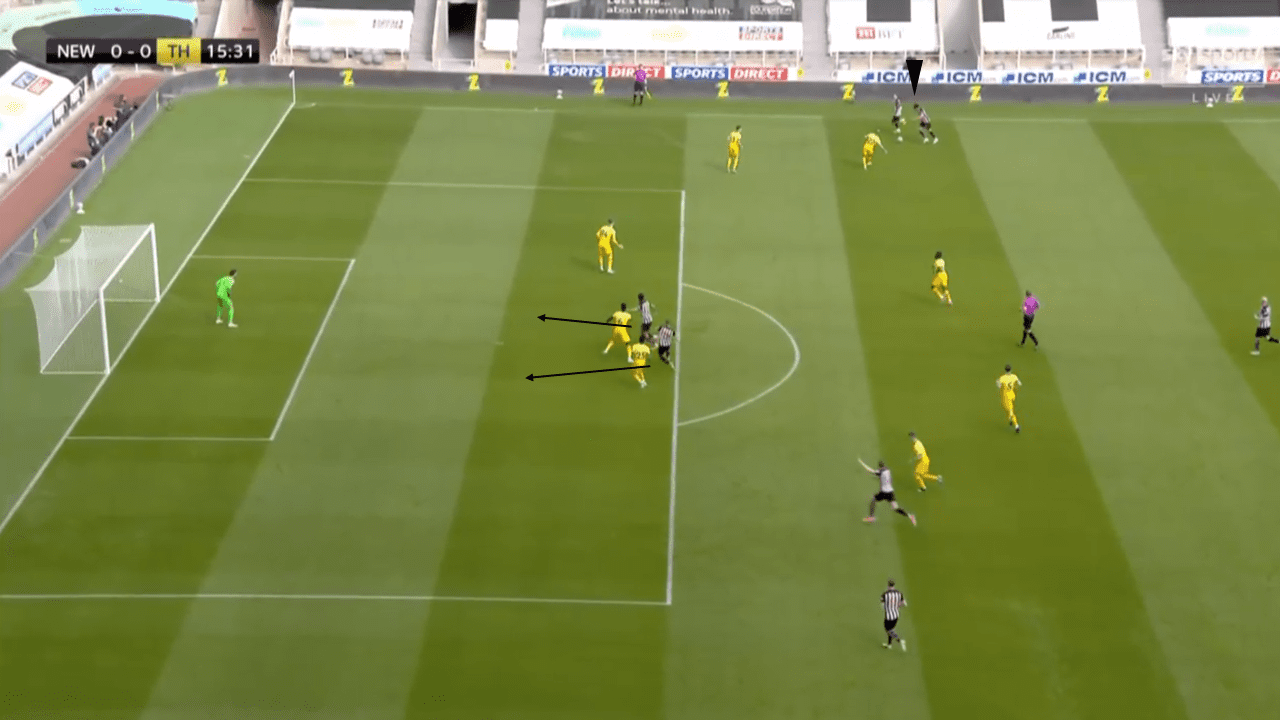
Once they advanced into these areas higher up the pitch, Newcastle looked to rotate the ball down the wings with their wing-backs and central midfielders and allowing the forward to get into the box as mentioned earlier. The obvious option was going to be crosses into the box but what Newcastle did well was to start their cross early. Instead of going deep before putting in a cross and allowing Spurs to drop men back into the box, Newcastle played early crosses into the box with their two forwards darting into spaces between the defenders. The usage of two forwards meant that Spurs could not take a chance with just two centre-backs behind but one more player, usually the full-back would have to stay close to them to ensure numerical superiority in their own box. This would then free up spaces for the Newcastle wing-backs and central midfielders to run into down the blindside of the backline and while the Spurs central midfielders should have covered them, they were naturally positioned further up the pitch owing to the position of the ball on the pitch.
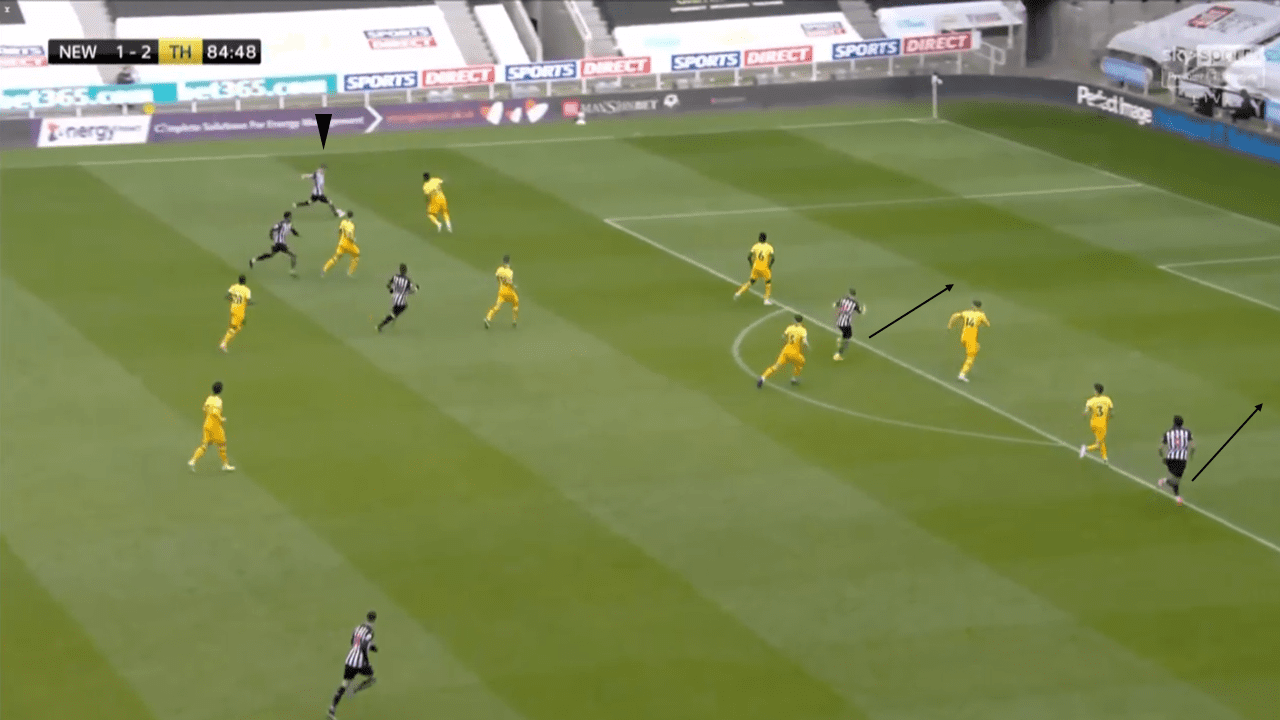
These early crosses surely troubled Spurs, with Newcastle creating excellent opportunities from them and eventually after the early cross shown above, they managed to put the ball in the back of the net. Once again, the forwards are able to exploit the spaces in the box and the early cross means that the Spurs defence is not set to defend the aerial ball. Although they did not score directly off the cross, Spurs were unable to deal with the loose ball in the box after the initial attempt as they were not structured defensively due to being caught out and loanee Joe Willock could slot home to give Newcastle a point, the least that they deserved for their efforts.
Conclusion
The point means that Newcastle are three points clear of 17th place Fulham having played one lesser game, meaning that their future is very much in their own hands. Their performance against Spurs was a much-improved one and with 22 shots and 17 in the box, they could have even won the game and put considerable distance between them and the relegation zone. An away trip to Burnley awaits Bruce’s side and a win there would see Newcastle move to just one point behind next week’s opponents.
As for Spurs, they failed to take their chance to leapfrog Chelsea and move into fourth place, staying in sixth, level on points with Liverpool. West Ham’s win took them to fourth instead and they now lie three points ahead of Spurs with David Moyes doing a splendid job with the Hammers. With Manchester United visiting next week as well, the memories of their 6-1 triumph at Old Trafford seem like ages ago and should Spurs drop points next week it could be an even bigger task to break into the Champions League spots next year.



Comments