This weekend in the Premier League season saw a vital London derby on the cards with 5th placed West Ham hosting 4th placed Chelsea. The clash’s significance the race for the Champions League spots was huge, with both teams on 55 points before this match.
Chelsea went into the game having had a mixed result against Brighton in midweek and Tuchel would have had an eye on the Champions League semi-final clash against Real Madrid in a few days. West Ham meanwhile have had a great season but are in the middle of a slight slump with injuries and suspension to some key players.
This tactical analysis features a detailed explanation of the tactics deployed by both managers. Let’s begin the analysis.
Lineups
West Ham lined up in their usual 3-4-3 formation that would shift into a 3-4-1-2 often with Fornals in a roaming role behind the two strikers. Fabian Balbuena was drafted in by Moyes for the suspended Craig Dawson.
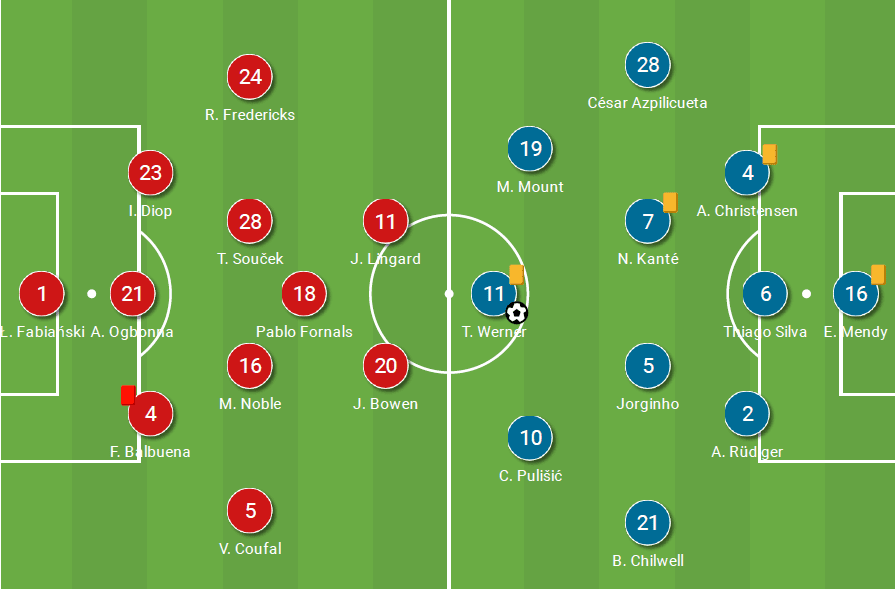
Chelsea on the other hand lined up in the same 3-4-2-1 system that Tuchel has been using recently with a lot of success. He made 7 changes to the side that was held to a 0-0 draw against Brighton with only Andreas Christensen, Antonio Rudiger, Jorginho and Mason Mount being retained.
West Ham’s central coverage forced Chelsea wide
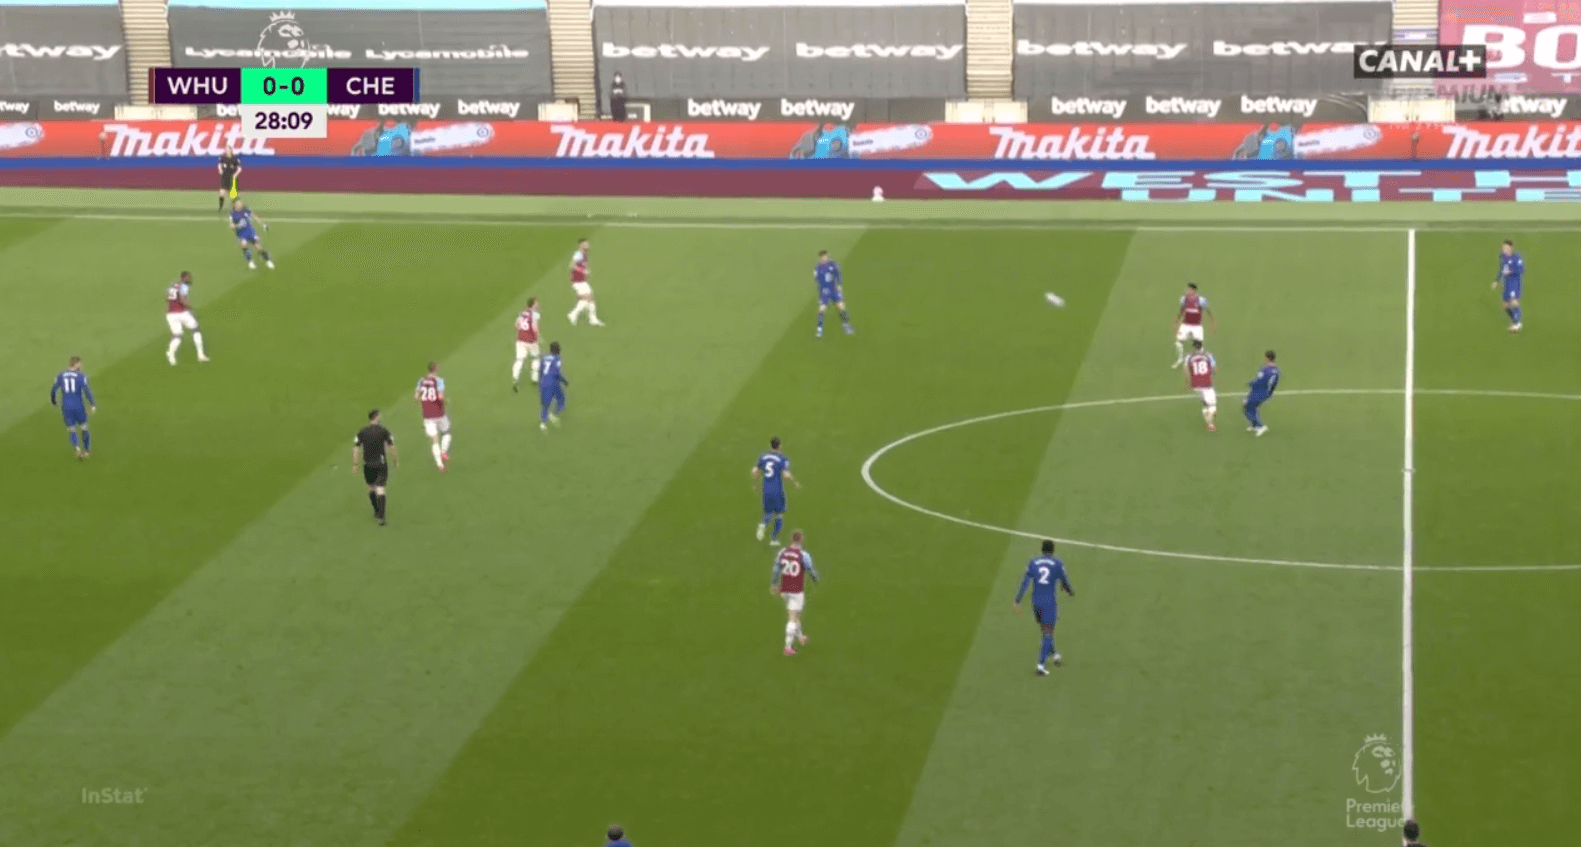
West Ham went with their usual 3-4-3 formation which often varied into a 3-4-1-2 when they did not have possession. Fornals would probably start behind the likes of Lingard and Bowen as he would be tasked to keep Jorginho in check. Moyes opted for a mid-block with very less intense pressing that saw the Chelsea centre-backs get more time on the ball. We can see that in the image below where West Ham forwards and central midfielders have formed a pentagonal block at the centre around Kante and Jorginho. If the ball is played to one of them then they would be pressed aggressively by the surrounding West Ham players.
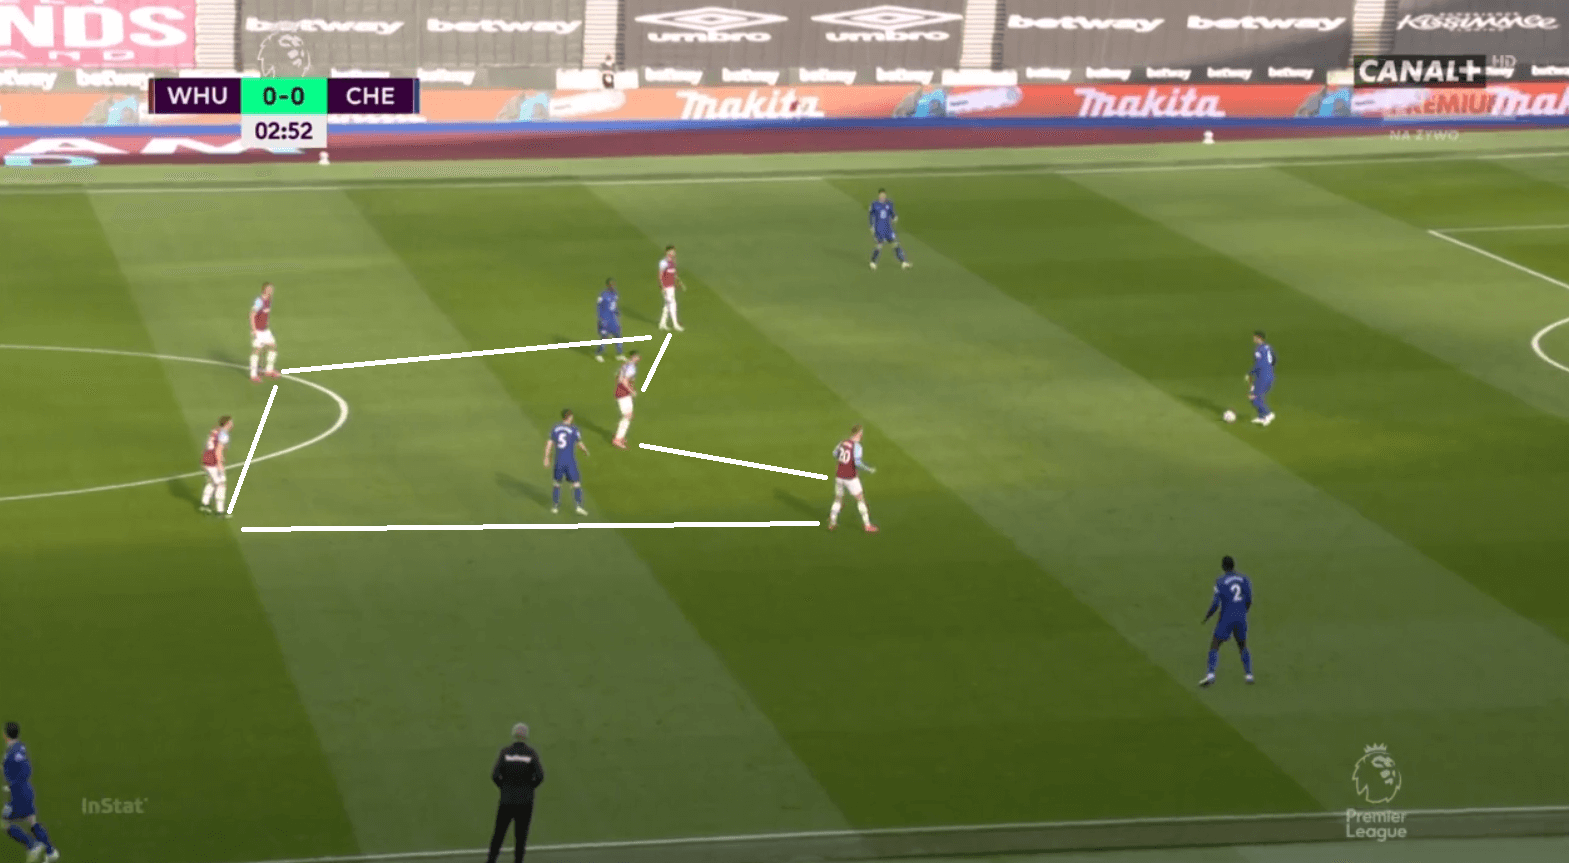
The body orientation of the players were also successful in preventing the Chelsea centre-backs to pass to them as a pass to Jorginho or Kante means they need to immediately play a one-touch pass to the wings. The West Ham players for the most part ensured that their positioning was good enough to stop such a move. Their plan was to eventually force Chelsea to wide regions where they would then deploy a man-man marking and intensely press Chelsea. The trigger would be a pass from the middle centre-back to the wide centre-back or when the ball goes to the wing-backs.
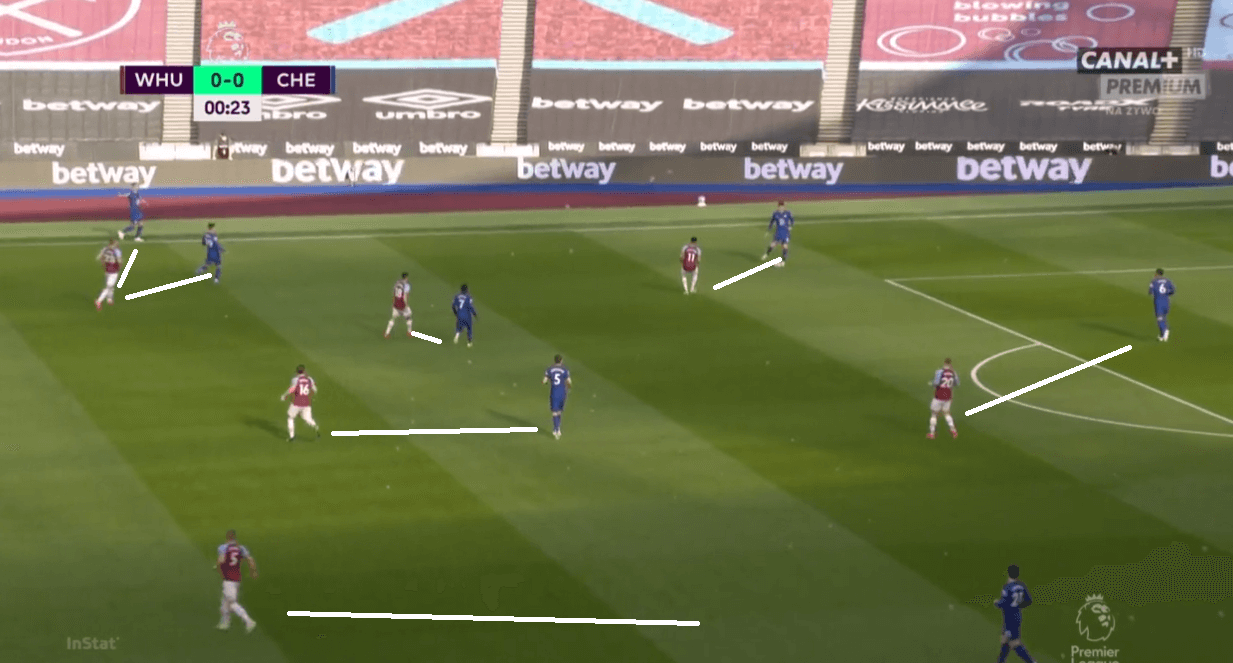
The wing-back to wing-back press here is most important as West Ham would be looking for this interaction as they would press the Chelsea wing-back with the touchline beside them acting as an extra defender.
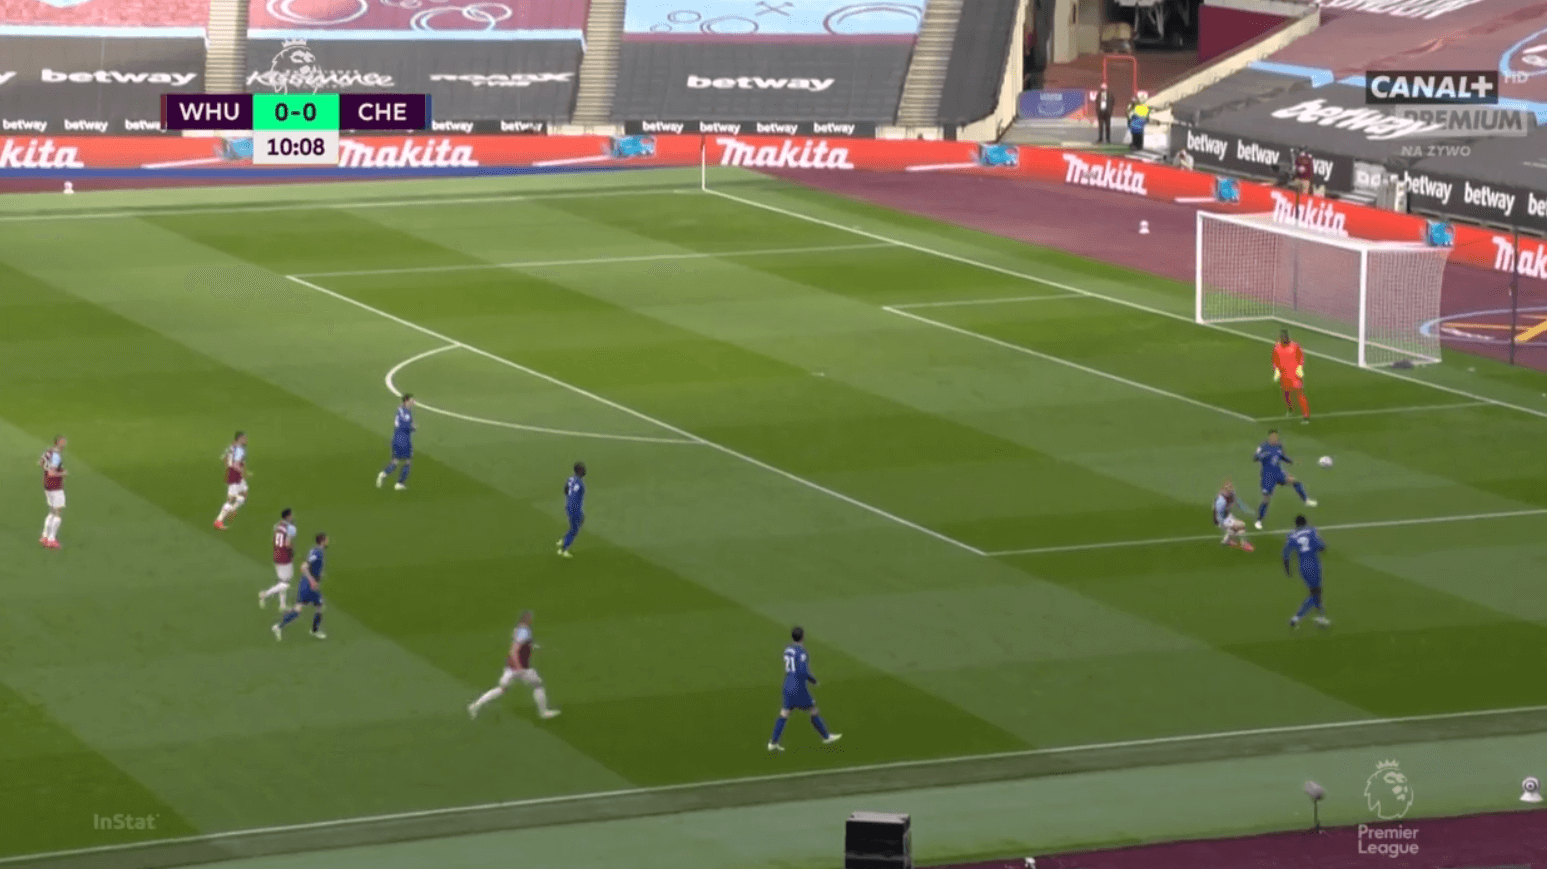
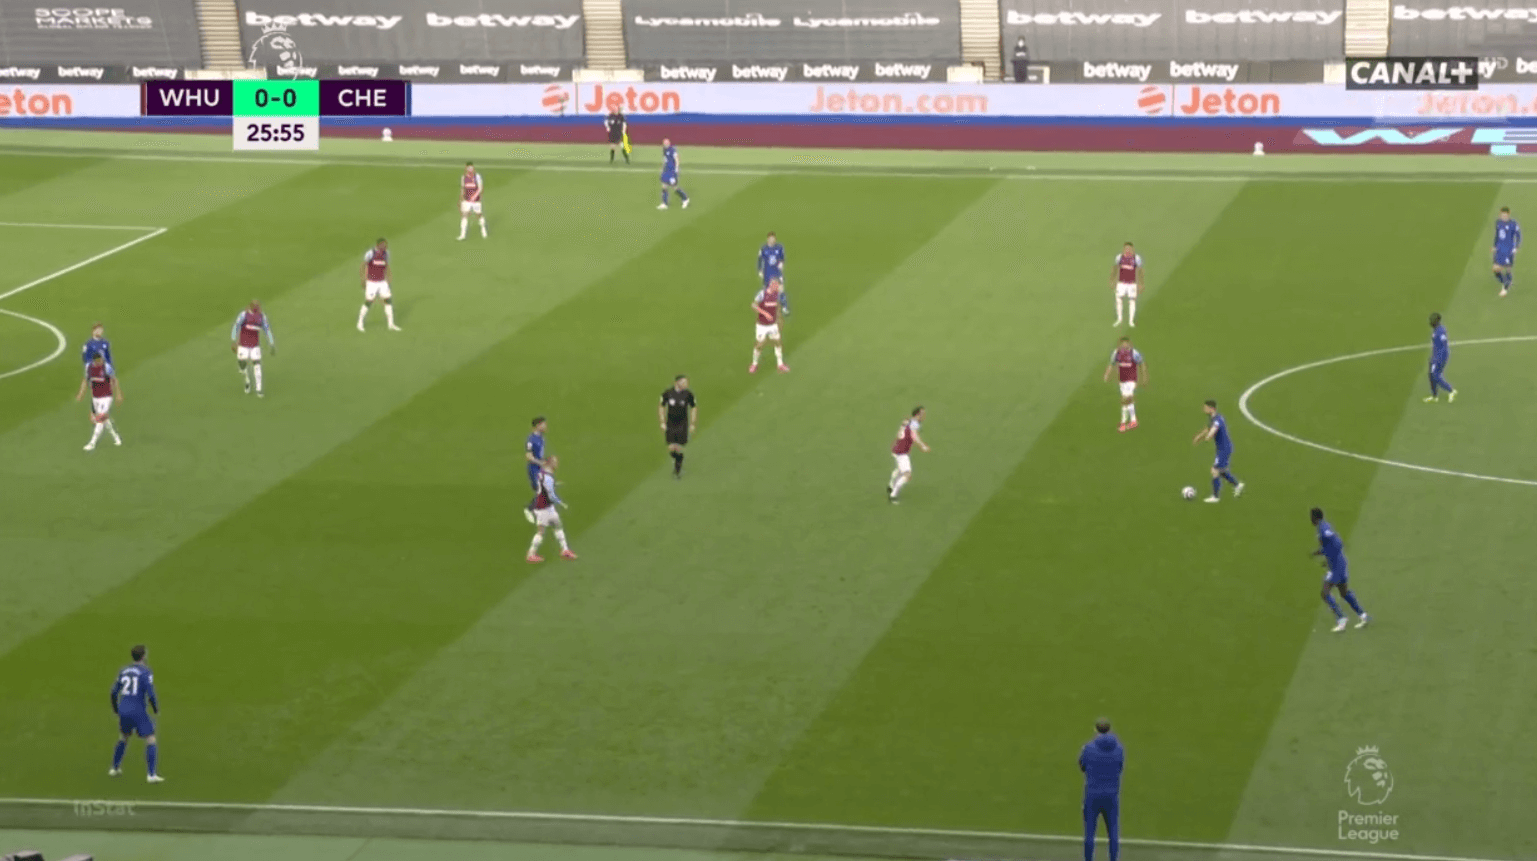
Chelsea initially faced issues or at least when they looked to play out from the back and look to progress with their centre-backs. West Ham were constantly engaging and looked threatening whenever Chelsea were looking to use their CBs to pass the ball. This forced their CBs to keep retaining it by passing it around the back. But they also had to do it with conviction since passing out wide was the trigger here like in the image below.
Tuchel’s response to this rigid system
Tuchel had already come up with a plan for this match but he waited for some time to implement this strategy. We saw how the West Ham midfield and forward lines went forward and formed a box around the Chelsea midfielders to ensure a lack of central penetration from Chelsea. But they set their defensive line very deep so that the pacey forwards of Chelsea do not have space to run in behind the defence. So setting that way seemed to be logical from West Ham’s point of view with the presence of Werner and Pulisic on the pitch. This brought a trade-off where now space was available in front of the defensive line as the gap between the defensive line and the midfield line grew. Chelsea did this by initially luring the West Ham players to press them high and open spaces.
There were different strategies that Tuchel used to his advantage and got into the final third. The first was to ask Werner to drop in between the lines and use this space. Werner dropping in between the lines means a West Ham centre-back would have to follow him to deny the space and time for Werner on the ball. Before this, they had to find him in between the lines. For that, both Jorginho and Kante increased the distance between them. This meant that Soucek and Noble, the duo who marked them had to follow them. Now because of that, the gap increased between the West Ham duo and with Fornals having to adjust his positioning to have either Kante or Jorginho in his cover shadow, the straight passing lane from Silva to Werner opened. We can see an example of that in the image below.
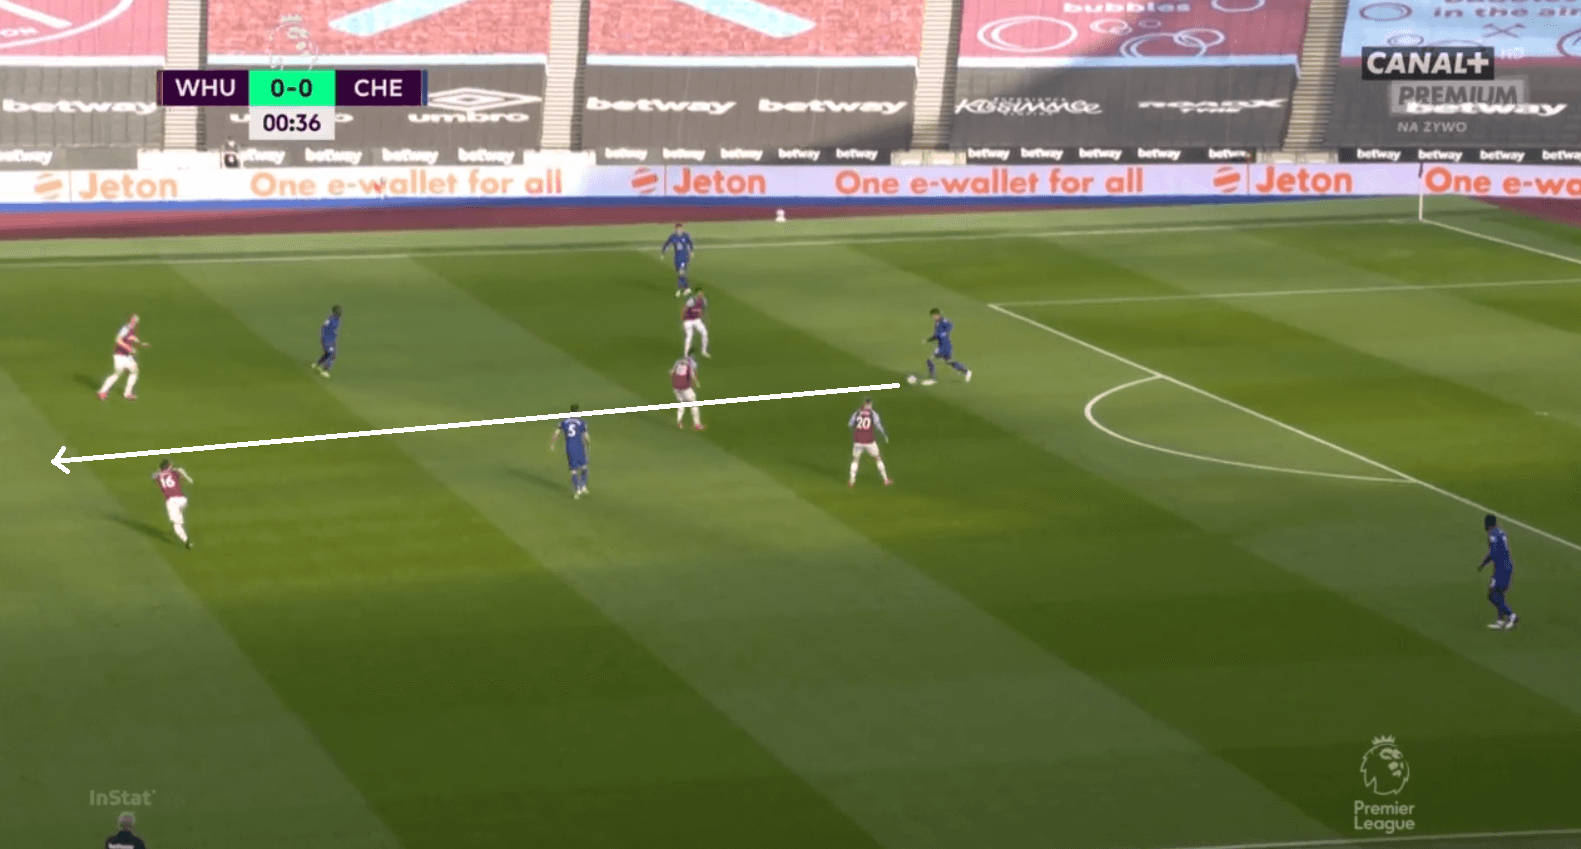
We mentioned how the centre-back followed Werner whenever the German dropped deep. West Ham was able to afford that due to their back-3 system that saw another defender filling the vacated space and keeping track of other Chelsea forwards if they made a run. So this was pretty much less successful for Chelsea.
The second pattern that Tuchel used was to drop Mount in the right half-space. Mount, who started as the right winger in their 3-4-3 system, was constantly kept an eye on by Issa Diop (the left-sided CB). For Mount to receive in between the lines, Chelsea ensured that Diop did not follow him. So they kept their wing-backs high up the pitch and positioned them in between the wide centre-back and wing-back to pin them. We can see Mount receiving in a similar fashion from Thiago Silva because Azpilicuetta is staying higher up the pitch (not shown in the frame).
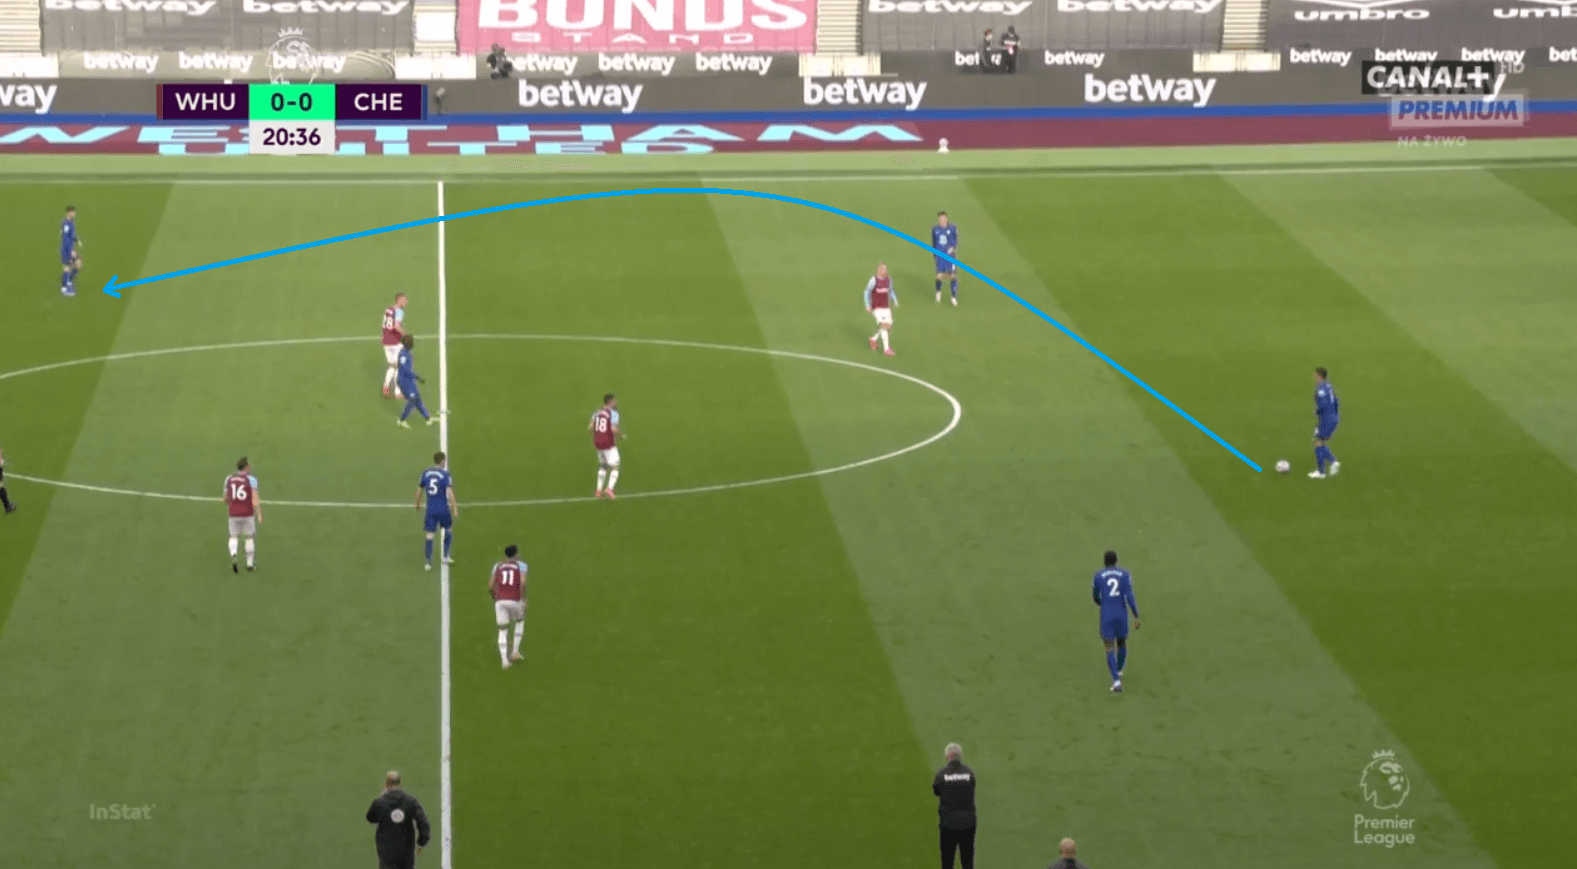
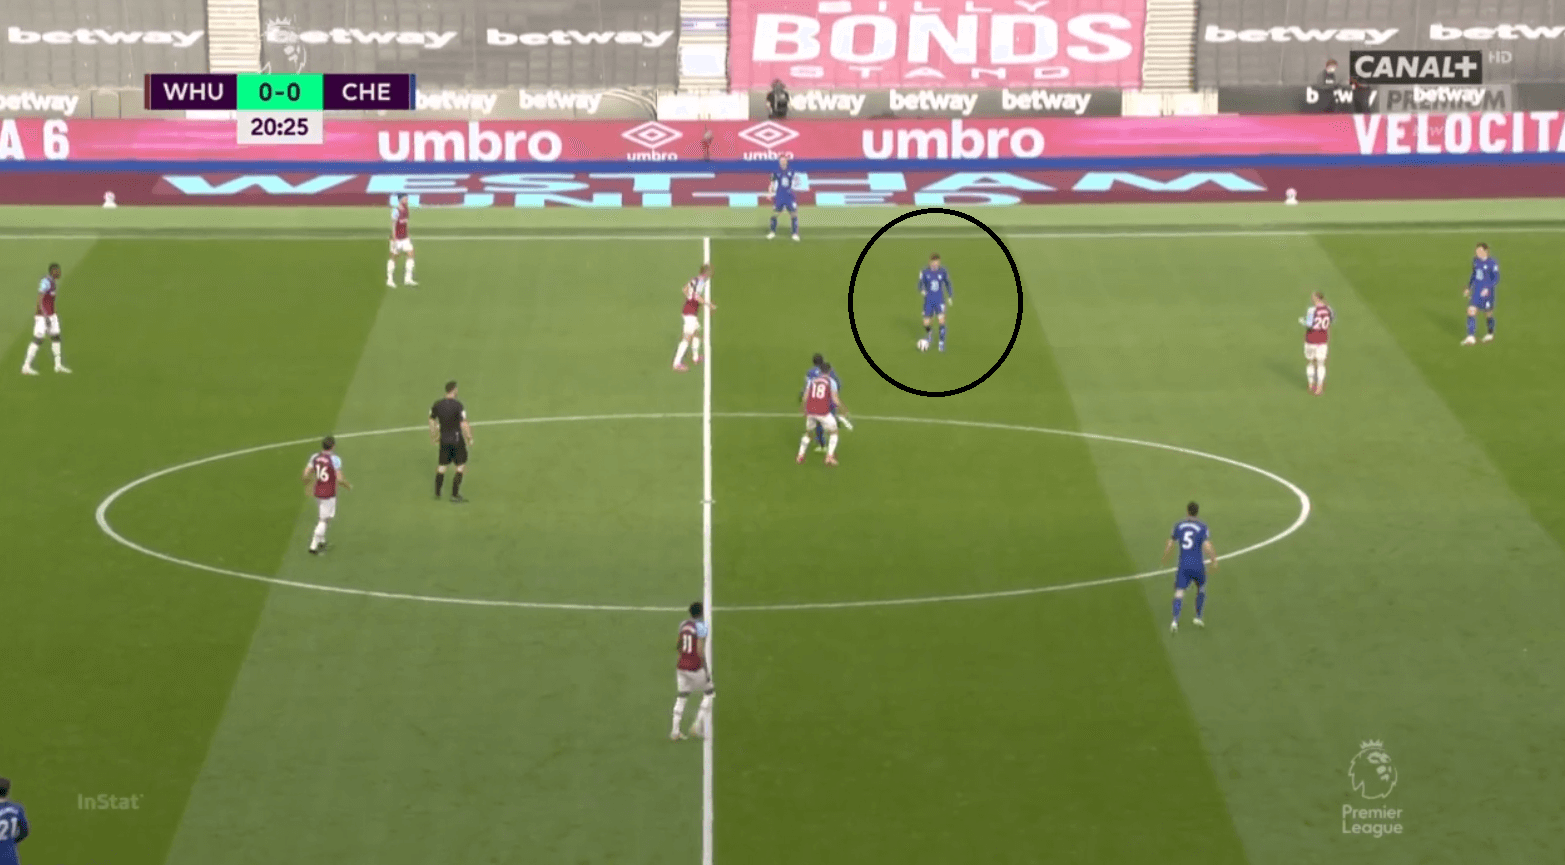
Their goal also came from a similar fashion when Mount dropped in between the lines and received the ball. Chelsea then used him to immediately combine with Kante and switch the ball to Chilwell in the opposite flank, who provided the final ball to Werner. However, the key to all this was the positioning of the wing-backs, if they are not high and pinning the defenders then Mount dropping in between the lines would not be effective like in the image below where Azpilicuetta is staying deeper.
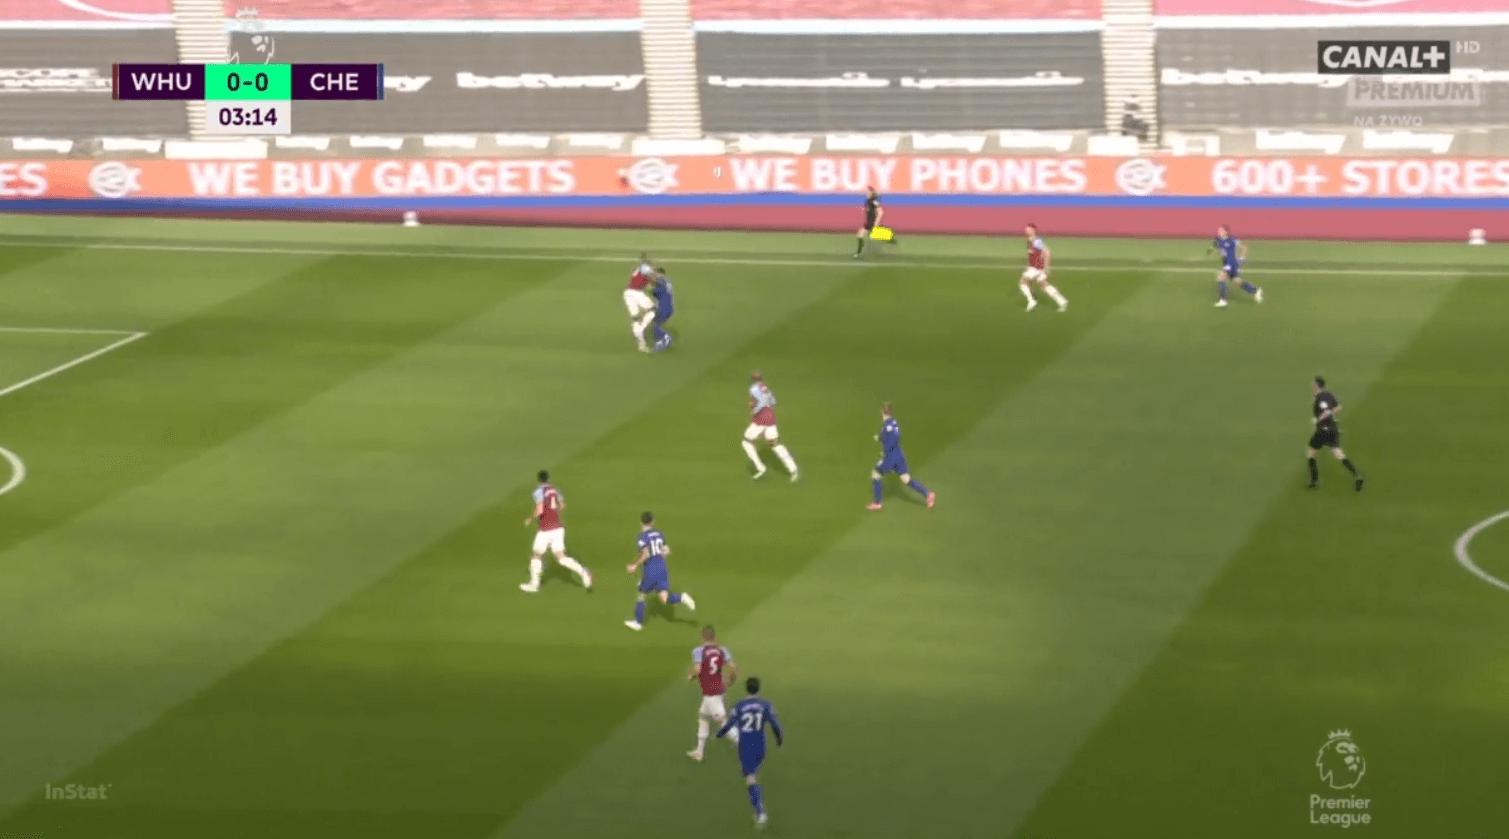
Chelsea also went direct to their forwards often with the centre-backs pinging long balls to the front 3. This also proved to be successful for Tuchel’s man despite the fact that West Ham had aerially good and physically strong defenders. The reason was again the space left in front of the defensive lines as those regions are where the second balls would usually come and Chelsea were quick to win those if they lost the first one. An example of that can be seen in the below image where we can see space in between the lines when the long ball is played.
The presence of a wing-back higher up the pitch proved to be very helpful for Chelsea on that day. Even they were recipients of constant long balls from the centre-backs when they looked to stretch the defensive line like in the image below. Fredericks, left wing-back, was constantly tempted to press high and follow Mount high but the presence of Azpilicuetta made it difficult.
The positioning of the wing-backs very high also gave the liberty for the forwards like Pulisic and Mount to occupy the half-space where they are known to be very dangerous. And with West Ham always having their defensive line pushed back to ensure less space is available behind, the Chelsea forwards were given the chance to drive with the ball forward.
West Ham tighten things in the second half but still fall flat
In the second half, West Ham were much more aggressive and they quietly deployed a man-man and were aggressive in their duels. This was obviously necessary given that they were chasing the game in the second half. The likes of Diop followed Mount and was aggressive even when Azpilicuetta was higher up the pitch.
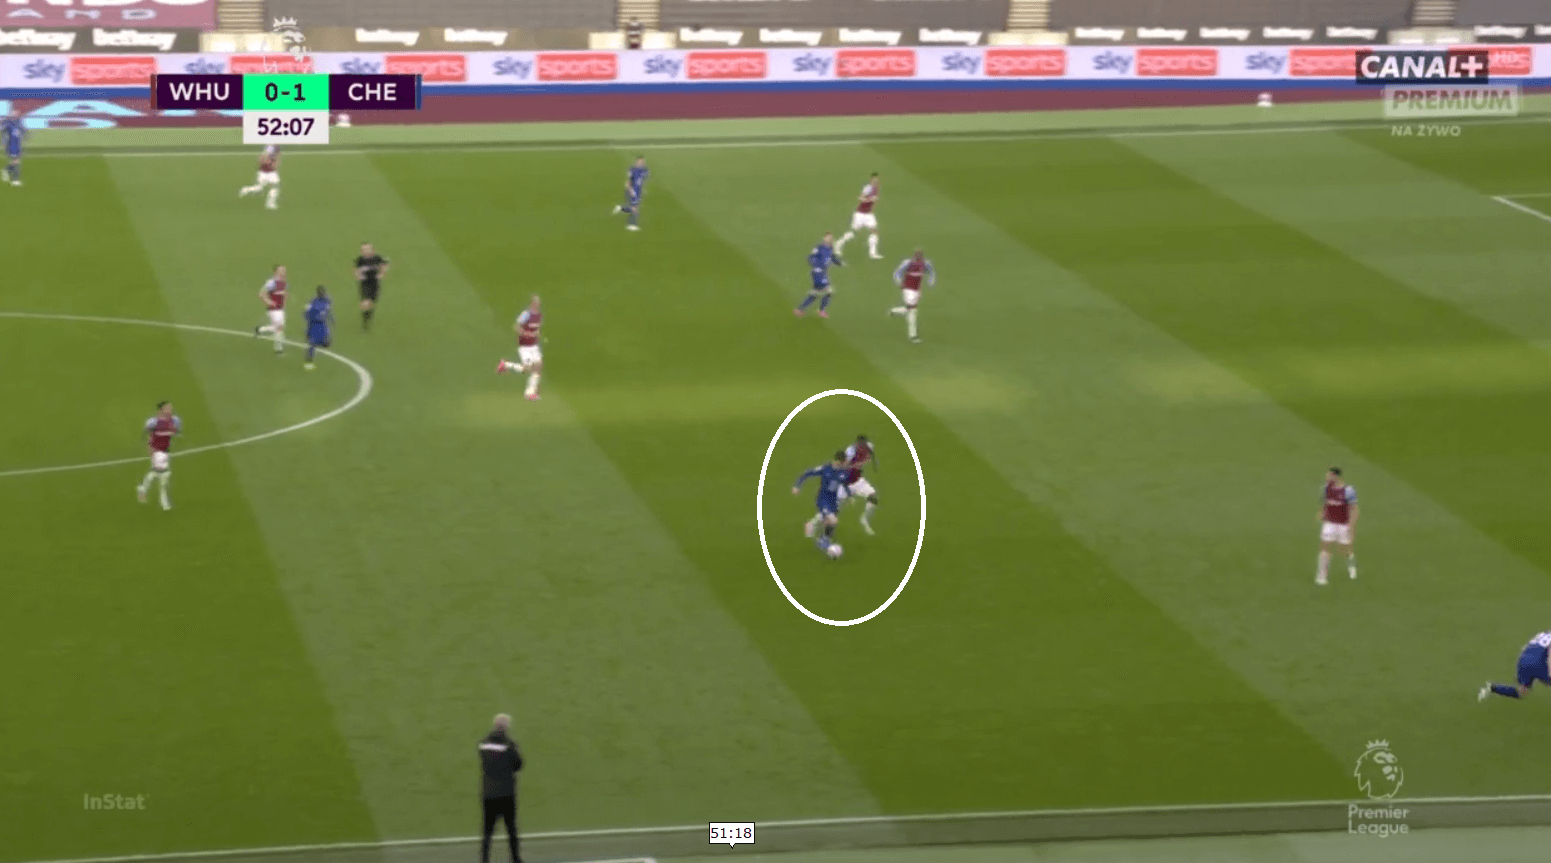
The constant pattern that West Ham have used this season is to combine in the wide areas and look for 3rd man runs from the likes of Fornals and the wing-backs. After seeing a lot more possession in the 2nd half, they were able to work well and release players. It was their final ball execution that let them down eventually.
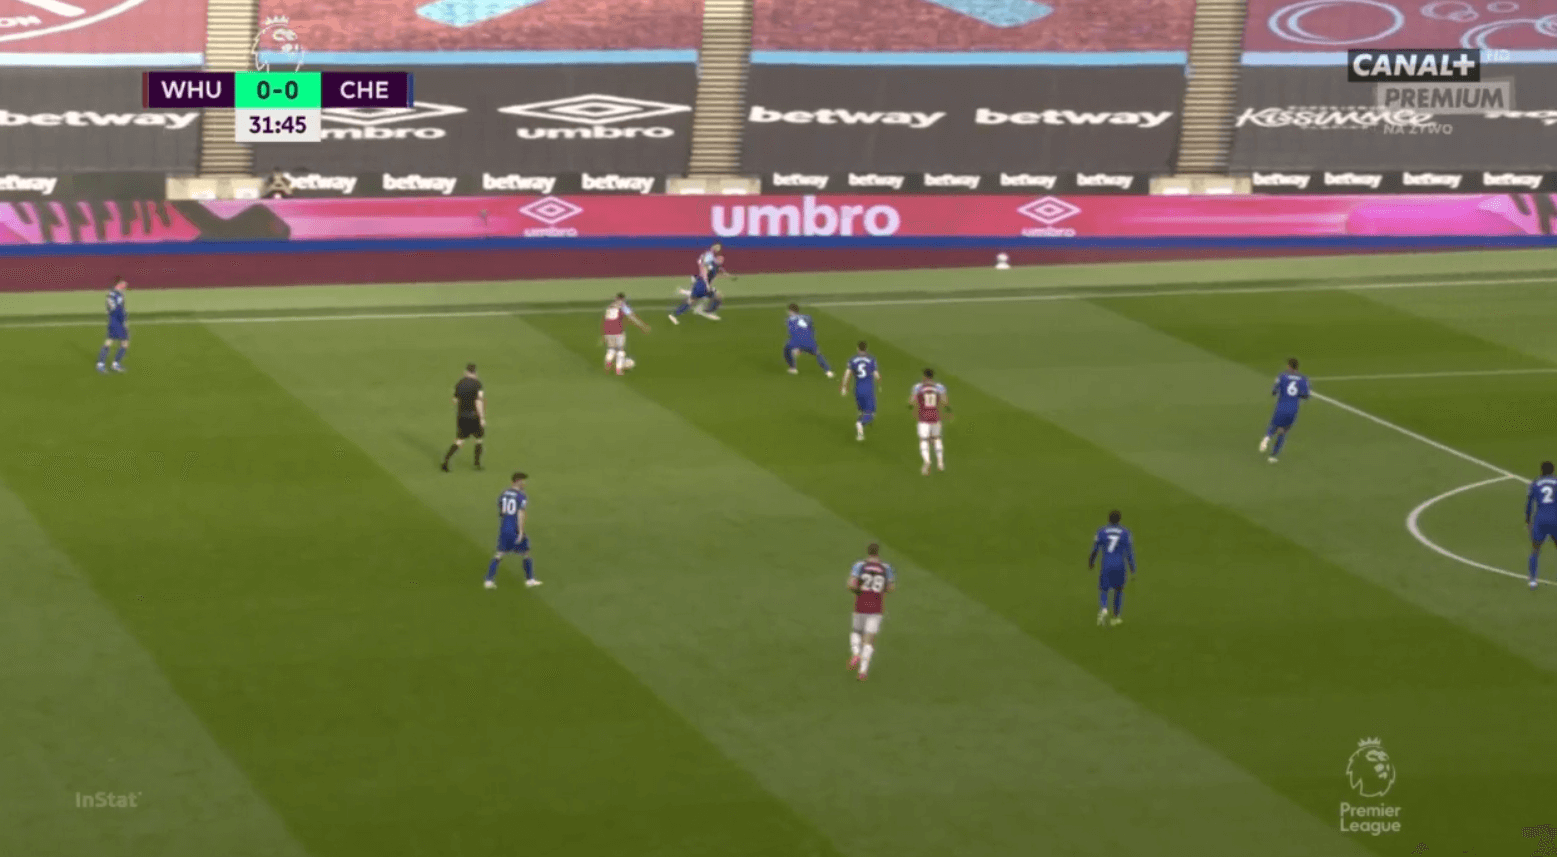
They missed the presence of Antonio, whose physicality could have been too much to handle for the Chelsea centre-backs and especially for someone like Christensen. His absence meant that runners Lingard and Bowen were tasked with holding the ball, which they aren’t comfortable with.
Also, Chelsea’s rest defence during transitions were excellent at executing counter-pressing which in many instances stopped the West Ham counter-attack at its infant stage.
Conclusion
The win puts Chelsea in an advantageous position to qualify for the 2021-22 Champions League. West Ham, who are pretty much the dark horses in the race now face a tough battle to secure the 4th spot.
Tuchel would be happy to have got a decent win despite so many missed opportunities and would be rearing to go against another depleted side in the form of Real Madrid in the mid-week.


Comments