With the 2020 J1 League season being just one game old when the fixtures were postponed, Sanfrecce Hiroshima have remained the leaders of the pack on goal difference. After a 3-0 victory over Kashima Antlers in their opening game, Sanfrecce will remain top at least until play resumes.
In that victory, Hiroshi Jofuku’s side boasted fewer possession (33% to 67%), far fewer passes completed (299 to 606), a much lower passing accuracy percentage (69% to 84%) and had fewer shots (12 to 17), although more on target (six to three), when compared to their opponent, yet were still 3-0 victors.
The home side’s structure of 3-4-2-1 from last season remained the same, however, the front three were the only players to be replaced from the final game of the 2019 season against Yokohama F. Marinos to the first game of the 2020 season, all of which bagged in the 3-0 victory.
Jofuku’s side appeared to be incredibly well-versed and efficient in how they played, with every tactic an intricate detail which resulted in a spotless scoreline for Sanfre. So, with play still suspended and the Hiroshima side sitting top of the table, they are as interesting a side as any to analyse.
So this tactical analysis will dissect the key tactics of Sanfrecce Hiroshima. The scout report will also use analysis to show why those tactics will make Jofuku’s side a threat over the 2020 J1 League season.
The press of Sanfrecce’s front three
As previously stated, the front three which started the game against Kashima Antlers were the only positions to have new faces in the starting lineup from the 3-0 defeat to Yokohama F. Marinos on the final day of the 2019 season. Douglas Vieira and Tsukasa Morishima were instated to the lineup having already been at the club, and loan signing Leandro Pereira, who joined from relegated Matsumoto Yamaga in the offseason, started as the front trio. The press of these three was vital to how Sanfrecce played.
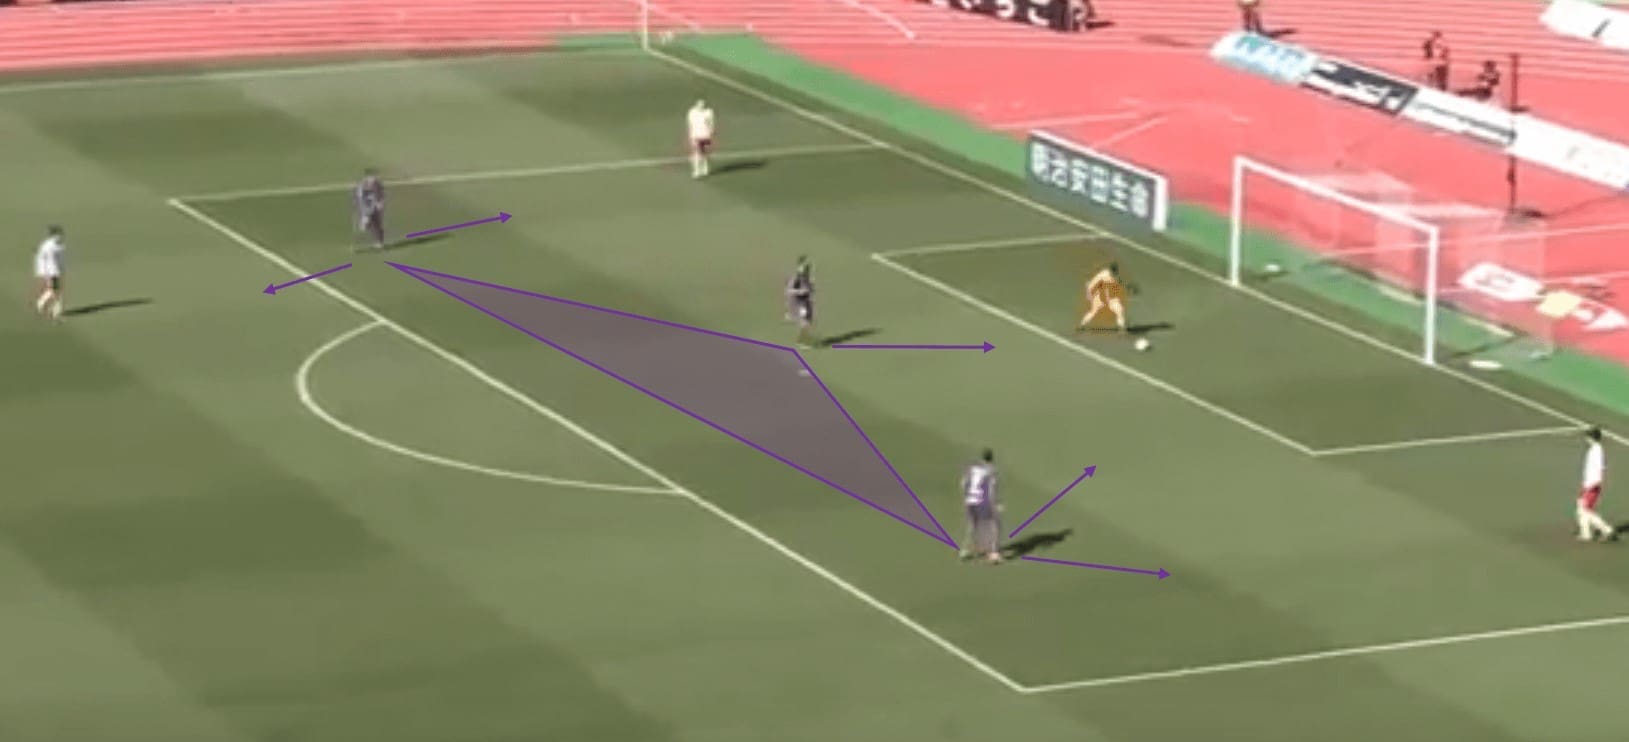
In this annotation, the pressing structure of that front three can be seen. The centre-most point of the three – usually Pereira – would be slightly advanced of the two wingers and the three would keep themselves fairly wide. This would allow the two base points of the triangle to cover passing lanes and be in position to press the ball should it be played to a man near to them – as the purple arrows show. As can be seen in the annotation, the press would be initiated as high up the pitch as possible if there was a real chance of regaining possession.
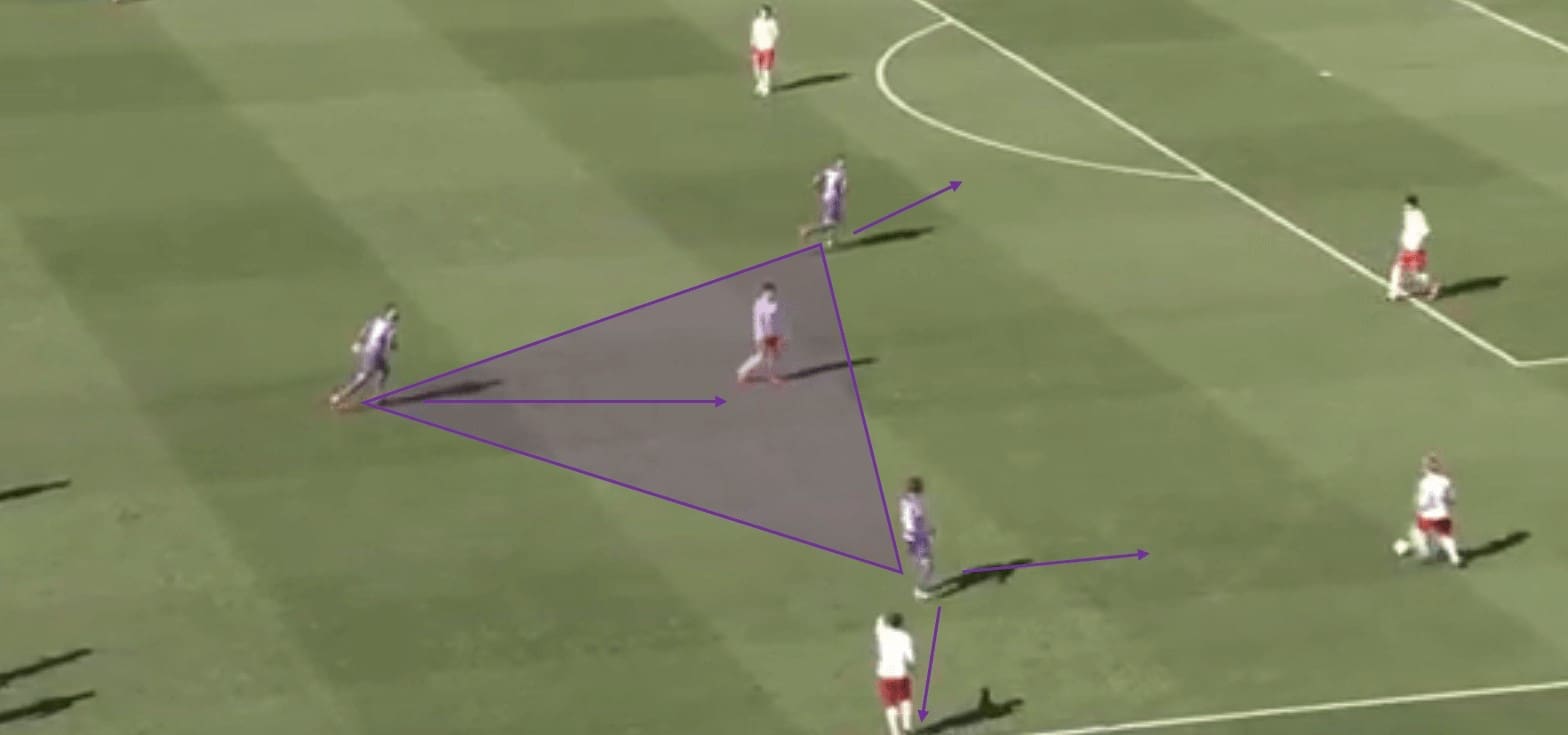
In this image, the build-up to Sanfre’s opening goal against Kashima Antlers can be seen. Following a throwing for the away side, play has resumed quicker than expected and the front three are out of position, with Vieira at the centre-most point. However, the three know the roles of one another perfectly and acclimatise to the situation.
With play resumed, Vieira recognises he is the centre-most point and moves towards the open space in case the press is successful. Pereira – usually the centre point – recognises his role in the situation and sniffs a chance to win back possession so immediately presses the man who is about to receive a pass.
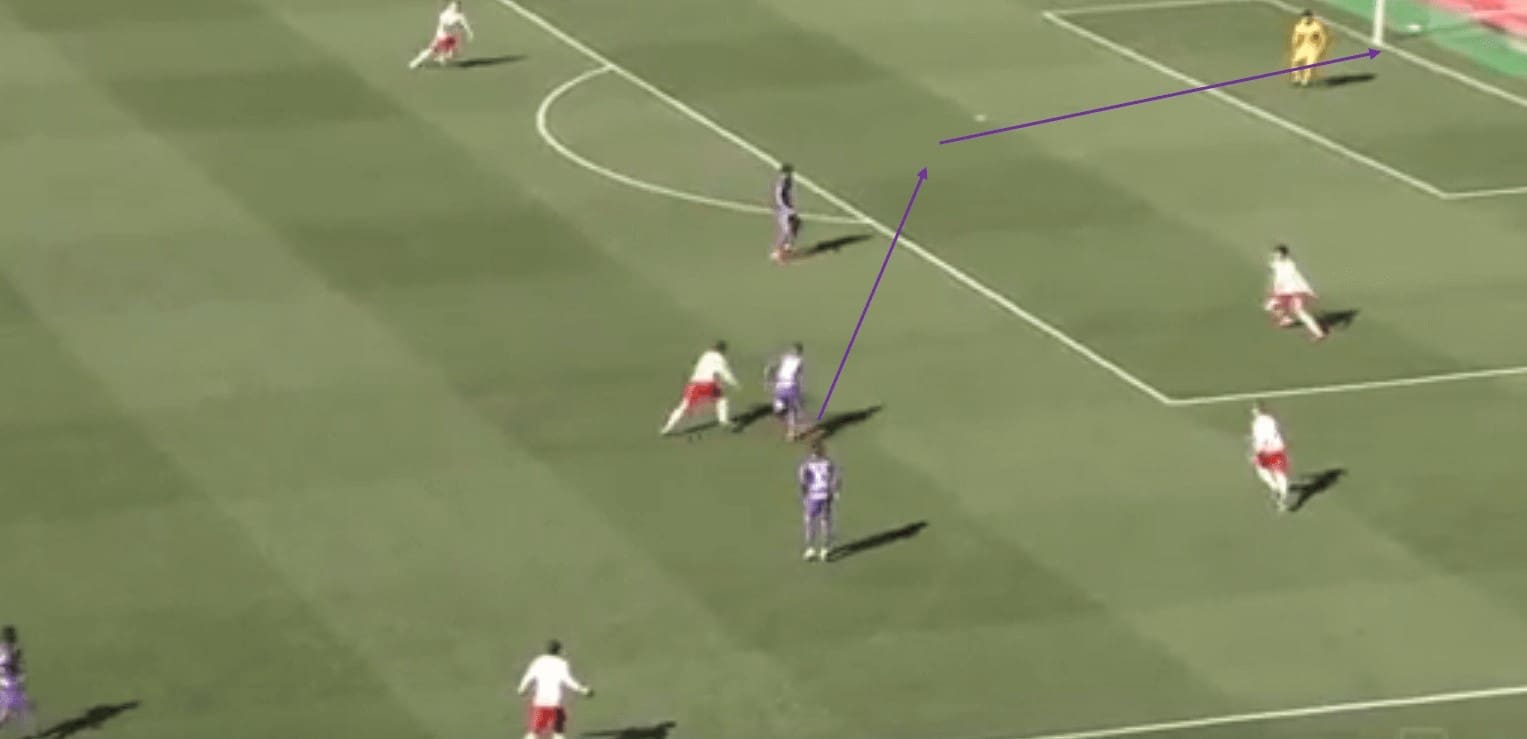
Here, the result can be seen after the press has paid off. Pereira plays the role that was usually performed by Vieira to perfection and seizes possession of the ball. With Vieira having recognised where he needs to be positioned should the press be successful; he is left in open space between the two centre-backs. A through ball from Pereira later and Vieira is able to slide a first-time finish into the bottom left corner. This press of the front three and their ability to be fluid in the role they are performing will make the front three deadly over the 2020 season.
The narrow front three when in possession
What was a prominent feature during the game against Kashima Antlers was the home side’s out-of-possession shape – having boasted only 33% possession. However, the front three took a completely different approach when in possession. While without the ball the front three would be wide and make the pitch big, to be ready to press any defensive player who would receive possession. However, when in possession they would remain compact, with the two wingers giving very little width – that was left to the wide midfielders.
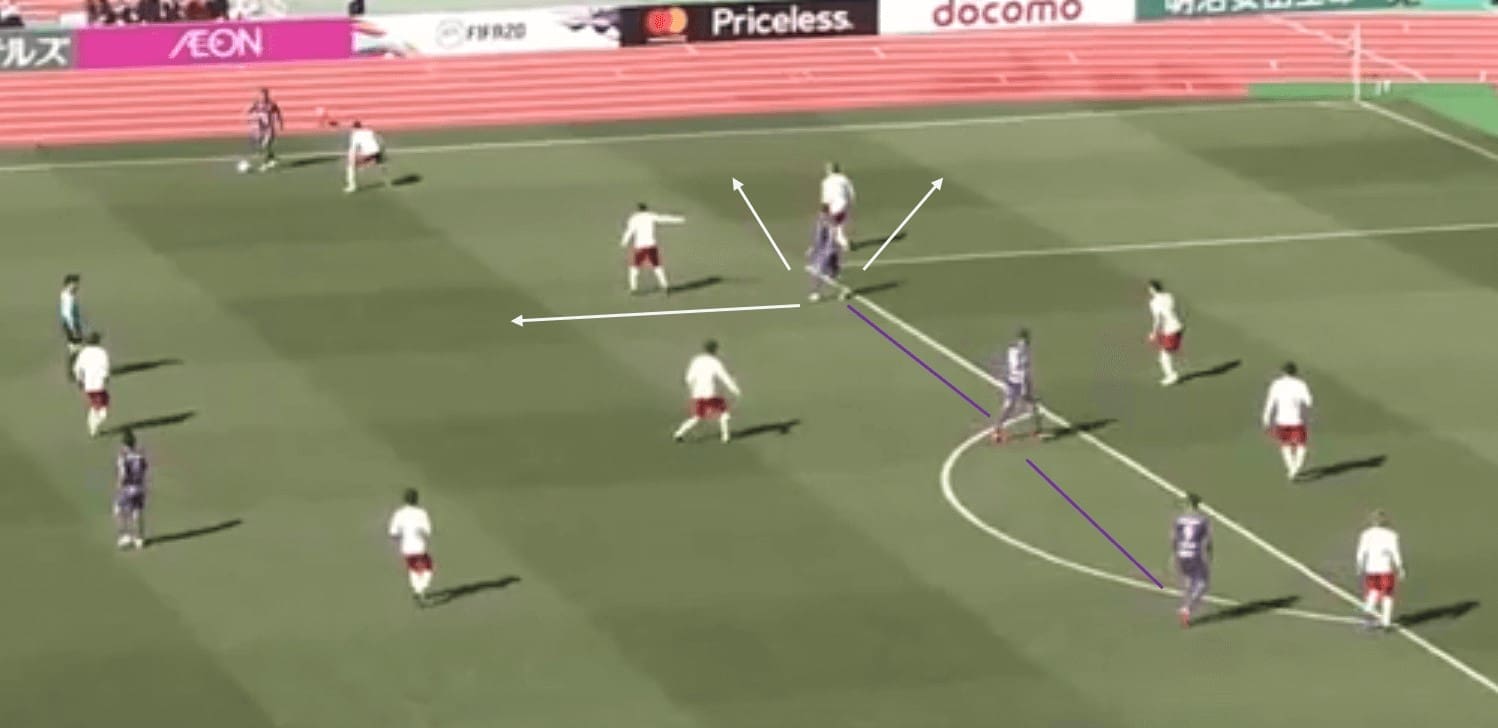
As can be seen here, with Sanfre in possession, Yoshifumi Kashiwa is wide with the ball, however, the front three remain compact. Morishima could make any of the runs marked by the white arrows to provide a better passing option and create width, however, he does not. The left-winger remained central and compact, close to the striker and right-winger on the opposite side.
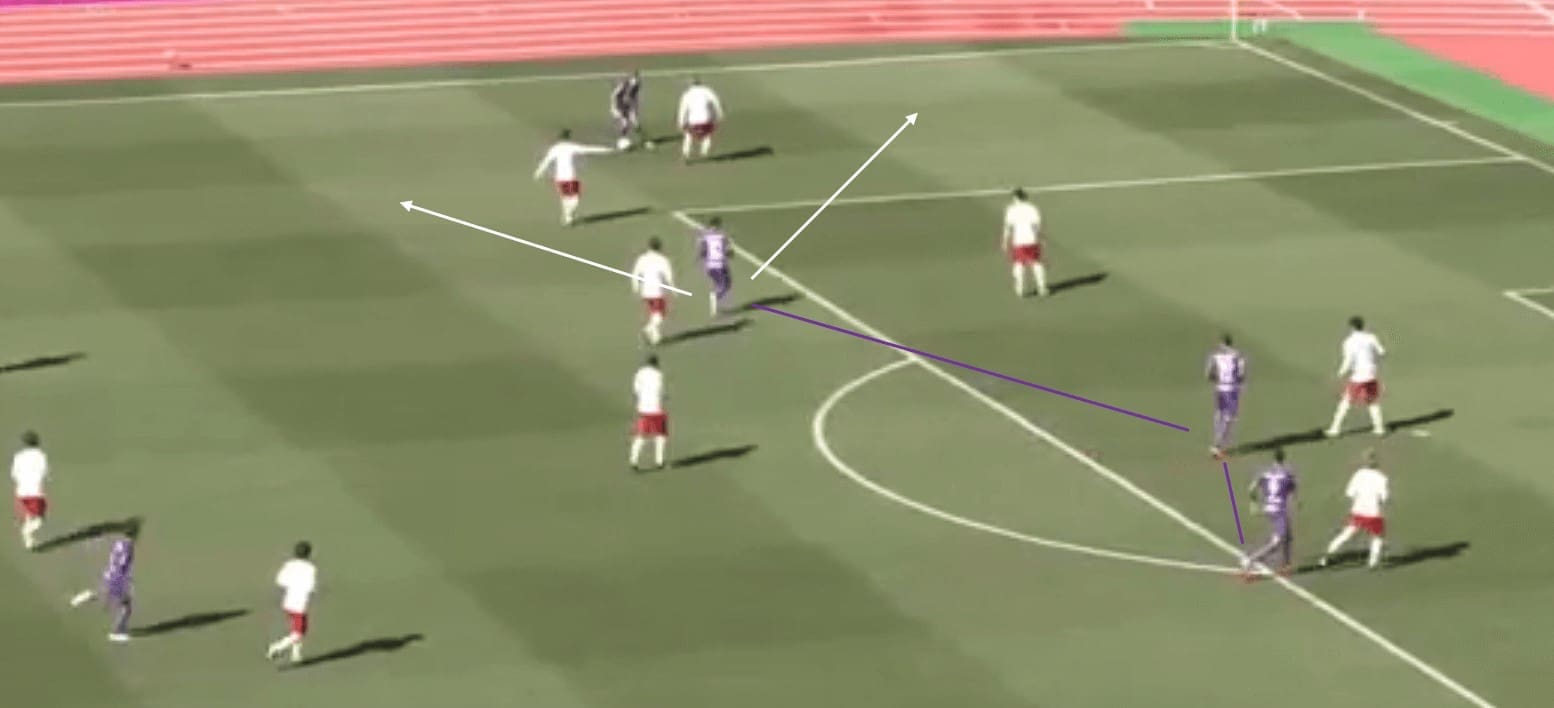
Here, a similar pattern of play can be seen. Morishima could follow either of the white arrows, but he does not and instead opts to move further inside, closer to the Pereira. This was to help the three interlink their play, which often saw the left and right-winger play off Pereira and ultimately led to the Brazilian striker assisting a goal for both Morishima and Vieira, whilst also bagging one himself. This chemistry amongst the Sanfrecce front three will again stand them in good stead for the 2020 season.
A compact back five when OOP
When out of possession, similar to many other teams who implement a three-back formation, Sanfrecce derived solidarity at the back by transitioning into a five-back formation. This transition from the home side in their opening game of the season was slick and a key feature in them maintaining a clean sheet against Kashima Antlers.
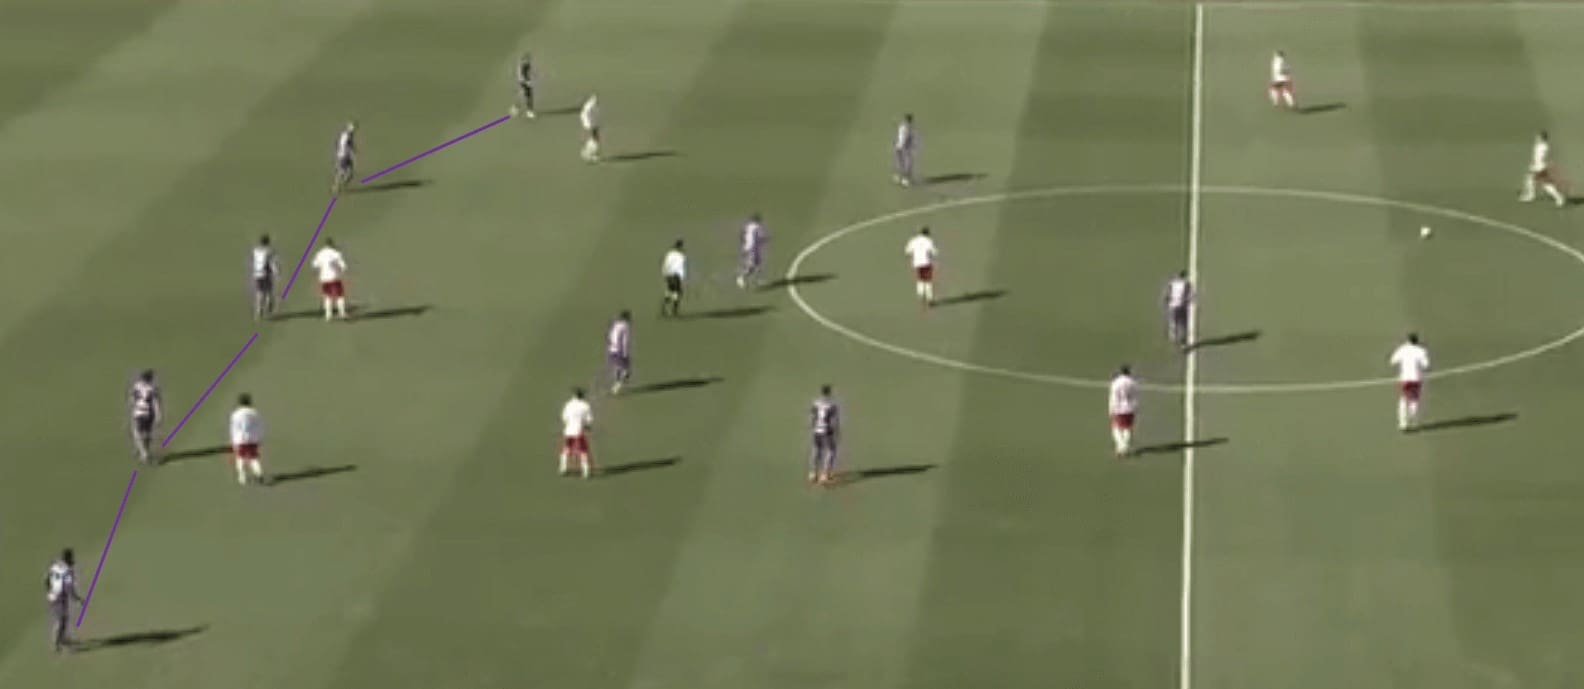
As can be seen above, the two wide midfielders – Kashiwa and Rhayner – dropped into the defensive line when out of possession which made life difficult for Kashima Antlers’ attack. While the home side had five fewer shots at goal than their opponents, they had three more shots on target as this back five limited the away side in the quality of their chances, with Kashima Antlers only having three shots on target by the full-time whistle.
Having used the 3-4-2-1 formation over the duration of the 2019 J1 League season, it seems likely that the defence and midfield of Sanfre, which has remained largely unchanged since last season, will be well-drilled in the use of this tactic. The out of possession shape will likely be a key feature for Jofuku’s side over the season and help them maintain a consistent level of solidarity.
The midfield double pivot
Finally, another key area of Sanfrecce Hiroshima’s tactics, this time in the midfield, is the use of a double pivot with the central two midfielders by Hiroshi Yofuku. This saw the two centre-midfielders on the day – Hayao Kawabe and Toshihiro Aoyama – alternate which would perform the pivot role in a given situation, with both reacting in sync to the requirement of the phase of play.
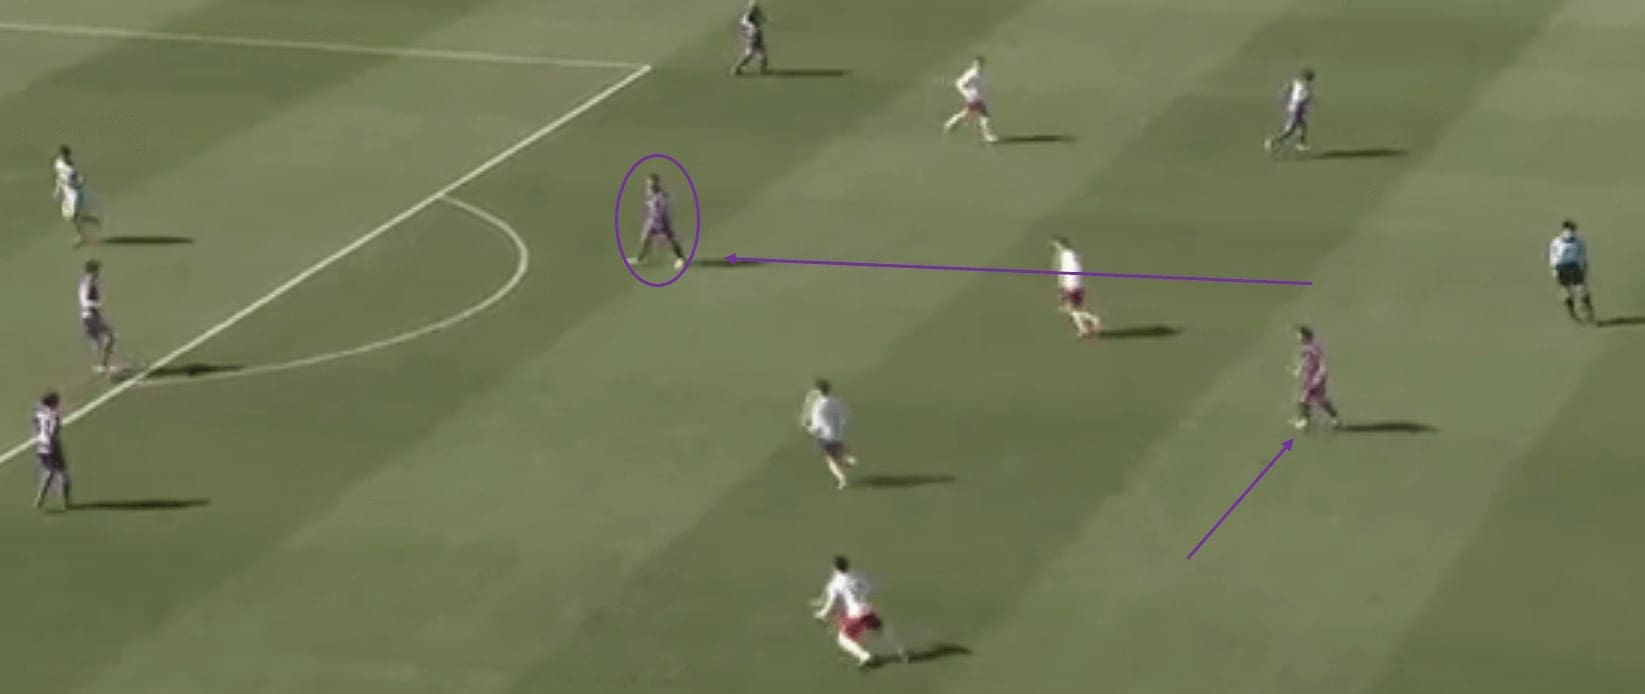
As can be seen in this annotation, Aoyama, on the left side of the two centre-midfielders, is performing the pivot role in this situation. He has dropped deep to support the defence and pick up possession of the ball. This is done by a pivot to help link the defence to the midfield and the attack more smoothly. In response to Aoyoama dropping deep, Kawabe has shifted across to a more central position to cover the gap left by Aoyama.
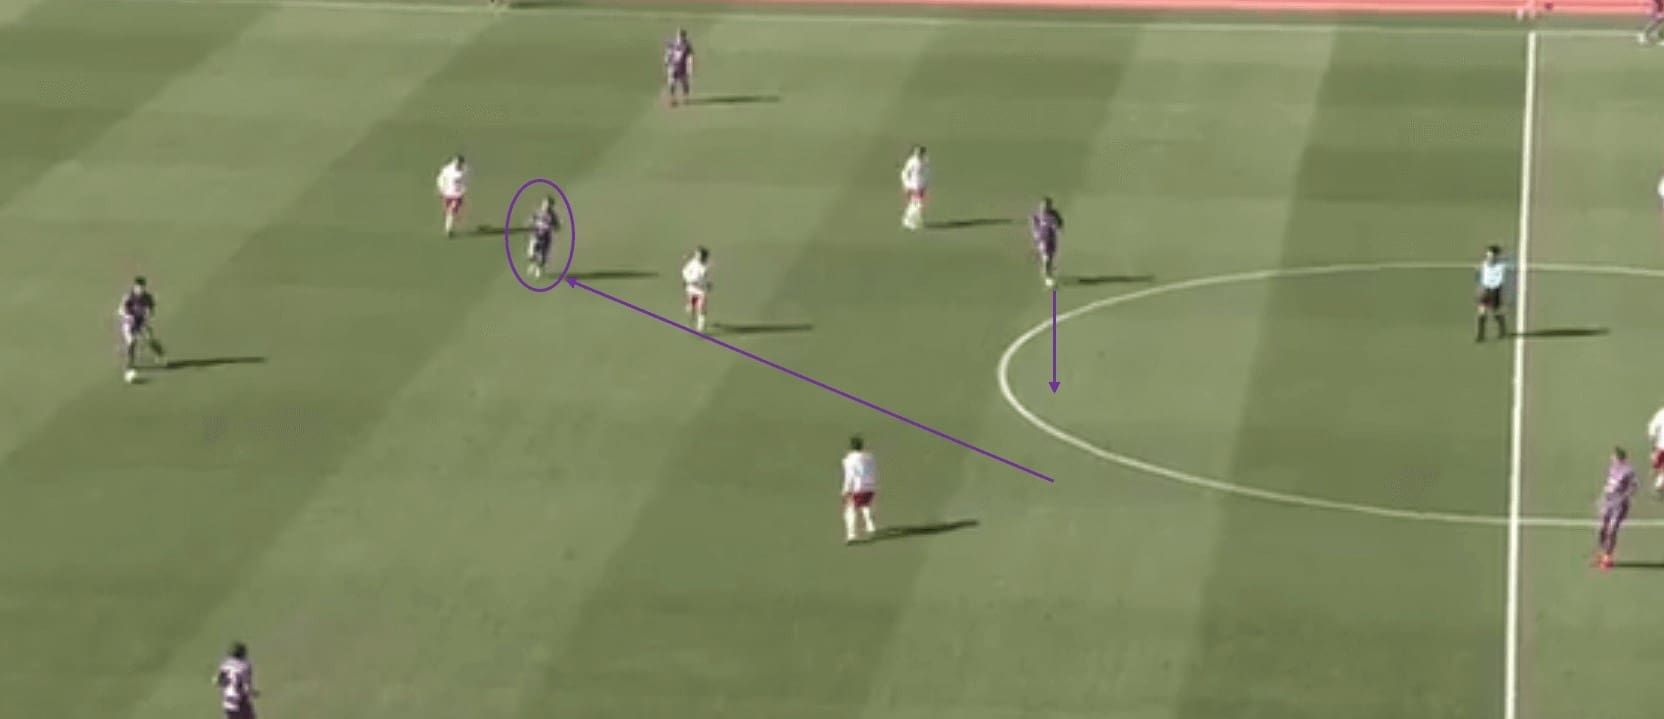
Here, the same pattern to Sanfrecce’s play can be seen, however, it is a mirrored image. In this situation, Kawabe has dropped deeper to perform the pivot role and link the defence to the midfield and attack, and Aoyama is shifting into a more central position to cover the middle of the pitch. This fluidity between the two midfielders and their ability to work in unison will again be a key feature if Sanfrecce Hiroshima are to enjoy a successful season.
Conclusion
In their first game of the season, Sanfrecce Hiroshima could not have had a much better start after a 3-0 victory saw them go top of the J1 League table. The side was slick and well-versed, which allowed them to enjoy a spotless and positive result without boasting the best of the stats.
Jofuku’s side finished sixth in the J1 League last season and it seems likely that the Japanese gaffer will be targeting a higher finish this time around. Based on what the side put on show in their first game of the season, that could be entirely possible.
Although he arrived from one of last season’s relegated sides, Leandro Pereira could have been an inspired loan signing after he picked up two assists and a goal in his first league appearance for Sanfre. The Brazilian forward seems like he will play a pivotal role for the Hiroshima side over the 2020 season.
This scout report has highlighted key tactics used by Sanfrecce Hiroshima in their opening game of the 2020 J1 League season, whilst using the analysis to show how those tactics could be deployed over the remainder of the season.


Comments