Sydney FC currently occupy fifth position in the A-League, having accumulated 34 points from 22 matches, trailing by four points behind the third-placed Melbourne Victory FC, who have garnered 38 points from 23 matches, indicating an additional match played.
Defensively, the team’s statistics are relatively average, having conceded 34 goals, positioning them fifth in terms of best defensive lines in the league, with an average of 1.55 goals conceded per match, knowing that they have managed to keep clean sheets in only two matches.
On the offensive front, we observe a complete contrast as they are deemed the strongest attacking line in the league, having scored 41 goals at an average of 1.86 goals per match. Upon investigating the reasons behind this dominance, it was found that one of the contributing factors is their superiority in set-pieces and corner kicks, in particular. They currently lead the league in terms of goals scored from corner kicks, tallying eight goals, indicating that offensive corners account for approximately 20% of their goals.
In this tactical analysis, we will elucidate the tactics of their proficiency in offensive corner kicks and their superiority over opponents with seemingly simple yet effective ideas. We will focus our efforts on studying how they utilise floated crosses, which constitute the primary concept behind most of their goals, outlining various execution methods and also integrating them with other ideas to form an effective and comprehensive routine.
Targeting a free player from marking
Ufuk Talay’s side are very good at using floated crosses, as we have mentioned above, but we will start with the reasons behind preferring this strategy. First, we will mention the general benefits of this strategy, and then, we will illustrate them one by one using examples.
Defending teams that use a hybrid or zonal defending systems usually defend the most valuable areas with many zonal defenders. Hence, the area around the six-yard becomes crowded while the far areas are left unprotected because if the opponent gets the ball there, it won’t be a dangerous chance from such a far distance. In contrast, Sydney FC knows that it is difficult to threaten the goal directly, but what about exploiting that to get the first touch in far areas, making it another starting point for the routine of implementing ideas to exploit that?
Using floated crosses is an excellent method to achieve that purpose by increasing the opportunity of getting the first touch because it gives the attacking team many advantages over the defending team. First, it gives the best player of the attacking team at aerial duels the chance to start far away from the targeted area, exploiting that the ball takes a long time on the air, which is also an opportunity for him to show his skills at measuring the ball on the air predicting the landing point while showing his physical skills to push any defender tries to block him exploiting also that he comes from a movement which is a dynamic mismatch over any marker tries to wait for him more inside.
It also gives him an opportunity to escape from the man marker who decides to go out and mark him from the beginning because it is difficult to track him and the ball all that time and distance. The marker faces a problem of orientation, which makes it a good way also against man-marking defending systems. All of that makes it easier to get the first touch.
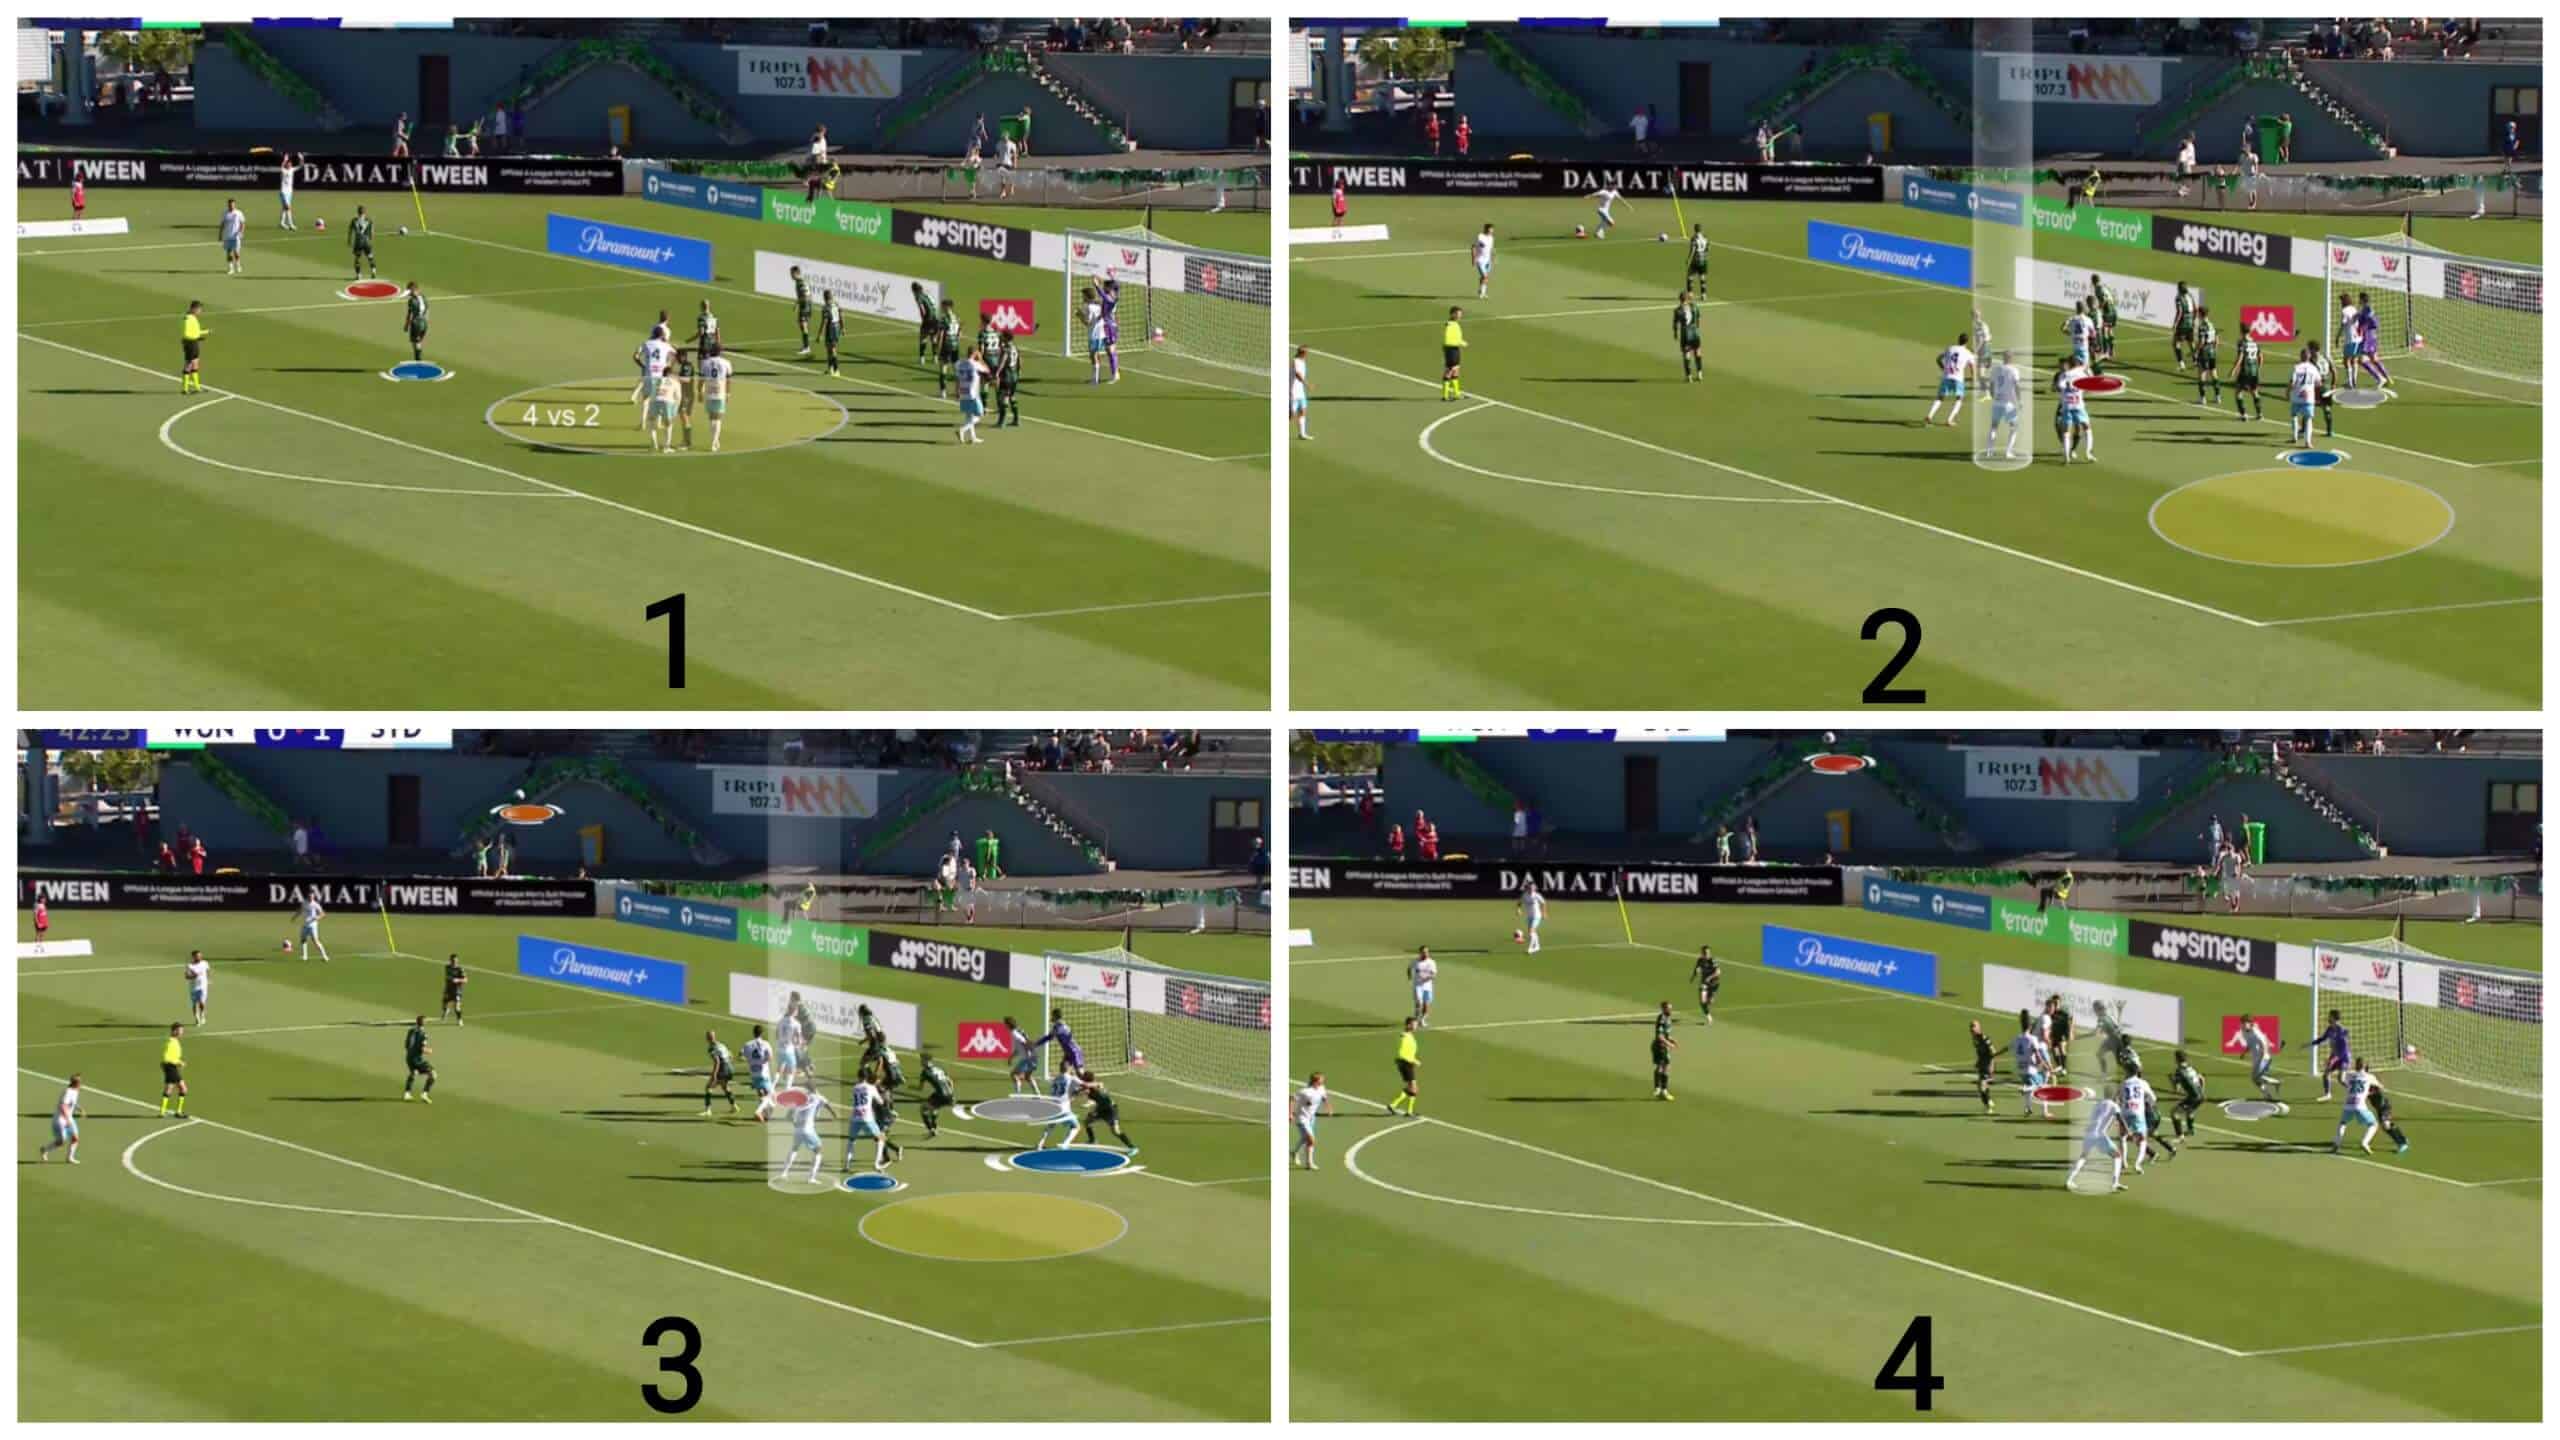
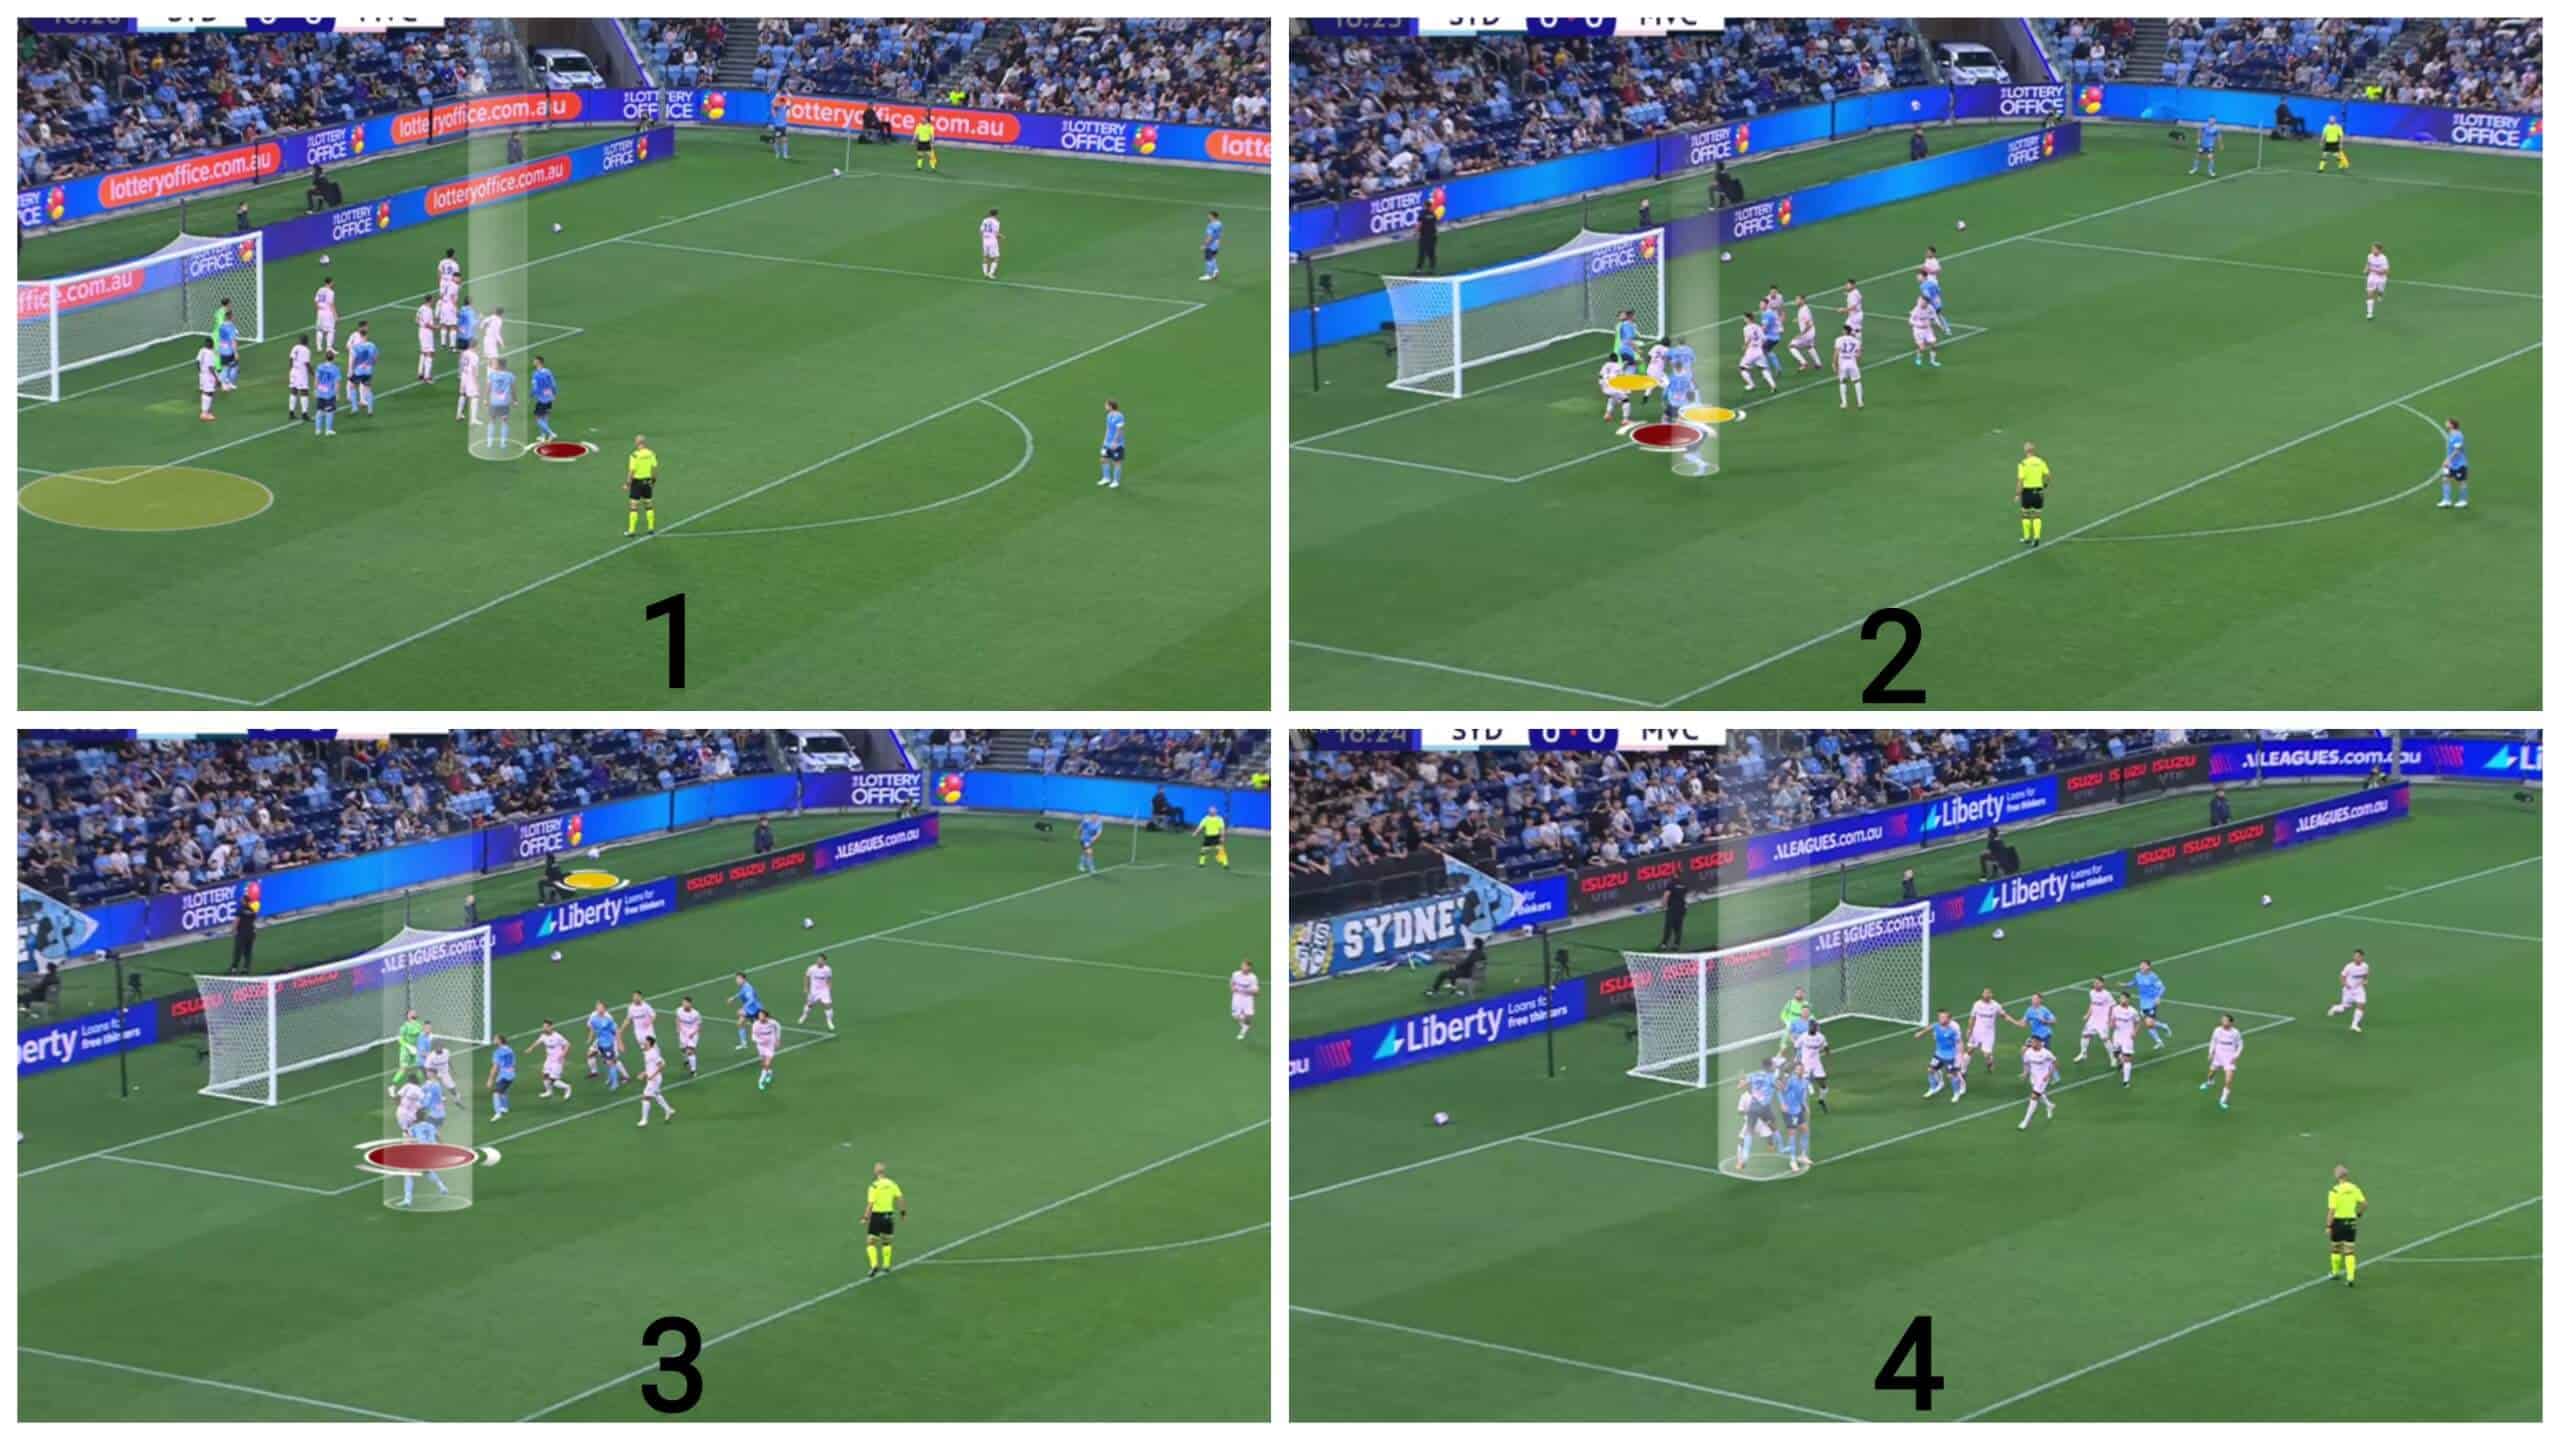
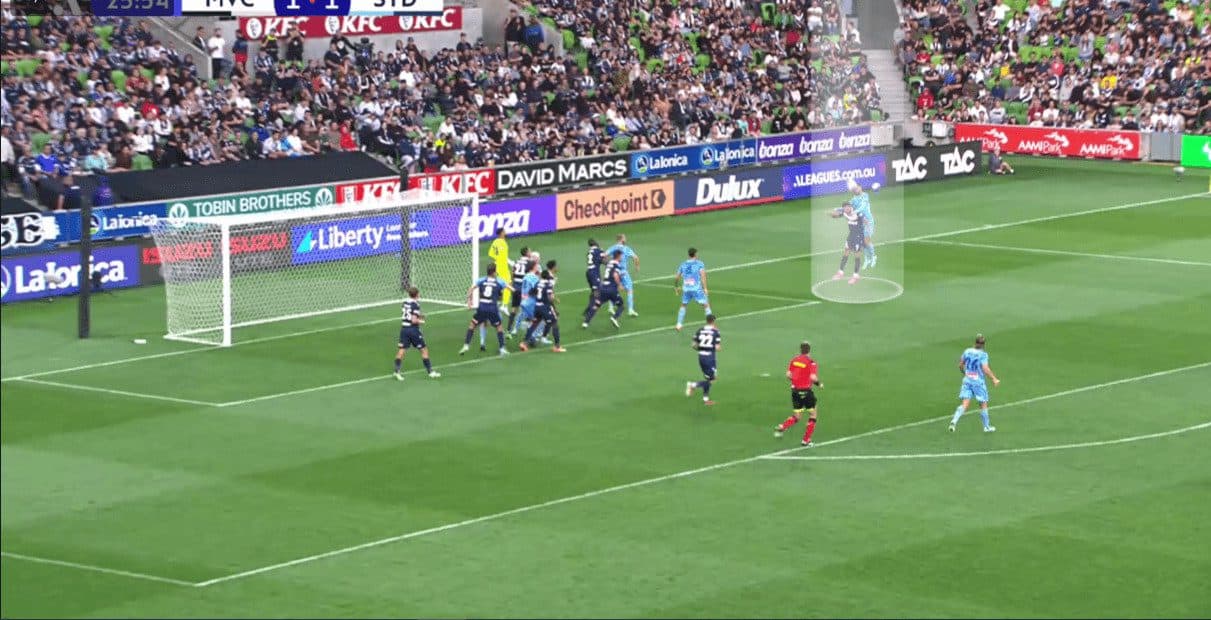
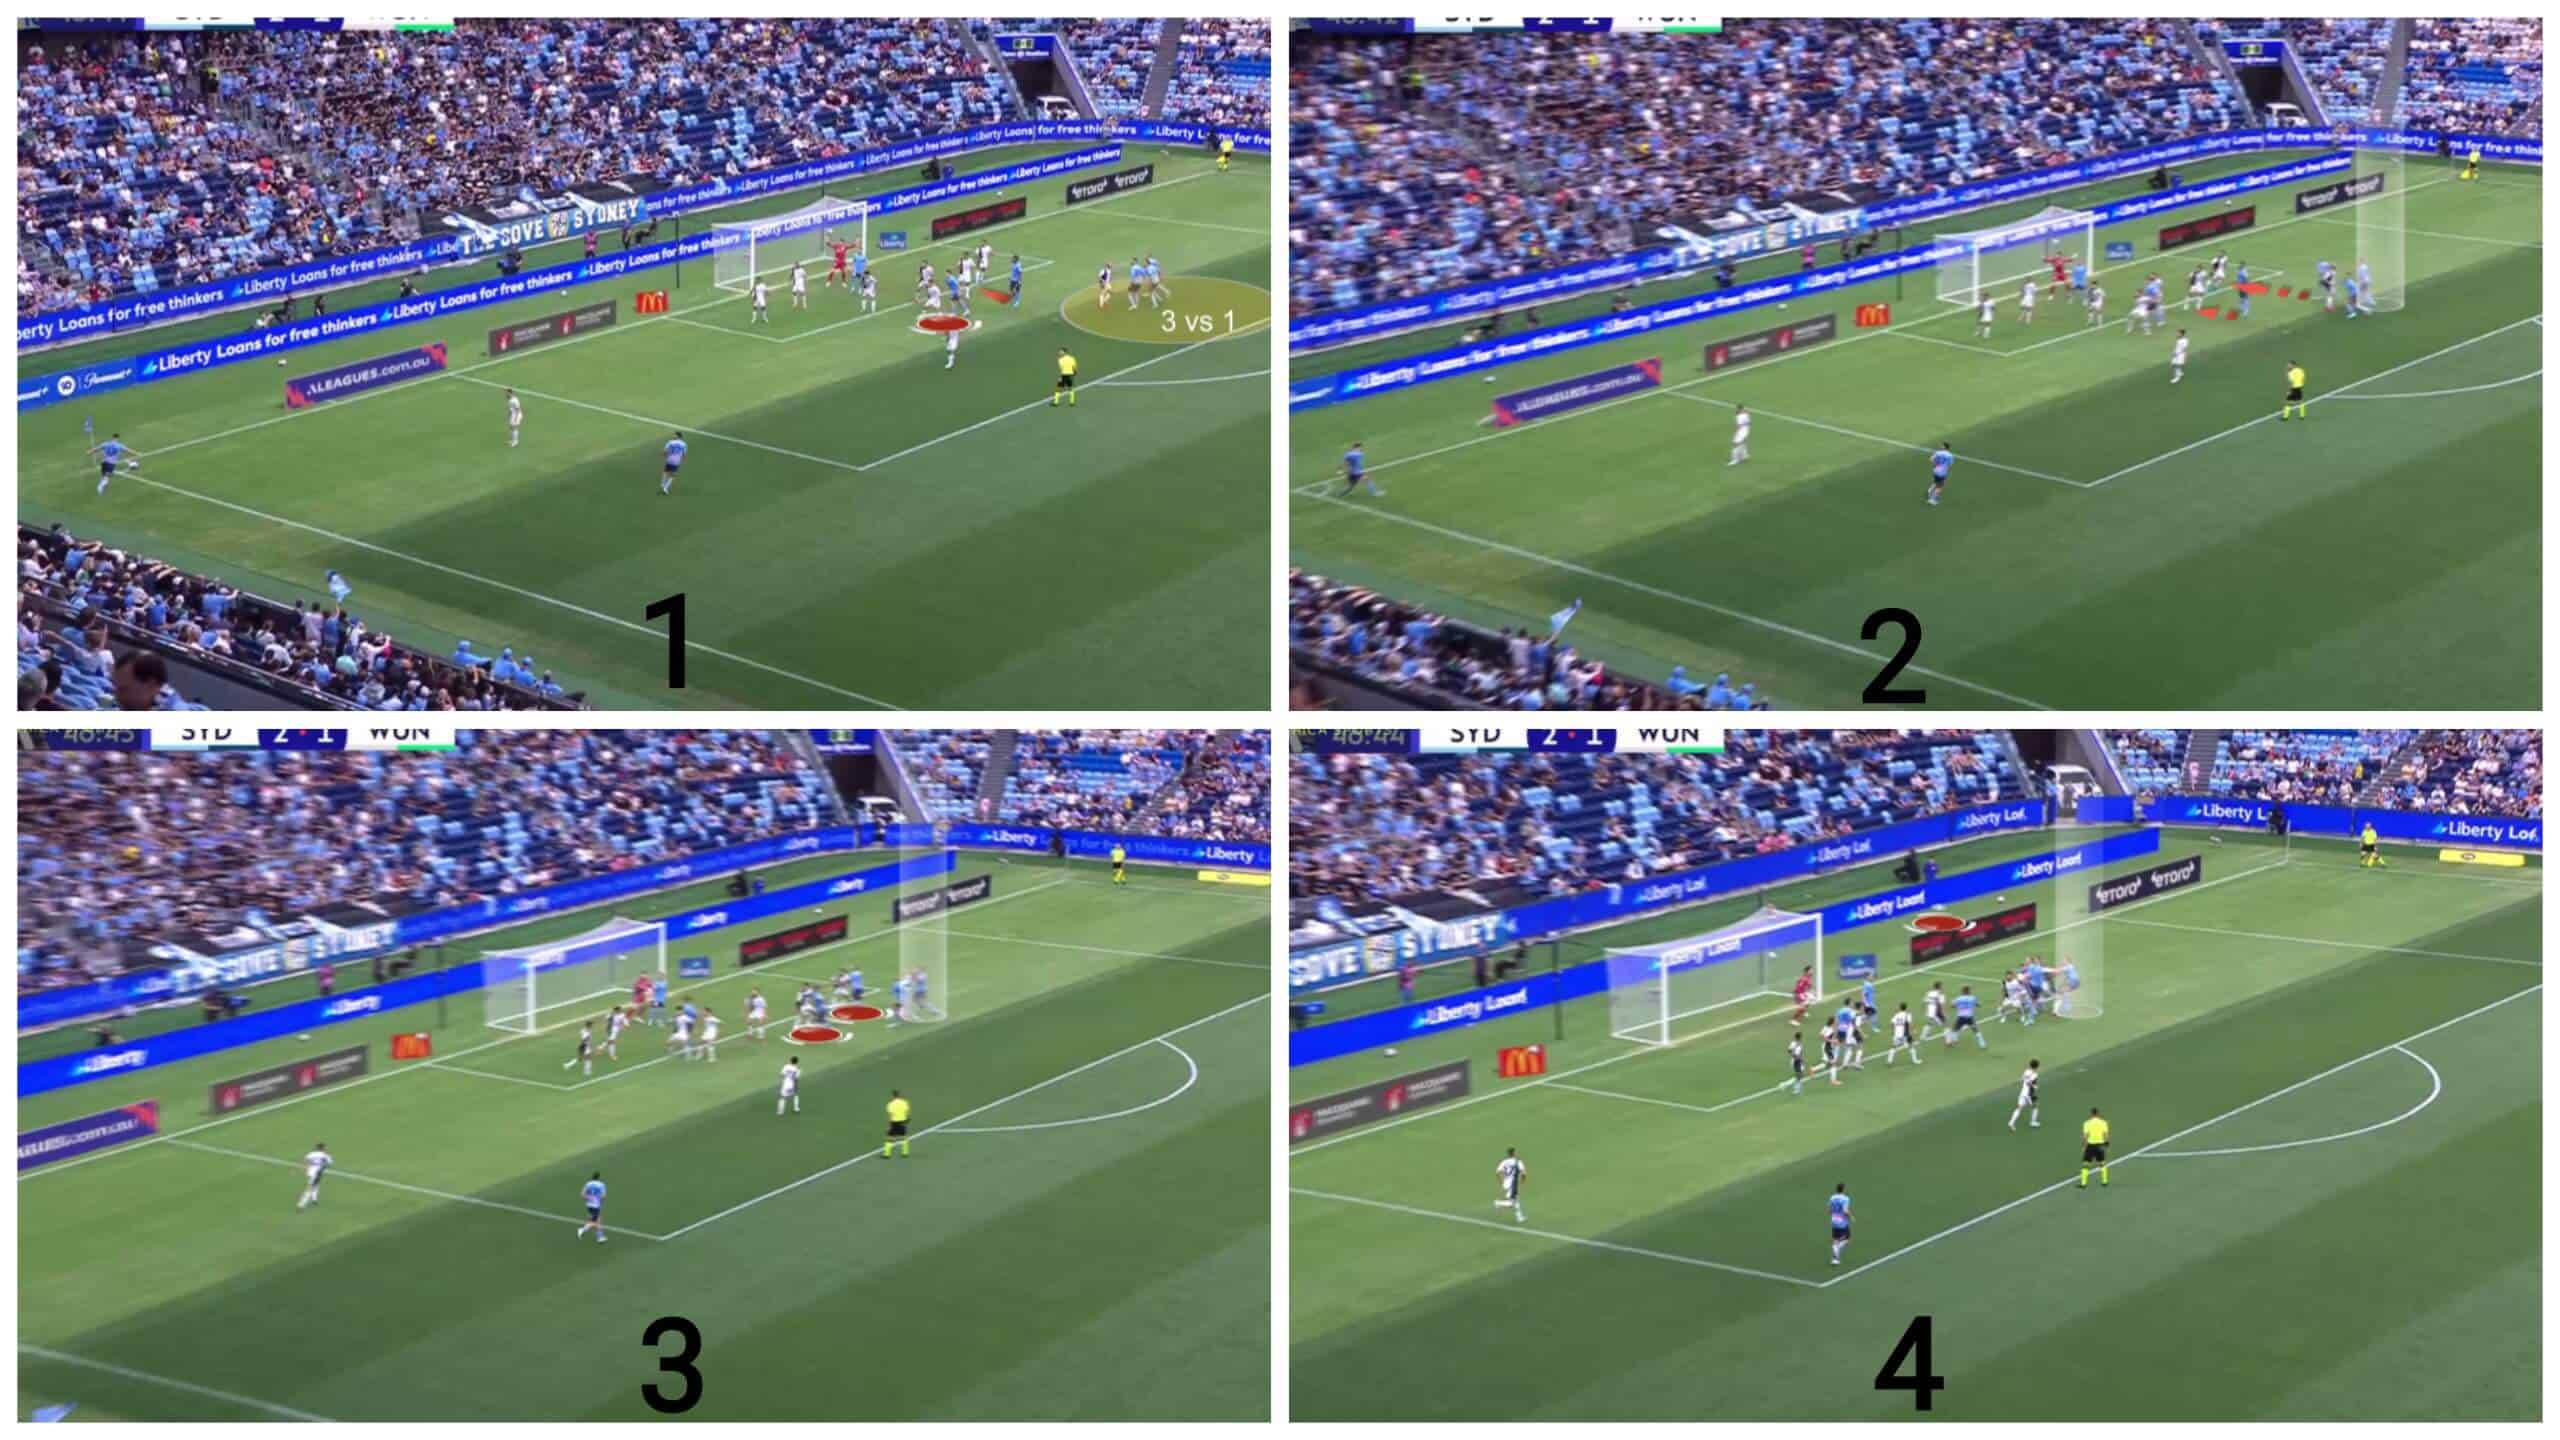
In the first photo below, the opponent defends with a hybrid system involving six zonal defenders around the six-yard line, two man markers, a short-option defender, and a rebound defender. We see the first way they use this system, which is overloading the area around the penalty spot, making it a 4-v-2 situation against man markers there. This leaves the other two attackers, one with the goalkeeper while the other stands with the last zonal defender.
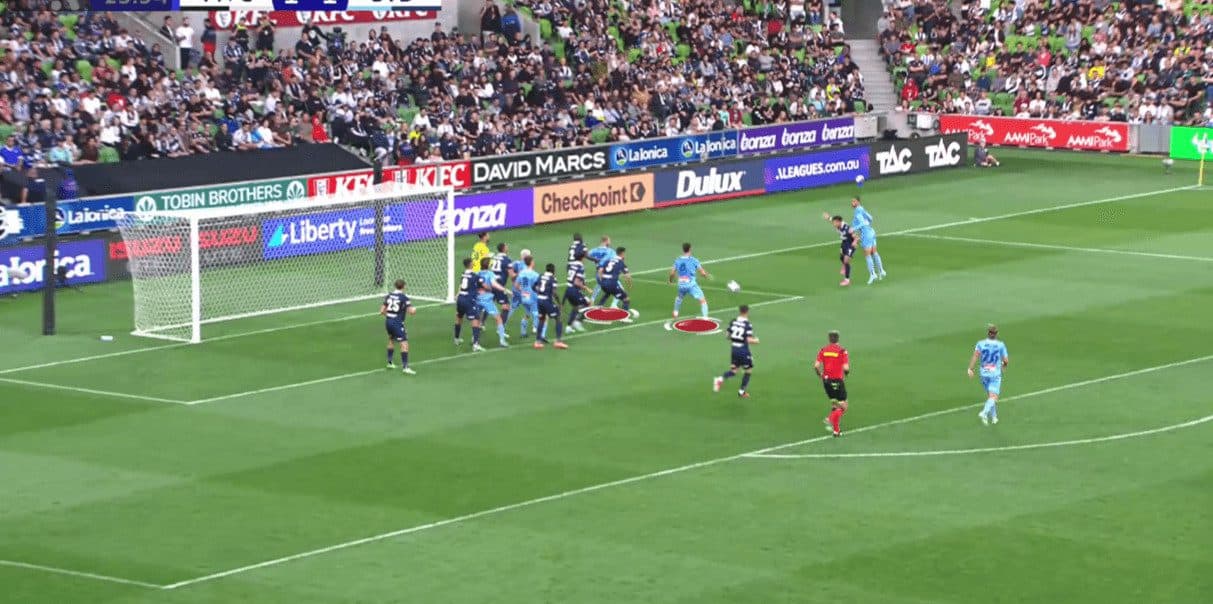
In the second photo below, the targeted player starts a bit late away from the two man markers, who go with two attackers, targeting a far area, shown by a circle. The fourth attacker, in red, goes to the near post to receive the headed pass, as we will explain below. The other two attackers’ job is to block the goalkeeper and the last zonal defender because the goalkeeper may decide to go out to claim the ball, and the last zonal defender may go out to the targeted area.
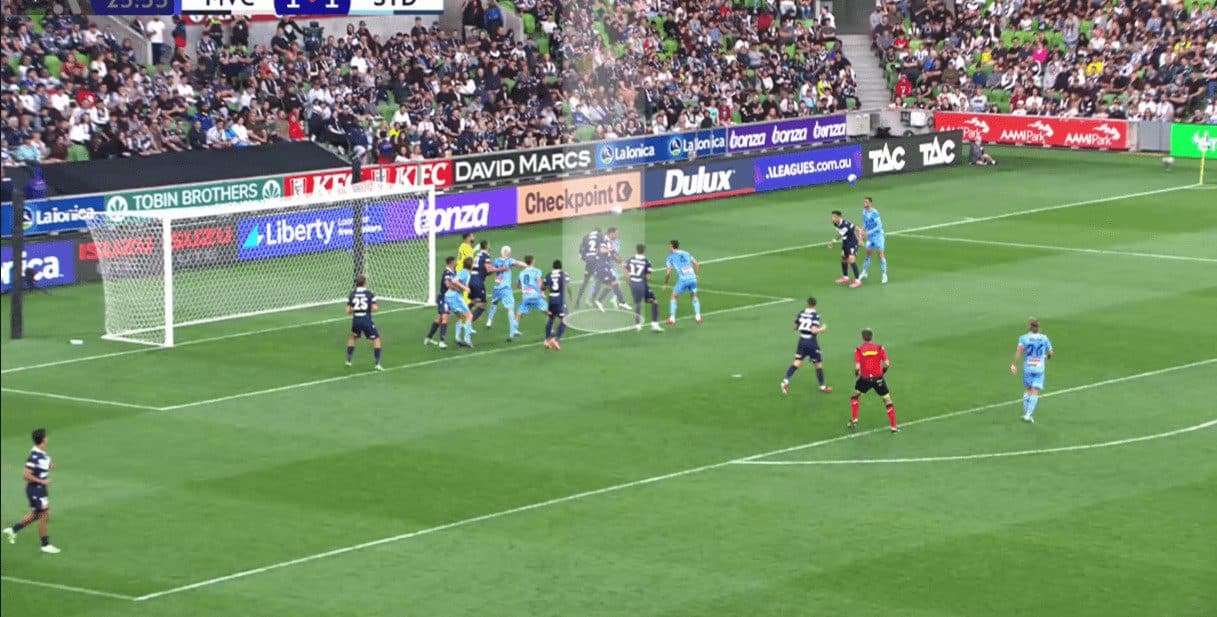
In the third photo, everything is done with the help of the height of the ball, in orange, which forces the defenders to raise their necks to track the ball, allowing the targeted player to escape to the targeted area, exploiting the time that the ball takes on the air. In the fourth photo, the attacker who blocked the goalkeeper leaves him when the ball gets nearer to join his red mate, waiting for the headed pass going a bit back, away from offside.
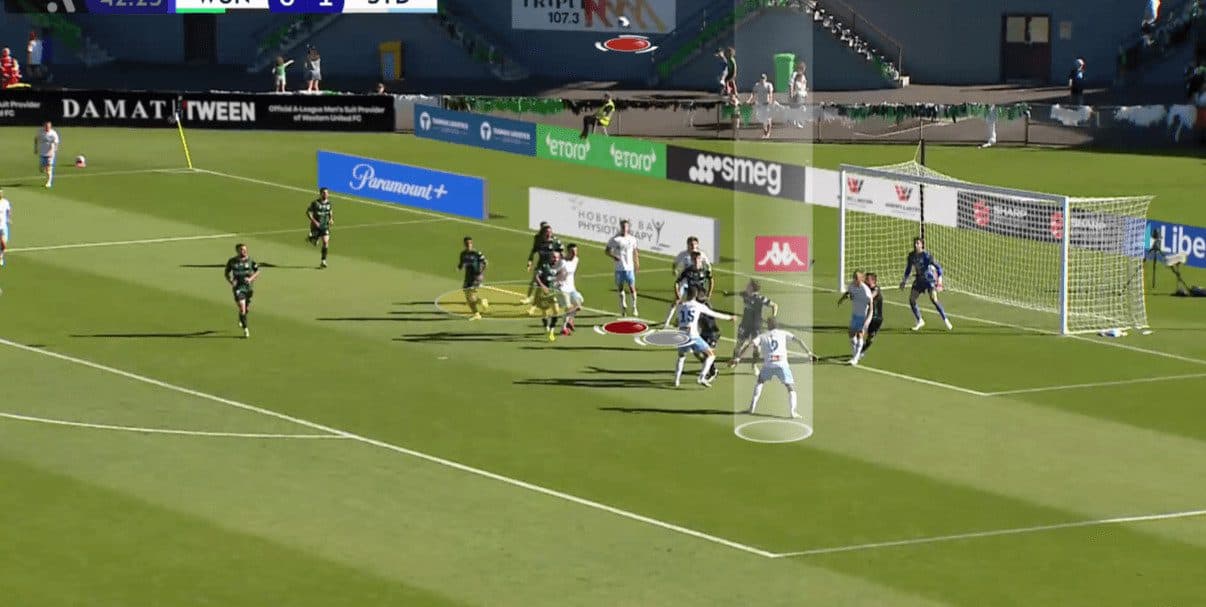
The other thing which helps in that situation is the unorganised going up from the defence line, so you see below the first three zonal defenders go up to implement the off-side trap, but they leave a gap between them and the other zonal defenders, as shown below. Here, we should mention that only high-level teams can reorganise themselves with an organised line without leaving gaps or a player covering the offside, so it is a good thing to be exploited when you face a defence like that who rushes to go up without organising. It is also a good job from the attacker on the right who blocks the last zonal defender, and this, maybe luckily, helps them more with their essential plan.
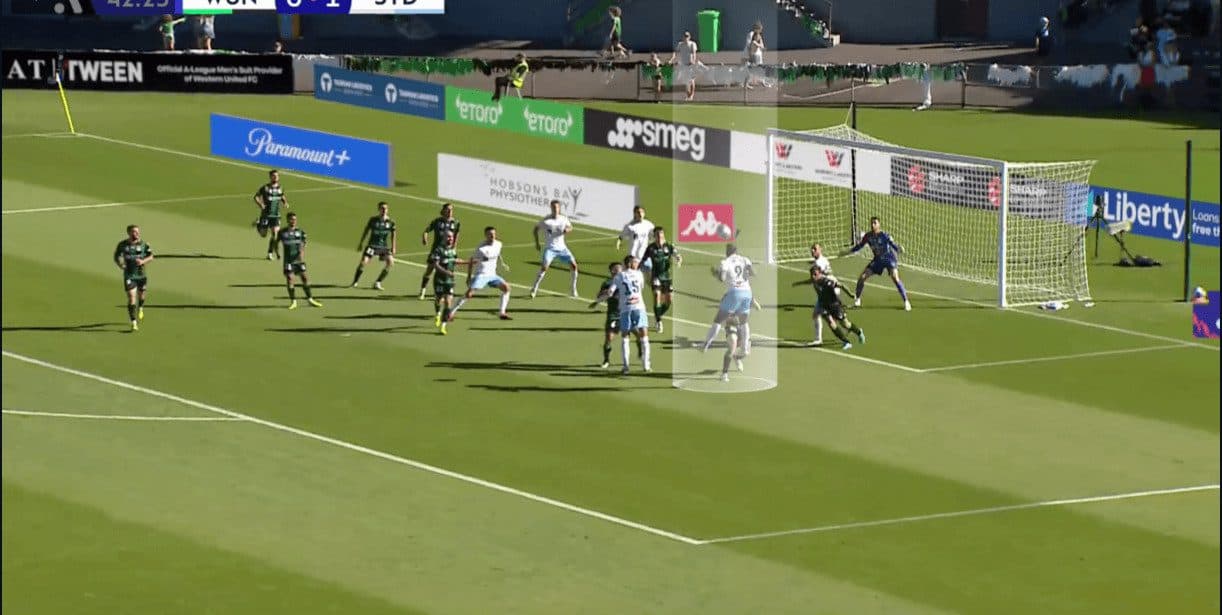
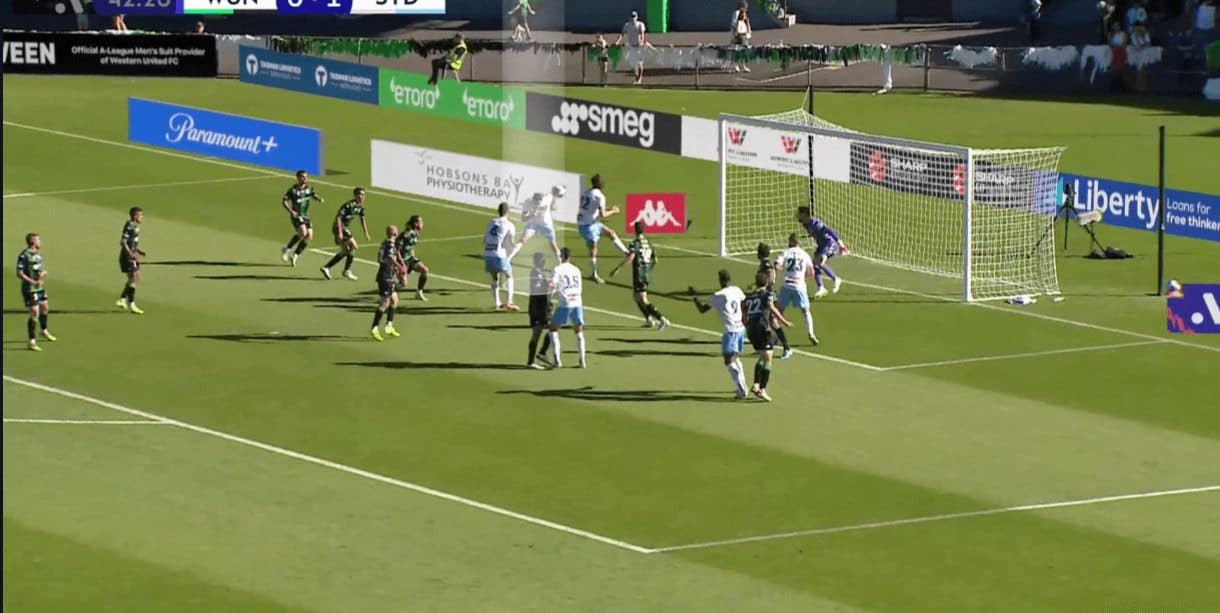
The plan works, and the result is a goal, as shown in the two photos below.
In the case below, they face an opponent who defends with a zonal system. They give priority to the area around the six-yard, so they ask the two attackers near the penalty spot in the first photo to go toward the targeted area; the white one is the targeted player, while the red one goes to block the last zonal defender. In the second photo, they are helped by two other yellow attackers; one blocks the goalkeeper, while the other blocks the second-last zonal defender.
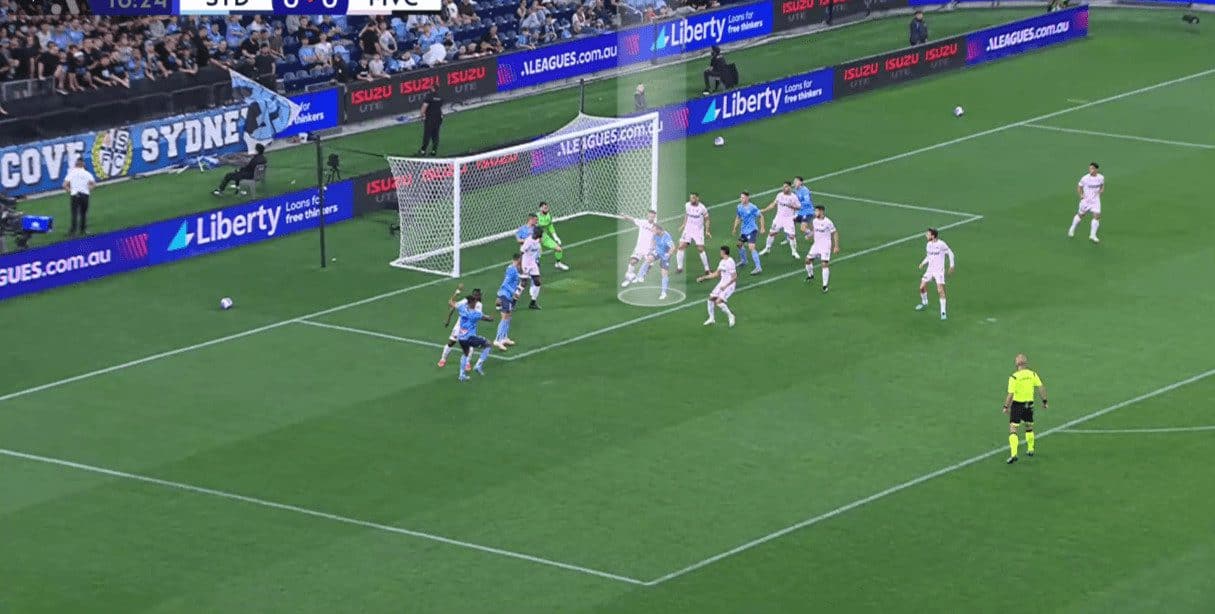
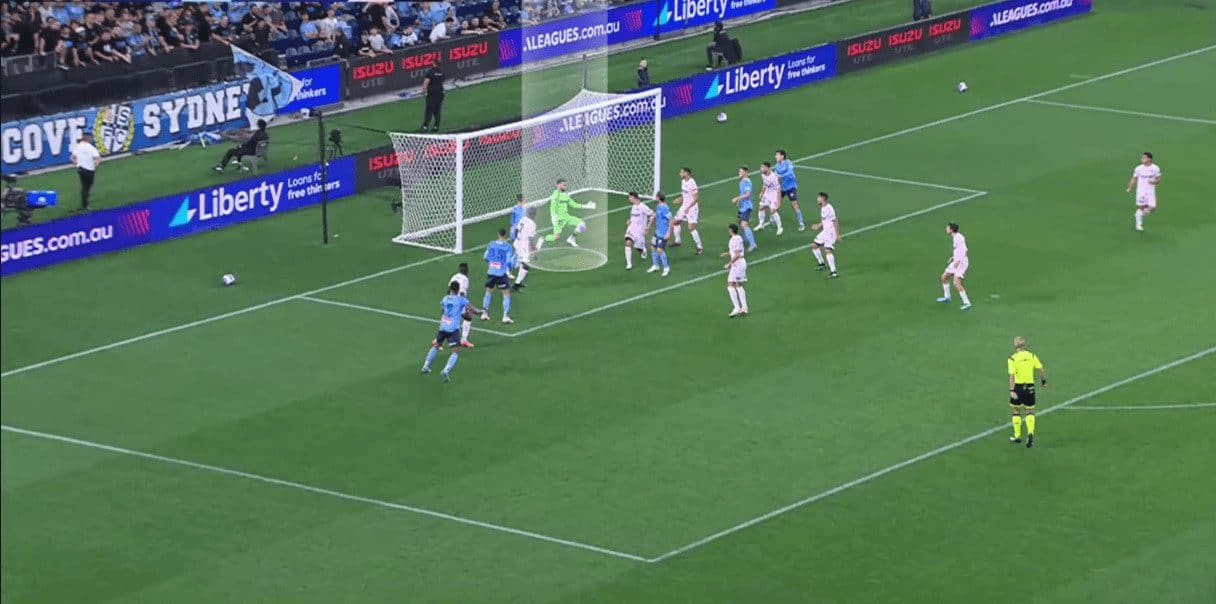
The plan works, and the targeted player gets the ball while three players frame the goal, waiting for the headed pass, as shown in the third and fourth photos.
The headed pass reaches the first attacker, who kicks it towards the goal, but the goalkeeper saves it, as shown in the two following photos.
Targeting a marked player
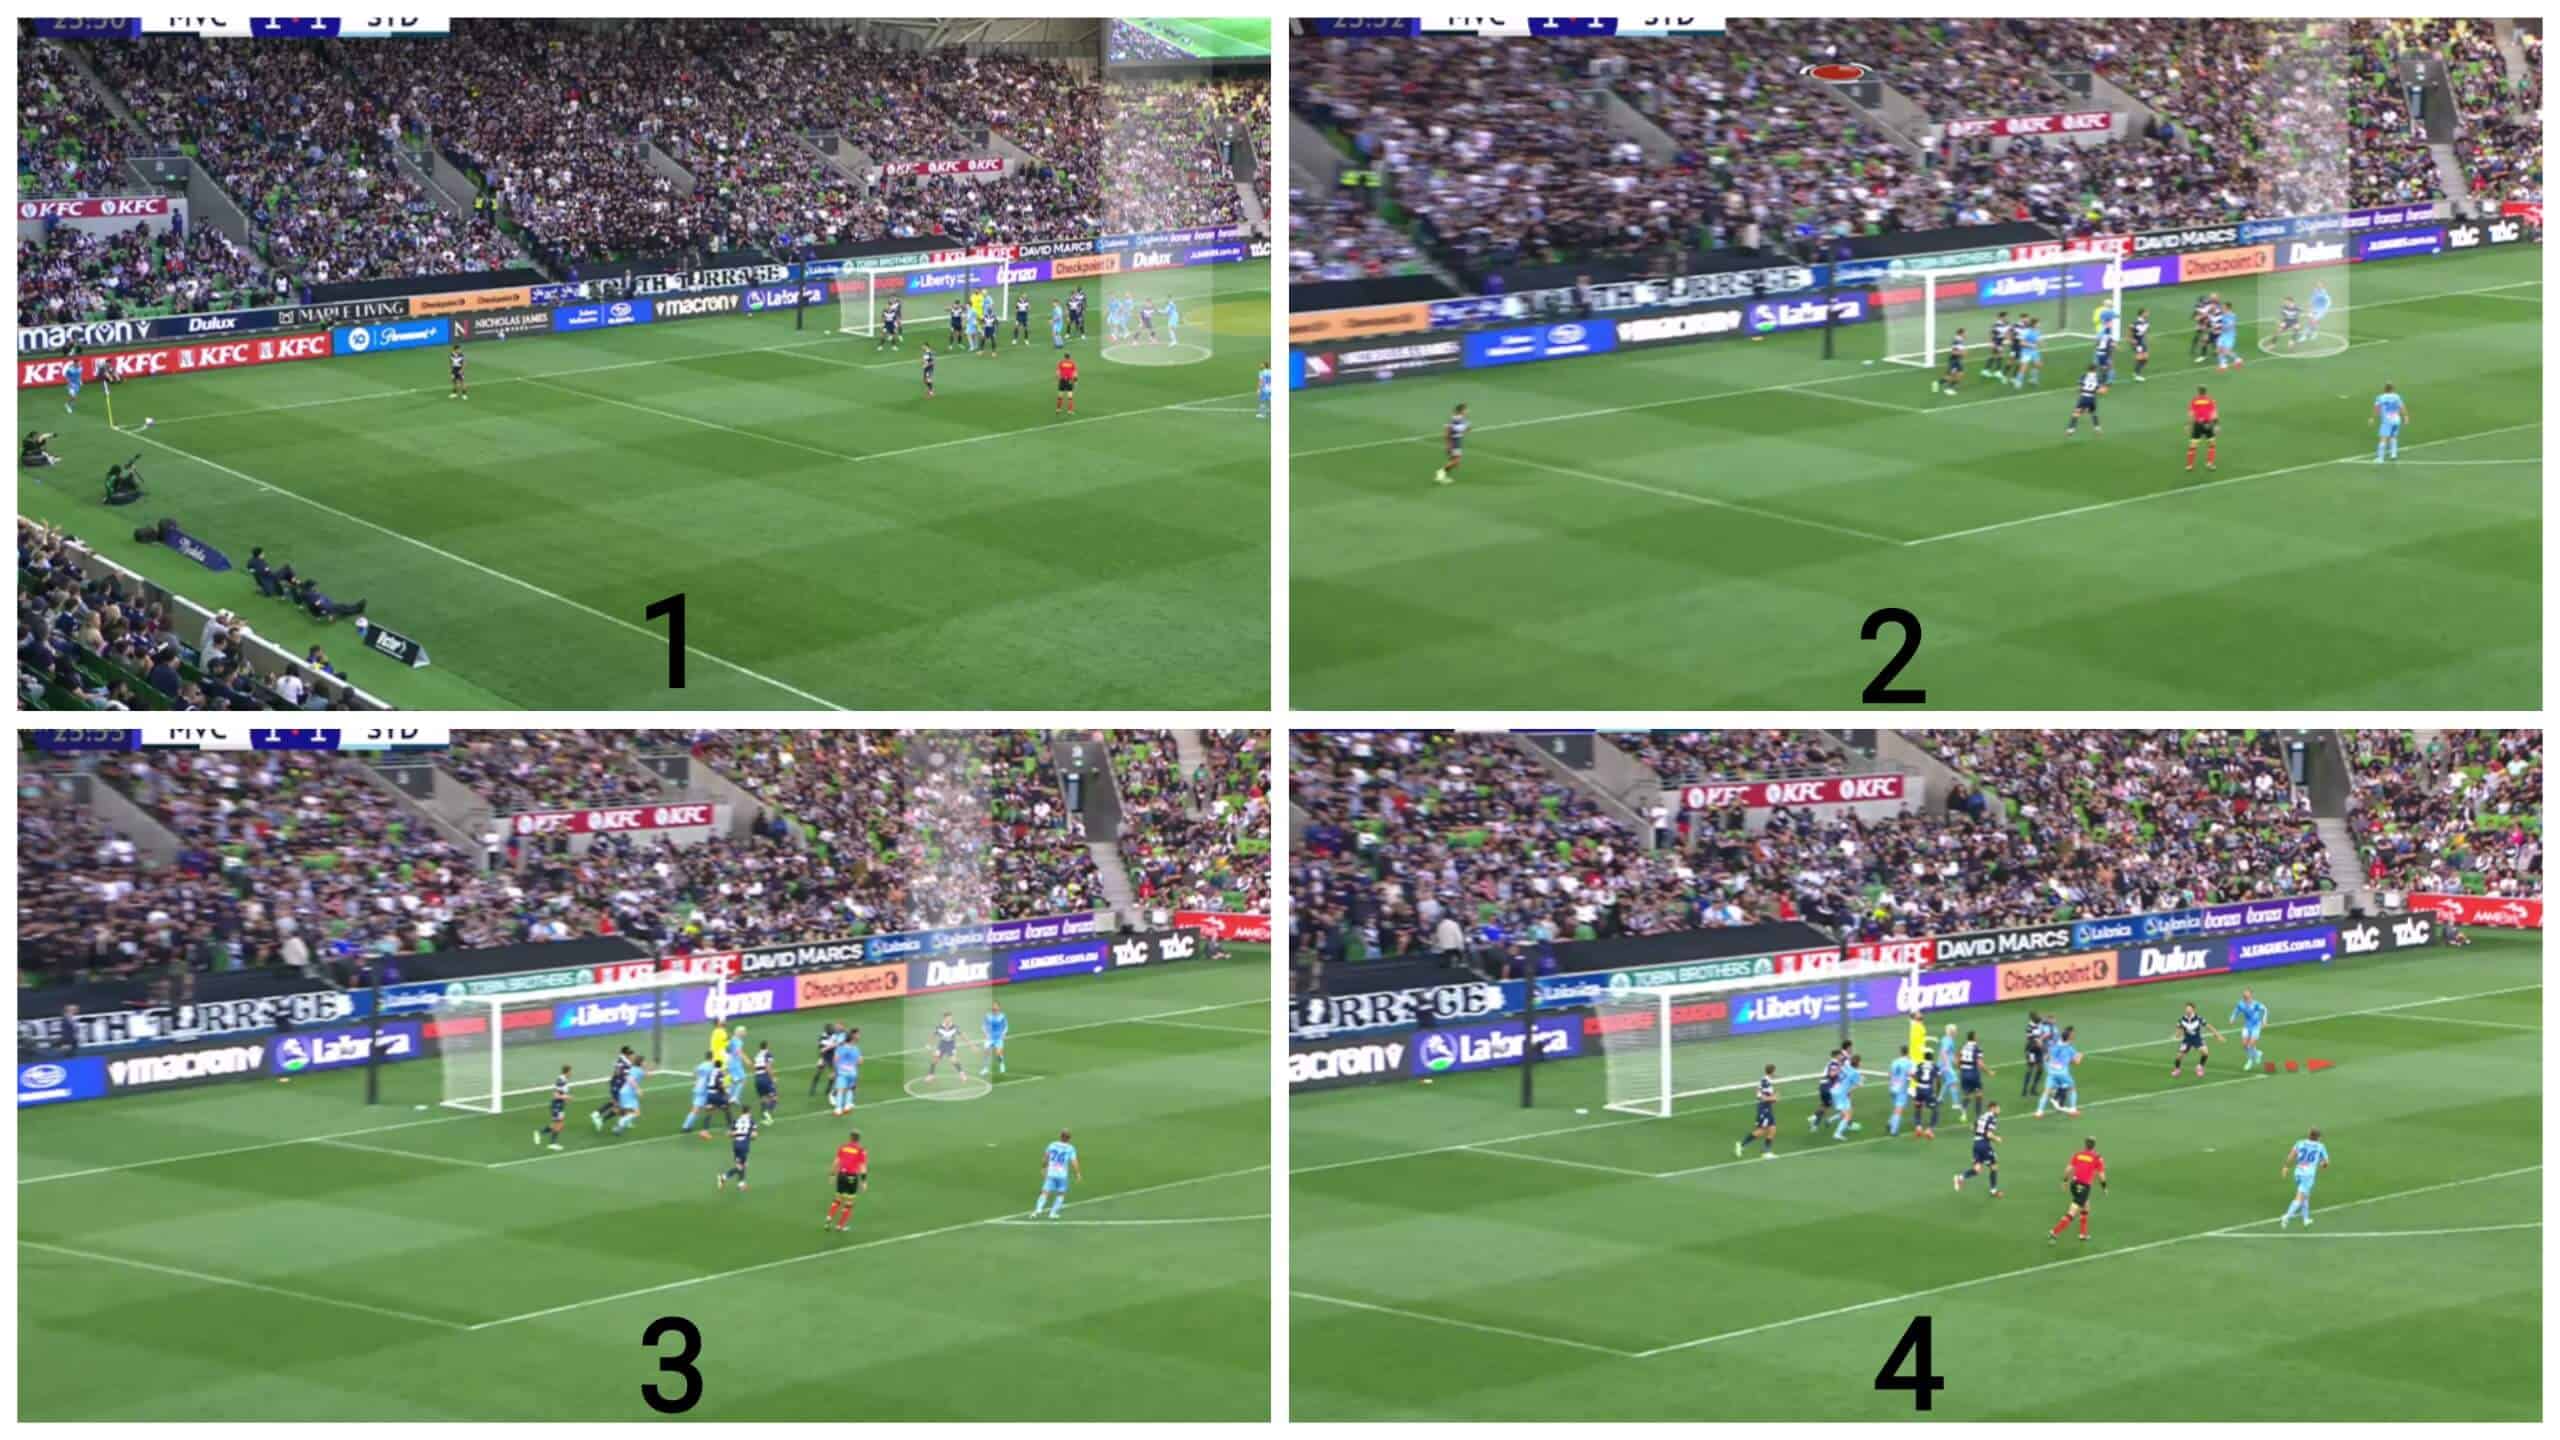
You may say that it worked because the targeted player wasn’t unmarked from the beginning, so the reply is in the case below, in which the targeted player is marked from the beginning, as shown in the first photo below.
In the second photo below, you find the ball, highlighted in red, on the air while the targeted player exploits that the defender finds it difficult to keep tracking the ball, so he moves behind him, putting the marker between him and the ball when he raises his neck to track the ball and this causes a problem of orientation for the marker who can’t keep tracking the attacker and the high ball at the same time, so he completely loses the communication with the attacker, as shown in the third photo.
In the fourth photo, another benefit of the floated cross appears: the attacker has the time to measure the ball in the air, adjust his position, and step back if the cross is inaccurate.
The plan works and the attacker gets the ball, as shown below.
However, the first targeted player passes the ball to the area in front of the near post, where two red attackers stand. They find it difficult to control the ball between them in such a difficult position, as shown in the two photos below.
Using a pack
As we have mentioned above, they merge this idea with other ideas, so you can find them asking many players to start near each other in a pack, as shown in the first photo below in which the opponent uses three man markers, one stands with an attacker on the near post, in red, while the other two is in a 4-v-2 situation against the pack. The first two players of the back will move a first to drag two man markers, so the last two attackers become free, as shown in the second photo.
In the third photo, the ball is still in the air, which gives the targeted player the time to measure where it will land, so he steps back, deciding to receive the ball and shoot with his feet, as shown in the fourth photo below.
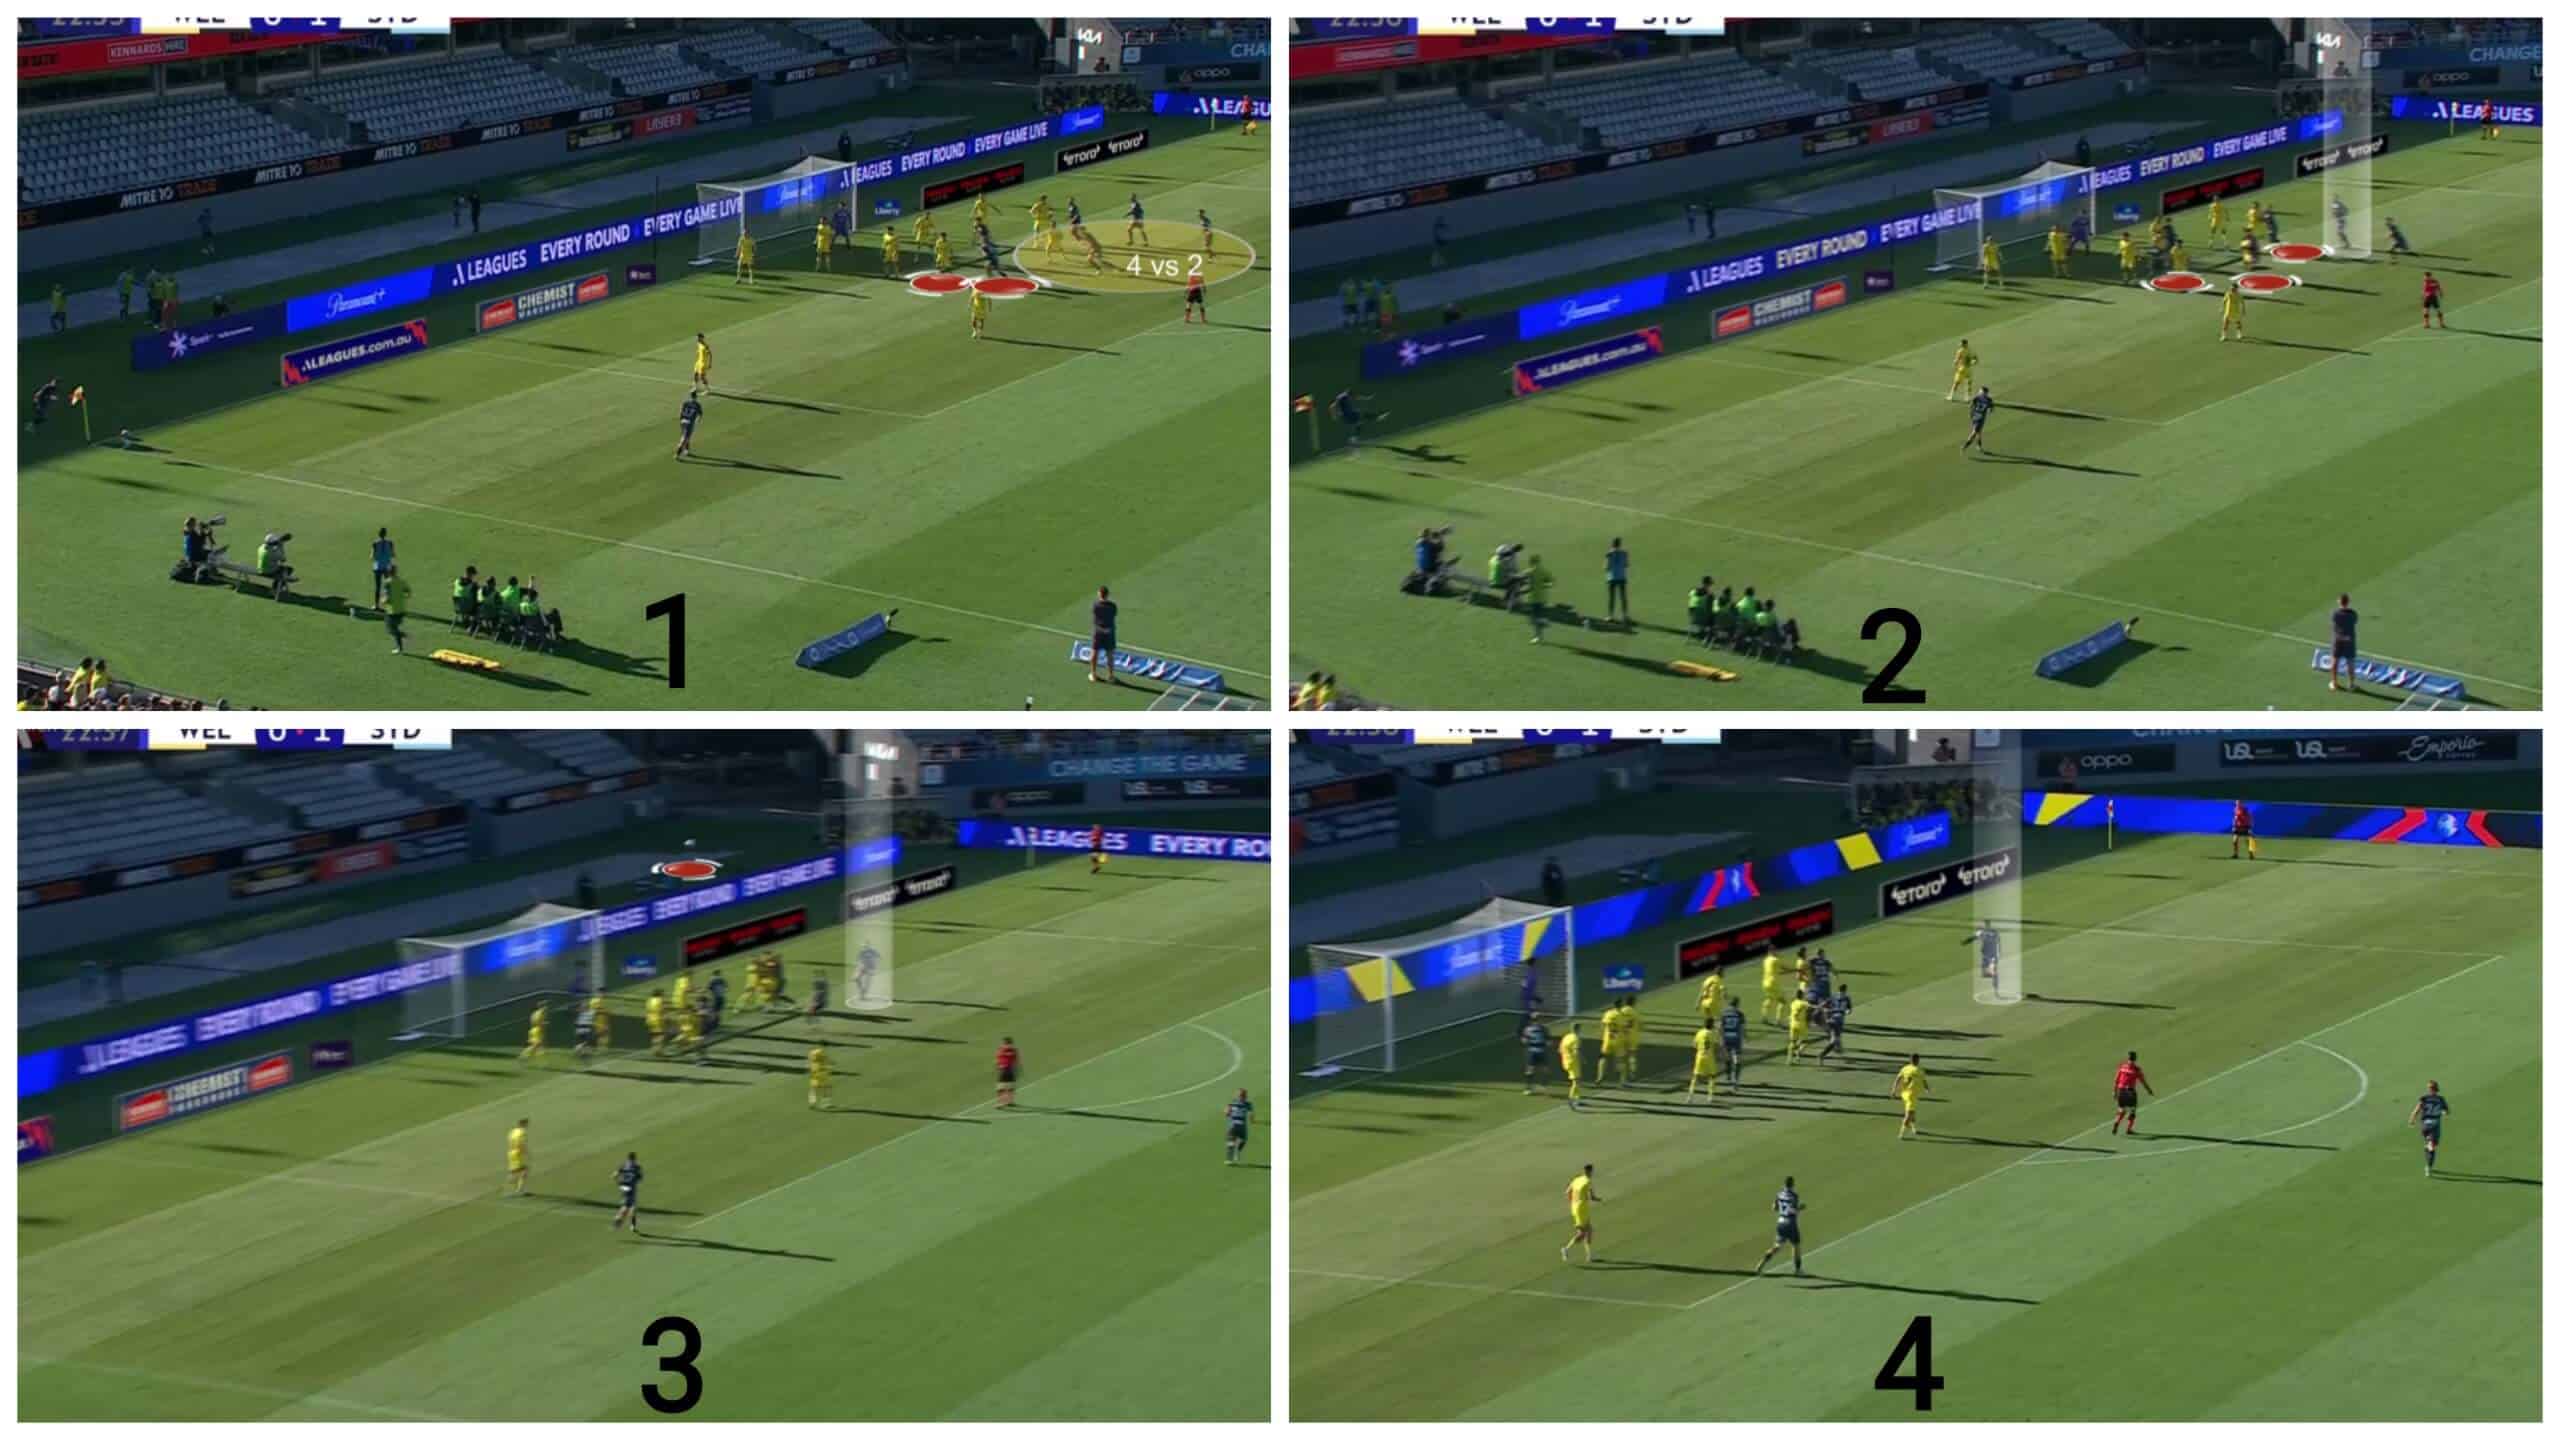
The plan works and the ball hits the crossbar.
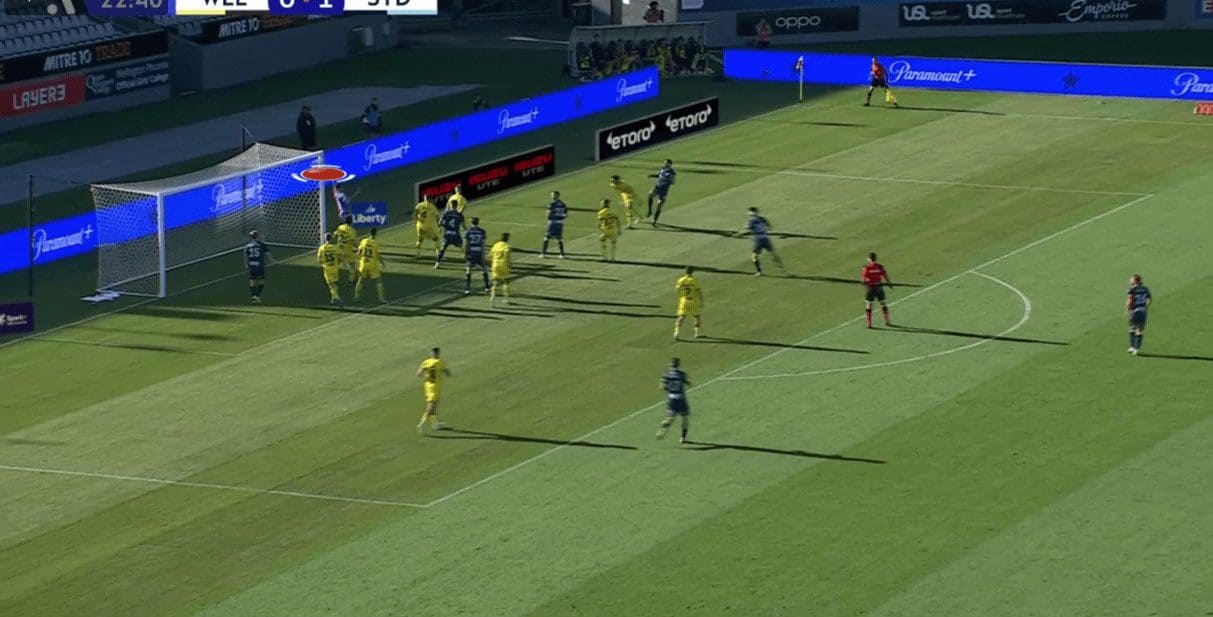
In the first photo below, the same strategy is clear while asking a player with a red arrow to block the second-last zonal defender. In the second photo, the first two attackers of the pack start to move. One goes to block the last zonal defender while the other tries to drag the man marker, but he still marks the targeted player, as shown in the third photo. Do you still think that is a problem?
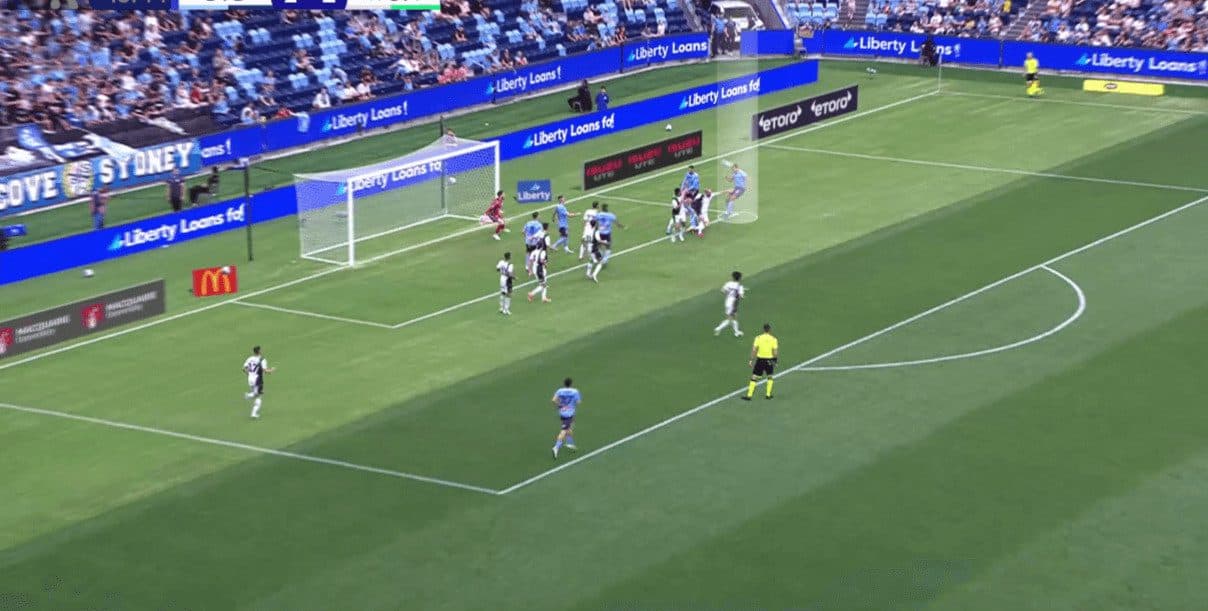
In the fourth photo below, it is difficult to keep running with such a strong attacker all of this distance while being forced to give your back to the ball, as shown in the fifth photo.
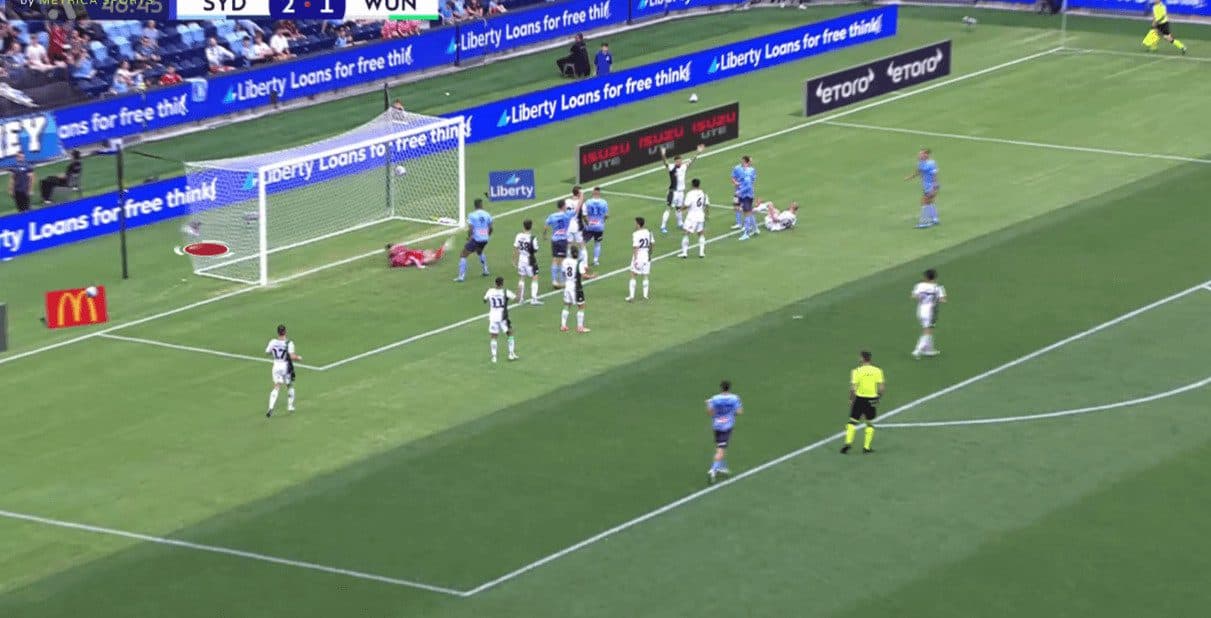
The orientation and mismatch problem are clear, and the result is a goal, as shown in the two photos below.
Targeting the goal directly
It is worth mentioning that they could threaten the goal directly, especially against the full zonal systems without man markers.
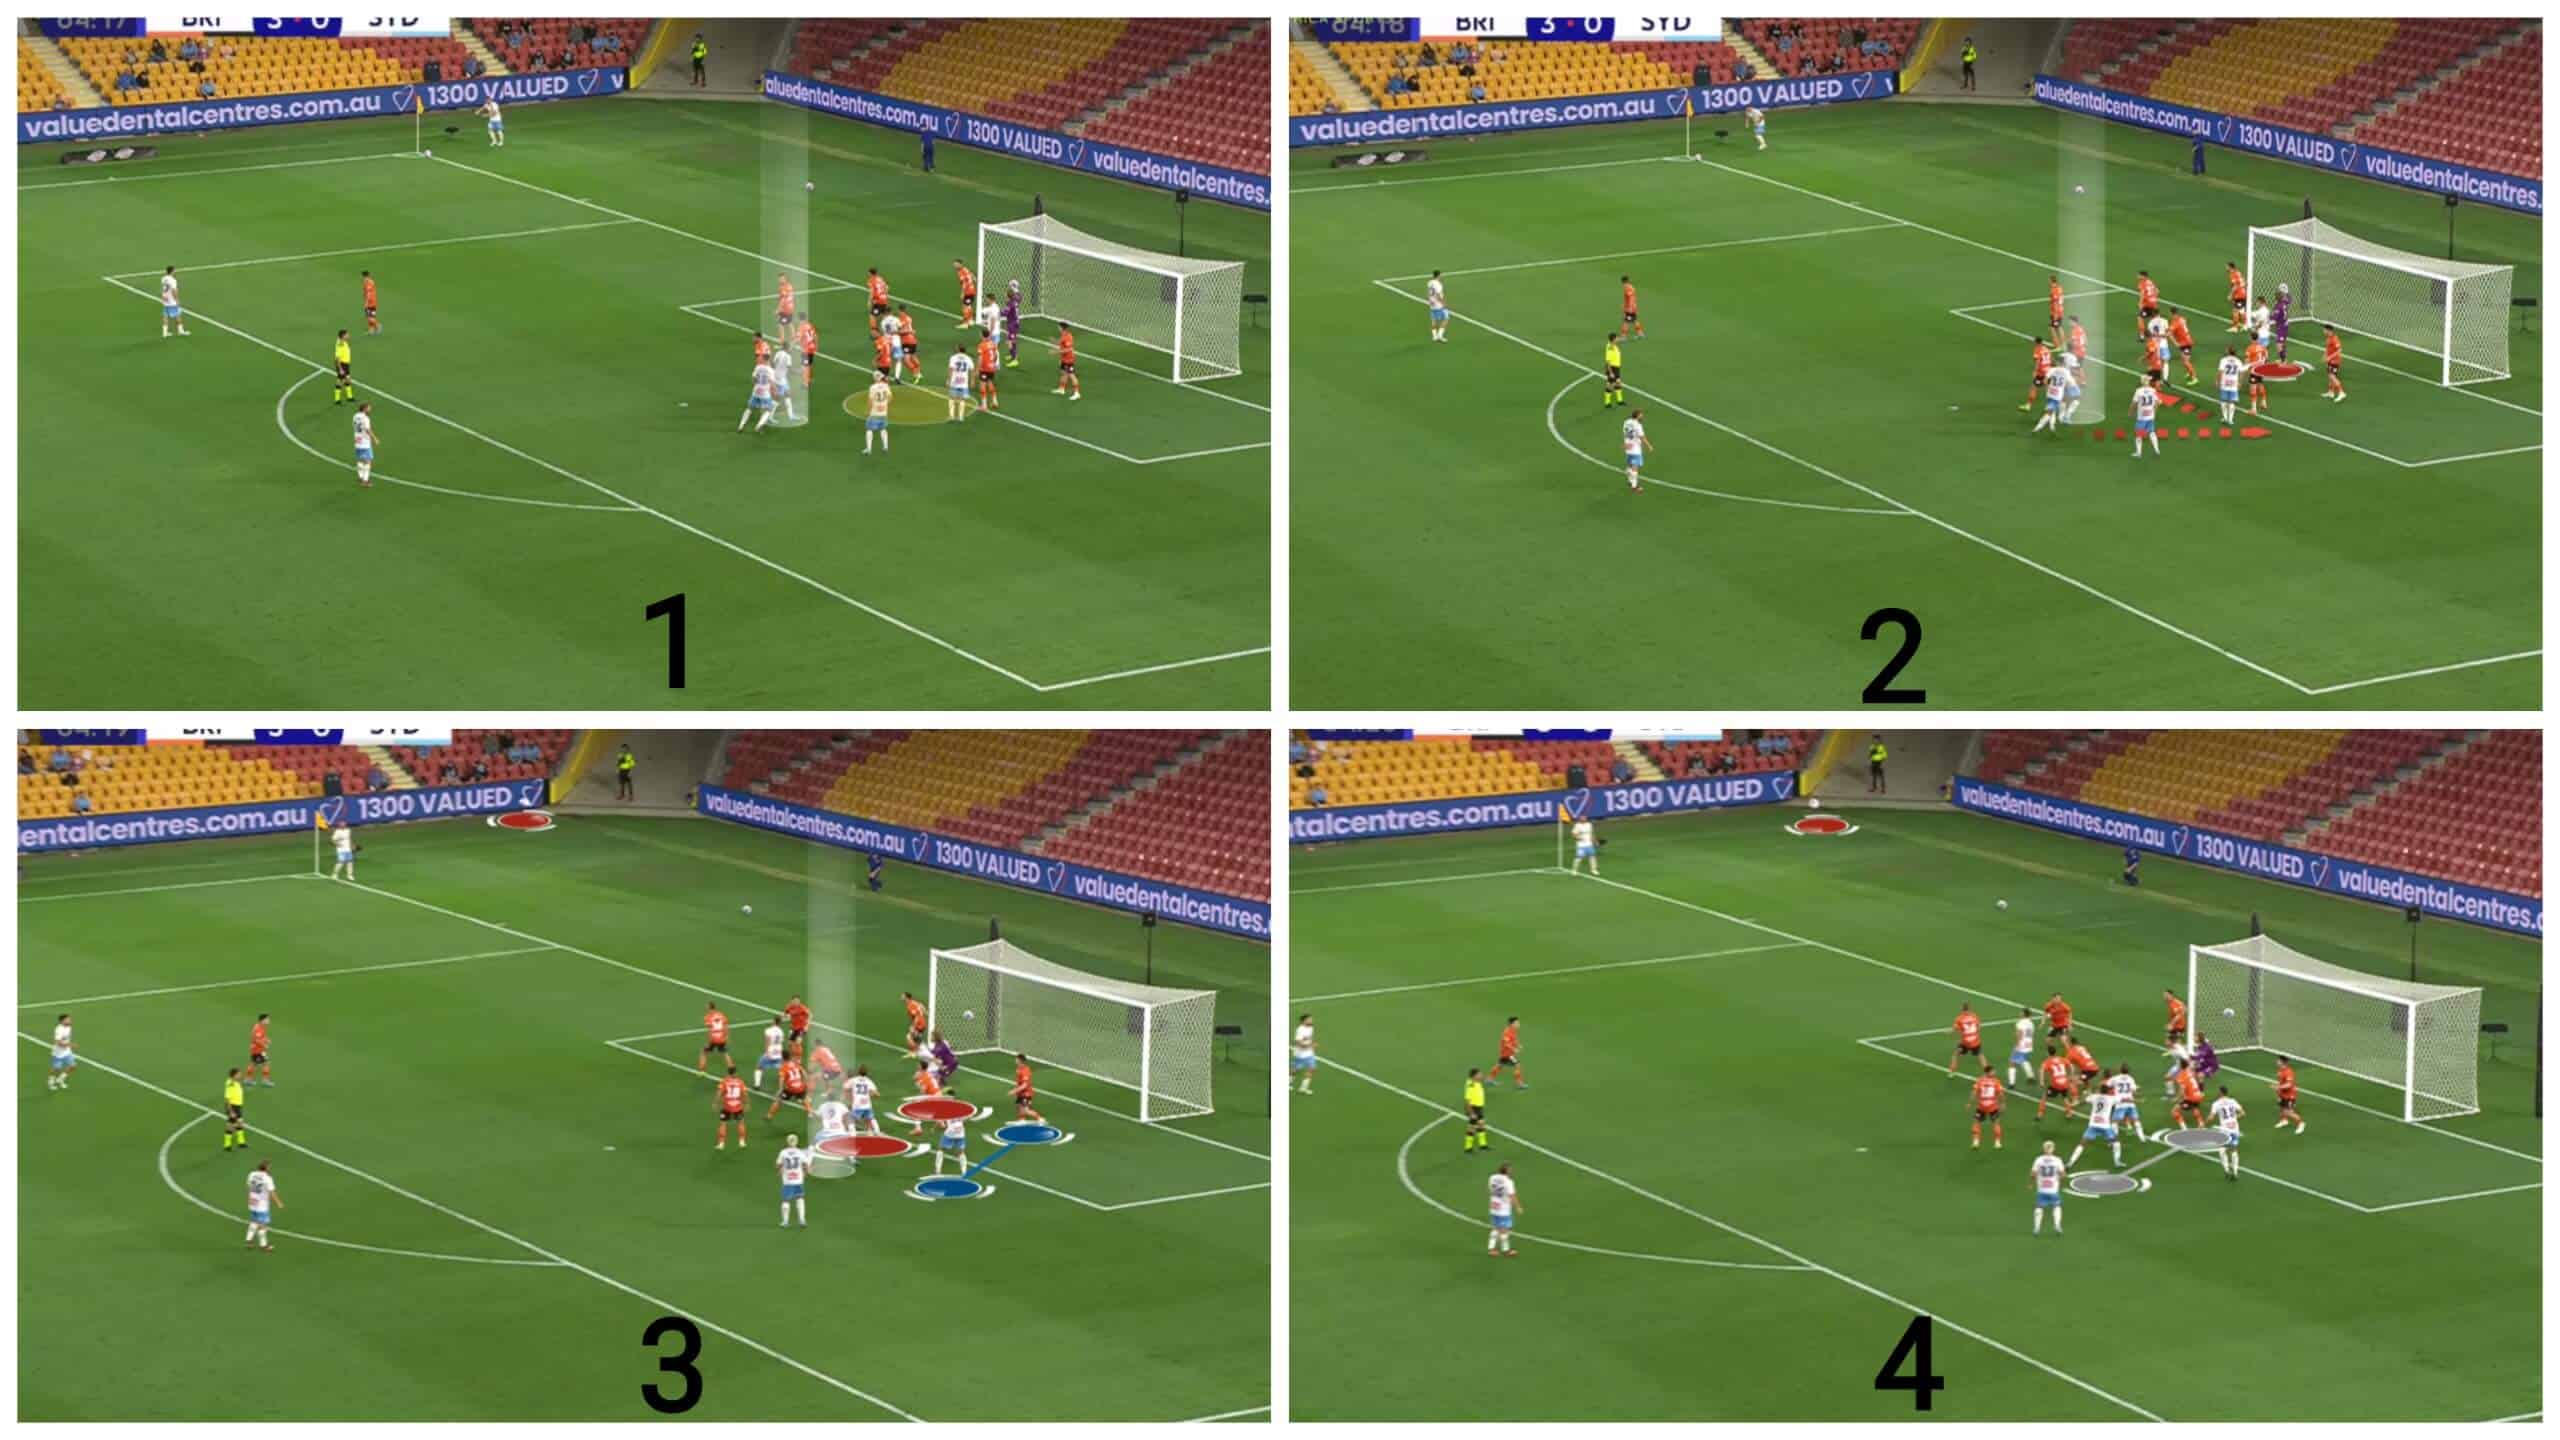
In the first photo below, the opponent defends with a fully zonal system while the targeted player and area are shown. In the second photo, the second attacker near the penalty spot goes to the far post to take the attention of the last zonal defender while another attacker goes to block the defender near the targeted area who is in the second-zone line, two movements with two arrows.
In the third photo, these two movements appear beside the player who blocks the goalkeeper, so there is no solution for the defending team except that the first-zonal-line defender goes up to face the targeted player, as shown in the fourth photo. This distance means that the attacker comes from a movement with a dynamic superiority, and he will win the duel.
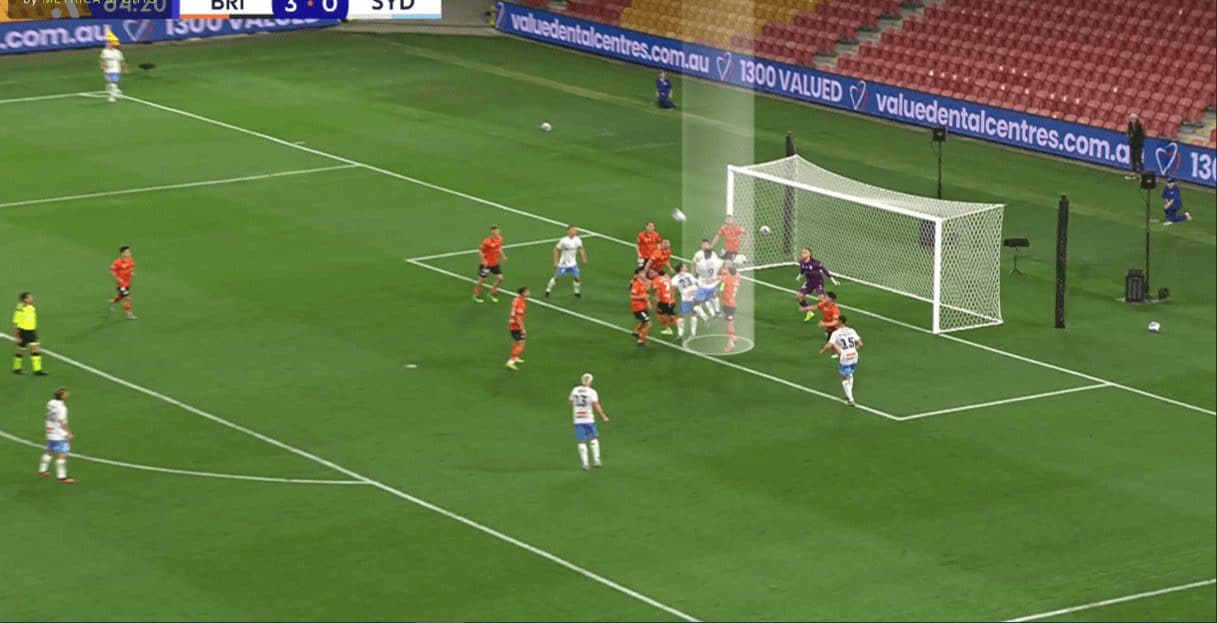
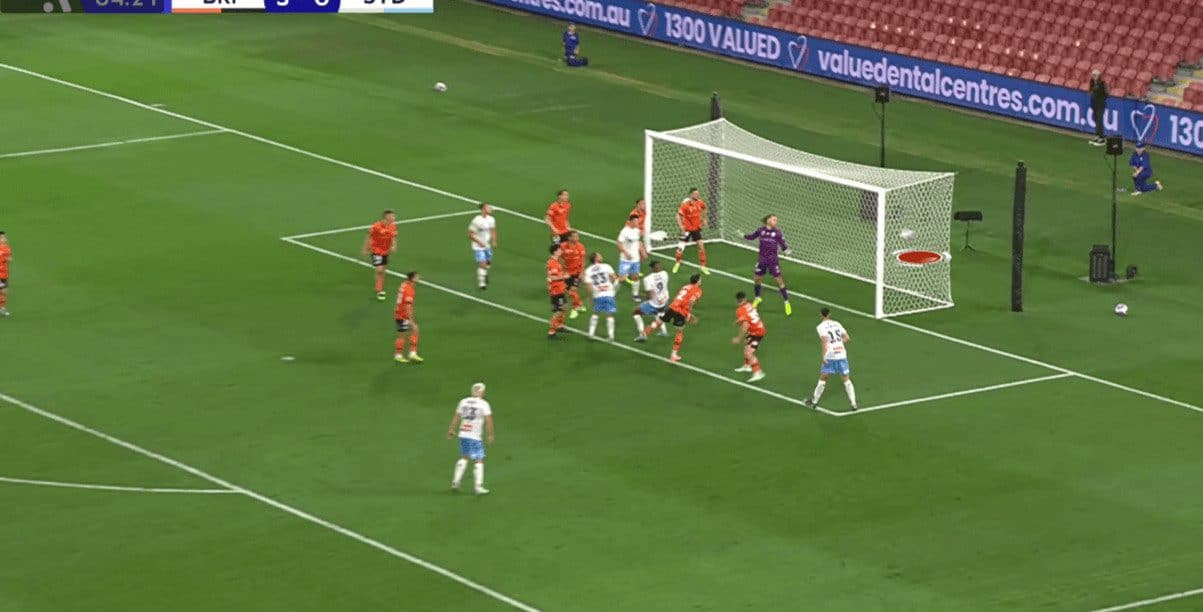
The targeted player easily wins the duel putting the ball near the post in a dangerous chance, as shown in the two following photos below.
Conclusion
In this analysis, we have elucidated how Sydney FC capitalised on corner kicks to pose an indirect threat to the opponent’s goal by utilising floated crosses, but in a highly effective manner. This has rendered them the league’s most proficient team in converting corner kicks into goals, with a total of eight goals scored from such set-piece situations.
Furthermore, in this set-piece analysis, we have also illustrated how Sydney FC utilise floated crosses in various forms, whether to target unmarked players or even if they are under man-marking. Additionally, we have highlighted instances where they integrate this concept with other tactics, such as using a pack to block man markers and impede their access to the targeted player. Moreover, we indicated the potential of exploiting these crosses to score goals directly, particularly against teams employing a deep zonal scheme close to the six-yard box.


Comments