The EFL Championship play-offs threw up two very intriguing ties – Derby vs Leeds was always going to be a highlight following ‘Spygate’ earlier this season, while a West Midlands derby between Aston Villa and West Bromwich Albion was the second semi-final. Villa came into this game on a good run of form, having won ten games on the spin to storm into the play-off spots, before losing to Norwich and then drawing with Leeds on the last day in controversial fashion. West Brom, on the other hand, had been in and around those positions for the majority of the season, and thus it was a massive shock when the club sacked Darren Moore in March, despite the Baggies being in fourth place. This tactical analysis will look at the first leg of this semi-final and how it sets up the tie for Tuesday’s second leg
Lineups
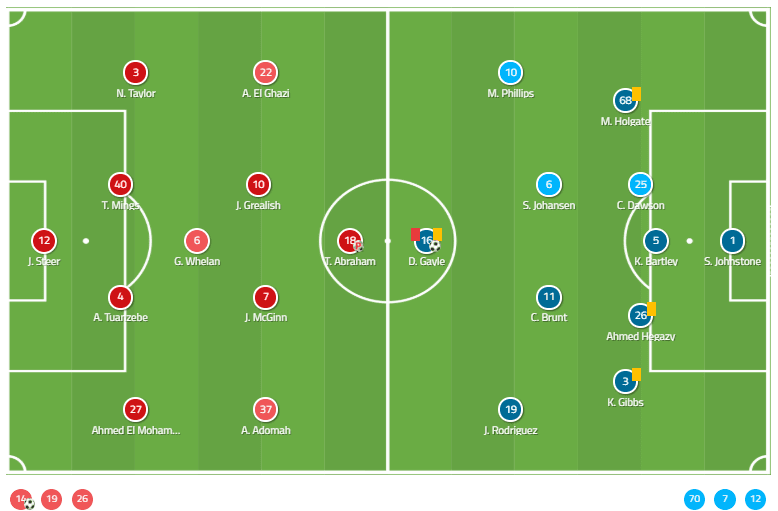
Dean Smith picked his first-choice back four, with Tyrone Mings returning after being rested on the final day of the season. Glen Whelan anchored the midfield, with John McGinn and Jack Grealish playing further forward, and Tammy Abraham continued as the lone striker.
West Brom went with a back three for this game – Craig Dawson, Kyle Bartley and Ahmed Hegazy playing at centre-back with Mason Holgate and Keiran Gibbs as the wing-backs. Chris Brunt came into midfield, while Matt Phillips and Jay Rodriguez supported Dwight Gayle.
West Brom sit deep and suffocate
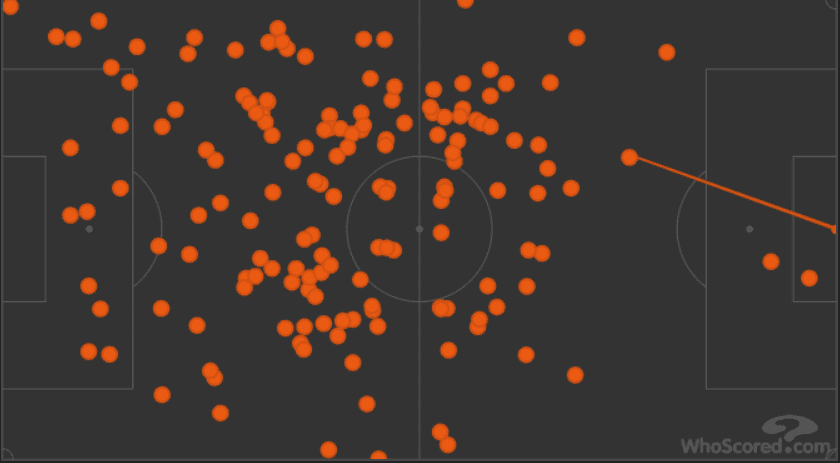
The Baggies’ 5-4-1 system used in this game has been something of a staple in their away games this season. Their usual tactic has been to frustrate the opposition before nabbing a goal or two through quick counter-attacks, and it was no different at Villa Park on Saturday afternoon. West Brom sat deep, with the midfield forming a line of four in front of the back five, which denied Villa any space to work the ball around. They were not interested in pressing high up the pitch at all, and were often content with allowing Villa possession up until their third of the pitch. A knock-on effect of this was that the Villa centre-backs, Tuanzebe and Mings, had plenty of time on the ball; they had 72 and 85 touches of the ball, respectively, and their combined touch map (shown below) is also illustrative –
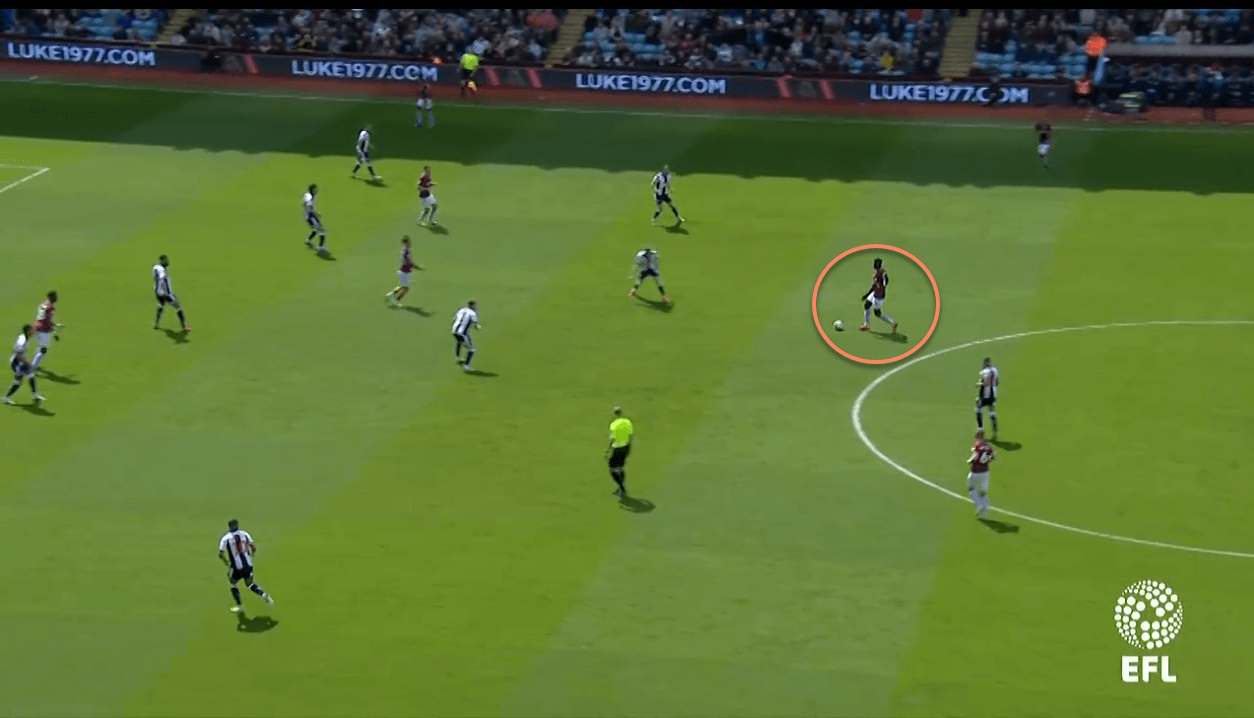
While both Tuanzebe and Mings were allowed to move high up the pitch on the ball, West Brom made sure that Jack Grealish, Villa’s captain and talisman, was closely marked at all times. This task usually fell to Stefan Johansen, who spent the afternoon shutting Grealish down whenever he received the ball. Despite this, Grealish had the most touches of any player on the pitch (90), but it can be argued that the Villa captain struggled to influence the game.
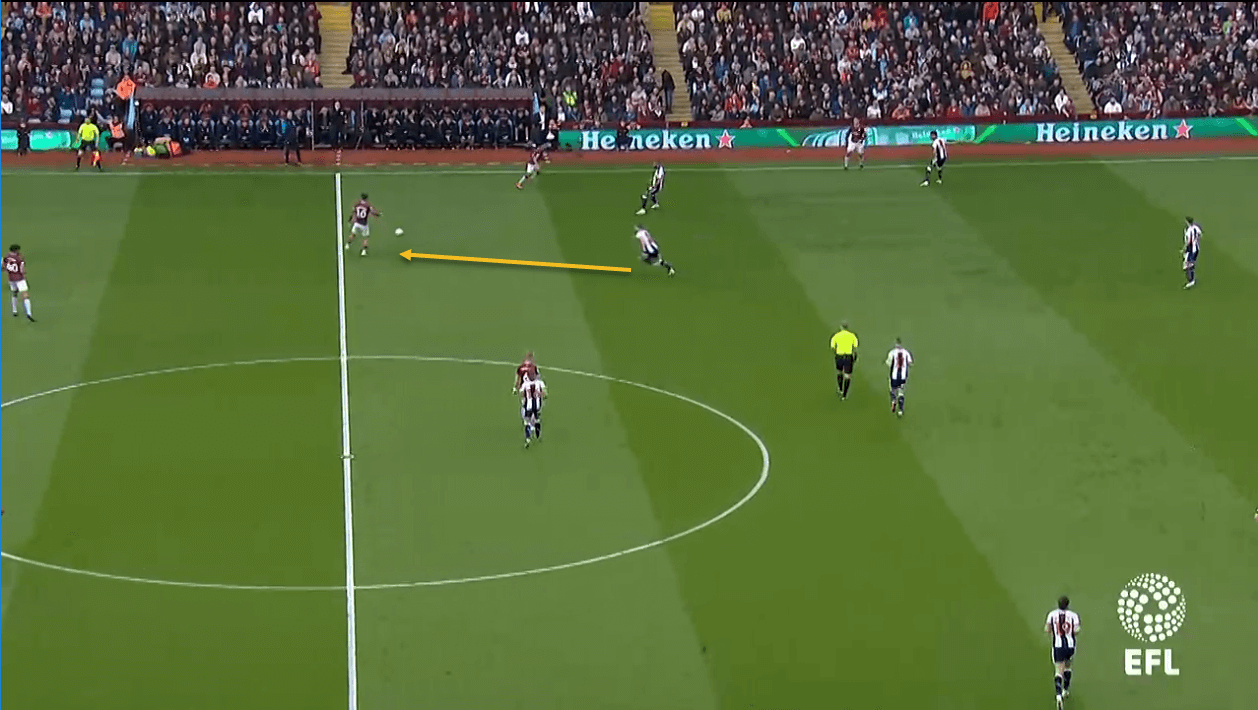
Another effect of the two sides’ systems was that West Brom could afford to have one of their centre-backs mark Tammy Abraham, given that Villa were playing with a sole striker against the Baggies’ three centre-backs. Kyle Bartley, the central man in the three-man defence, usually picked up Abraham, to the extent that he even followed the Chelsea loanee into midfield, content in the knowledge that there were at least two men covering him –
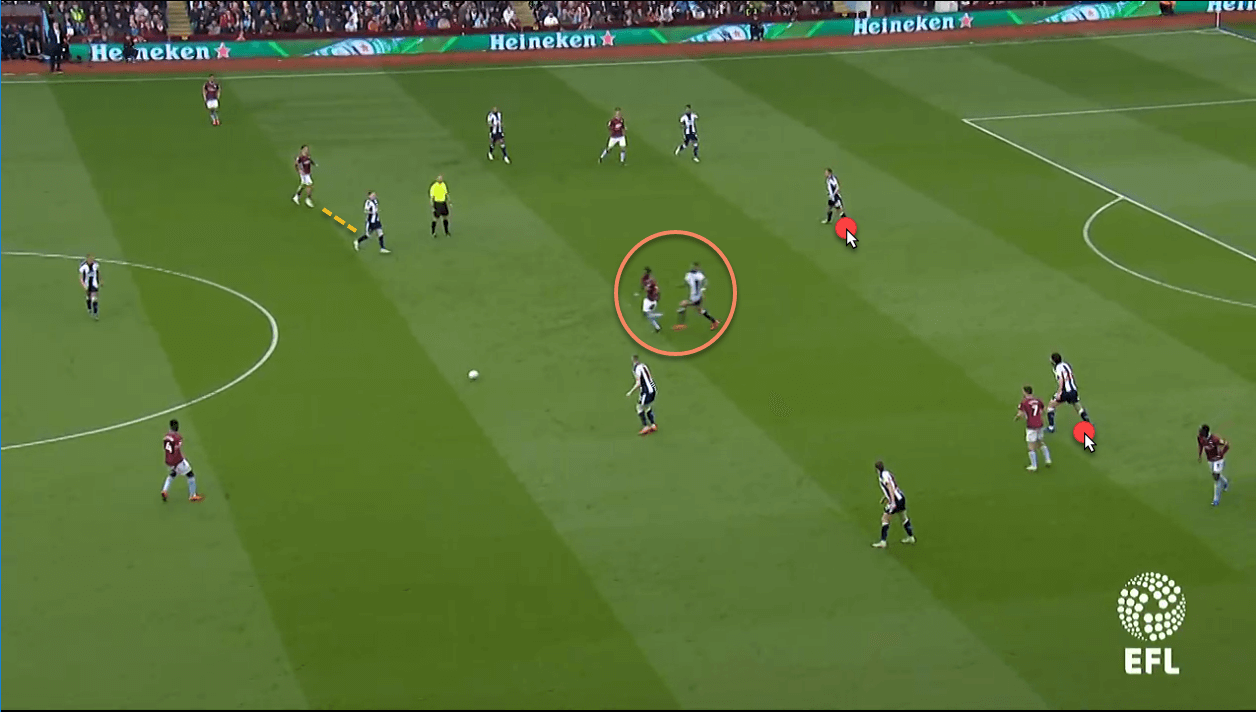
West Brom’s tactics were successful in limiting Villa’s chances, but the Villans were complicit as well.
Villa struggle to create
While West Brom set out their stall to defend, and went ahead due to Whelan’s unfortunate mistake which allowed Gayle to pounce, Villa were quite poor in possession as well. This made it easier for the Baggies to defend their box, and there was a complete lack of creativity from the home side.
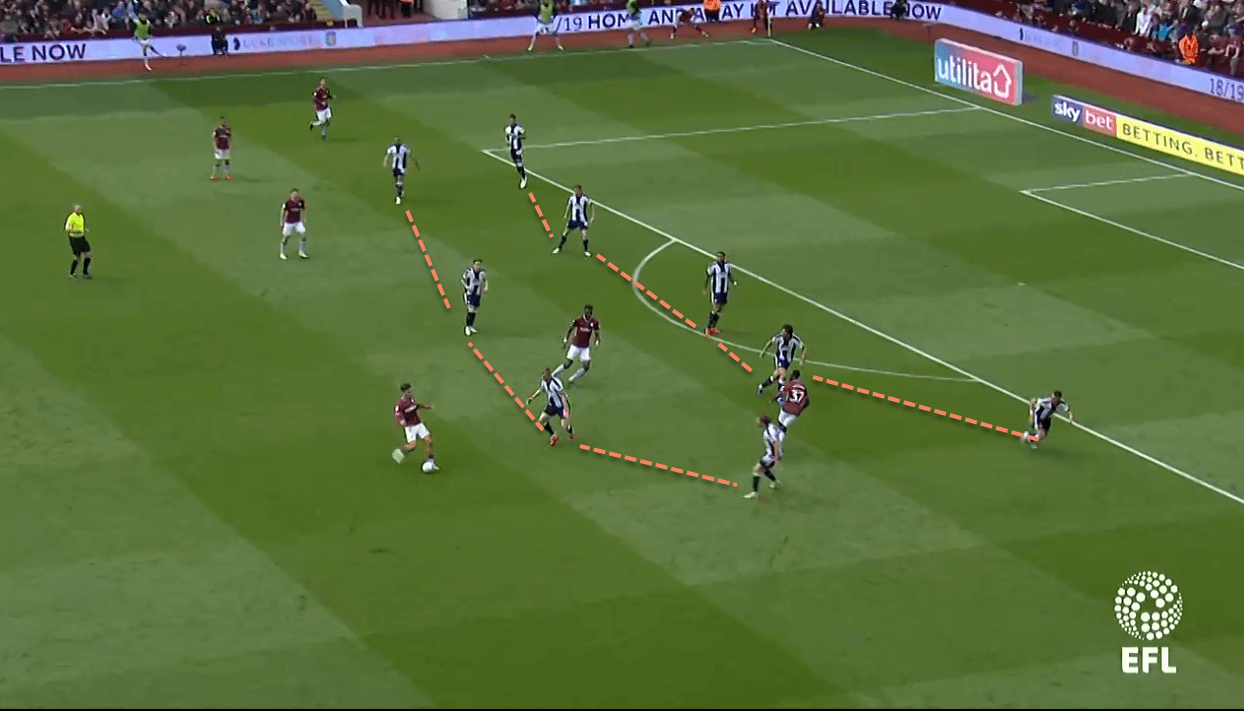
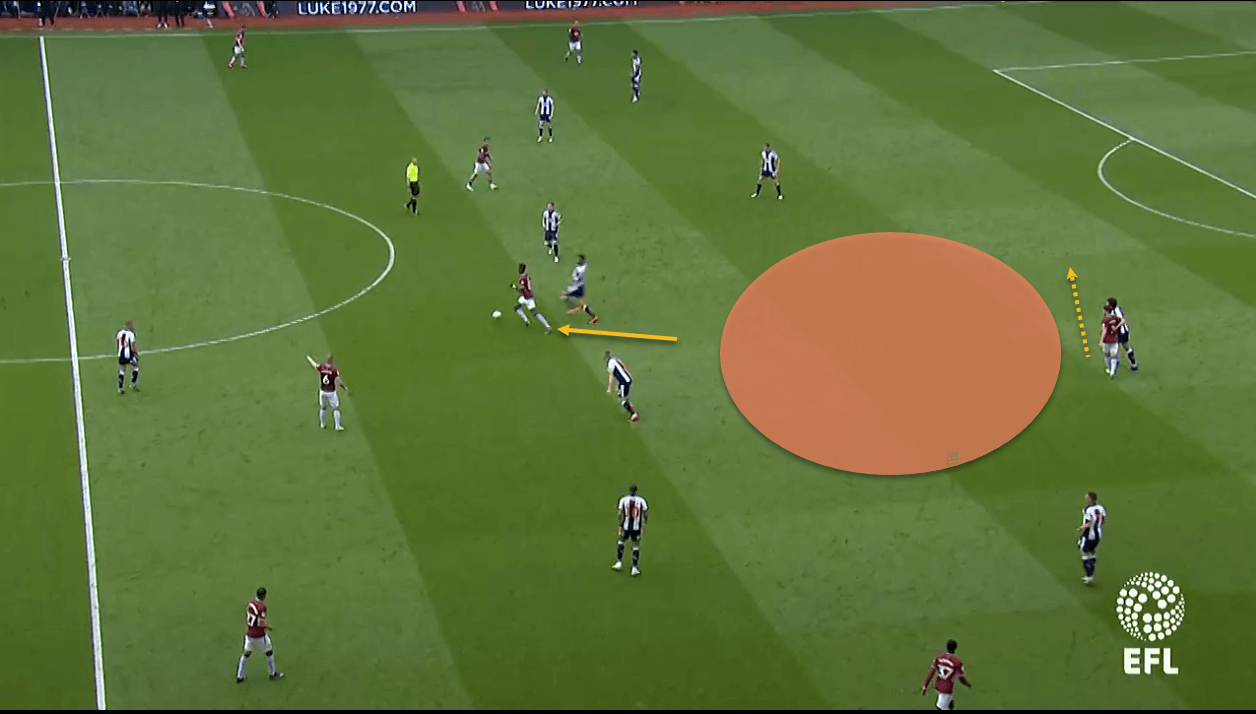
Playing against a five-man defence, Villa needed to stretch the pitch and make line-breaking runs from midfield to drag the West Brom defensive line out of position. However, there was very little of either of these tactics from them. Both full-backs, Neil Taylor and Ahmed Elmohamady, got high up the pitch and were on the ball often as well (88 touches each), but the lack of intelligent movement in front of them meant that they would usually be forced to play the ball back or sideways –
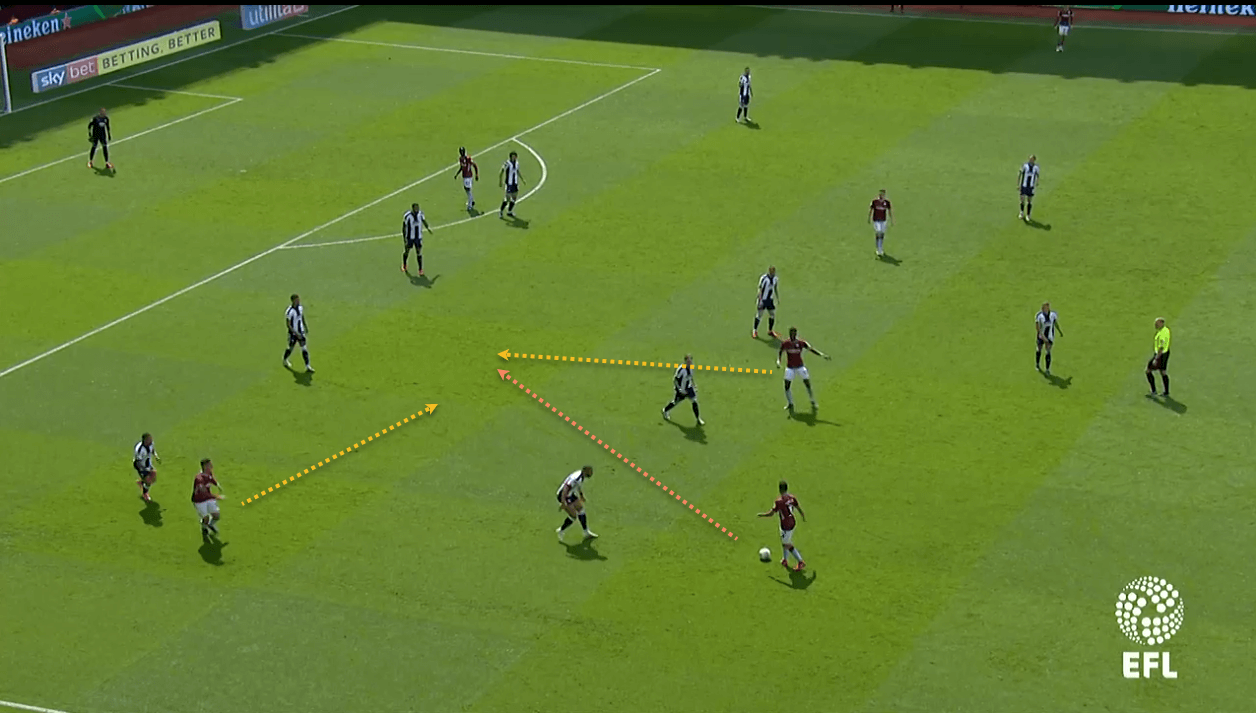
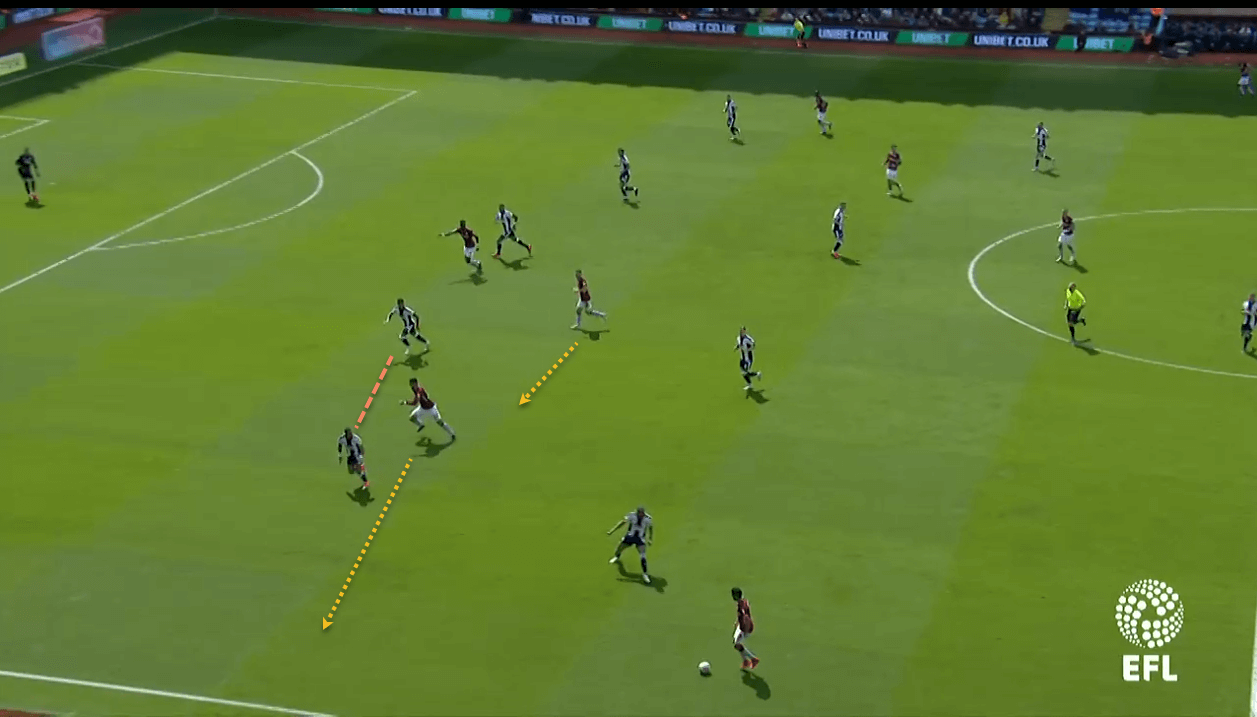
The wingers were also poorly positioned, neither stretching the play well enough nor supporting the midfielders by coming inside at the right time. The problem with Villa’s tactics in this game was poor decision-making; runs were made at the wrong time or in the wrong direction, while players were often in harmless positions –
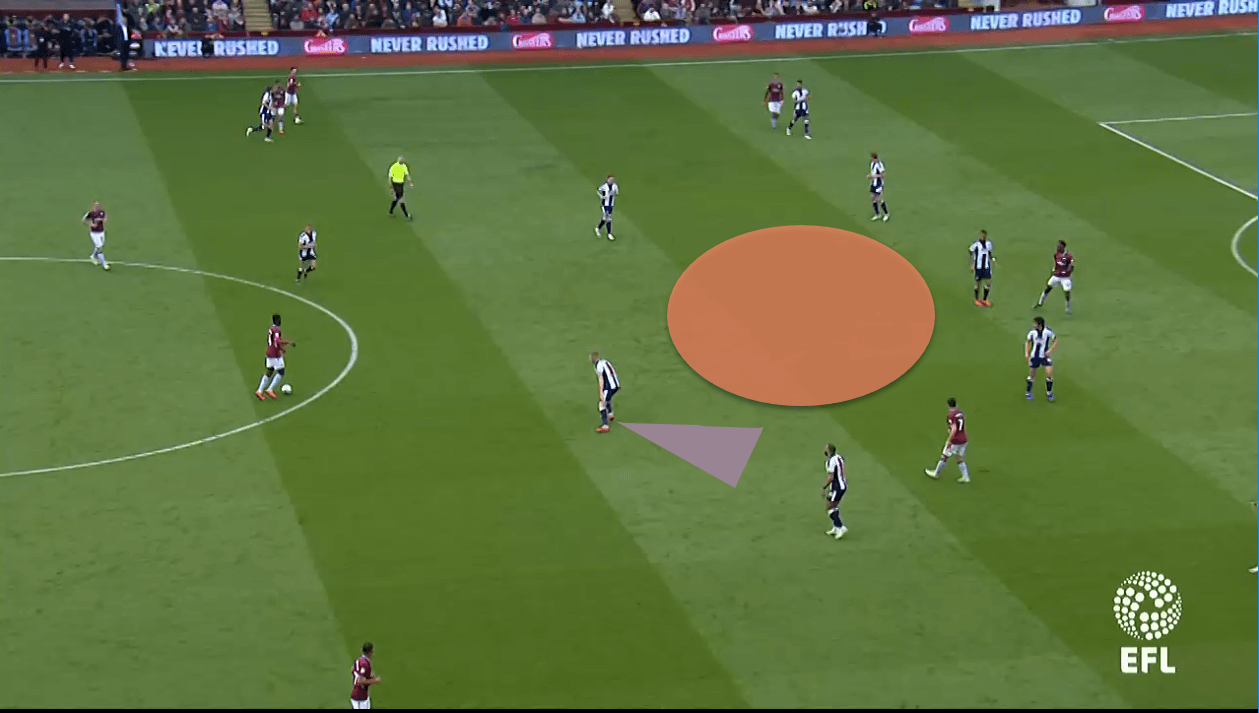
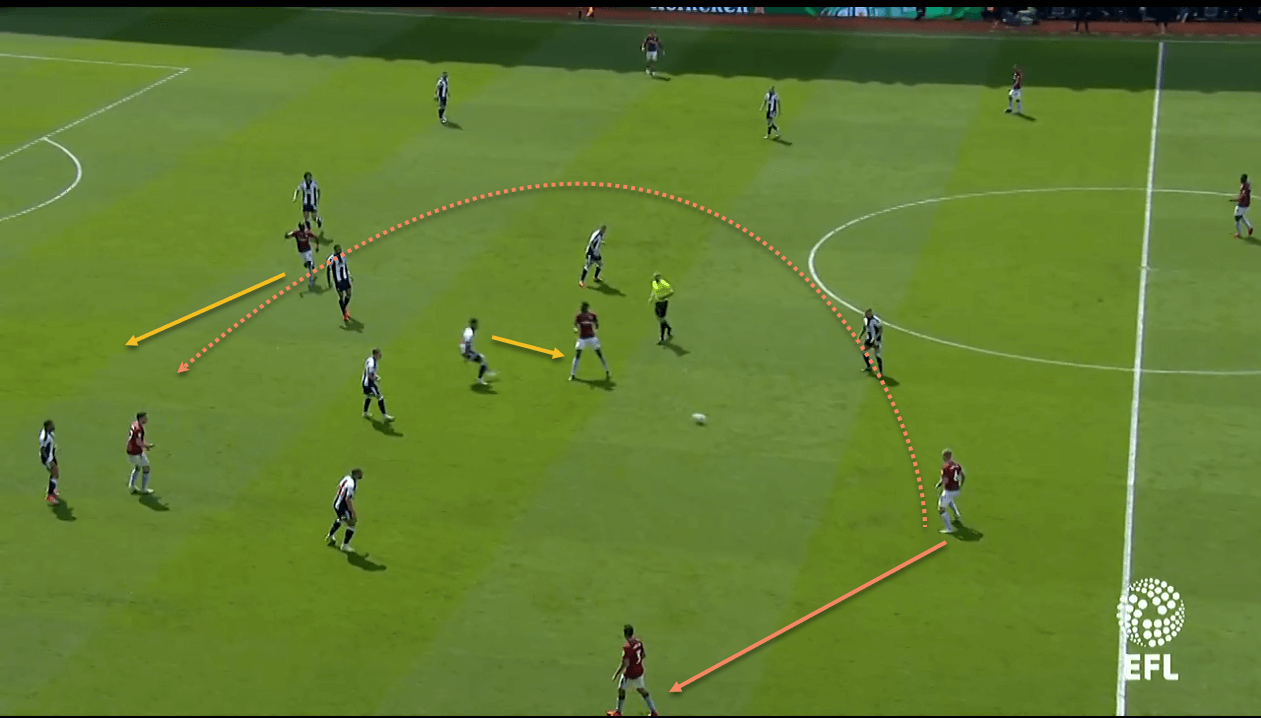
Whelan’s selection also played a part here. The veteran had been enjoying a renaissance of late, but in addition to directly contributing to West Brom’s goal through his mistake, his passing was conservative, just when Villa needed inspiration. Whelan, as the deepest of the midfield three, would recycle the ball from flank to flank; this was arguably his job, but he does not possess the necessary vision and technique to unlock the game from his position, as seen below –
Conclusion
It was fitting that Villa’s goals came via a long-range effort and a penalty; they looked incapable of creating clear-cut chances in this game. They were fortunate to win the first leg, and Dwight Gayle’s sending off makes it likely that they will prevail in the second leg as well. However, both Leeds and Derby are better sides, and Aston Villa will have an extremely difficult task in the final, provided they are able to see off West Brom’s challenge at the Hawthorns tonight.
If you love tactical analysis, then you’ll love the digital magazines from totalfootballanalysis.com – a guaranteed 100+ pages of pure tactical analysis covering topics from the Premier League, Serie A, La Liga, Bundesliga and many, many more. Buy your copy of the May issue for just ₤4.99 here, or even better sign up for a ₤50 annual membership (12 monthly issues plus the annual review) right here.



Comments