Pressing can be defined as applying pressure on your opponent with the intention of forcing a negative action on the opponent. These “negative actions” can come in a variety of forms, with the most advantageous to the pressing side being a turnover in possession, but other favourable outcomes include a backpass or a forced long ball. Pressing using a diamond is particularly interesting, as (in most cases) the pressing side doesn’t have any wingers to press, so the role of most players in the press can be drastically different when compared to other formations. By far the most common formation with a midfield diamond is the 4-diamond-2 formation, so that will be the main focus of this analysis. In this tactical analysis, I’ll take a look at some theory that can be applied when pressing with a midfield diamond.
The midfield diamond’s strengths and weaknesses in defensive organisation
Many coaches in football tend to avoid using the midfield diamond as it is quite a ‘niche’ formation, as its strengths and weaknesses are so glaring in comparison to other formations. In this section I won’t be looking at the diamond’s characteristics in offense as it won’t pertain to pressing, but rather how the diamond shapes up defensively.
Strengths
- There is potential for an extremely compact centre due to having four central midfielders.
- The diamond naturally has a highly staggered shape, with diagonal angles between players, making it very difficult for the opponent to execute line-breaking diagonal or vertical passes.
- More control of the halfspaces in comparison to formations with two or three central midfielders, as the outside central midfielders are naturally positioned in the halfspaces.
- Having a defensive midfielder adds stability to the back line.
- Having four central midfielders allows for some flexibility in positioning and the formation can change seamlessly to counteract weaknesses without dragging players very far out of their starting position.
Weaknesses
- Opponents who play with wingers and fullbacks naturally overload the wings.
- The fullbacks are the obvious solution for attacking width in a diamond but advancing fullbacks can be caught out in transition due to lack of defensive cover in wide areas.
- The diamond is susceptible to being stretched – if the midfield doesn’t move as a unit there is danger of gaps opening up between midfielders.
- Due to the compactness of the midfield, the diamond is susceptible to switches of play.
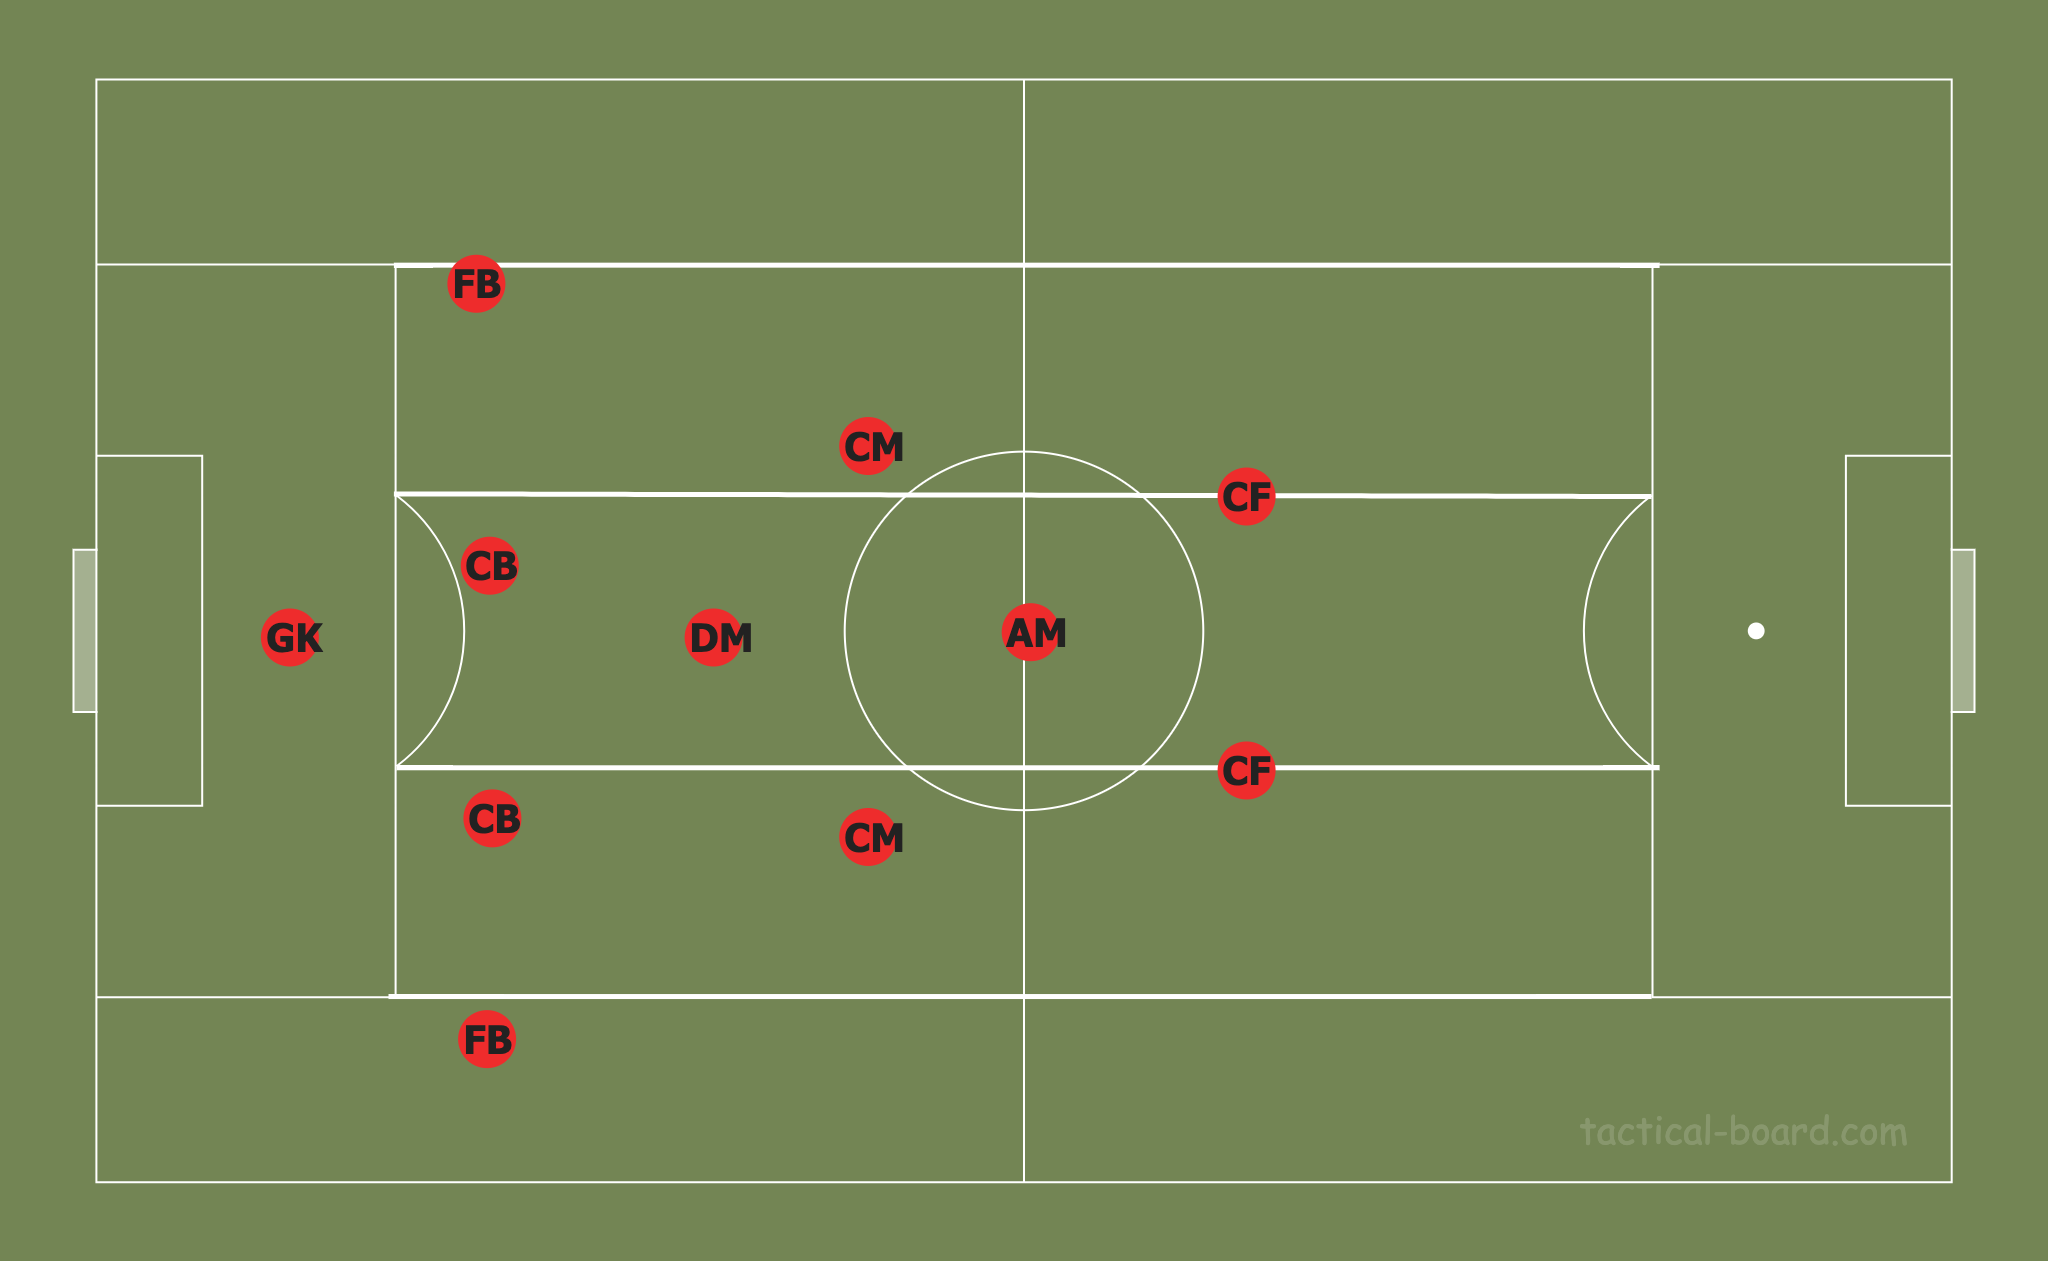
Pressing the opponent’s build-up
The 4-diamond-2 creates an interesting dynamic when pressing against a build-up due to the lack of forward players, almost all of the time the pressing side will have a numerical inferiority. This obviously is an issue but it can be solved in two ways:
- Removing the numerical inferiority by creating a numerical equality or superiority
OR
- Positioning the two centre forwards in such a manner that we can eliminate options thus forcing the opponent into areas in which we have the advantage.
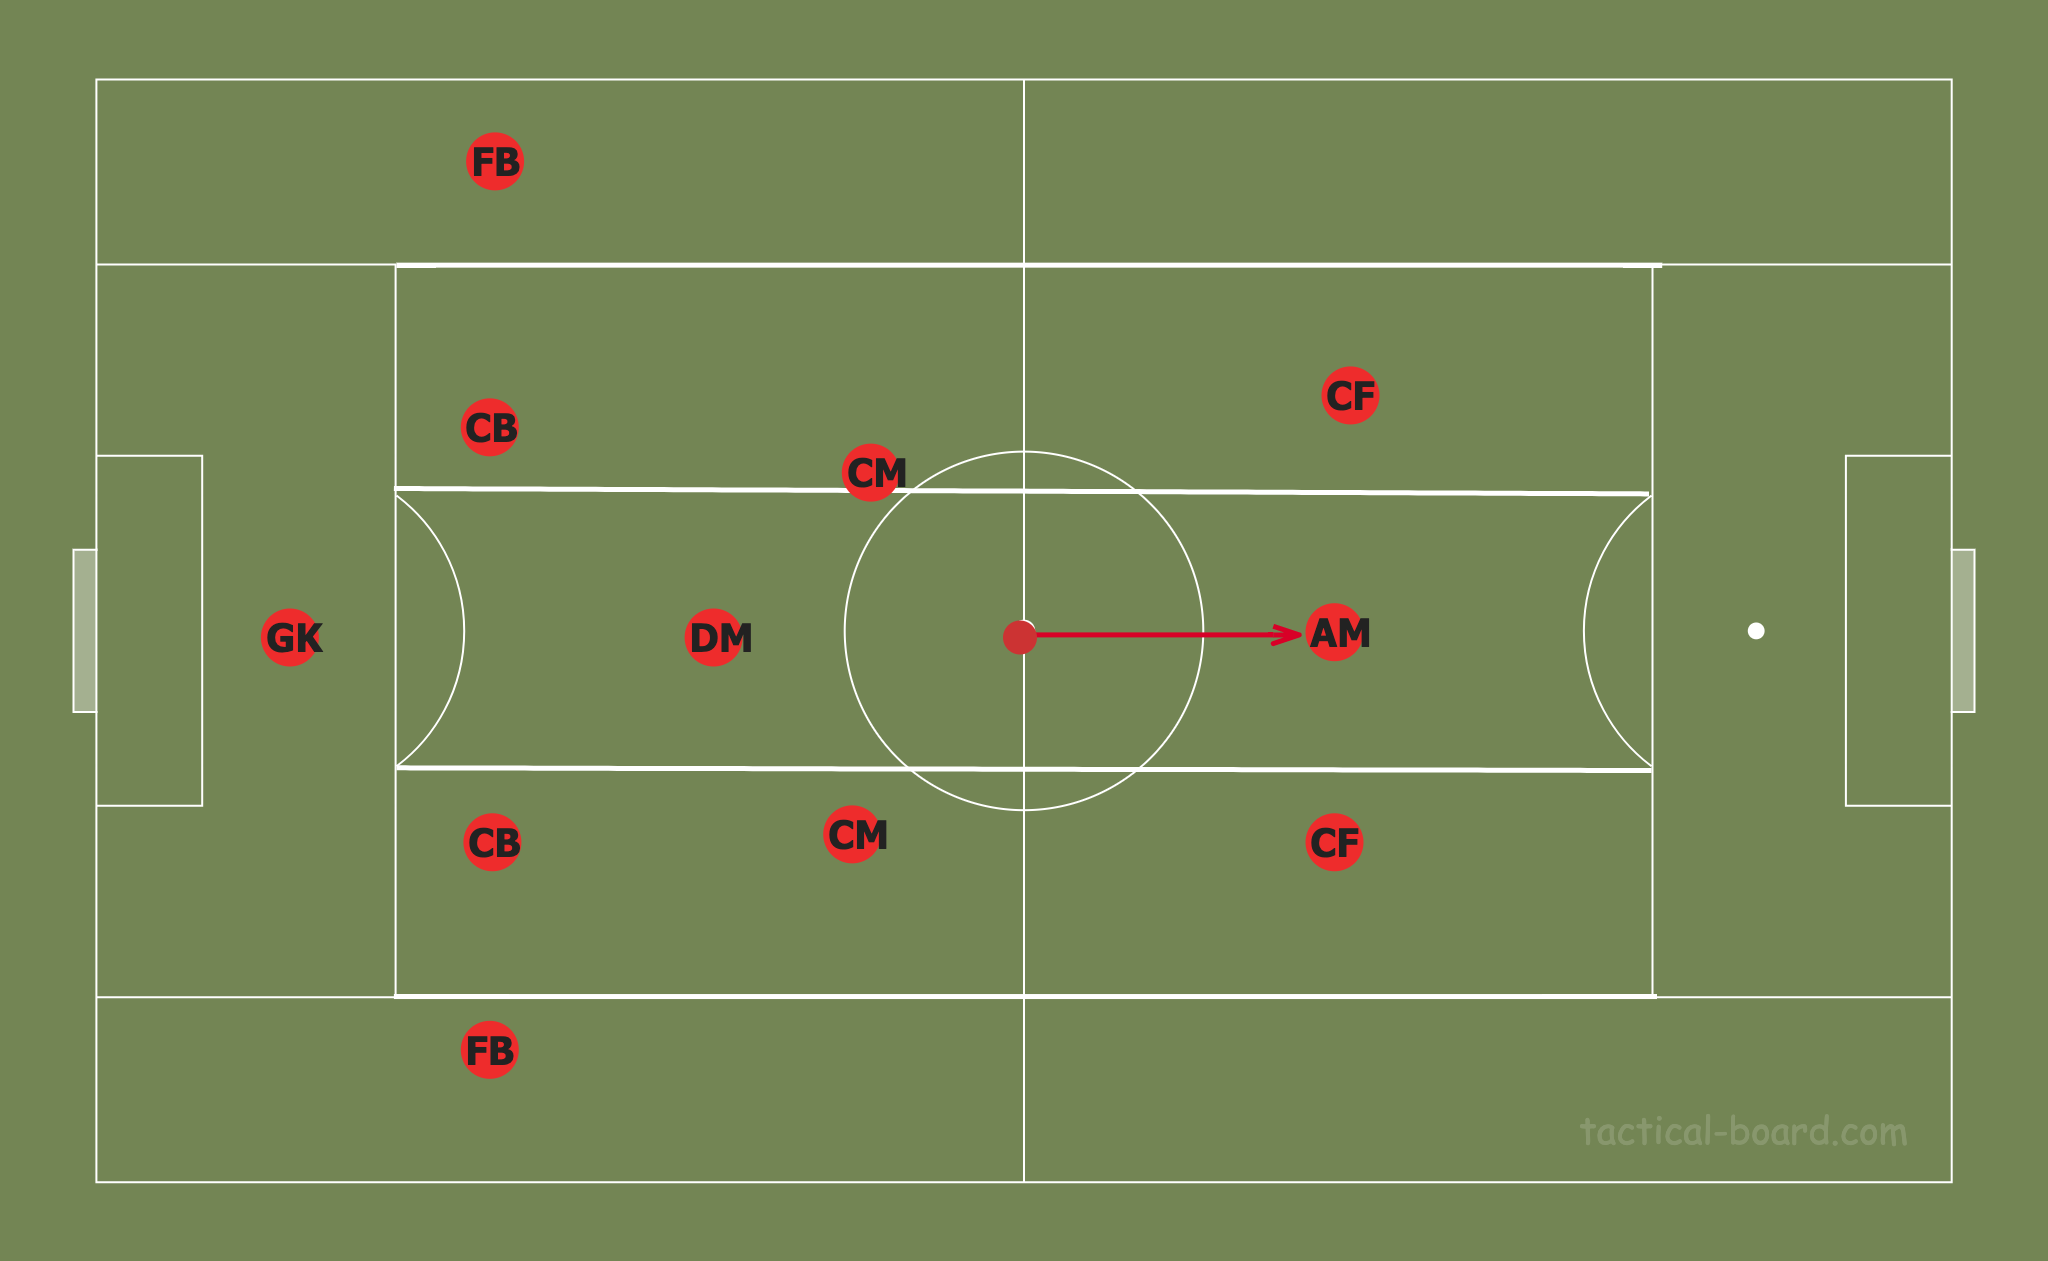
We can eliminate the numerical inferiority by utilising one of the strengths of the diamond in defensive organisation mentioned previously; potential for positional fluidity. I’ve chosen the most basic example of such positional fluidity which creates a front three, with the attacking midfielder pushing up alongside the strikers creating a 4-3-3. This is only one example and the potential for movements to remove numerical inferiority when pressing with the diamond is very high.
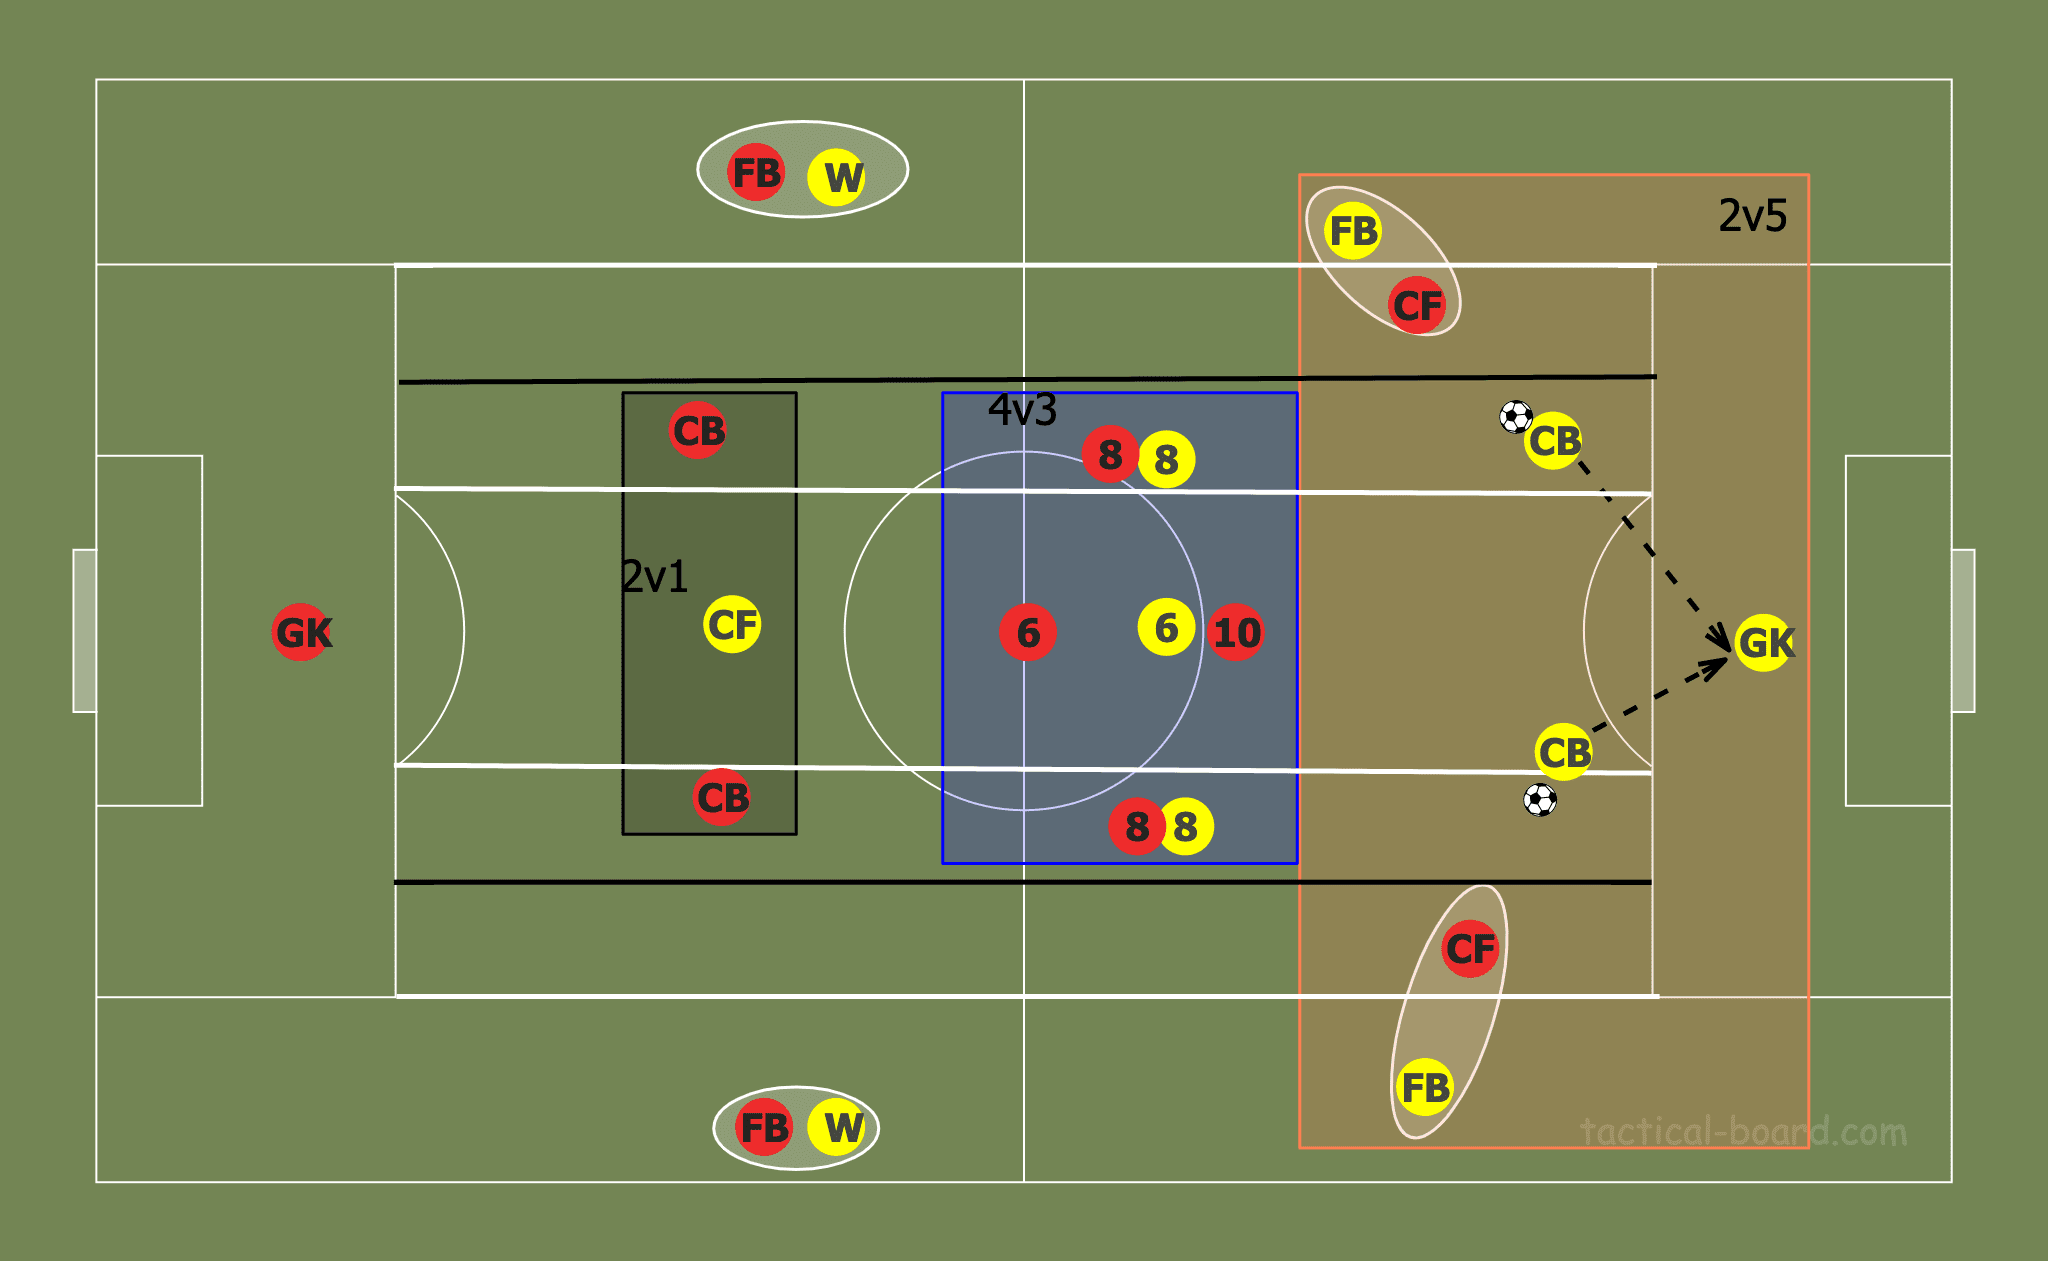
Forcing our opponents into advantageous positions for us is challenging when we have a numerical inferiority and is challenging from a tactical perspective, but we can take advantage of predisposed positional behaviour from certain positions. In the example below the centre forwards are positioned between the opponent’s centre backs and full-backs. For specificity of positioning, the halfspaces have been bisected to more efficiently cut off the angle, with the centre forwards positioned in the ‘outer halfspaces’. In the below example the only clear passing angles for the centre backs is a negative action – a backpass to their goalkeeper – a direct pass into our midfield would be advantageous for us due to the 4v3 numerical advantage we have. Using intelligent positioning of our forwards we can completely nullify any positional advantage the opposition has despite our hefty numerical inferiority.
How we position our players when forcing the opponent into certain zones of the pitch is entirely dependent on which area of the pitch we want to funnel their play.
Forcing the opponent into the centre
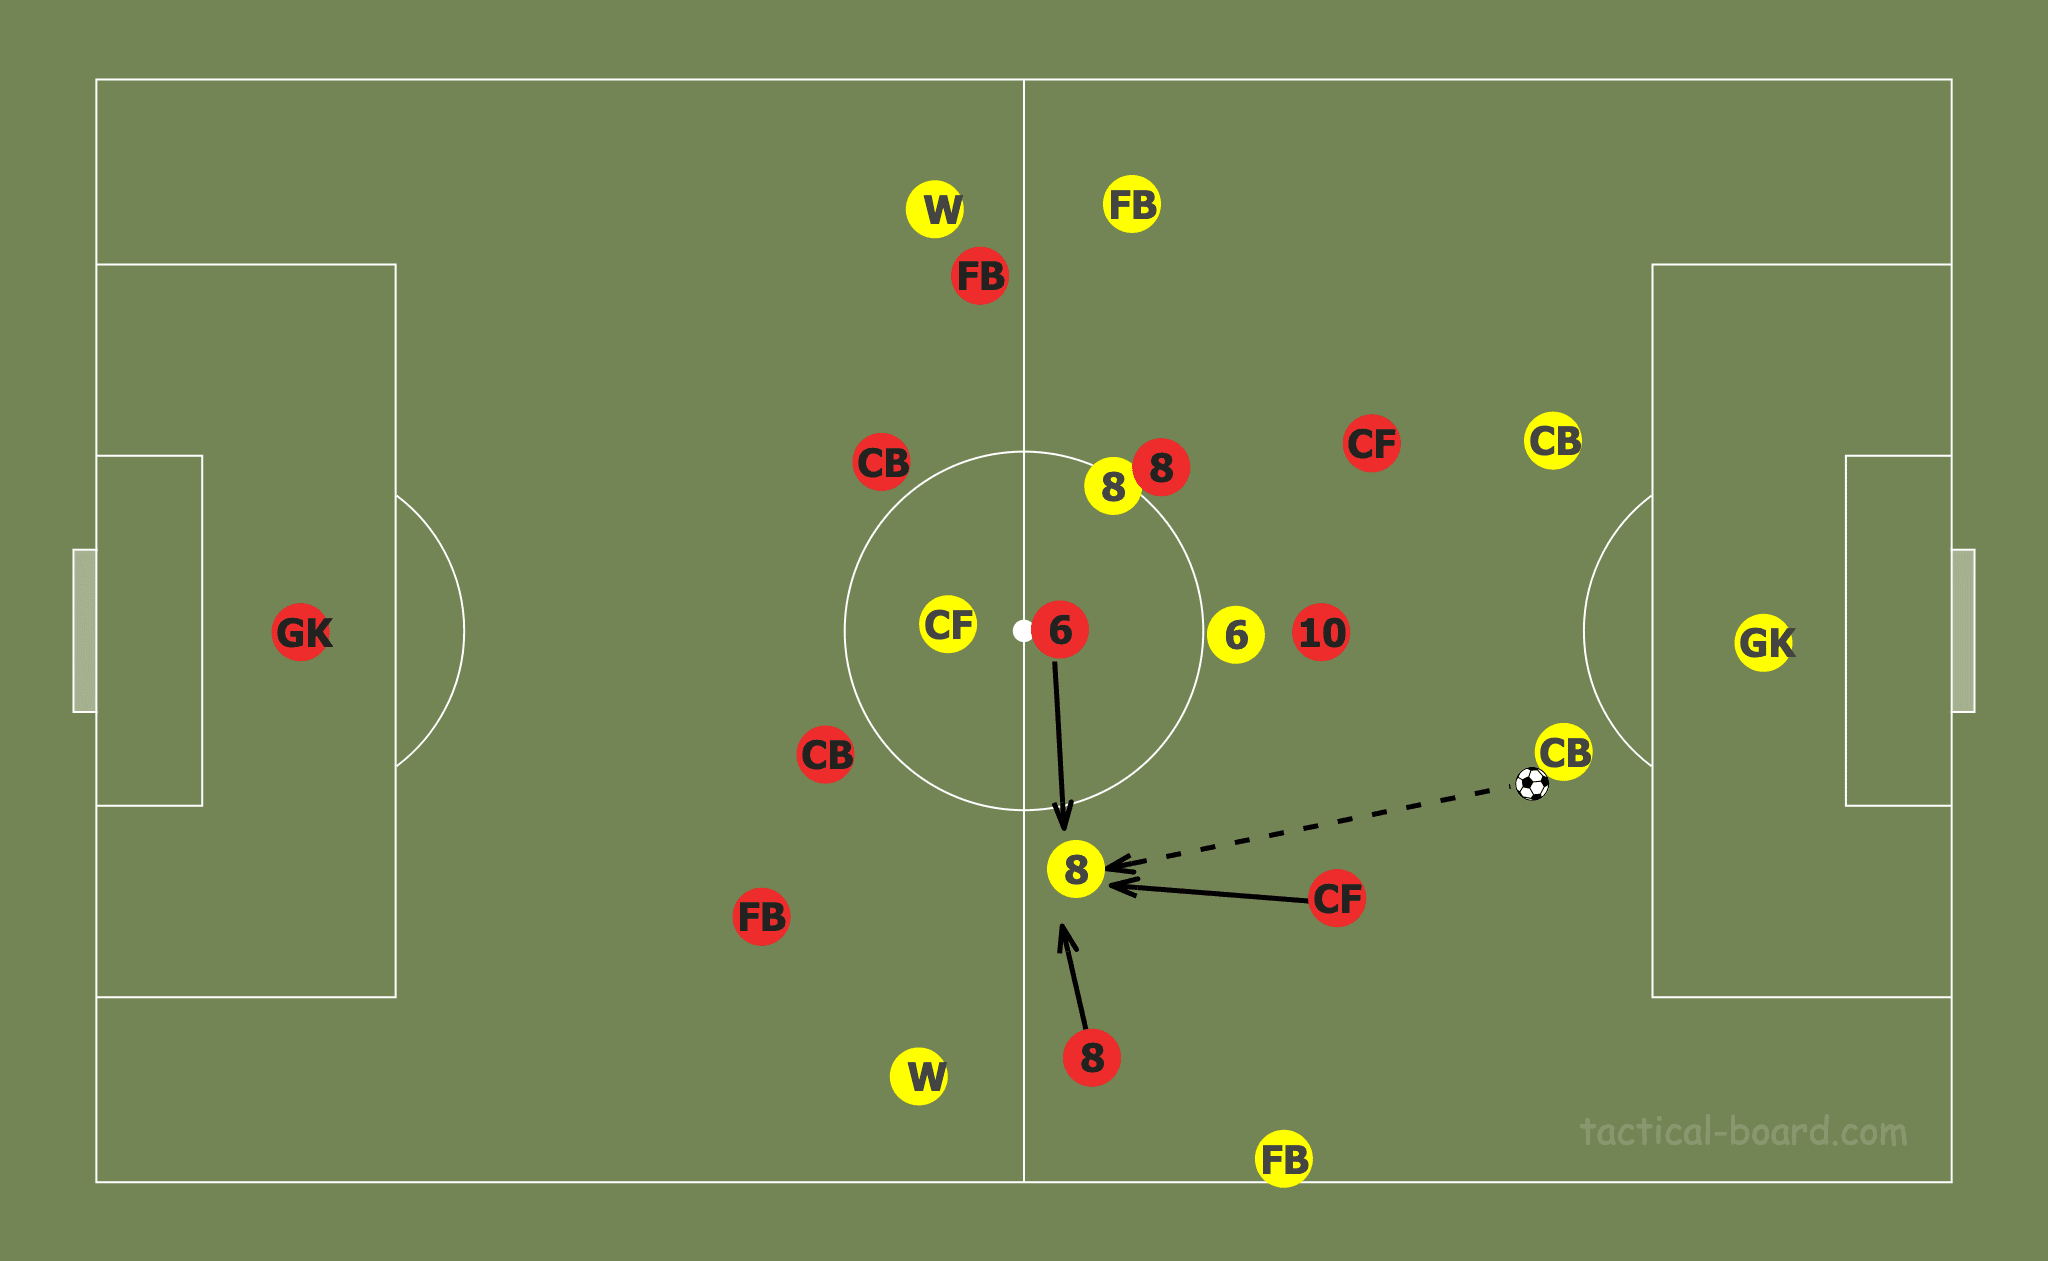
The example I used in the ‘Pressing the opponent’s build-up’ section, is a good example of how to force your opponent’s centrally. In the next example, I’ll use a different pressing principle to demonstrate how tactically flexible the diamond can be. The below example makes use of pressing traps to invite the opponent into the centre, where we can collapse on the ball carrier with numbers, the example is quite extreme with regards to the positioning of the players creating space for the opponent but that is to more easily show the principle in action.
The main principle to use when forcing your opponent wide is intelligent positioning on behalf of the forwards. In a 4-diamond-2 your opponents will naturally look to play wide, and preventing this while only using two forward players can be difficult but very effective when executed well.
Forcing the opponent wide
The most common place coaches tend to funnel their opponent’s play is to the wide areas, this is because the touchline can be used as an extra defender. However, attempting to force the opponent wide with a 4-diamond-2 may seem counterintuitive at first, as there is a lack of wide players, which is the main reason coaches don’t use the 4-diamond-2 formation. However, this is quite a one-dimensional way of viewing the formation, football is a dynamic game, and formation graphics tend to show the shape as being very static. If we look at the formation with the mindset of it being malleable, the lack of width becomes much less of an issue, and we can see that the 4-diamond-2 formation can have a very efficient pressing structure when applying pressure on the opponent on the touchline. For example; if the opposing fullback is in possession and we want to apply pressure we can collapse our ball near central midfielder, centre forward and fullback while still maintaining compactness in other areas of the pitch. The issue that arises here is that when shifting a naturally narrow formation across large areas of the pitch, gaps tend to appear on the opposite side, leaving us vulnerable to a long switch of play, however, if we collapse on the ball-carrier well enough they shouldn’t have the time nor the space to play such a pass but we should coach our team to shift over long distances as a unit regardless as switches of play are bound to happen eventually, but gaining the ball back quickly before a switch of play is paramount.
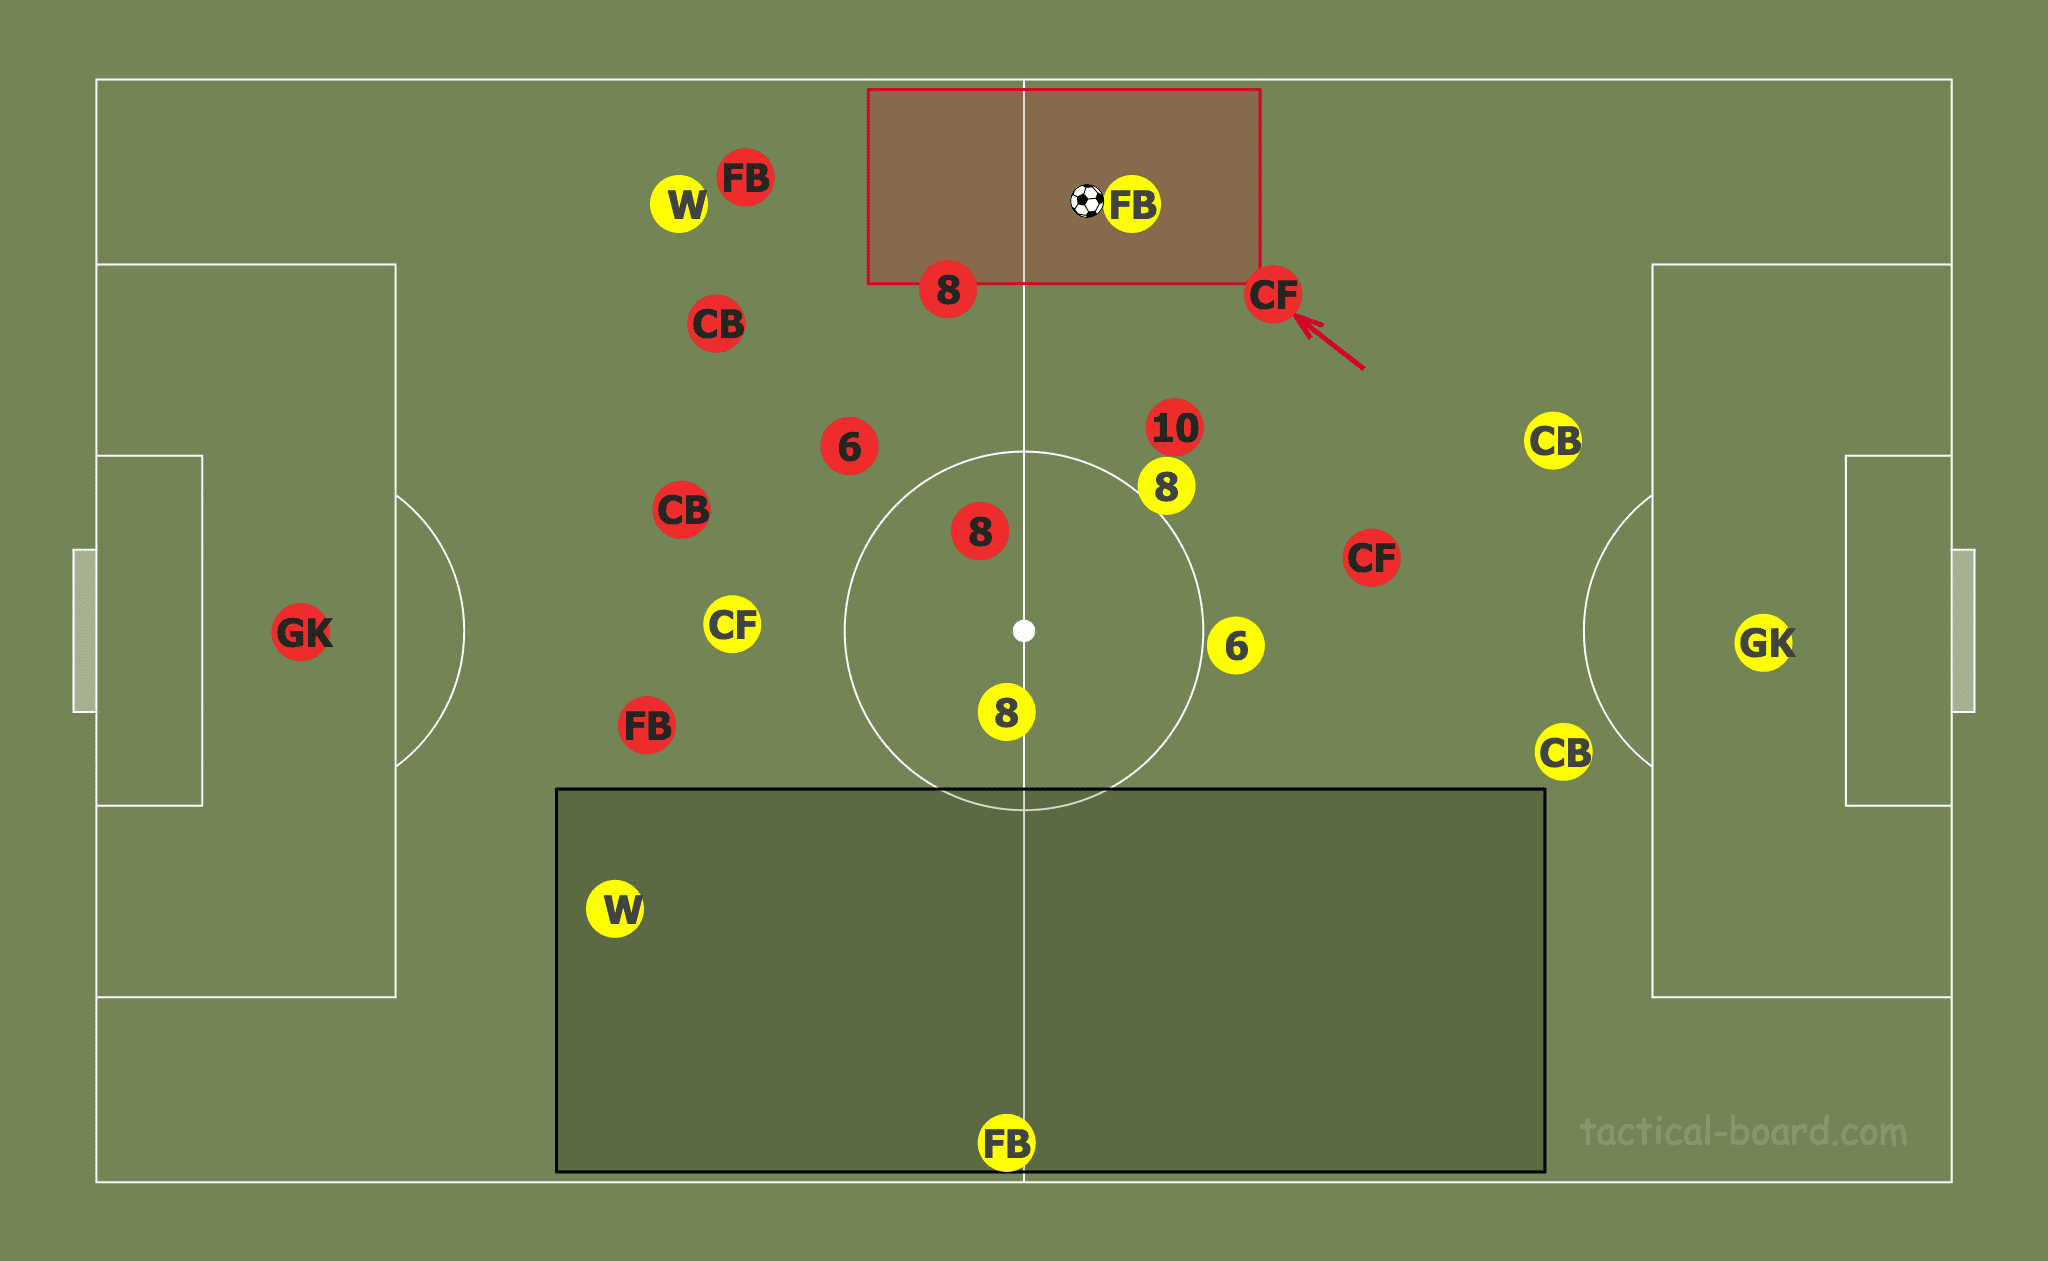
A theoretical solution to a switch of play is to commit the players that are not immediately involved in defending to areas of the pitch that are particularly narrow, which can widen that area and more effectively combat players holding wide positions.
In the first example, we commit the idle centre forward to the midfield diamond, allowing one of the ‘8’s to hold a wider position and therefore have greater access to players holding wide positions looking to stretch our shape.
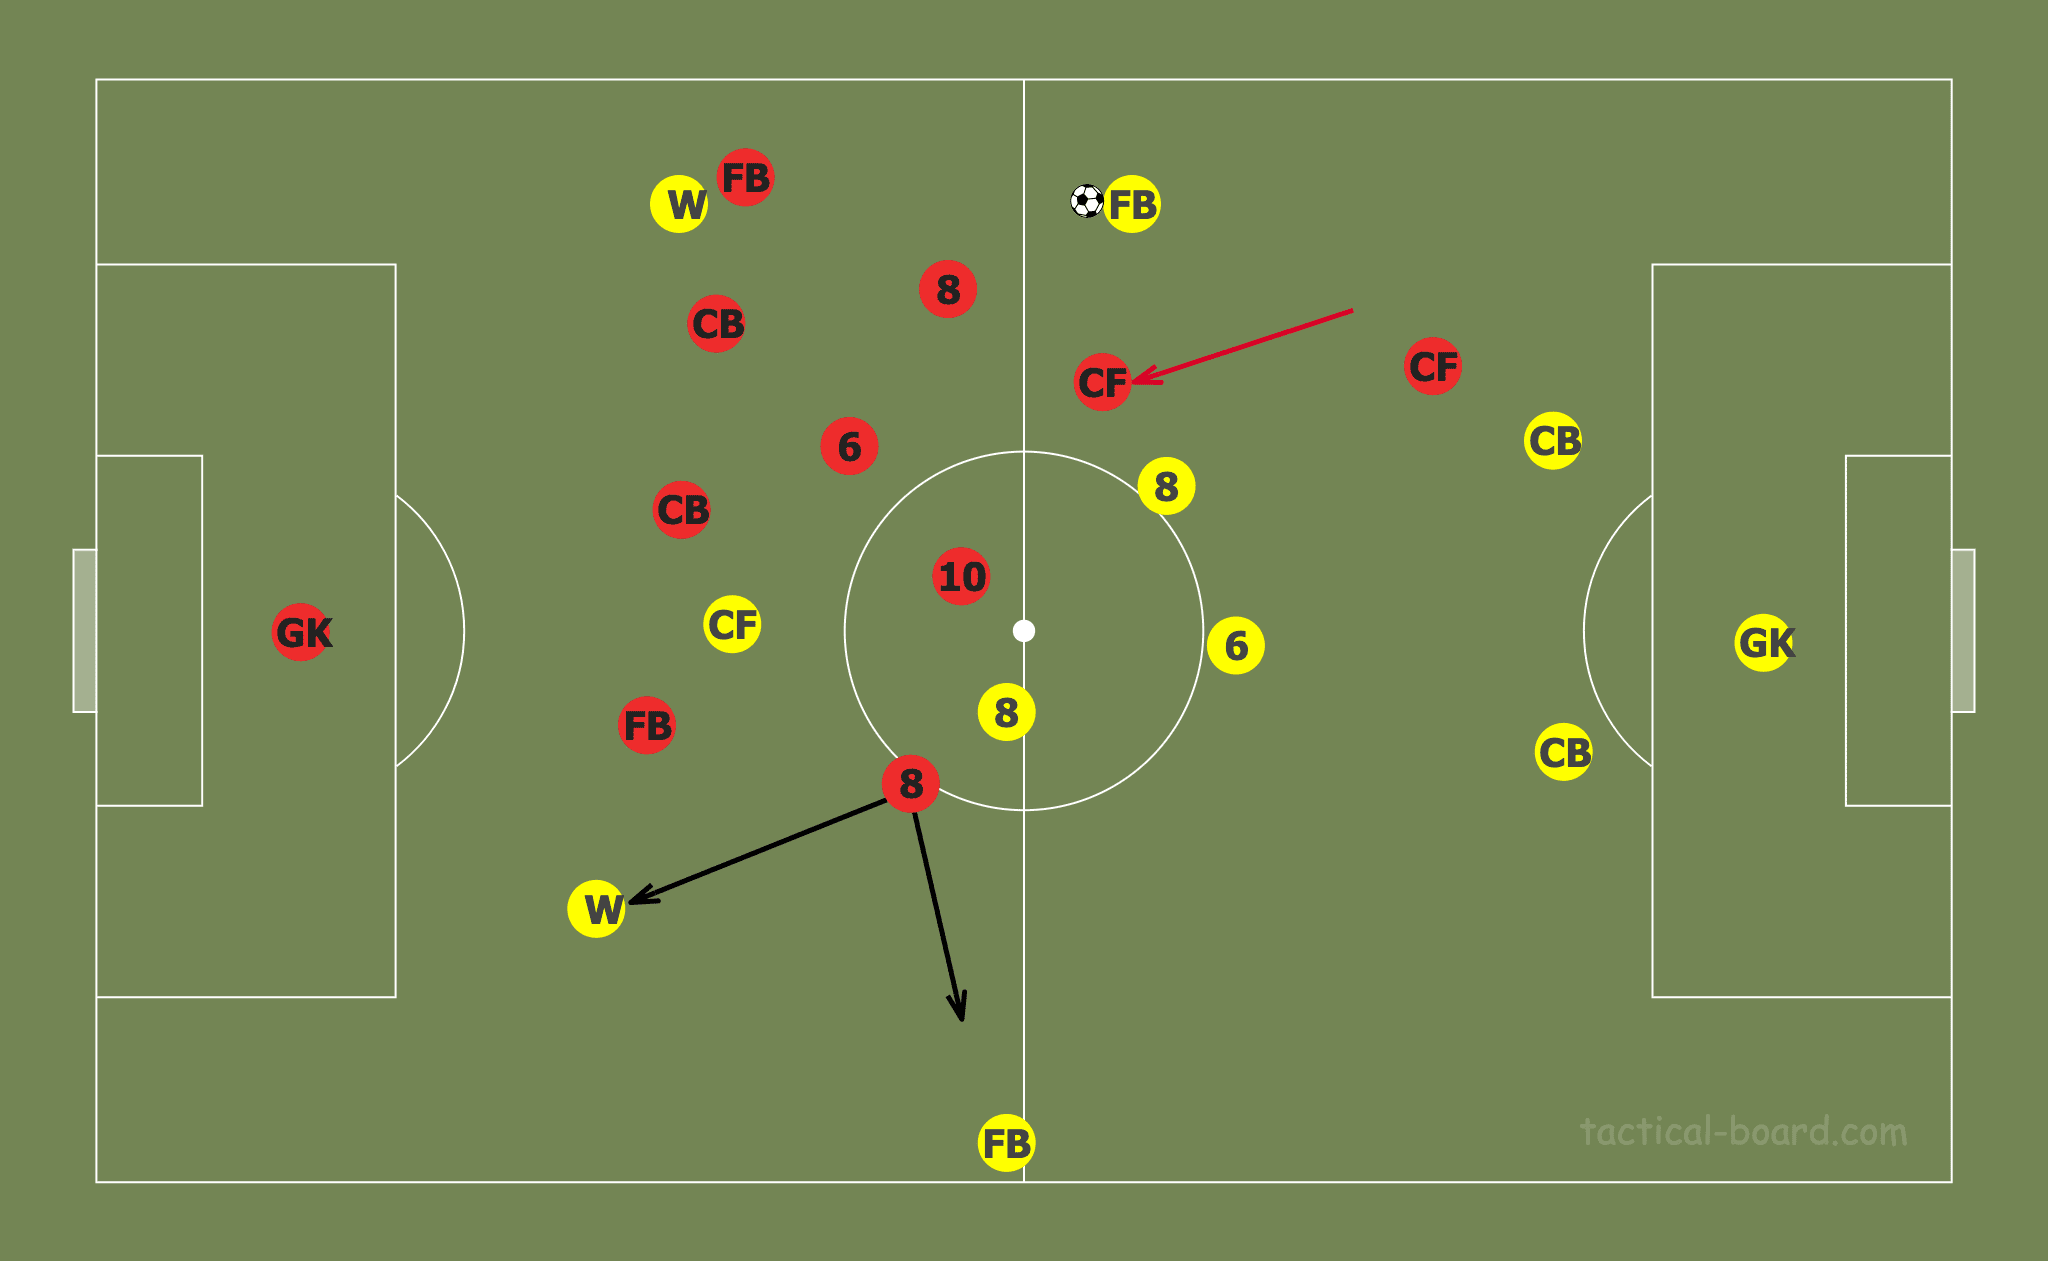
In the second example, the ‘6’ drops into the defensive line, allowing the defensive line to stretch and cover more horizontal space, allowing the ball far fullback to have greater access to the opponent.
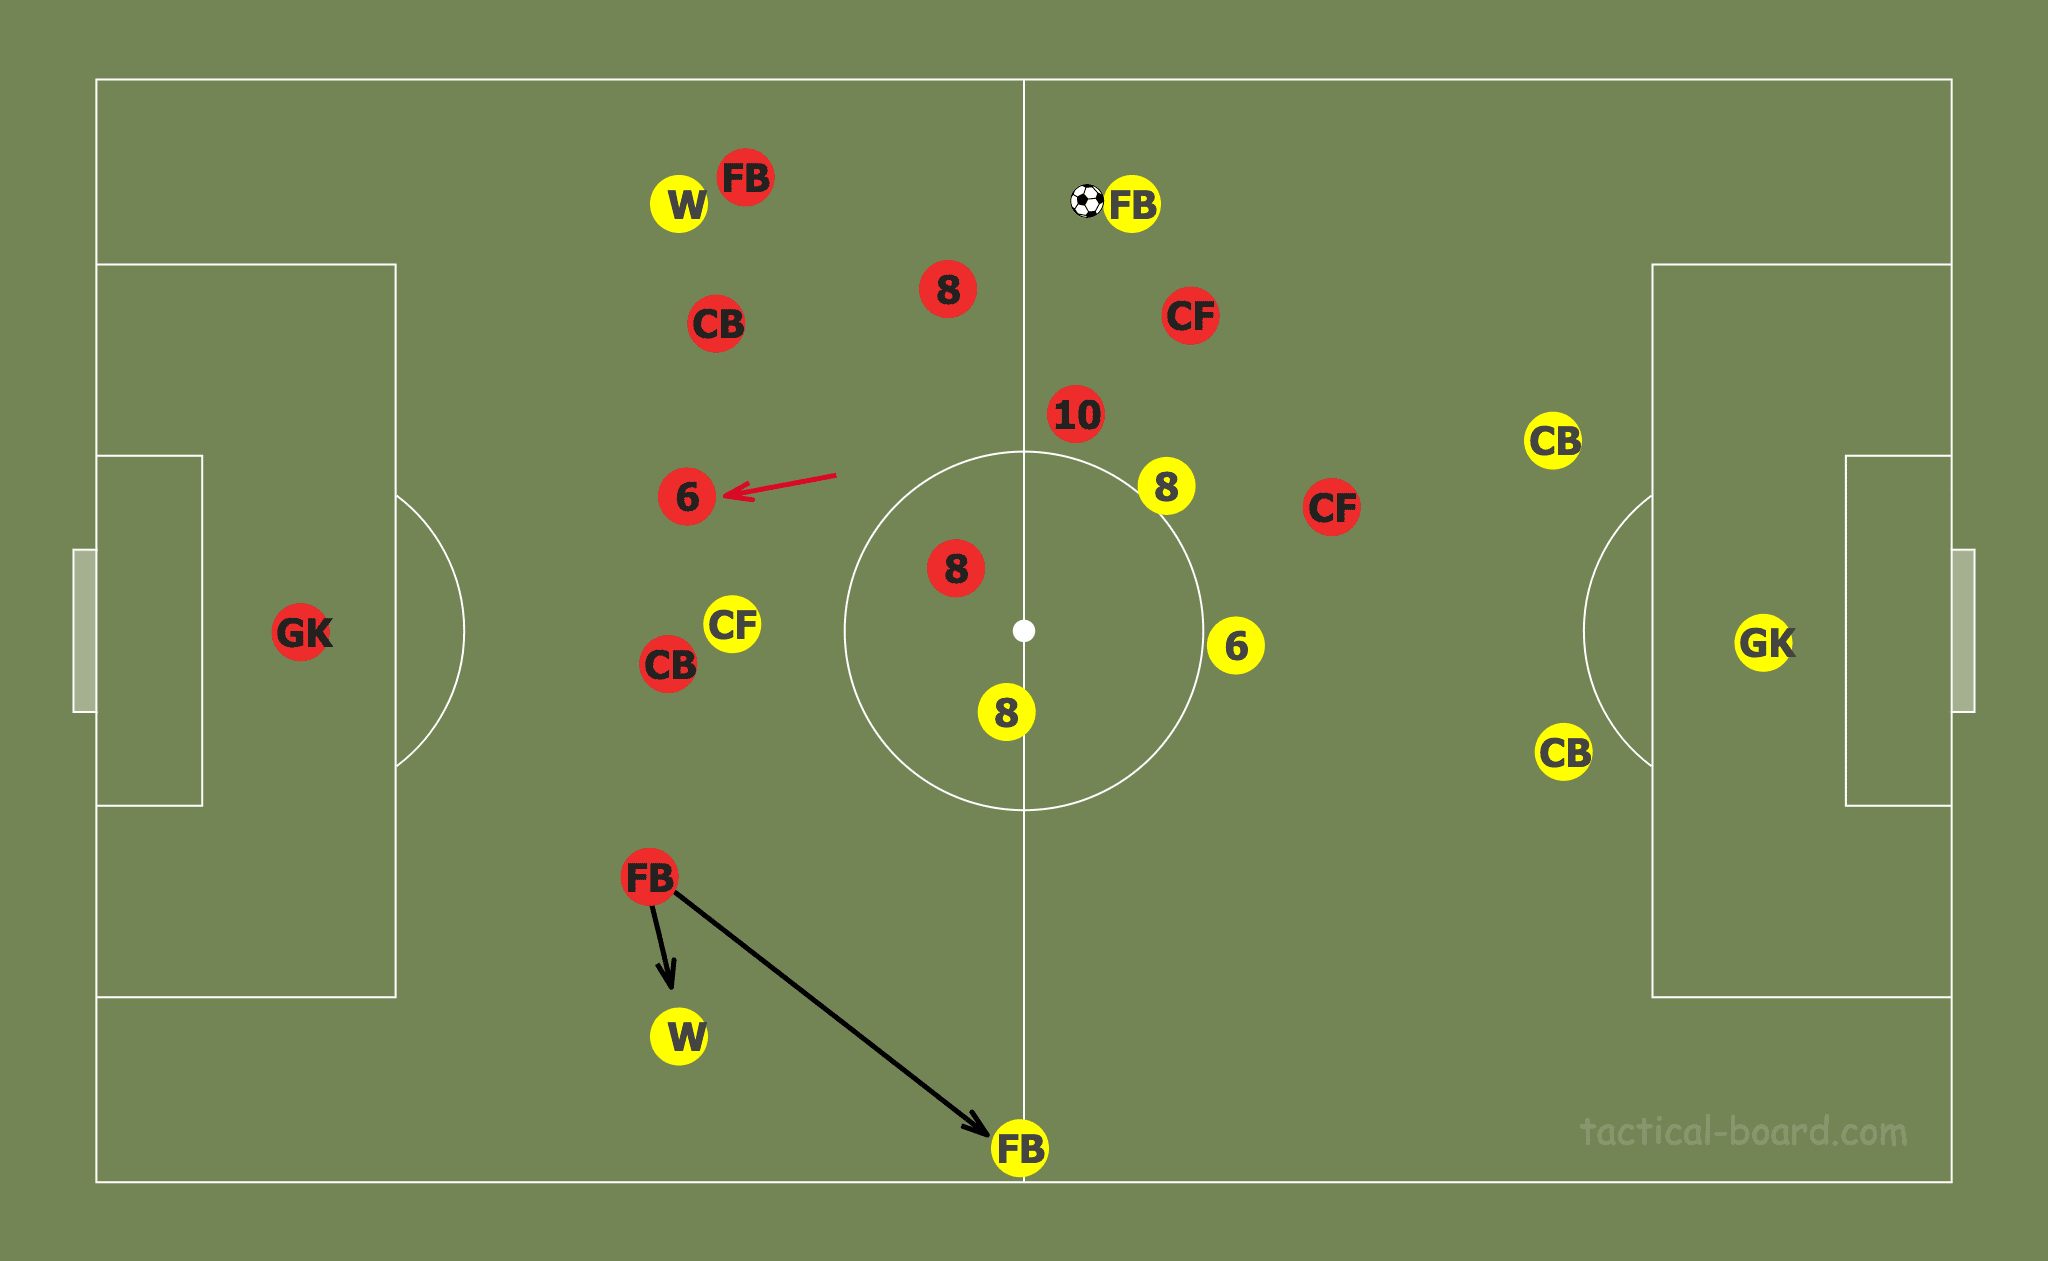
The team must be careful to not overcommit the outer central midfielders to pressing against the touchline as compactness can easily be lost.
The main principle needed to force your opponent’s wide is to maintain discipline. Your opponents will naturally start to play wide to avoid the congested centre, so ensuring your players are not stepping out of their position and giving your opponent free passing lanes into the centre is key.
Potential for pressing traps in the second phase of the opponent’s build-up
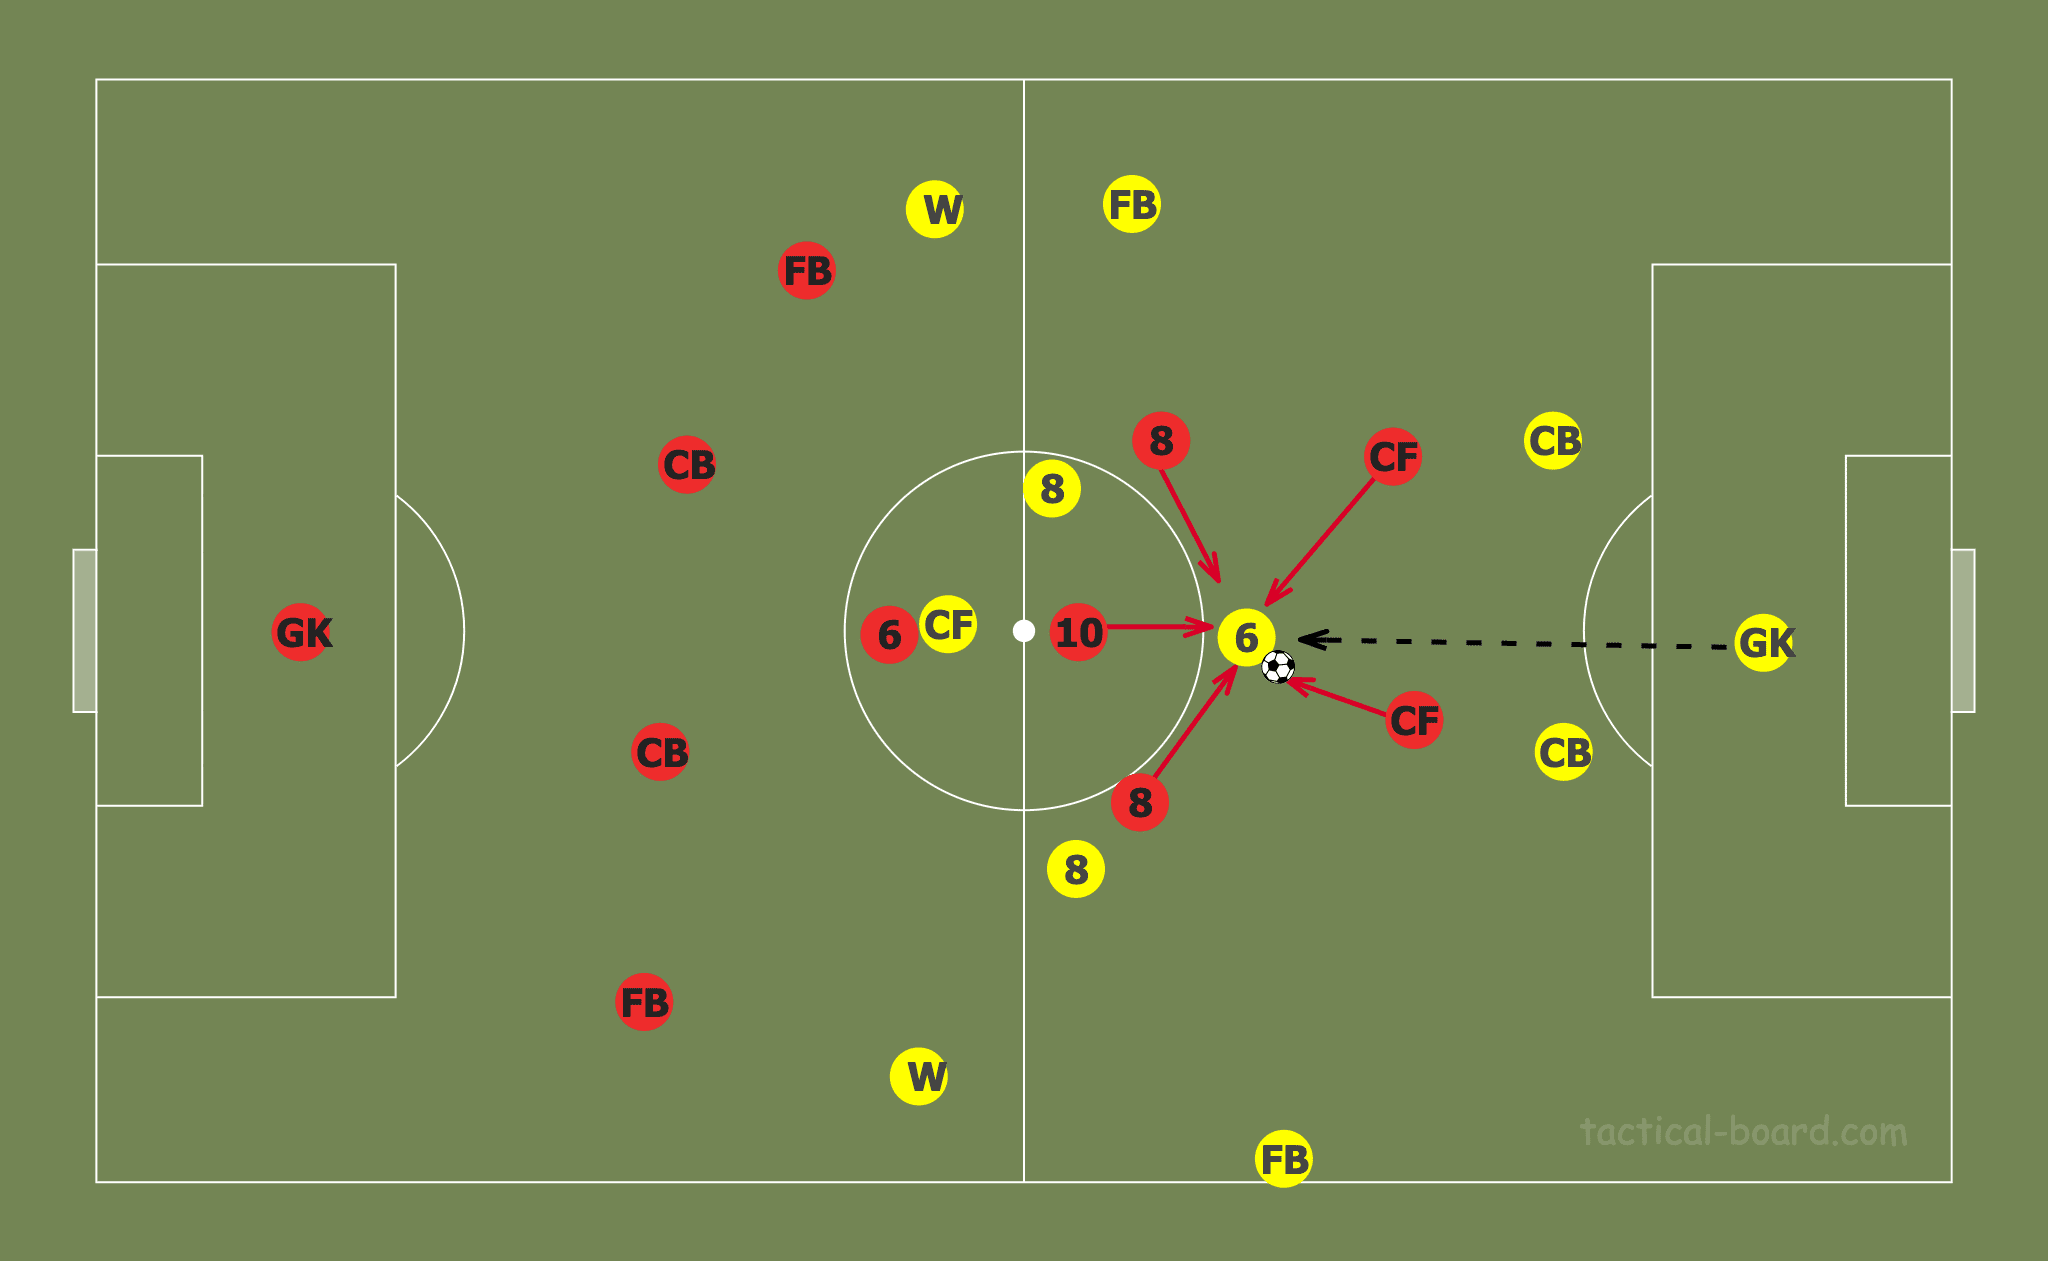
It is unrealistic to assume that your opponent will never penetrate past your first line of pressure, thus we need to come up with solutions for when this happens. We can use these penetrations to our advantage, as the area behind the first line of pressure in a 4-diamond-2 is extremely compact. We can utilise this compactness and intentionally leave a player in this area open to receive the ball and then collapse on him. In the below example the opponent’s goalkeeper passes to their ‘6’ who has positioned himself in between our first and second lines. As he receives the ball he is instantly pressed by five players who surround him from all sides.
Conclusion
The midfield diamond is one of the most interesting formations in football. On the surface, it seems very rigid and narrow, but in reality, it is extremely fluid and it allows for the coach to implement creative and unorthodox tactical systems when pressing their opponent.


Comments