Aston Villa moved one step closer to returning to the Premier League by beating Midlands rivals West Bromwich Albion on penalties at the Hawthorns to advance into the Championship play-off final. This tactical analysis uses statistics to look at the tactical trends of the game. The focus is on West Bromwich Albion’s attacking setup, Aston Villa’s midfield mechanisms and how West Brom looked to deal with the positioning of Jack Grealish.
Lineups
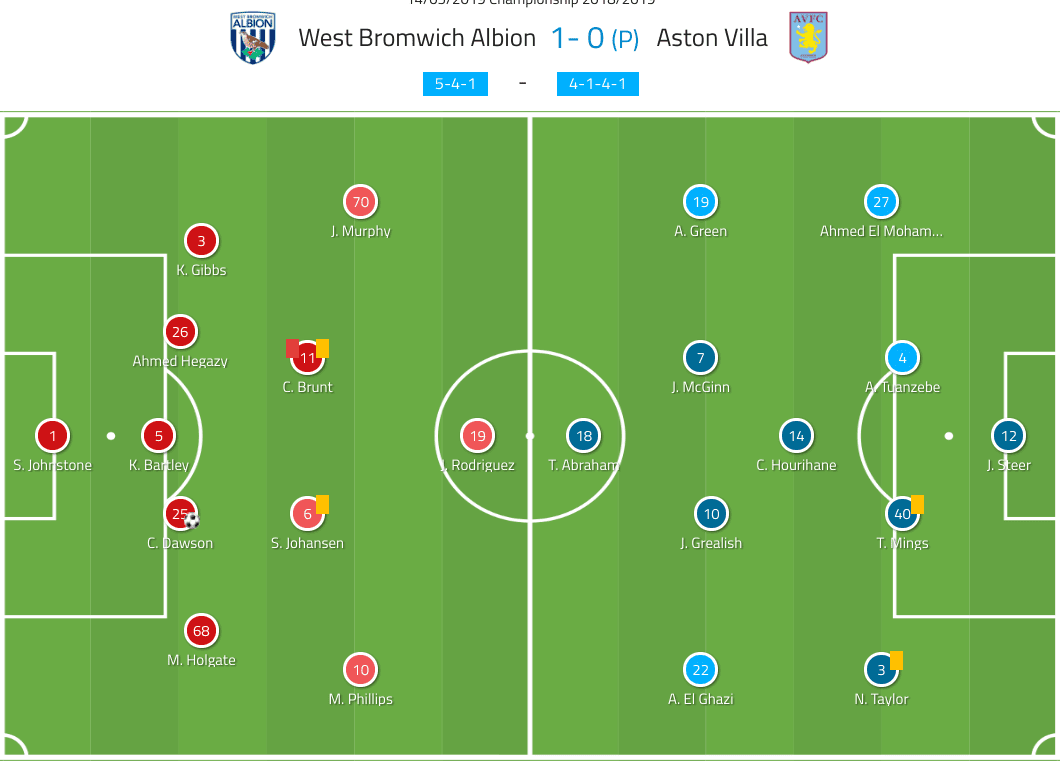
West Bromwich Albion started in a 5-4-1 which turned into a 3-4-3 in attack as Matt Phillips and Jacob Murphy moved inside either side of Jay Rodriguez. Aston Villa started in a 4-3-3 where Conor Hourihane came into midfield instead of the more defensive-minded Glenn Whelan.
As the analysis below will show, Aston Villa used very interesting mechanisms in the make-up of their midfield three to get star man Grealish, in particular, into dangerous positions.
Tactical analysis: West Bromwich Albion’s attacking setup
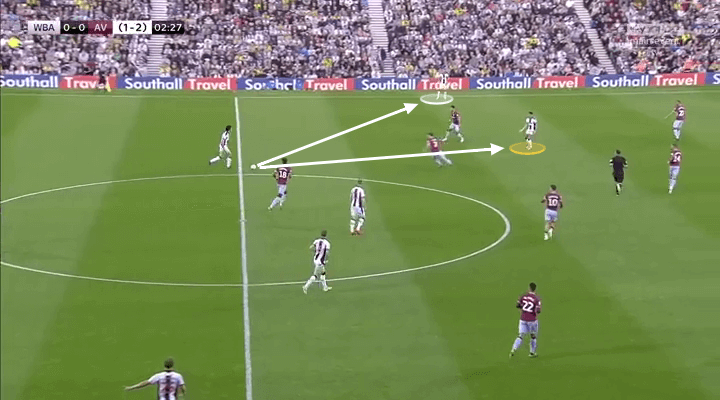
West Bromwich Albion’s attacking setup was fairly straightforward but also very effective in putting Aston Villa under pressure. The movement of Murphy and Phillips into more central positions opened up the flanks for wing-backs Kieran Gibbs and Mason Holgate to attack. In the build-up phase, this was mainly done to help the outer centre-backs progress the ball. As we see in the image below, Ahmed Hegazy has two potential passing options as he steps forward with the ball. Murphy (yellow) is an option centrally while Gibbs (white) is an option wide. Due to Villa having the ball-near central midfielder press the ball-carrying centre-back on both sides, West Brom tried to find their inside forwards in the spaces behind Grealish and John McGinn.
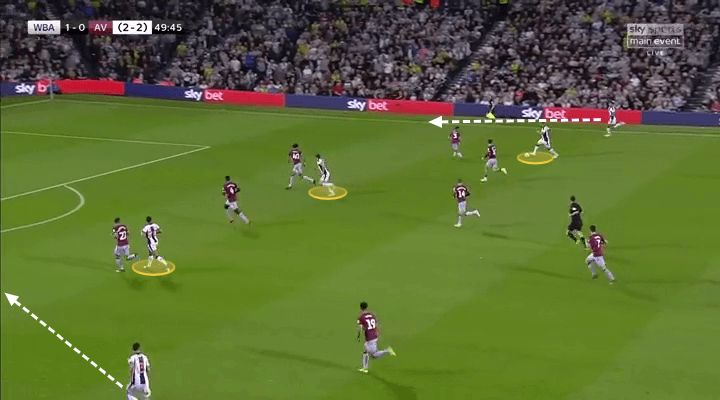
When West Brom managed to get the ball into their inside forwards, such as Phillips in the image below, they attacked with five players against Villa’s back-four. Thus, they could overload against Villa’s full-backs with the wing-back and inside forward often creating a 2vs1 situation out wide.
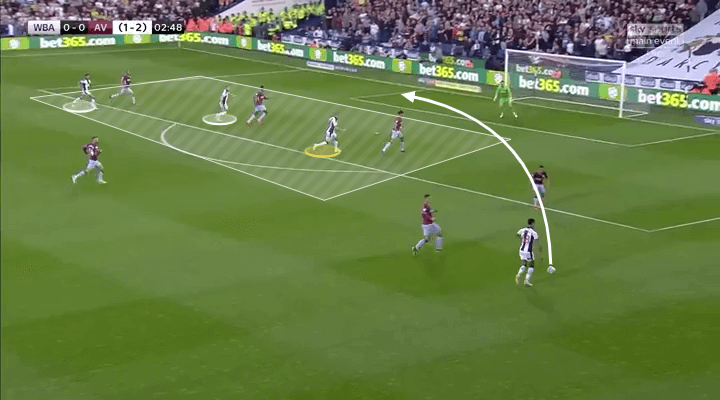
Naturally, with West Brom targeting the wide areas, they then tried to create chances from crosses. When the wing-back, Holgate in the image below, was about to cross the ball West Brom would have their three attackers attack the cross centrally. Due to Villa’s ball-near full-back having to put pressure on the crosser, this left Villa’s remaining three defenders in a 3vs3 situations against West Brom’s attackers.
West Brom managed to build some pressure on Villa from their effective wing-play, and thanks to their counter-pressing, especially at the beginning of the second half. However, Villa defended well and managed to limit West Brom to one goal, which came from a long-throw.
Aston Villa’s midfield mechanisms
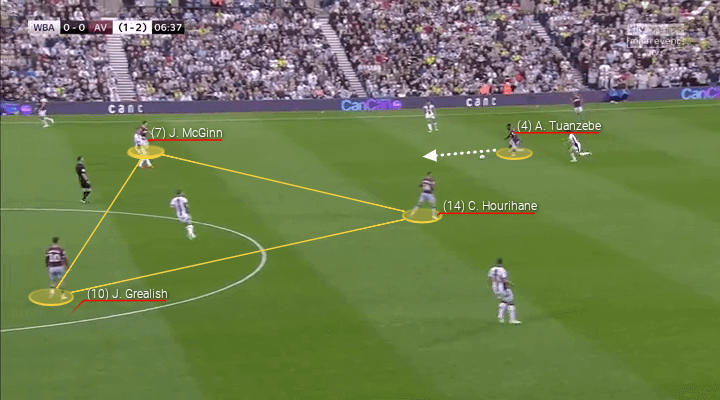
Aston Villa had a very different idea on how they wanted to attack. While West Brom were quite direct and often looked for long-balls, Villa tried to patiently build from the back. That was probably the reason for the more technical Hourihane being preferred over Whelan in defensive midfield. Hourihane was always dropping to receive the ball to initiate Villa’s attacks. What was interesting about the mechanisms in the Villa midfield was how they were positioned. Hourihane was often the deepest with McGinn slightly further forward, while Grealish would push into the left-sided half-space between the lines of West Brom’s midfield and defence. This meant Villa had their three central midfielders positioned on different horizontal lines and always kept a presence between the lines of West Brom.
The image below highlights this setup. Axel Tuanzebe steps forward with the ball and has Hourihane as an easy option. McGinn provides another option slightly further forward while Grealish is pushed right up behind West Brom’s central midfielders.
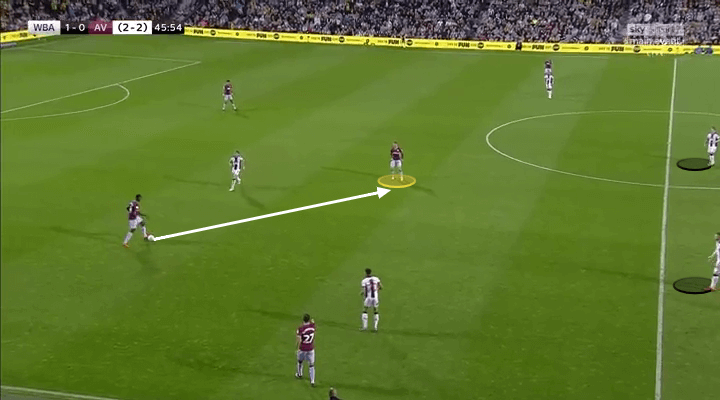
West Brom opted not to press Hourihane, which caused them some issues since he could often receive the ball in plenty of space, as seen in the image below, given West Brom’s central midfielders sat back and allowed him the space to build Villa’s attack.
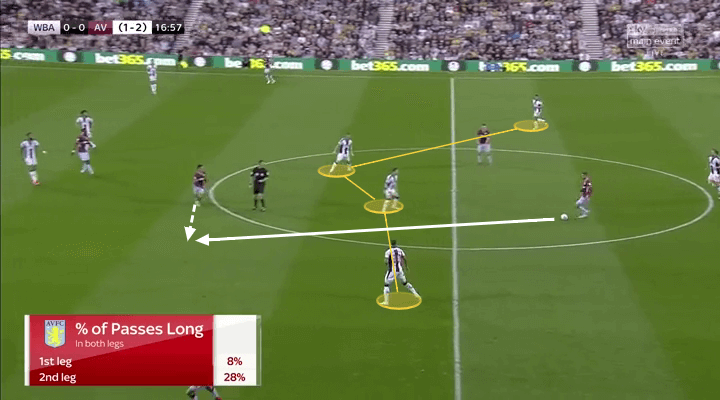
The real problem, though, was Grealish. He was extremely clever with his positioning and repeatedly found great positions throughout the game. We can see an example of this in the image below as Hourihane slips the ball into Grealish. West Brom’s problem in midfield could be explained by this single image. They have three players between Hourihane and Grealish. Neither of those three puts pressure on Hourihane or marks Grealish.
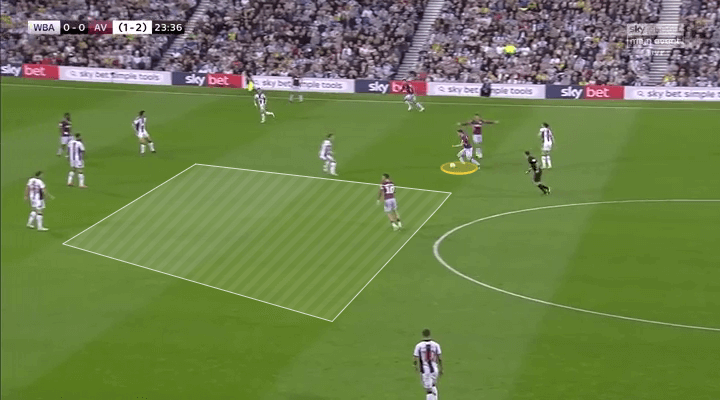
Aston Villa could have used Grealish so much more though. He found so much space throughout the game that he should basically have been given the ball in every Villa attack. The image below is a telling example of how Villa should have involved him more. McGinn is on the ball and Grealish is in oceans of space centrally. His teammate chooses to go back to the right wing though and doesn’t take advantage of all the space Villa’s best player has in front of him. This is just one example of something that happened throughout the game. Villa could have exploited West Bromwich Albion’s poor midfield coverage more by giving their best player the ball more often.
Grealish is a lovely player and had a good game at the Hawthorns. One is left wondering, though, how good he would be in a better team, with better teammates who would spot the positions he picks up and give him the ball quicker. Then Grealish would blossom even more than he is right now.
West Brom try to deal with Grealish’s positioning
West Brom spotted the issues Grealish caused to their defensive shape though and tried to come up with a solution. Their idea was for Craig Dawson to leave the defensive line when the ball was about to be played into Grealish. It made sense in a way since West Brom hardly needed three central defenders against only Tammy Abraham. It asked a lot of Dawson though. In the image below we can see an example of this approach as Dawson steps out of defence to mark Grealish (yellow).
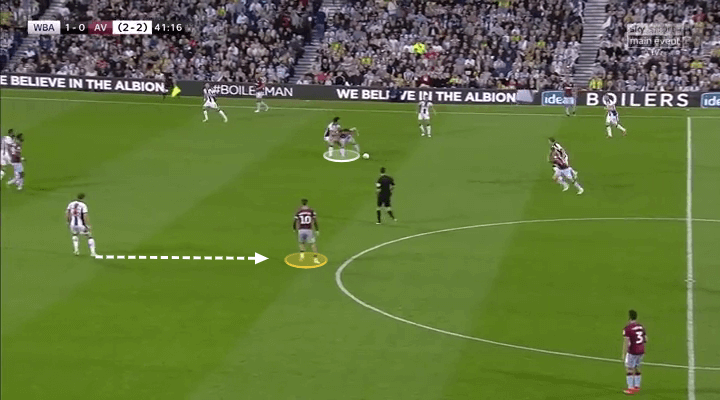
For this approach to work, Dawson had to read the game very quickly and also have the speed to get up to Grealish before he had time to turn and play. Dawson rarely got this balance 100 per cent correct. The image below is a good example. Dawson steps out towards Grealish (black) who has just received the ball. Grealish has already prepared to progress the ball into Abraham and Dawson’s movement was in vain as West Brom failed to stop Grealish on this occasion.
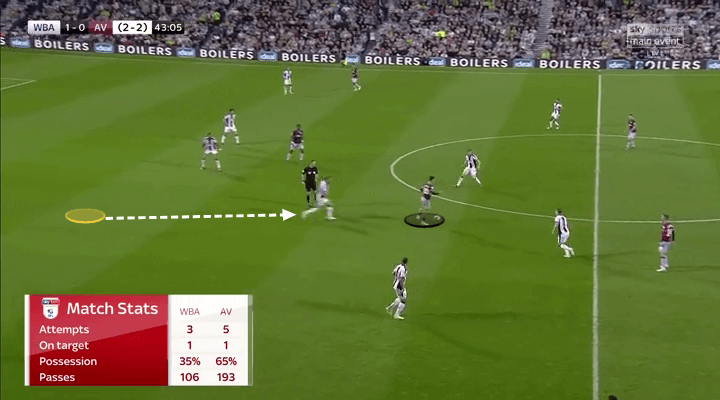
Dawson’s movement also opened up a huge hole behind him which could be exploited by someone else. This was something Villa clearly spoke about at halftime as left-back Neil Taylor made inverted runs into this space in the second half. In the image below, Hourihane has played the ball into Grealish (yellow). Dawson steps out from the highlighted space to press him. Taylor (white) then makes the run inside to attack the space vacated by Dawson. The wide positioning of Anwar El Ghazi prevents Holgate from stopping this run, leaving Dawson to drop off again and allowing Grealish to turn without pressure.
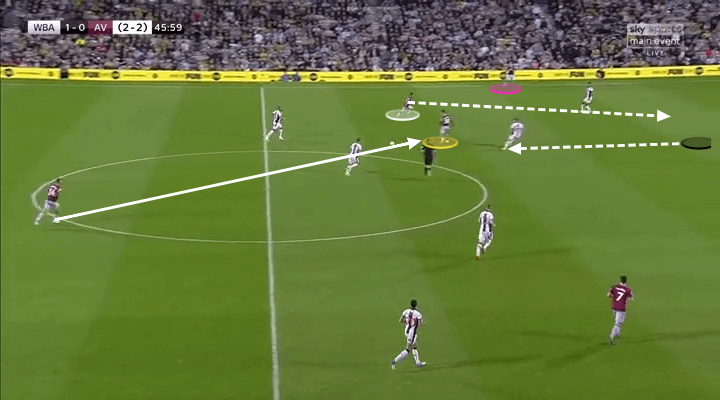
Dawson was also dragged out of position by Grealish. In the image below, Dawson (black) has stepped up to press Grealish (yellow) and followed him into the centre of midfield. Dawson is even higher up than West Brom’s two central midfielders. Again, this has left a huge space at the back which Taylor looks to exploit with an inverted run. Grealish goes on to beat Dawson and skips past Stefan Johansen too before he is brought down by the Norwegian midfielder. If he hadn’t been, then he would likely have played Taylor through.
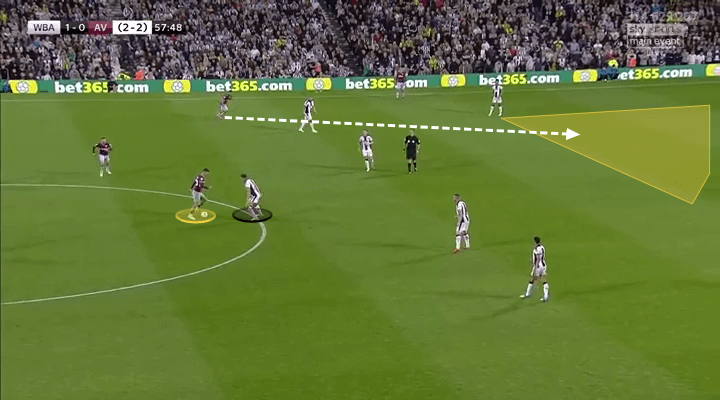
West Brom’s idea made sense, but the execution failed as it’s very difficult to have centre-backs defending in this way. This is because it vacates space in the most dangerous area just in front of goal.
Conclusion
West Bromwich Albion and Aston Villa provided us with an entertaining play-off game that Villa won on penalties. They will now take on Derby County in the final in a few weeks time. If they can involve Grealish more while keeping their defending solid, they will have a good chance of returning to the top flight.
If you love tactical analysis, then you’ll love the digital magazines from totalfootballanalysis.com – a guaranteed 100+ pages of pure tactical analysis covering topics from the Premier League, Serie A, La Liga, Bundesliga and many, many more. Buy your copy of the May issue for just ₤4.99 here, or even better sign up for a ₤50 annual membership (12 monthly issues plus the annual review) right here.


Comments